A DIY sweater pumpkin is one of the easiest and coziest fall crafts you can make. And the best part is that you can give new life to a sweater you love but no longer wear!
I love finding ways to reuse and upcycle old clothing.
**Some of the links in this post are affiliate links. This means if you click on the link and purchase the item, we will receive an affiliate commission at no extra cost to you. We appreciate your support. (disclosure policy)
Do you remember how I upcycled a sweater a couple of weeks ago to create a DIY ghost in a cloche?
Well, I had scraps leftover, and I thought they would make pretty pumpkins.
Then, I remembered that I also have some scraps leftover from my cozy home decor with old sweaters project from a few years back.
With inexpensive Dollar Tree pumpkins and just a few extra supplies, I’ll show you how to transform your sweaters into beautiful pumpkins that add warmth and texture to your fall decor.
Take a look!
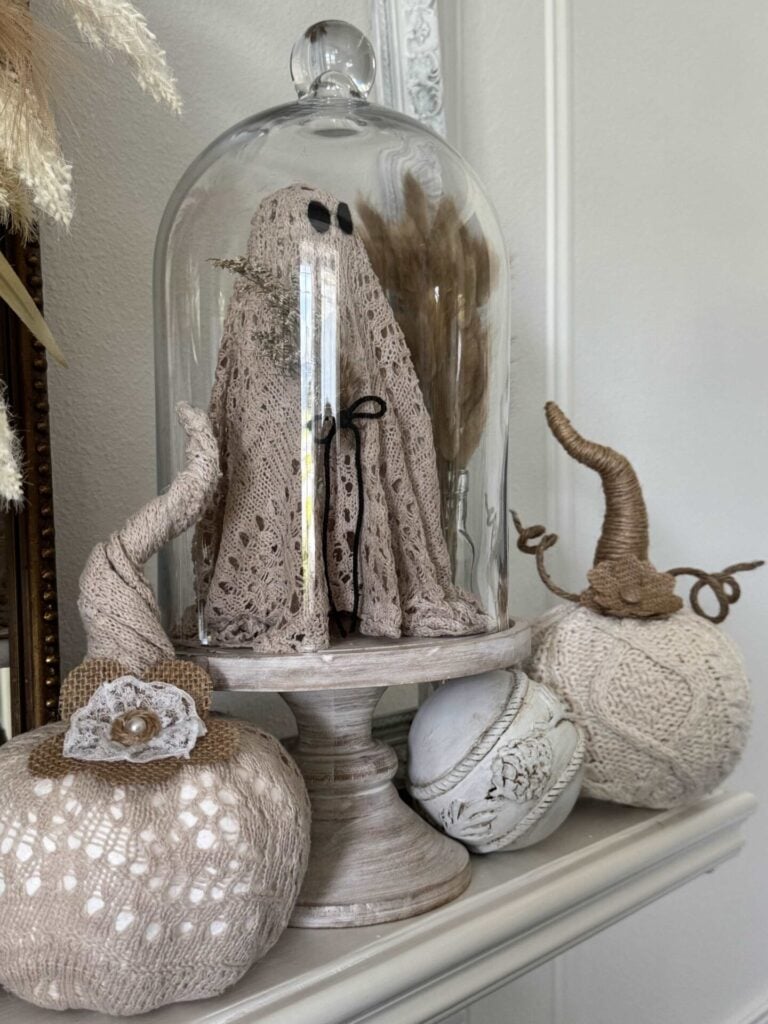
How cute are they?
Here are the materials and steps you need to make these precious pumpkins!
Gather Materials
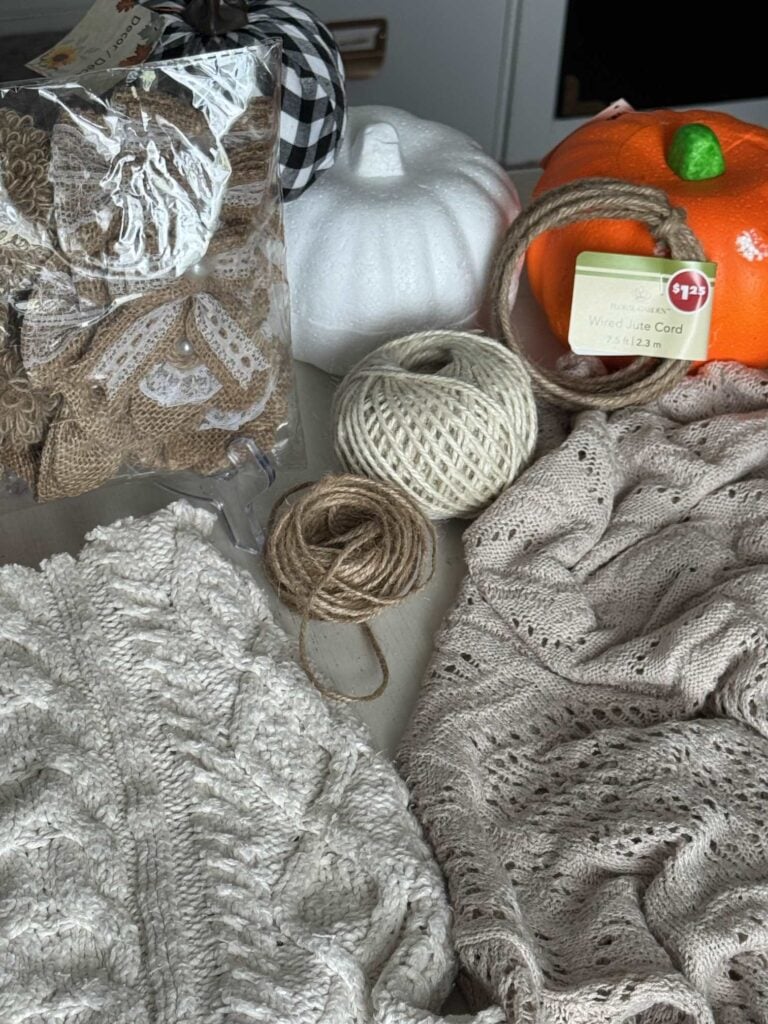
Gather the following materials to complete this project:
- Old Sweater(s) – cable knit, chunky, or lightweight (different textures give unique looks)
- Scissors
- Styrofoam Pumpkins- Dollar Tree (or any lightweight faux pumpkins)
- Paint & Paintbrush– to cover bright-colored pumpkins before adding sweater fabric
- Clear Rubber Bands – to secure fabric neatly at the bottom
- Floral Pins – for holding fabric and embellishments in place
- Wired Jute Twine – to create realistic stems and curly tendrils
- Hot Glue Gun & Glue Sticks
- Embellishments – burlap flowers, lace flowers, ribbon bows, buttons, or anything that matches your fall decor.
Steps to Make A DIY Sweater Pumpkin
Prep the pumpkins
For this project, I used five pumpkins that came from Dollar Tree.
Remove tags and stickers

Start by peeling off any price tags or stickers from the bottom of your styrofoam or faux pumpkins. This gives you a smooth surface to work with. I had to remove material from one of my pumpkins.
Paint if needed

If your pumpkin is a bright or contrasting color, give it a quick coat of white paint (or a color that matches your sweater). I used Waverly Chalk paint in White. This step prevents the original color from showing through the fabric once it’s wrapped. Allow the paint to dry completely before proceeding.
Cover the pumpkin
Cut the sweater

Begin by cutting the sleeves off your sweater. Each sleeve will cover one pumpkin.
Slip the sleeve over the pumpkin

Take the widest end of the sleeve and carefully pull it down over the top of the pumpkin until it fits snugly.
Secure the bottom

Gather the extra sweater fabric at the bottom of the pumpkin and glue it in place with a hot glue gun.
Tip: Use a low heat setting on your glue gun to prevent the styrofoam from melting. Wear finger protectors to avoid accidental burns.
Twist the top

Pull the remaining sweater fabric at the top upward, twist it tightly, and then secure it with a clear rubber band, sliding the band down toward the pumpkin’s stem area.
Hold the rubber band in place

Since the rubber band may slip, insert three floral pins around the base of the stem to secure it.
Make the Stem
Cut the stem wire & secure ends

Trim a piece of twine-covered wire to the desired length for your pumpkin stem. Because the jute can unravel from the wire, add a dab of hot glue to both ends to keep it in place.
Insert the wire

Gently pull the sweater fabric away from the stem area and insert one end of the wired twine into the top of the pumpkin. Secure it with hot glue.
Wrap & glue the sweater around the wire

Twist the sweater fabric around the wire to form the stem. Add hot glue at the base of the stem to conceal the floral pins and hold the fabric in place. As you continue twisting upward, occasionally tuck glue into the sweater ridges and secure the fabric to the wire.
Trim excess fabric

As you approach the top, the fabric may be too bulky to create a neat stem. Trim away the extra material and keep twisting and gluing until you reach the tip.
For thick sweater material

The cable knit sweater was too thick to use the same technique, so I wrapped twine around it, cutting away the excess material as I approached the top.
Shape the stem

For a natural look, bend or twist the wire slightly to create a crooked stem shape.
Embellish the pumpkins
The DIY sweater pumpkins look adorable on their own, but adding a few embellishments can give them extra charm and personality.
Choose your accents

I used burlap, lace flowers, and rustic bows that I found on Amazon, but you can also use ribbon, buttons, or seasonal picks to match your fall decor.
Add tendrils

For a natural touch, curl pieces of wired jute and glue them near the stem to look like pumpkin vines.
Glue in place

Hot glue the flowers or bows around the base of the stem to dress up your pumpkin.
Style your DIY Sweater pumpkin

Once your DIY sweater pumpkins are finished, it’s time to display them!
These cozy little pumpkins look beautiful almost anywhere in your home, and the best part is you can mix and match them with other fall decor for a warm, seasonal look.

I placed two pumpkins alongside my upcycled sweater ghost.
The textures play off each other perfectly, creating a cozy, upcycled theme for fall.

The remaining three pumpkins were placed in a woven basket with faux, neutral-colored leaves and a few large pinecones.
I set the basket on the dining room table in front of the fireplace, and it instantly became a warm and inviting focal point for the season.
Looking for more ways to style your DIY sweater pumpkins? Here are a few ideas:
- Tiered Tray Display – Stack them with mini pumpkins, candles, and fall greenery for a layered look.
- Bookshelf Accent – Tuck one or two among your books and framed photos for a subtle seasonal touch.
- Entryway Table – Welcome guests by placing a few pumpkins in a wooden bowl or basket near your front door.
- Coffee Table Tray – Pair them with a candle and a vase of autumn stems for a simple yet elegant everyday arrangement.
- Bedroom Decor – Add one to a nightstand or dresser to carry cozy fall vibes into unexpected spaces.
No matter where you place them, DIY sweater pumpkins bring warmth, texture, and a handmade touch to your fall decorating.
Final Thoughts

And that’s it—your very own DIY sweater pumpkins!
I love how each one turns out a little different, depending on the sweater and the embellishments used.
They’re the perfect way to add cozy texture and charm to your fall decor while giving old clothing a second life.
I hope this tutorial inspires you to make at least one DIY sweater pumpkin for your own home.
If you try this project, let me know in the comments—I’d love to see how your pumpkins turn out!
If you enjoy the blog, please sign up for our email list to stay up-to-date with our latest posts.
Until next time, follow us on Pinterest, Facebook, and Instagram!
Blessings, Donna and Rich
More DIY Pumpkin Inspiration
If you loved these DIY sweater pumpkins, why stop there?
Pumpkins are fun to make, and there are numerous creative ways to decorate them for the fall season.
To give you even more ideas, I’m sharing five other fun DIY pumpkin projects you can try—each with its own unique style and charm.
- DIY Rope and Twine Pumpkins
- Create Velvet Pumpkins With Real Stems
- Tips to Decoupage Elegant Pumpkins
- How to Make Adorable Yarn Pumpkins
- Easy DIY Twine Pumpkins
Pin It For Later
Love this idea? Don’t forget to Pin it!
Save these DIY sweater pumpkins to your favorite fall or craft board on Pinterest so you’ll have the tutorial handy when you’re ready to make your own (hover over the picture and click the red Pin button in the top left corner).

Related Posts:


**Some of the links in this post are affiliate links. This means if you click on the link and purchase the item, we will receive an affiliate commission at no extra cost to you. We appreciate your support. (disclosure policy)
Adorable, Donna!! You are KILLING it with these fall DIY’s this year!! So good. I love the neutral color of the pumpkins…they look so pretty styled on the mantel!
Thank you Rachel! Pumpkins are my favorite and they were so fun to make!
Love the way these sweater pumpkins came together, Donna, and how you created your own stem too. They’re perfectly whimsical! Hugs, CoCo
Thanks, CoCo! I adore making pumpkins each year to add to my collection!