Are you looking for a beautiful way to dress up your table for Easter without spending a lot? Let me show you how to put together an easy DIY Easter centerpiece using thrifted and vintage finds!
We recently went to the first yard sale of the year at Renninger’s in Mount Dora, and when I spotted this vintage basket…
**Some of the links in this post are affiliate links. This means if you click on the link and purchase the item, we will receive an affiliate commission at no extra cost to you. We appreciate your support. (disclosure policy)
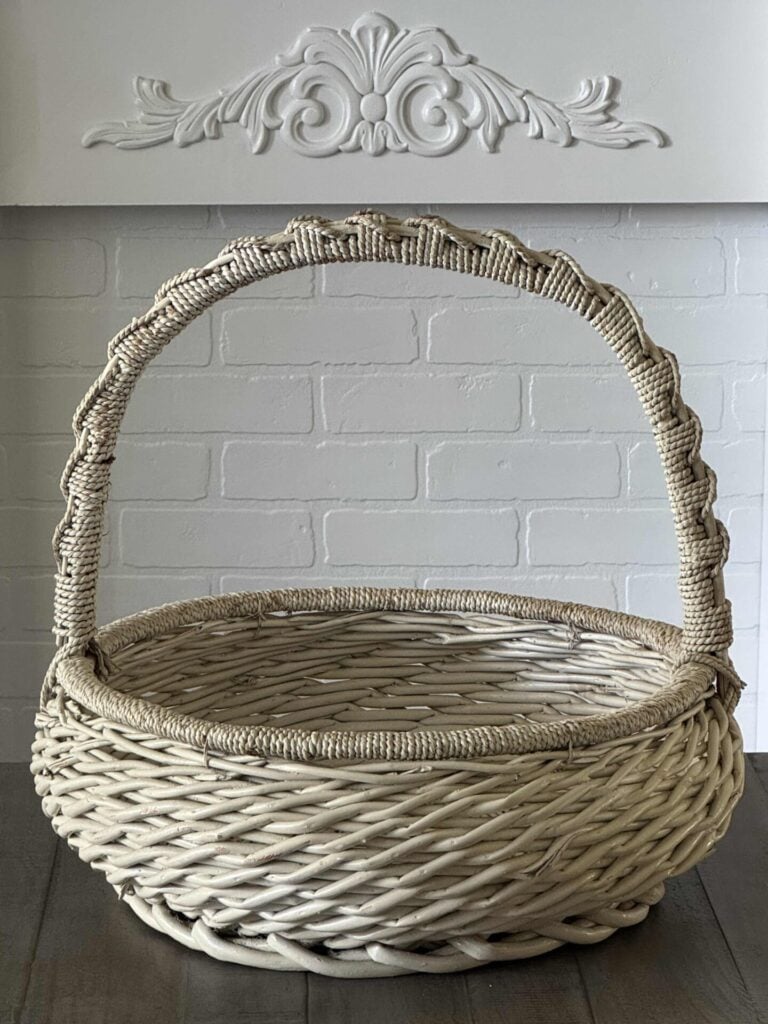
I knew I had to have it!
It’s large and super functional, and I thought it would make the perfect centerpiece for our Easter table.
I couldn’t wait to get it home, clean it up, and start filling it with something pretty.
Since we’re not hosting guests for Easter dinner this year, I didn’t want to buy anything new—so I decided to shop my house instead.
And honestly, I love how it all came together!
Steps to create a DIY Easter Centerpiece
If you’d like to create your own DIY Easter centerpiece, here’s how I put mine together step by step.
Prep your basket
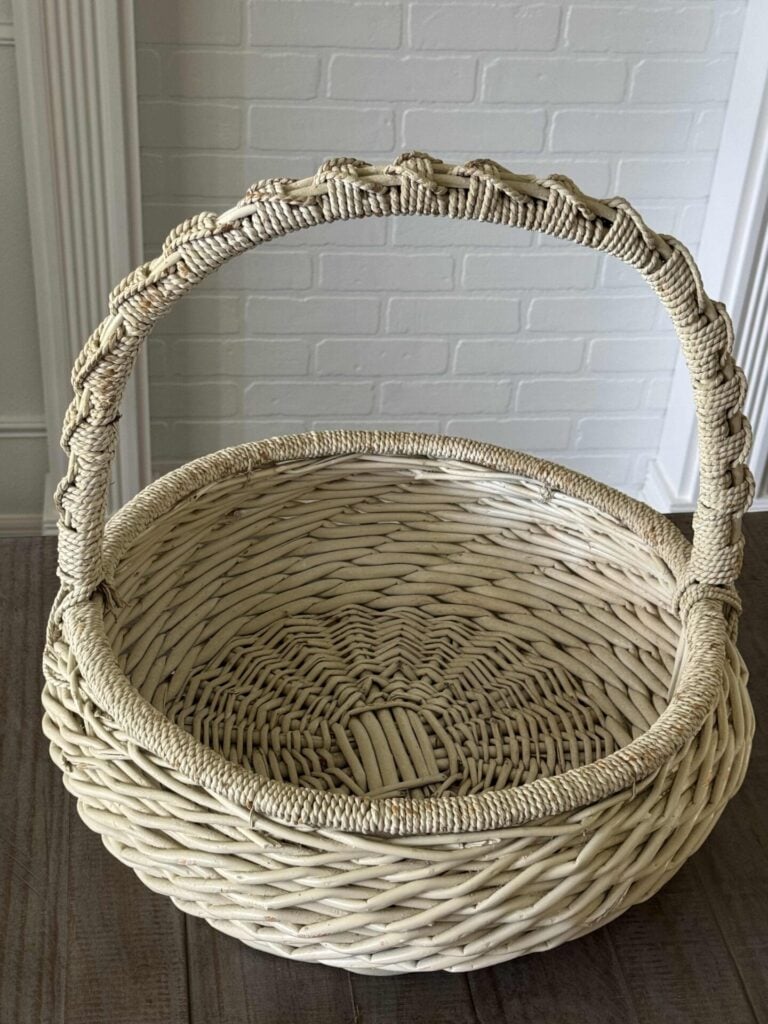
Mine needed a good cleaning, so I vacuumed up all the dust and debris, then wiped it down with a damp cloth.
Create a base inside the basket

To give the arrangement some height, I placed one book at the bottom and stacked two more across it to elevate the items I’d be adding.
Fill the space around the base
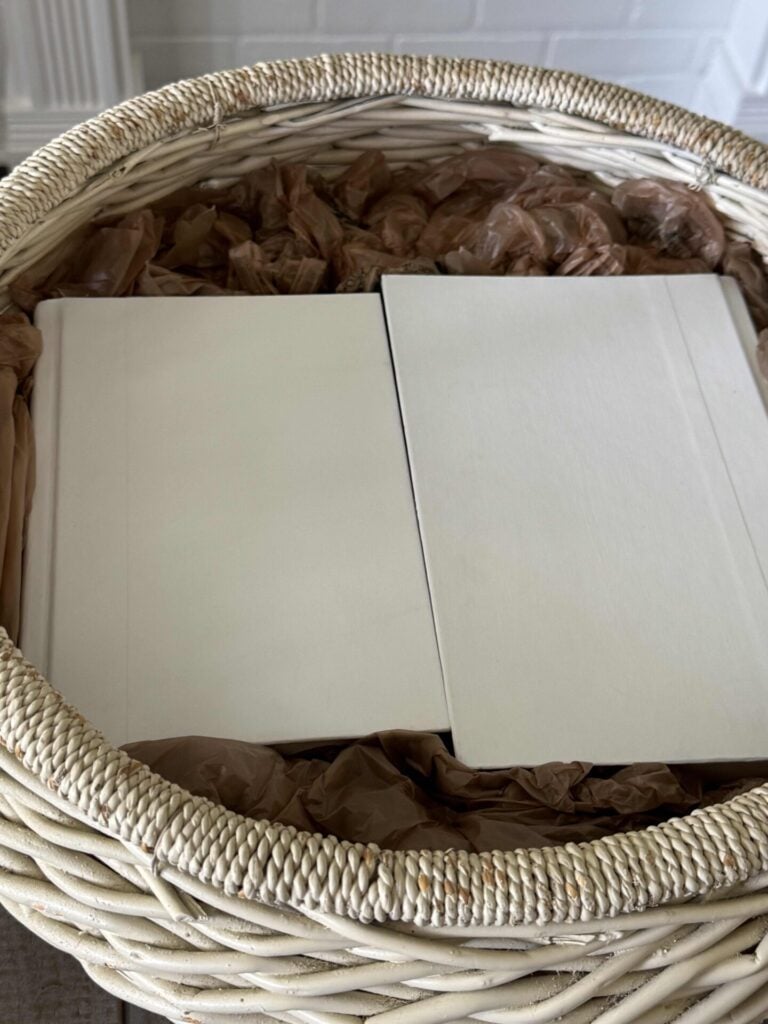
I tucked plastic grocery bags around the books to fill in the empty areas and help support everything.
Choose a tall focal piece
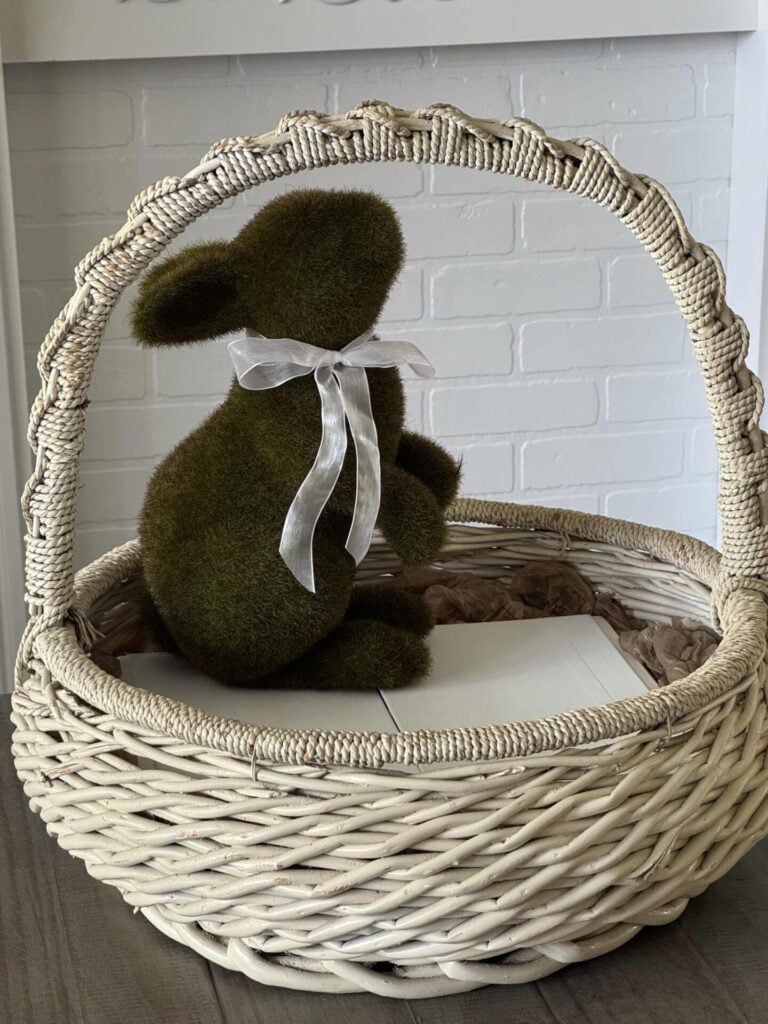
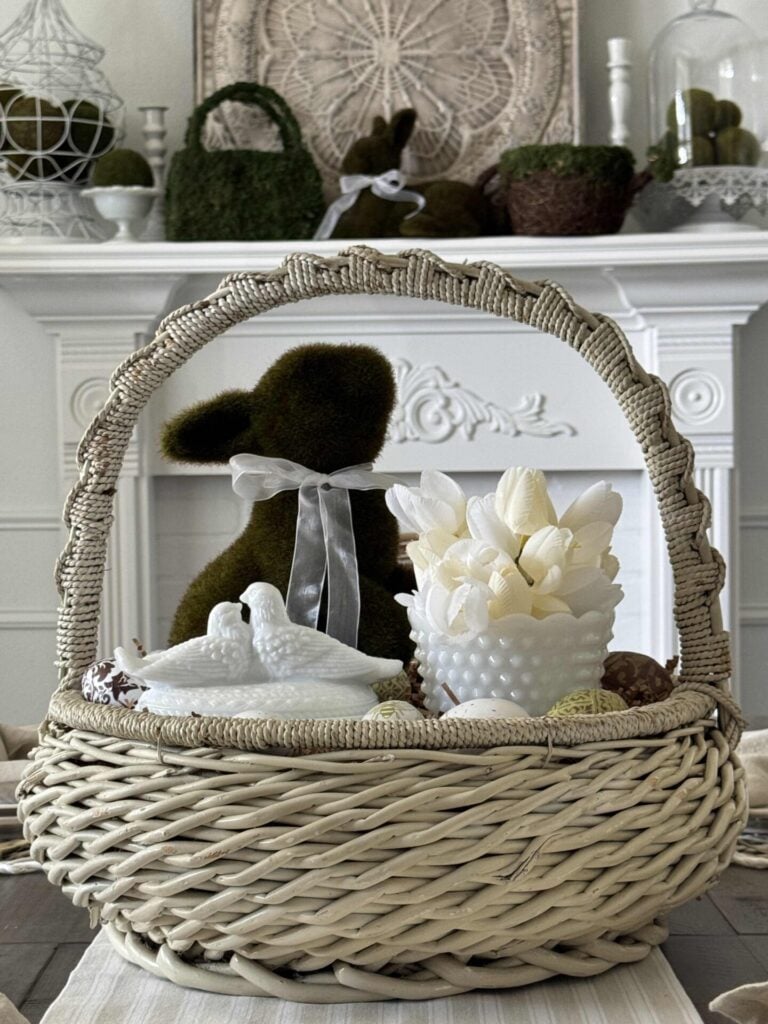
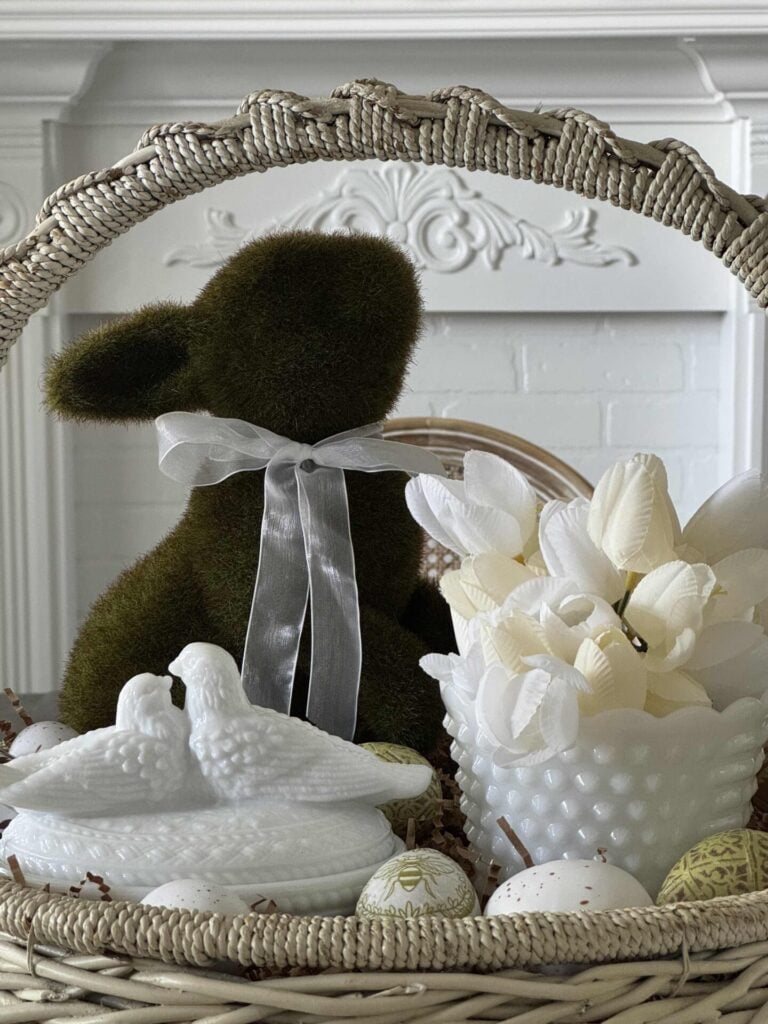
For height, I used a moss-covered bunny I’ve had for years (I honestly can’t remember where I found it!) and placed it toward the back left side.
The white ribbon around its neck adds a soft touch.
Add a medium-height element

Next, I placed a white milk glass bowl (a yard-sale find!) in the basket and filled it with small white-and-cream faux tulips.
Include a smaller decorative piece
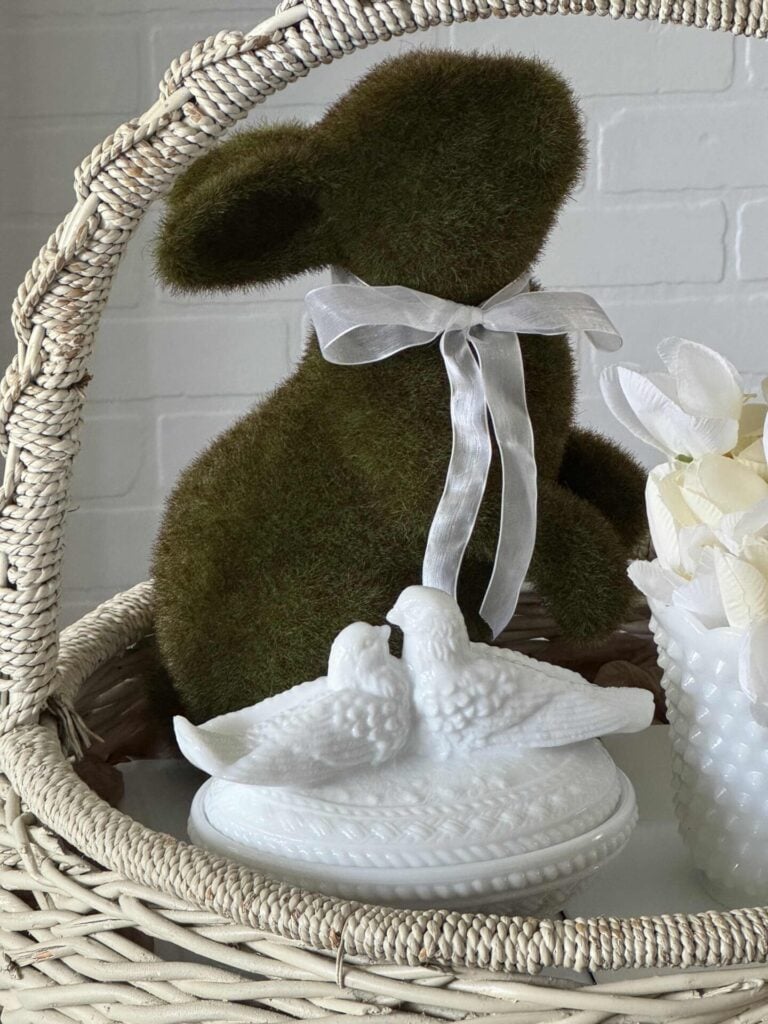
To balance everything out, I added a vintage Westmoreland milk glass lovebird trinket dish from an antique sale.
Add filler
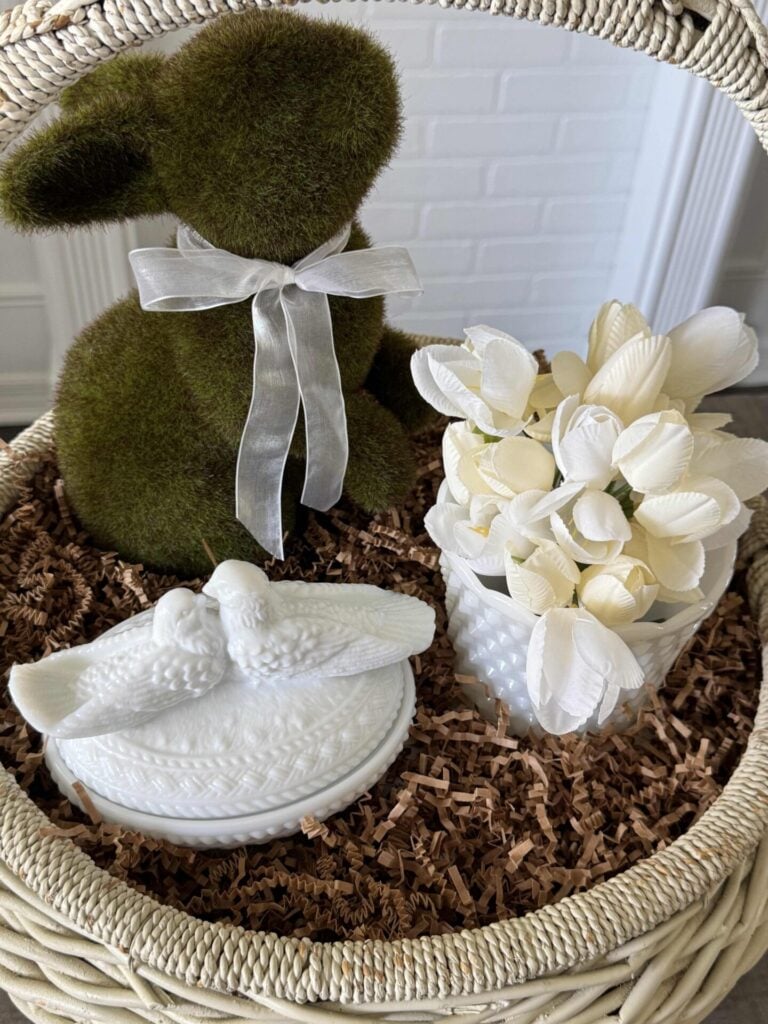
I used brown crinkle paper to fill in any gaps and give the arrangement a more finished look.
Finish with a seasonal touch
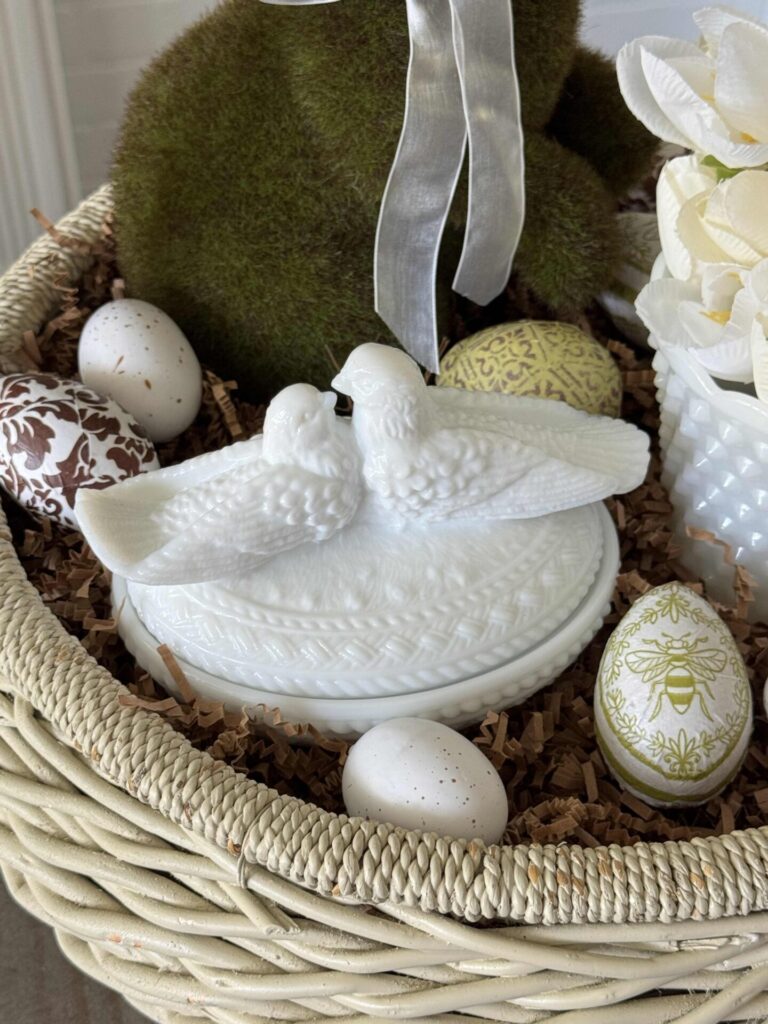
For a little Easter charm, I tucked in a few speckled eggs and some DIY decoupage eggs that I made several years ago.
I carefully chose each item in the basket so it would go nicely with the items on our mantel.
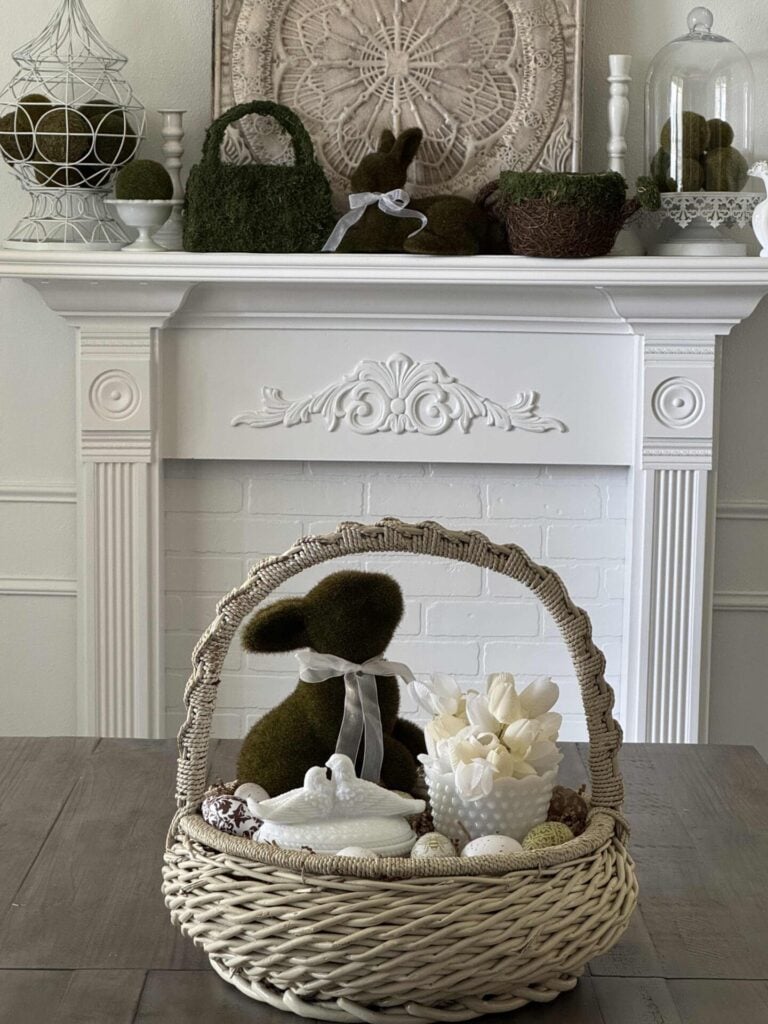
And here is the finished basket!
Easy Easter Table Setting with the DIY Centerpiece
Now it’s time to set the table for Easter!
I decided to keep it simple and neutral so the basket could really shine.
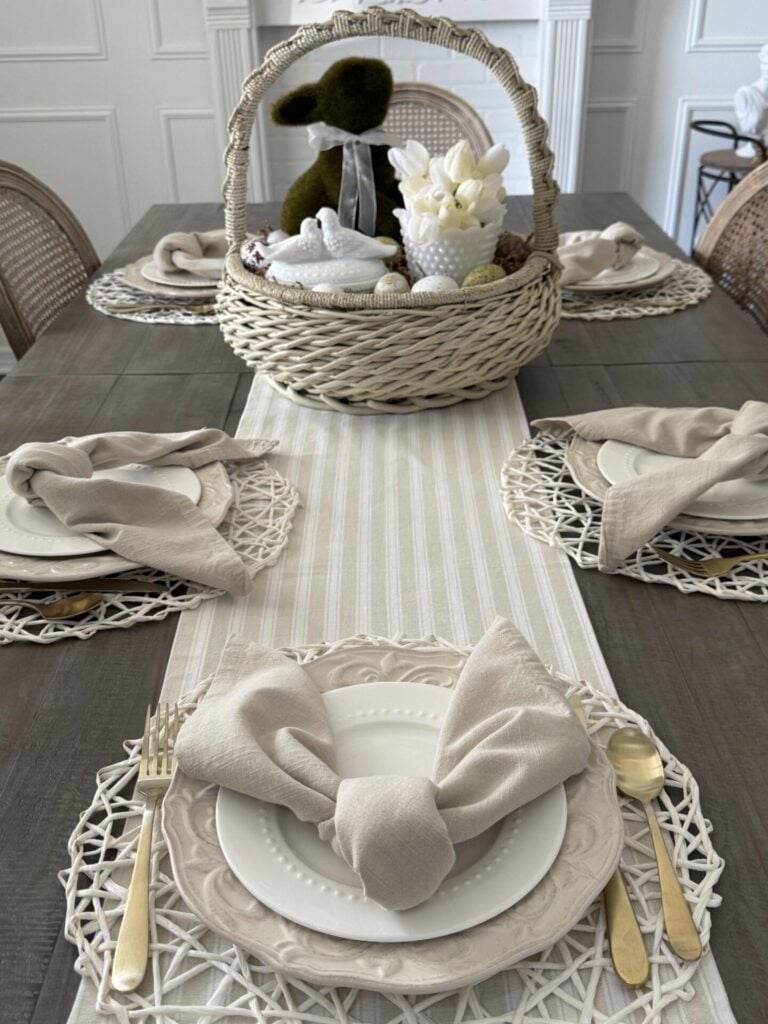
I started with a tan-and-white striped table runner and placed the basket right in the center.
The soft tones of the runner worked perfectly with the basket’s natural texture, helping tie everything together.

To add a fun Easter touch, I folded tan napkins into bunny ears, tied them at the top, and placed them on each stack of plates.
It’s such a simple detail, but it really makes the table feel special.
I finished each setting with gold utensils, which add just a bit of warmth and polish to the overall look.
Tips for Creating Your Own Easter Centerpiece
If you’d like to create your own DIY Easter centerpiece, here are a few simple tips to keep in mind:
- Start with what you have
Before buying anything new, take a look around your home. You might already have the perfect pieces to create something beautiful. - Don’t have a basket? Try another base
If you don’t have a large basket, don’t worry—there are so many other options that work just as well. A wooden crate, serving tray, shallow bowl, or even a decorative box can create a beautiful base. Just use something you love that gives you space to layer your pieces. - Use different heights for interest
Combining tall, medium, and shorter items helps your centerpiece feel balanced and visually appealing. - Choose a simple color palette
Sticking with a few coordinating colors keeps everything looking cohesive. - Add texture for warmth
Mixing materials like basket weave, glass, moss, and paper filler adds depth and makes the arrangement feel more collected and cozy. - Don’t overthink it
Sometimes the simplest combinations are the most beautiful. Arrange your pieces, step back, and adjust until it feels right. - Swap in what you love
You can easily change this look by using different flowers, figurines, or containers to match your style or what you already own.
Closing Thoughts
I love how this DIY Easter centerpiece came together using pieces I already had and a few special vintage and thrifted finds.
It’s such a simple way to add a seasonal touch to your table without spending a lot or overcomplicating things.
Whether you’re hosting Easter dinner or just want to bring a little spring into your home, this is one of those easy projects that feels special without a lot of effort.
I hope you’ll try it!
If you enjoy the blog, please sign up for our email list so you won’t miss a post!
Until next time, follow us on Pinterest, Facebook, and Instagram!
Blessings, Donna and Rich
More Easter Decorating Ideas
Looking for more table ideas? Take a look back at our past Easter tables:
- Tips for Creating a Simple Easter Tablescape
- How to Create a Nature-Inspired Easter Tablescape
- Beautiful Easter Table Decor Ideas
- Easter Table Ideas to Make Your Holiday Special
- Easy Last Minute Easter Table Decor Ideas You’ll Love
Pin It For Later
Don’t forget to pin the image below to one of your Pinterest boards (hover over the picture and click the red Pin button in the top left corner).

Related Posts:


**Some of the links in this post are affiliate links. This means if you click on the link and purchase the item, we will receive an affiliate commission at no extra cost to you. We appreciate your support. (disclosure policy)
Looks adorable!! Love the milk glass inside…I’ve never seen the milk glass birds before…how pretty! Happy Easter!
Thanks Rachel! The lidded bowl with birds is by Westmorland and it’s my favorite milk glass find so far! I hope you and your family had a wonderful Easter!