Do you love Easter eggs as much as I do? Then you need to check out my beautiful decoupage Easter egg DIY! It’s a simple and fun project!
When I think about Easter eggs, it brings back so many wonderful memories!
**Some of the links in this post are affiliate links. This means if you click on the link and purchase the item, we will receive an affiliate commission at no extra cost to you. We appreciate your support. (disclosure policy)
Memories of filling brightly colored plastic eggs with candy and an occasional coin!
The joy of watching the boys run around the yard, filling their baskets with eggs, and opening them to find their treasures!
Seeing the boys all grown-up and hiding the eggs for the younger kids in the family!
Unfortunately, we won’t be hiding any eggs at our house this year!
So to make up for it, I’m going to create some beautiful decoupage Easter eggs for my spring decor!

You might think my choice of colors is unusual, no pastels this year!
I’m going for a nature-inspired Easter tablescape and want my eggs to coordinate with moss and twigs!
Let’s get this DIY started, and make some beautiful Easter eggs!
Gather

Gather or purchase the following items to make this project:
- Easter eggs-purchased from Walmart for $1.98 a dozen
- Mod Podge
- Foam brush
- Scrapbook paper
- Napkins-purchased from Home Goods
- Tissue paper-purchased from Hobby Lobby
- Wax paper
- Empty egg carton
Prep

We’re going to start with the napkin. Most napkins are 2-ply, so you will need to separate the sheets.
Discard the plain backside.

Cut or tear the napkin into small pieces.
Next, cut or tear the tissue paper.
Do the same with the scrapbook paper.
Cover your work surface in wax paper, so the eggs won’t stick to it.
steps to Make decoupage easter eggs
Dip the foam brush into the mod podge.

Paint it onto a small area of the egg.

Attach the piece of napkin to the mod podge and smooth with your finger.

Repeat until half of the egg is covered.

Paint over the pieces of the napkin with more mod podge.
Set on the egg carton and let it dry.
Turn the egg over and repeat the steps until the egg is covered.
tips i learned

- I was planning to lay the eggs on the wax paper to dry but since I did one side of the egg at a time, they would roll over. So instead, I placed them on an egg carton which worked great!
- The napkin and tissue paper were very easy to apply to the egg and I could make them quickly. However, the scrapbook paper was a different story. I had to hold each piece onto the egg until it adhered. It was not hard, it just took a lot longer than I expected.
- I cut the scrapbook paper into strips and squares. I liked how the squares looked much better than the strips!
- Your fingers will get messy, so have a wet cloth or wipe to remove the glue!
my beautiful decoupage easter eggs
snuggled in a nest

Resting in an egg carton

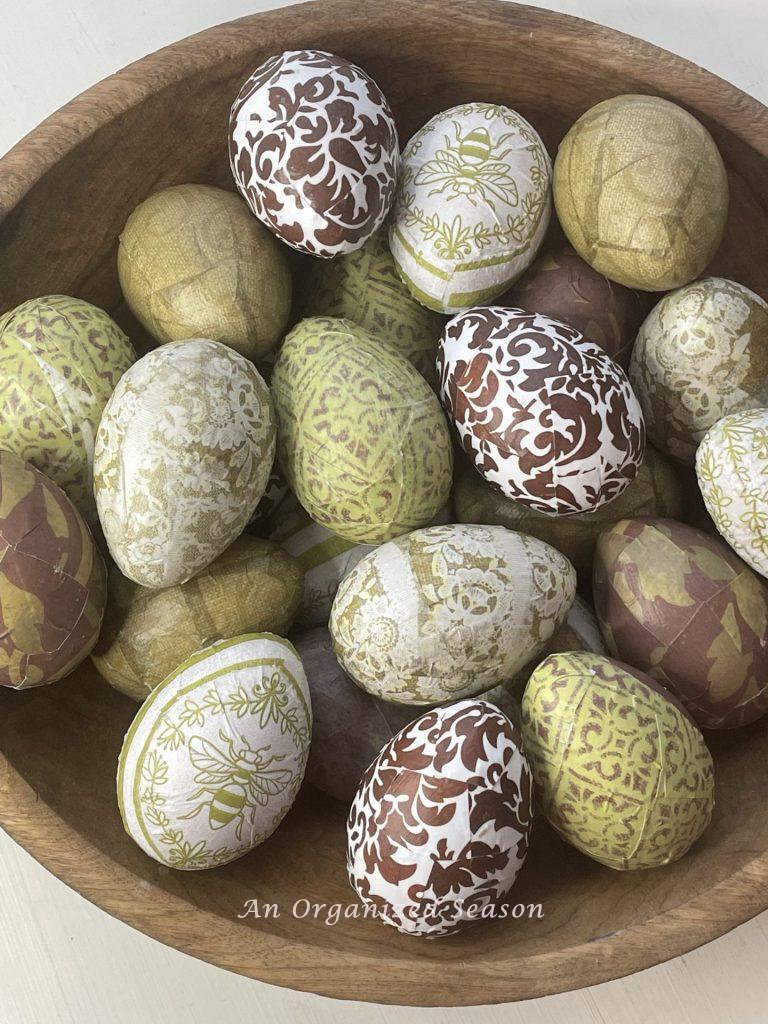
Displayed in a wooden bowl
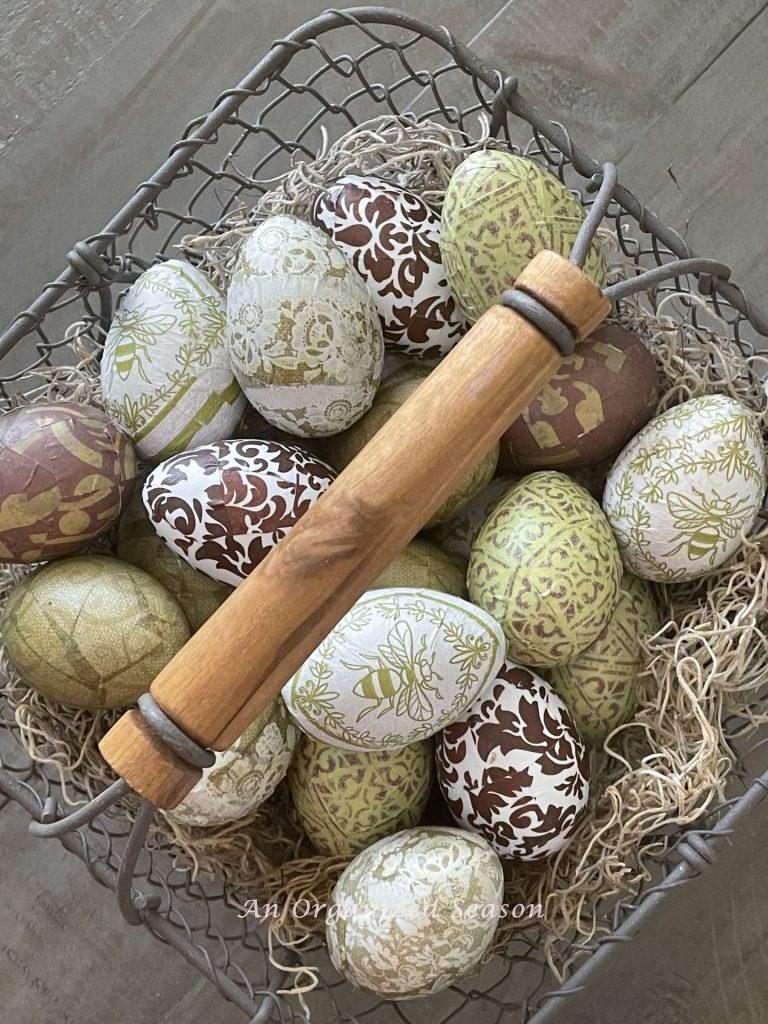
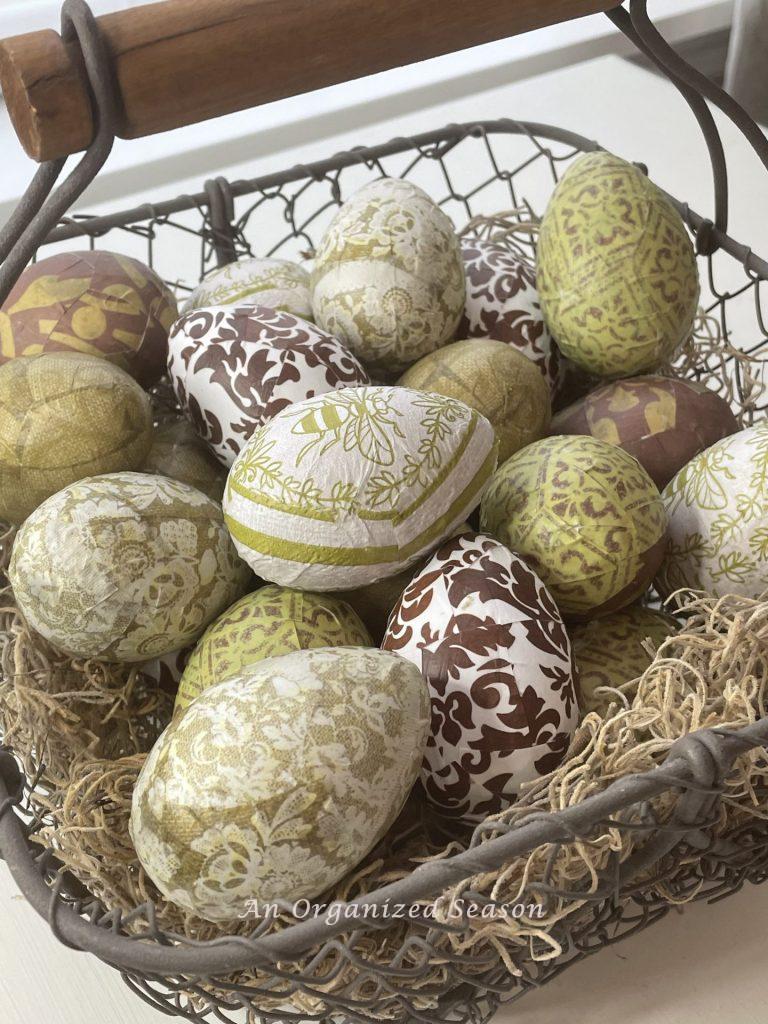
collected in a basket
Are you ready to give this decoupage Easter egg DIY a try? I think you should! It’s such an easy and inexpensive way to add spring decor touches to your home!
If you are enjoying our blog, we’d like to invite you to join our email list so you never miss a post!
Until next time, follow us on Pinterest, Facebook, and Instagram
Blessings, Donna and Rich
more spring inspiration
How to Make Speckled Eggs for Spring
Tips for Creating a Simple Easter Tablescape
How to Create Inexpensive Floral Napkin Rings
Helpful Ideas to Brighten Your Spring Decor
How to Make a Spring Wreath Using Hydrangea
get the look
If I can not find the exact product I used, I try to find something similar for your convenience!

Related Posts:


**Some of the links in this post are affiliate links. This means if you click on the link and purchase the item, we will receive an affiliate commission at no extra cost to you. We appreciate your support. (disclosure policy)
Just pinned these Donna, they are beautiful! I love all the different colors and patterns you created. That bee is stunning. I love the way you’re celebrating the season so far and I can’t wait to see more. Big hugs, CoCo
Thank you CoCo! I’m having so much fun decorating and creating items for my spring decor! Have a great day! Donna
These are gorgeous! I’m going to be on the lookout for some craft eggs and some pretty napkins! I love how all of your eggs coordinate yet are made with different papers. Love! Thanks for sharing on Crafty Creators!
XOXO,
Niki
Thank you, Niki! I was very pleased with how they turned out! Have a great weekend, Donna
These are just adorable Donna! I can imagine the craft paper was more difficult to work with because it is thicker – thanks for letting us know! Pinned 😊
Yes, it did not stick to the egg immediately, like the other papers. They took more time, but I think they were worth it! Take care, Donna
Hi Donna! Just wanted you to know I am sharing this post in my All Things Vintage round-up this weekend!
Thank you, Cindy! You are so sweet, I really appreciate it! Donna
These are the coolest eggs ever! The colors are so different but I really love how they look. Such a great tutorial! Please come link up to my party and share this post. https://karinskottage.com/2022/03/bring-on-spring-linky-party.html
Karin
Thank you, Karin! I appreciate the comment and the invite! I will head over there! Blessings, donna
This is amazing. I would love it if you would share this on The Fabulous Friday Link Party this Friday. You can find the link on my website. Hugs to you.
Hi Renae! Thank you so much! I would be happy to share this at your party on Friday! See ya then, Donna
Love this idea, Donna, and the colors you chose! Thanks for sharing such a creative idea for Easter eggs! Have a great week!
Thanks so much, Kim! I love the colors too and they match my nature-inspired Easter tablescape I’ll be sharing next week! Take care, Donna
So pretty Donna! They have such a great vintage vibe to them. Love the colors! I’m excited to see what you do next!
You’re so sweet, I can’t wait to share the eggs on my Easter tablescape! Thanks so much! Donna
Donna, I’m loving your neutral eggs. You just showed us that we don’t always need to go with pastels for spring.
Thanks for sharing at the FWF party!
hugs,
Rachelle
Thanks, Rachelle! It was fun to do something different by choosing non-traditional colors! Have a fabulous week! Donna
I like your choice of colors and patterns. When I do this, I find that if I tear rather than cut the napkins, and I only use napkins, nothing heavier, the edges disappear. Also, if you make small cuts into the edges of your paper pieces they will wrap around the curves of your eggs…or pumpkins in the fall…without wrinkling. The whole idea of decoupage is for the paper to appear as paint.
Great tips! I am planning to decoupage pumpkins, come fall, and I will remember this! Thanks so much, Donna
Your eggs are beautiful! I love the color of them and how they coordinate. Well done!
Thanks so much! They were fun to make! Blessings, Donna
These are adorable!! I love the simple color palette that you chose to use on them. The lace looking paper is my favorite…so pretty! Thanks for sharing at Home Imagined today, Donna!
Thank you Rachel, they were so fun to make! I found I really enjoy decoupage!
Donna- I love the color palette you chose for these eggs. The napkins with the bees on them are particularly charming. Thanks for sharing a great tutorial with clear step by step instructions. Also thank you for sharing this post on the Home Imagined Link party.
You’re welcome, Anna! I love partying with you at Home Imagined! I hope you have a great week! Thanks so much!