Spring is right around the corner! Have you started to decorate? Let me show you how to make speckled eggs to add to your spring decor!
I love to use Easter eggs in my decor during this special season!
**Some of the links in this post are affiliate links. This means if you click on the link and purchase the item, we will receive an affiliate commission at no extra cost to you. We appreciate your support. (disclosure policy)
However, unlike the artificial plastic ones you can buy this time of year, I want them to look real.
That means I need to do a little DIY magic!
Watch as I take these white eggs…

and transform them into this…
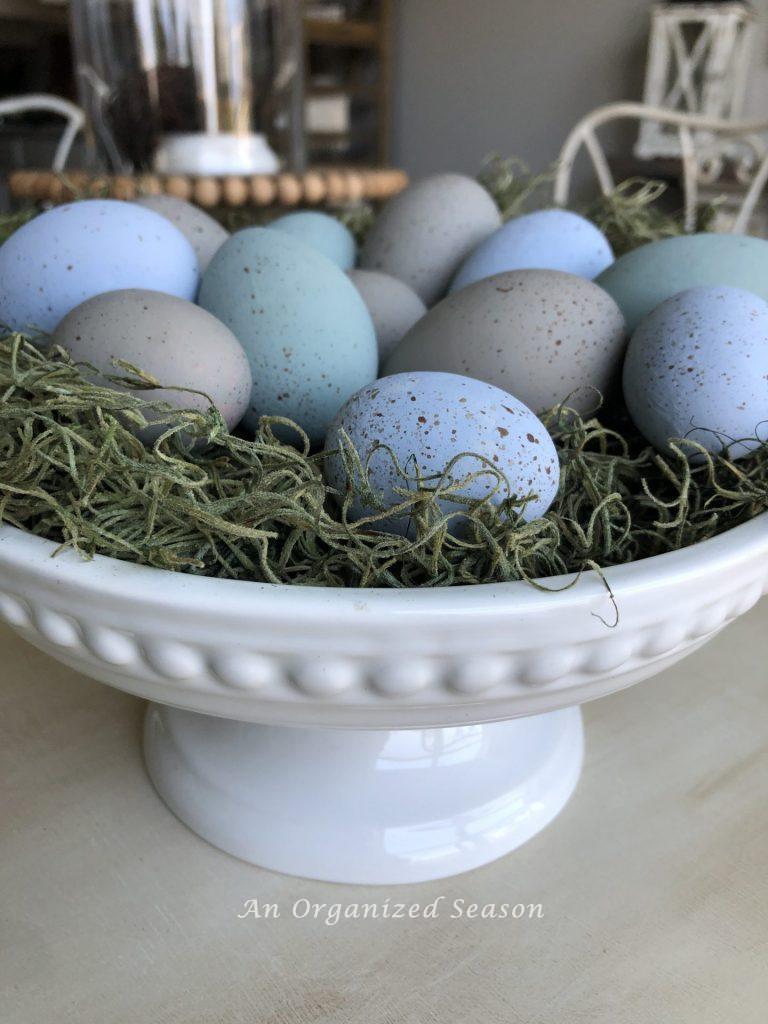
Can you believe that with just a few supplies and an easy painting technique, I was able to create realistic speckled eggs that look store-bought without the high price tag?
These beautiful eggs are perfect for decorating your home for spring, Easter, or even year-round rustic displays.
Whether styling a centerpiece, filling a decorative bowl, or crafting a unique wreath, these DIY speckled eggs will add a natural and elegant touch to your decor.
Let’s get started!
Gather Materials

Gather the following materials to complete this project:
- Eggs- purchased these from Walmart for only $1.98 a dozen (and some eggs I already had)
- Paint – Gather or purchase chalk or acrylic paint and choose realistic colors. I used Annie Sloan Chalk Paint in Duck Egg Blue and Louie Blue. I wanted a tan-colored egg so I also used FolkArt acrylic paint in Barn Wood. For the speckles, I used FolkArt acrylic paint in Coffee Bean
- Paintbrush
- Old toothbrush
- Egg carton
- Plastic gloves – to wear when you speckle the eggs
Steps to Make Speckled Eggs
Paint the eggs

Paint your eggs using the following steps:
- Put your eggs into a carton so they can’t roll around
- Paint half of the egg that is visible
- Let dry
- Turn eggs over and paint the other half
- Let dry
- Apply a second coat of paint, if needed

Sounds easy right?
Well, I managed to mess it up, and I wanted to share why, so you don’t make the same mistake I did!
Here’s what they looked after the first coat.

The paint was going on too thick.
So, after they dried I sanded them to remove the lines.
Ok, here goes round two!
I thinned the paint with water this time and used the soft-bristled paintbrush in the picture below.

The type of paintbrush you use makes a difference!!
Look at the eggs now!
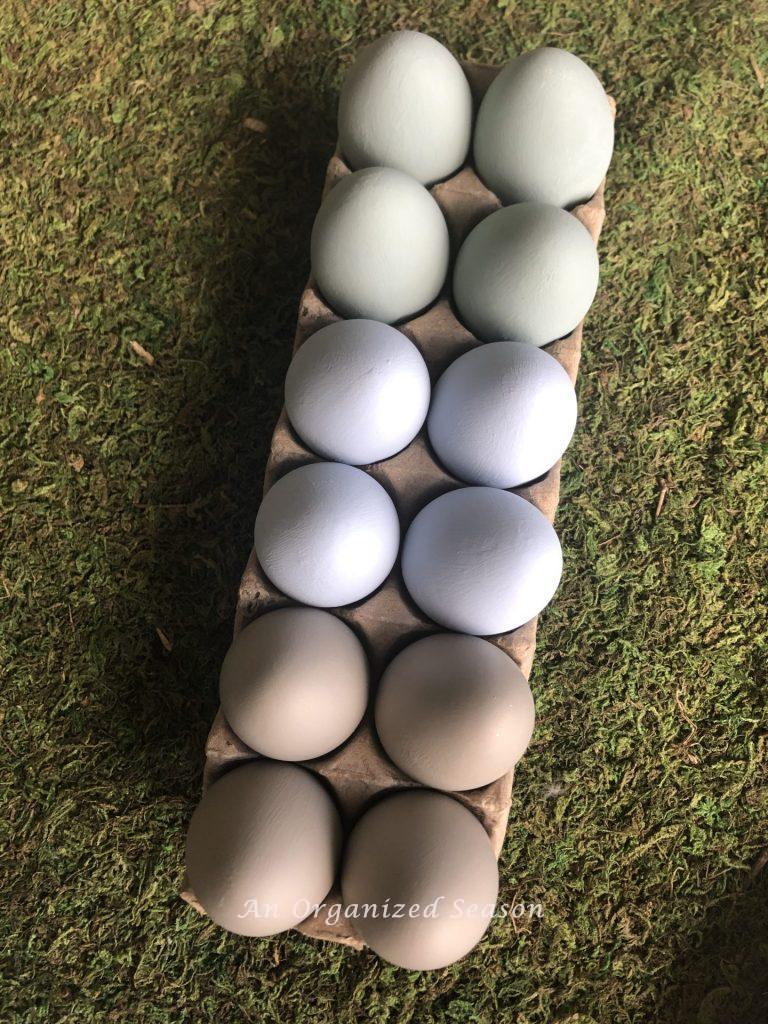
What a difference!
It took two coats of paint to get the coverage I needed.
I love the light natural colors!

So much better don’t you think?
Now it’s time to add the speckles!
Add Speckles to the Eggs
To make the eggs look more realistic, I want to add dark speckles, similar to robin’s eggs.
Here are the steps I took to get an authentic look:
- Wet the toothbrush
- Dip the toothbrush in brown paint
- Run your finger across the toothbrush (practice a few times on white paper to determine how much pressure to use)
- Let dry
- Turn eggs over and speckle the other half
- Let dry
Sounds easy right?
Well again, the type of brush you use matters!
Let me show you what I mean!
First, I tried to apply the speckles with the same paintbrush I used to paint the eggs.

You can see my first attempt on the left side of the paper.
The speckles came out straight in a row.
Not the look I was going for.
So, I grabbed an old toothbrush and tried it instead.
You can see those speckles are on the right.
That’s more like it!
Plus, the toothbrush was much easier to use, so it is the winner!!

The trick is to dip the toothbrush in water, put it into the paint, and blot the excess paint on a paper plate.
Then gently run your thumb down the length of the toothbrush.
I suggest wearing a glove, so you don’t look like you have dirt under your fingernails when you finish!!

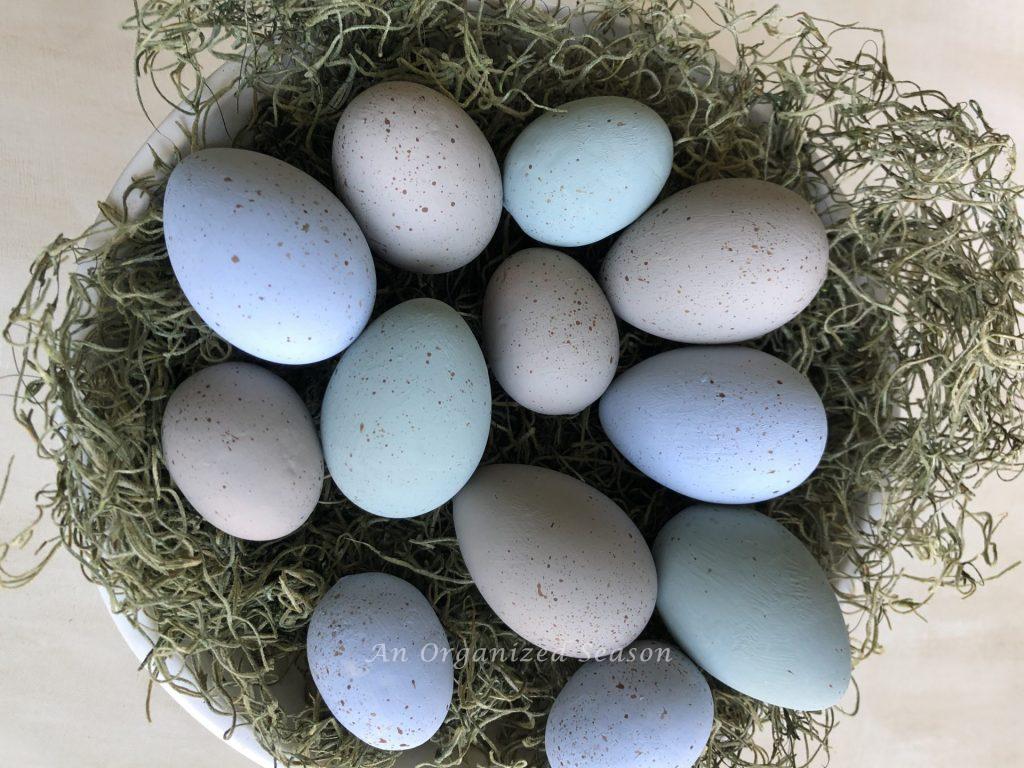
I might have gone a bit heavy on my first try, but I love how the speckles look on the eggs!

The eggs are dry and here is the finished product!
I’m pleased with how they turned out!
THE FINISHED PROJECT

I’m excited to welcome spring by displaying these beautiful eggs on my kitchen counter.
This DIY was super fun, and I learned so much from my mistakes.
Hopefully, you did too!

Now I have plenty of speckled eggs I can use in my spring decor year after year.
I hope this has inspired you to paint some eggs for your home and you’re excited to make a little DIY magic!
Let me know what you think about this project in the comments.
Happy Spring!!
If you enjoy the blog, please sign up for our email list so you won’t miss a post!
Until next time, follow us on Pinterest, Facebook, and Instagram!
Blessings, Donna and Rich
more DIY inspiration
- How to Create Floral Napkin Rings
- Update Old Decor Items
- How to Make a Wood Bead Garland with Tassels
- Breakfast in Bed Tray Makeover
- How to Make a Spring Wreath
Related Posts:


**Some of the links in this post are affiliate links. This means if you click on the link and purchase the item, we will receive an affiliate commission at no extra cost to you. We appreciate your support. (disclosure policy)
I absolutely love those and what a beautiful array of colors!! Perfect for spring!
Thank you! I was so pleased with how they turned out! Have a great day! Donna
Donna, I love the colors you used on these eggs. They are soft and perfect for early spring.
I would love it if you would share this at my Friday with Friends link party. It started today and here is the link: https://myhubbardhome.com/friday-with-friends-party-finishing-out-february/
have a nice weekend
RR
Thanks so much, Rachelle! I’ll head to the link party now! Have a great week! Donna
Did you blow the eggs empty?
Hello! I used faux eggs that I bought at Walmart to do this project. Have a great day!