Looking for a simple project that adds a custom touch to your home? This DIY framed art couldn’t be easier and is proof that beautiful decor doesn’t have to be complicated or expensive.
Sometimes the best DIY projects come from things you already own.
**Some of the links in this post are affiliate links. This means if you click on the link and purchase the item, we will receive an affiliate commission at no extra cost to you. We appreciate your support. (disclosure policy)
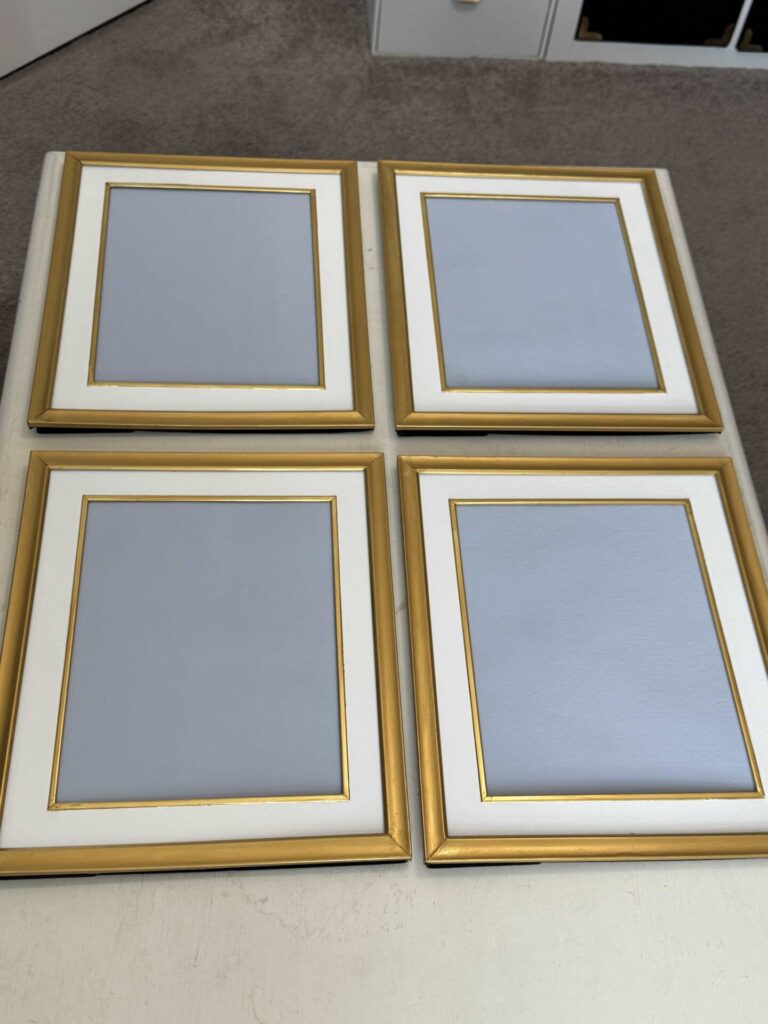
Case in point: When I was organizing the storage area off our guest room, I discovered four old frames holding our wedding pictures, tucked away and collecting dust.

These were my mom and dad’s photographs, but somehow they ended up here when we moved.
We are not going to display them, so I seriously considered putting the frames in our yard sale!
But for some reason, I couldn’t bring myself to part with them!
They are a bit too shiny for my taste, but I like how they have metal around the mat.
Here’s a close-up so you can see that detail.

Oh my goodness, can you get over how different we look!
Do you think I should go back to red hair, or keep it blonde???
Sorry, I’m getting off track, back to the DIY!
Earlier this year, while decorating my mantel for Valentine’s Day, I picked up some wood bead tassels from Dollar Tree.

Little did I know, the pretty wooden emblems from those tassels would eventually meet those wedding frames—and together, they’d become gorgeous, custom framed art for our living room makeover.
Proof that a bit of creativity can give old treasures a whole new life!
Gather Materials

Here are the materials I used to complete this project:
- Frame(s)- old or thrifted
- Wood bead tassels with wood emblem- Dollar Tree
- Painters tape
- Blue Paint- Annie Sloan Louis Blue
- White paint- Waverly White
- Gold metallic paint- FolkArt Pure Gold
- Paintbrush(s)
- Pliers
- Wood Glue
Steps to Make DIY Framed Art
This project is so simple, I hope you’ll want to try it!
Here’s exactly how I pulled it off, step-by-step.
1) Deconstruct the frames
First things first—let’s take those frames apart!
Remove the back of the frame, the glass, the mat, and the thin cardboard piece.
Set the mat, the back of the frame, and the thin cardboard aside for later and say goodbye to the glass (we won’t be needing it for this project).
2) Take Apart the Wood Bead Tassels
As I was saying, I originally bought these wood bead tassels to decorate my mantel for Valentine’s Day (you can see that project here).
But for this makeover, we only need the pretty wooden emblem.

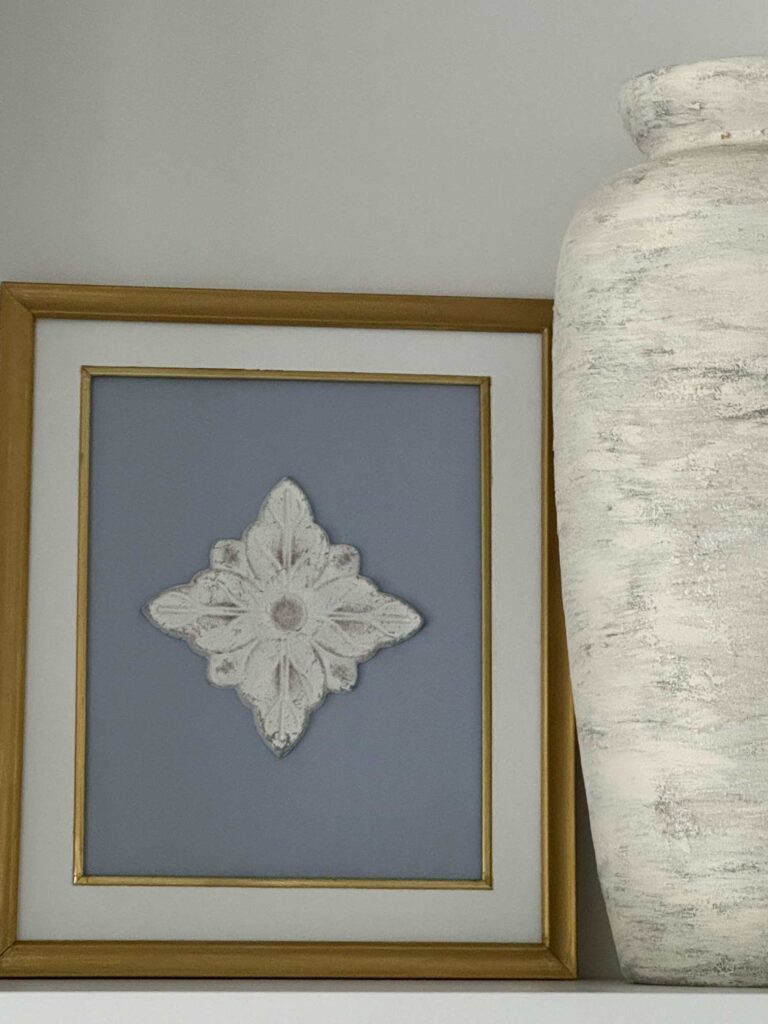
Using pliers, gently remove the emblem from the tassel—this little detail is going to be the star of your framed art.
3) Paint the Cardboard Back Piece Blue
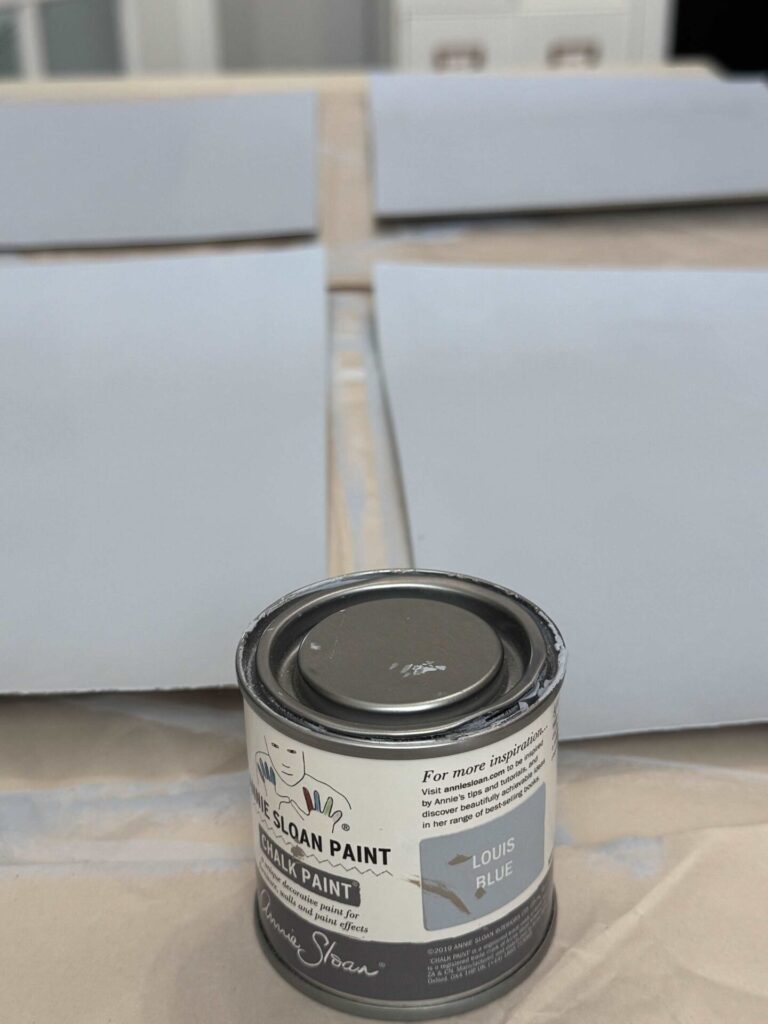
Next, paint the four thin cardboard pieces with Annie Sloan’s Louis Blue.
Don’t worry about perfection—just give it an even coat and let it dry completely before moving on to a second coat.
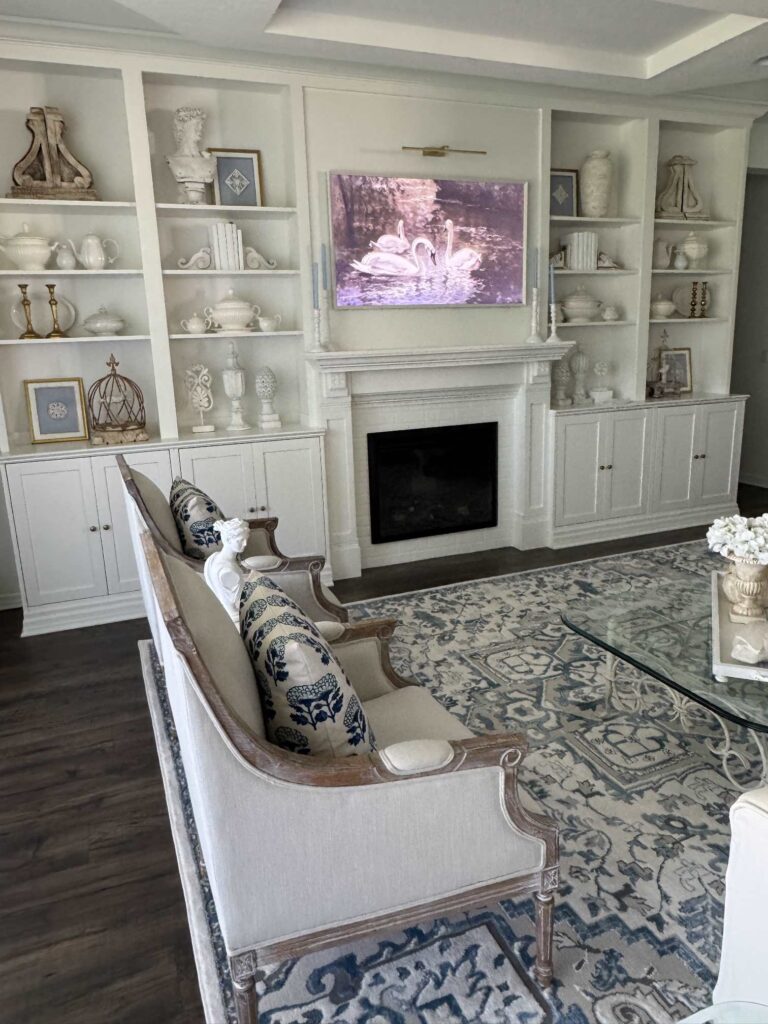
This color was the inspiration for our entire living room makeover, so it felt like the perfect choice for this project.
If you’d like to see the transformation, you can check out our living room makeover here.
4) Paint the Mats White
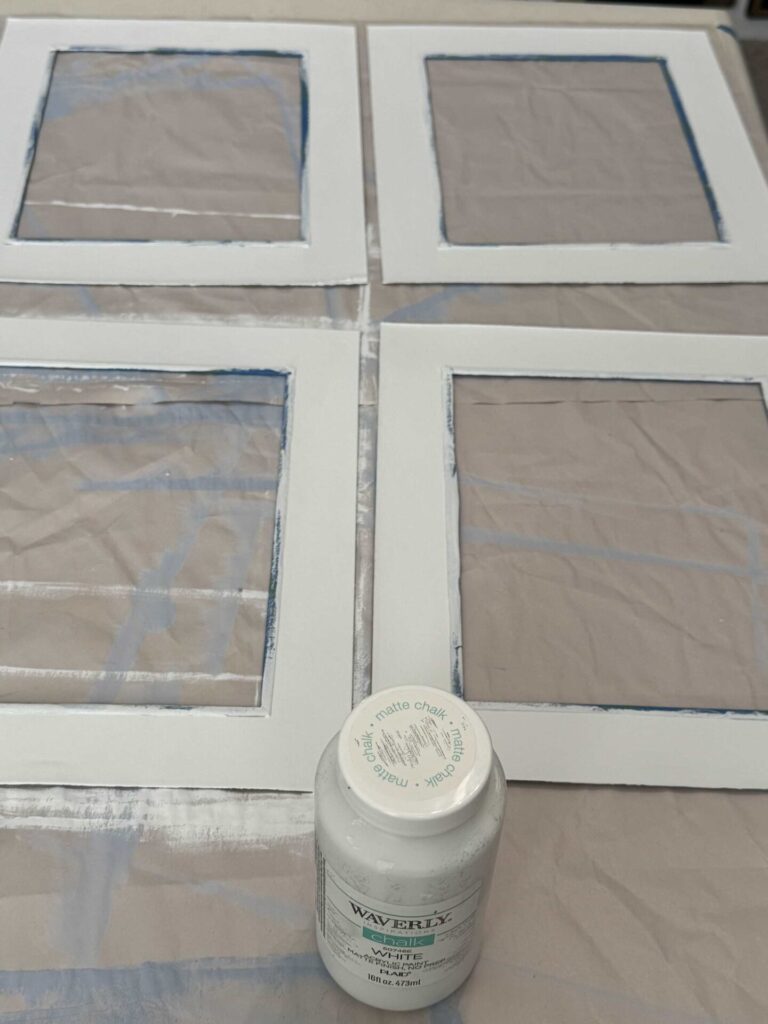
If your mat is a color other than white, it’s makeover time!
Mine had a gold edge that I had to cover with painters’ tape.
Then, I gave the mat a fresh coat of Waverly White.
It instantly brightens everything and gives your project a clean, crisp background.
Mine needed two coats.
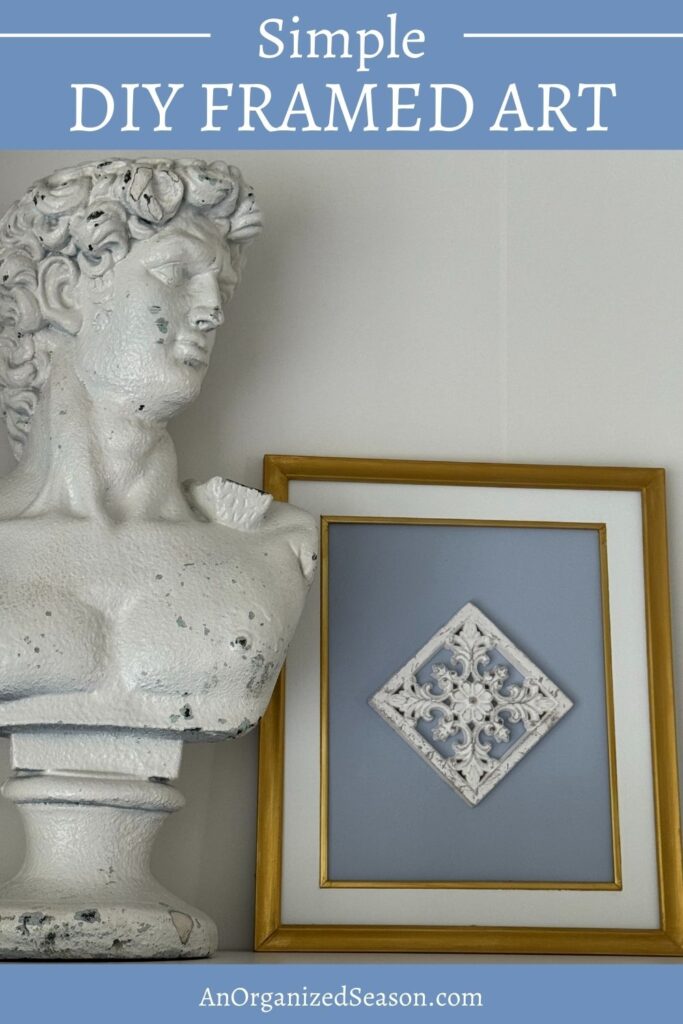
5) Paint the frames gold
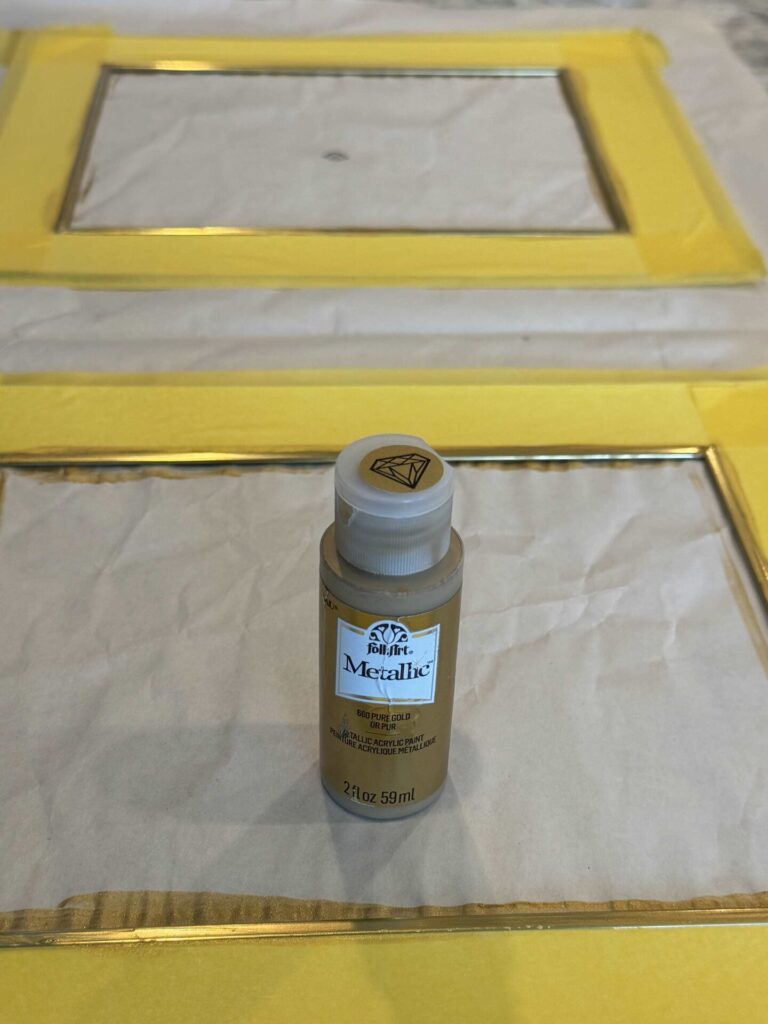
Here’s the magic moment—painting your frame gold with FolkArt Pure Gold.
It worked beautifully to remove the shiny look of the frames.
I think it gives the entire piece a high-end, custom look.
If your mat has an inner edge, like mine did, cover the mat with painter’s tape and carefully paint that gold too.
6) Reassemble the Frame (Without the Glass)
Once all your paint is dry, place the blue cardboard backing and white mat back into the frame.
We’re leaving the glass out so the art feels dimensional and handcrafted.
7) Glue the Wooden Emblem in Place

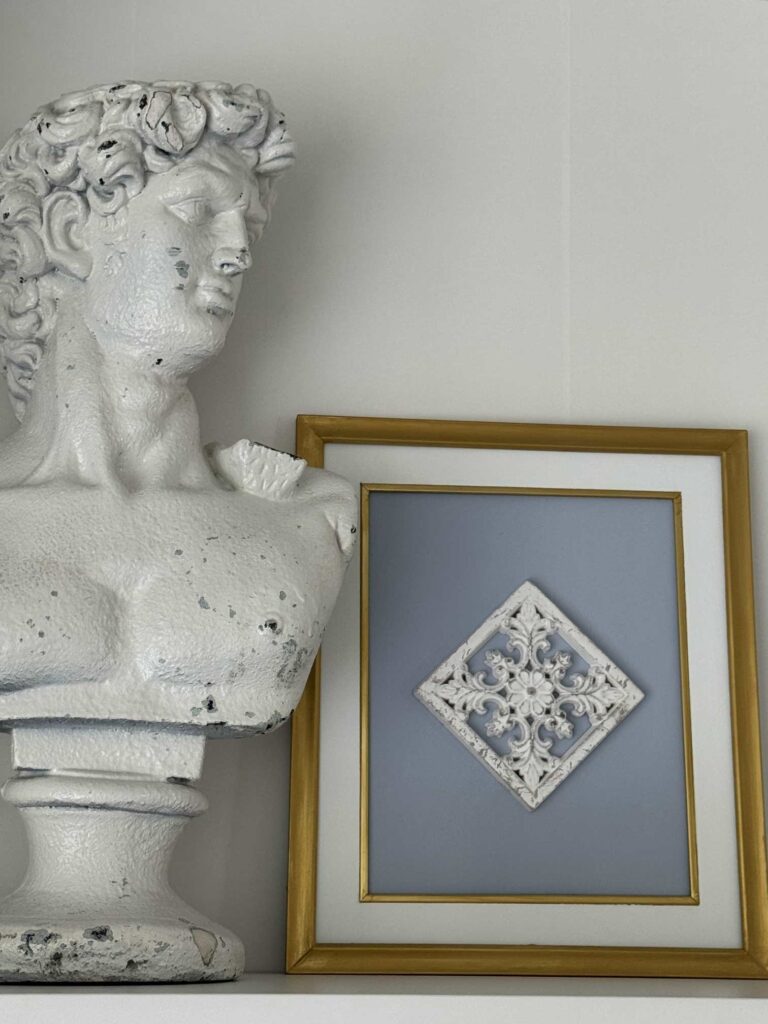
The grand finale—center your wooden emblem on the blue backing and attach it with wood glue.
Hold it in place for a moment, then let it dry completely before displaying.
And just like that, you’ve created gorgeous, one-of-a-kind framed art for your shelves or mantel!
How We Styled Our DIY Framed Art
These frames once held our wedding photos, so they’ve always felt special to me—but for years, they were tucked away, collecting dust.

I didn’t want to get rid of them, but I also didn’t want them sitting in storage.
This project gave them a completely new purpose and a fresh look, and now they’re out on display again, where I can enjoy them every day.

I also love how easy and affordable this makeover was.

By pairing the frames with inexpensive Dollar Tree embellishments and a few coats of paint, I created DIY framed art that beautifully matches our living room.
It’s the perfect example of how you can breathe new life into something you already own.
Final Thoughts
Do you have a special piece that’s been hiding away in storage—maybe an old frame, a keepsake, or decor you’ve fallen out of love with?
Pull it out, give it a fresh coat of paint, and turn it into something you can enjoy again.
I’d love to hear about your project ideas or see what you create—share them in the comments below so I can cheer you on!
If you enjoy the blog, please sign up for our email list to stay updated!
Until next time, follow us on Pinterest, Facebook, and Instagram!
Blessings, Donna and Rich
Pin It For Later
Don’t forget to pin the image below to one of your Pinterest boards (hover over the picture and click the red Pin button in the top left corner).
More DIY Artwork Inspiration
Interested in more ways you can make your own artwork? Check out these posts:
- How to use Vintage Items to Create Artwork
- Unique Wall Art Using Succulents
- How to Create an Inexpensive Gallery Wall
- Learn to Make Reverse Canvas Wall Art
- Easy Way to Repurpose a Sign Into Art
Related Posts:


**Some of the links in this post are affiliate links. This means if you click on the link and purchase the item, we will receive an affiliate commission at no extra cost to you. We appreciate your support. (disclosure policy)
Leave a Reply