Ever wondered if you can transform an old gardening tool into a stunning piece of home decor? This DIY project repurposes a rusty rake into succulent wall art, adding a unique and rustic touch to your space.
If you’re looking for a creative way to decorate your home, inside or out, this succulent wall art project is perfect!
**Some of the links in this post are affiliate links. This means if you click on the link and purchase the item, we will receive an affiliate commission at no extra cost to you. We appreciate your support. (disclosure policy)
Crafting with Garden Tools
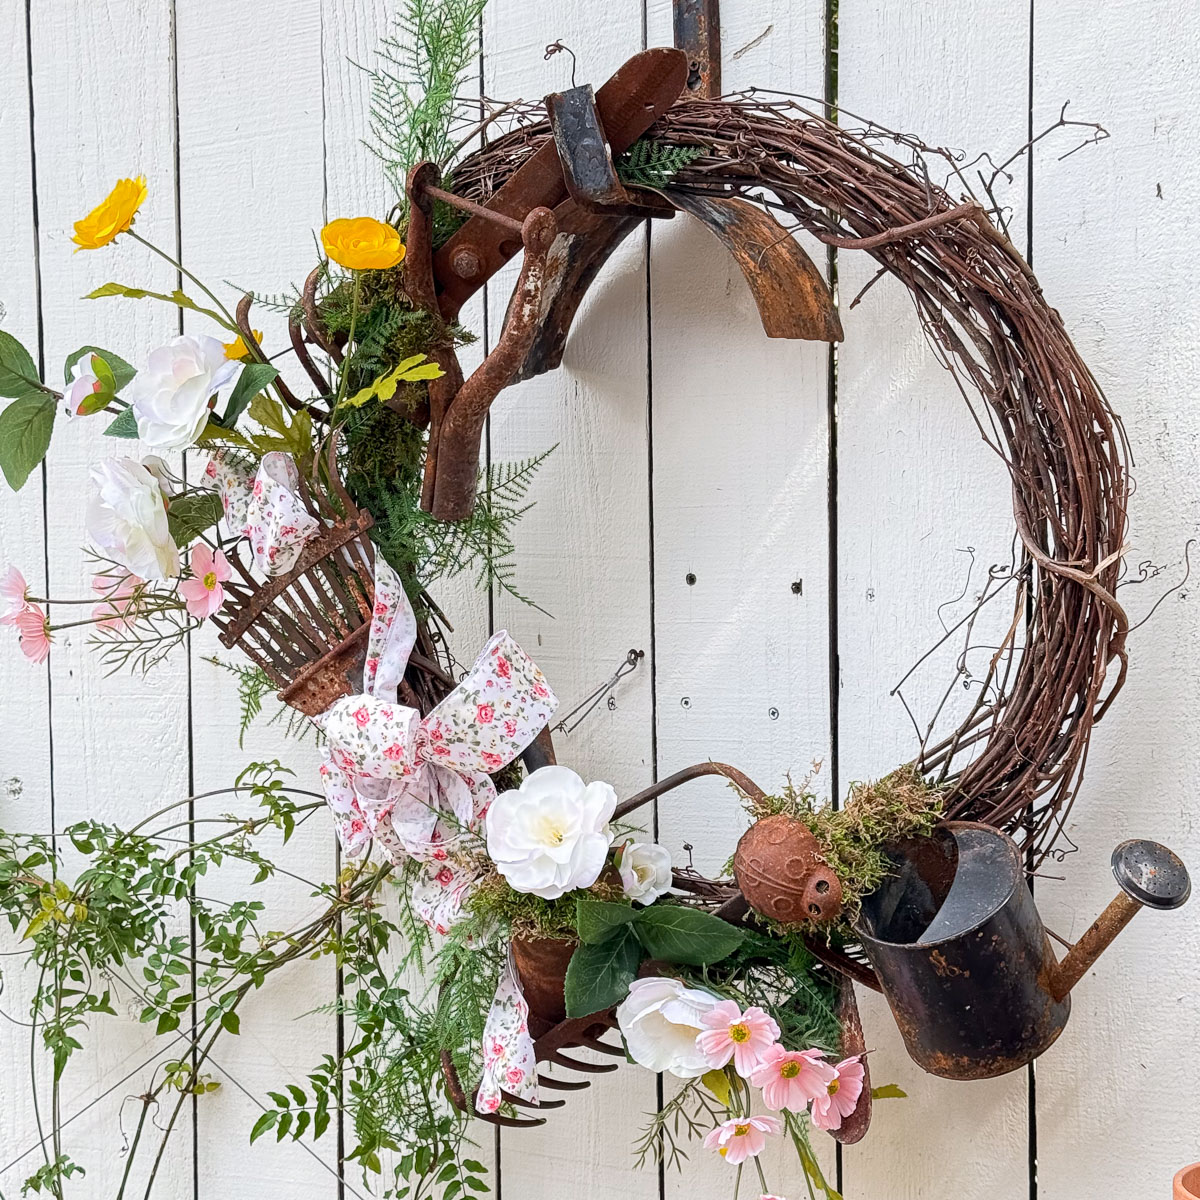
As part of The Handcrafted Society blog hop, I was challenged to upcycle a gardening item—and I knew just the thing!
I found an old rake at the Renninger’s Antique Collectors and Extravaganza and knew I could turn it into an interesting piece of wall art by adding some faux succulents I purchased from Michael’s clearance section last year!
Here’s what I started with…

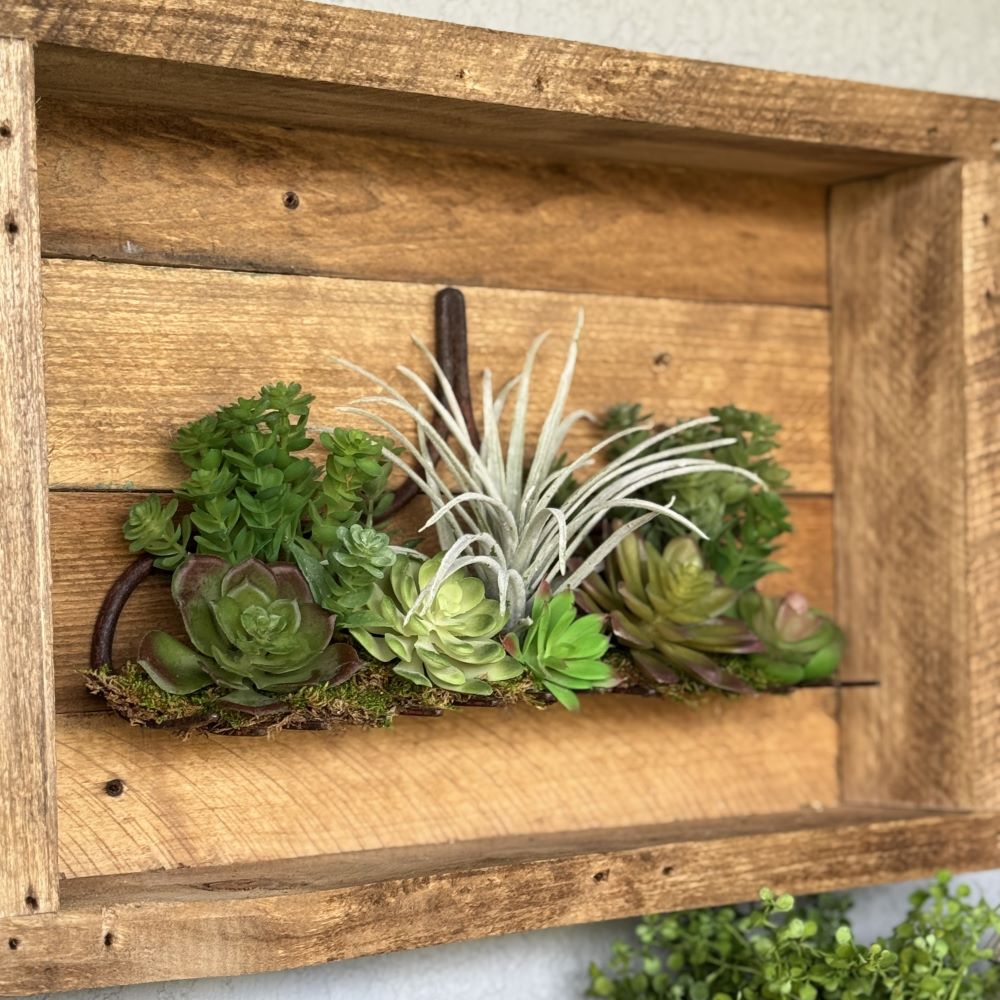
And here’s what I created…

How fun is that?
If you’re not familiar with The Handcrafted Society, we are a group of blogging friends that come together each month to share creations centered around a specific theme or craft medium.
And just in time for spring, we’re taking items that could be found in a garden shed and upcycling them!
At the end of this post you’ll be able to hop over to their blogs to see what they’ve created.
Now, follow along to see how you can make your own succulent wall art!
Gather Materials to make succulent wall art

Gather the following materials to complete this project:
- Vintage Rake head- Look in your shed, garage, an antique or thrift store
- Faux succulents- Michael’s– I bought mine at the end of last season when they were on clearance sale
- Wire cutters
- Moss- Michael’s
- Hot Glue Gun and glue sticks
- Finger Protectors
Optional frame:
- Pallet or scrap wood
- Mallet and hammer
- Saw
- Nails
- Stain- Minwax Special Walnut
- Rags
- Picture hanger/screws
- Screwdriver
Steps to Upcycle the Rake
Prepare the succulents

Remove the stems using wire cutters.
Glue the succulents

Use hot glue to attach the largest succulents to the back of the rake.
Note: Be very careful when using hot glue, as it can burn your skin. We recommend using finger protectors to prevent blisters!
Add moss

Glue pieces of moss around the succulents and adhere them to the rake.
Attach the remaining succulents

Secure the rest of the succulents to the moss for a lush, natural look.
At this stage, you can stop and hang your rake as-is.

It turned out so cute and would look great hanging on a wall like this!
But if you want to take it to the next level, adding a rustic frame from a pallet will give it a more polished, finished look.
Now, I know not everyone has a pallet sitting in their garage that they need to get rid of, lol!

But we do, so we’re going to make a frame that enhances the structure and provides a beautiful contrast to the succulents, making the piece stand out even more!
Steps to make a frame from a pallet
Disassemble the pallet

Use a mallet to separate the boards and then remove all nails with a hammer.
Select boards

Choose the straightest pieces for the frame and backing.
We will use the wider boards as the frame and the skinnier boards for the backing.
Cut the boards

Trim them to size to form a rectangle around the rake.
Assemble the frame

Nail the pieces together securely.
Create the back panels

Cut the skinnier boards and secure them across the back of the frame.
Stain the wood

Apply your choice of stain with a rag for a finished look.
Let it set for fifteen minutes and then wipe away the excess.
Attach the rake

Secure the rake inside the frame with a screw.
Add a Picture hanger to the frame
We attached a sawtooth hanger on the back of the frame so we can hang it on our lanai!
Display Your Succulent Wall Art
Once your frame is complete, it’s time to display your beautiful succulent wall art!
Hang it in your living room, entryway, or even a covered patio for a unique focal point.

We created ours to hang in this cozy corner of our lanai!

The combination of rustic wood, lush succulents, and an upcycled rake creates a charming, statement piece above our shelves.

In Conclusion
Repurposing old items into beautiful decor is such a rewarding process.
This succulent wall art project not only gives new life to an old rake but also adds a touch of greenery to your home without any maintenance.
I hope you feel inspired to try this fun and creative DIY!
Would you upcycle a rake into wall art?
We hope so, and don’t forget to scroll to the bottom of the page to see what our friends in the Handcrafted Society are up to!
If you enjoyed this project, be sure to sign up for our email list so you never miss a post.
Blessings, Donna and Rich
More spring DIY Inspiration From our Blog
Don’t leave yet; if you love DIY projects as much as we do, you’ll want to check out these posts:
- Fun Way to Paint and Stencil Flower Pots
- DIY Garden Markers From Dollar Tree Items
- Create a Topiary Frame From a Grapevine Wreath
- Easy DIY Moss Mushrooms
- How to Make Twig and Moss Charger Plates
Pin It For Later
Don’t forget to pin the image below to one of your Pinterest boards (hover over the picture and click the red Pin button in the top left corner).

The Handcrafted Society
Ready for more inspiration?
Now it’s time to see what my amazing friends in The Handcrafted Society have created with garden items!!
Click on the image or the blog name to hop over to each post!


Related Posts:


**Some of the links in this post are affiliate links. This means if you click on the link and purchase the item, we will receive an affiliate commission at no extra cost to you. We appreciate your support. (disclosure policy)
Omg Donna I LOVE it!! What an amazing idea! The wood box really makes the green pop. Such a lovely and beautiful handmade accent for any space!
Thanks so much Rachel! We are thrilled with how it turned out! I’m so glad we made the box for it!
How cute is this Donna and Rich!!! The reclaimed wood box frame really makes it! You’ve inspired me!!! I have an old fishing net on a pole I’ve been wanting to make into a planter, but it seemed like it was missing something. Maybe it just needs a box frame too.
So glad this post was helpful Diane! I agree, the box makes a big difference! You always come up with the best ideas so I’ll be on the lookout to see what you do with your net! Thanks!
This is such a clever way to grow succulents. I love planting them in the rack head and also how you built the box from a pallet! You are so resourceful, Donna!
Thank you Missy, you’re too kind! It’s easy to grow faux succulents, lol!! I would probably kill the real thing!
Donna – What a cute project and I loved that you repurposed both the rake and an old pallet. Using the faux flowers is genius because you can’t tell the difference and you don’t have to remember to water them.
Thank you Lynn! I don’t have a green thumb so using faux works better for me, lol! I have a pot of real succulents and only half of them survived the winter! Thanks so much!!
This came out great Donna! The rake itself looks amazing but by adding the frame really finished it off. It’s perfect for welcoming spring! XO- MaryJo
You know me, I always like to add a little extra!! Thanks so much!
What a great upcycle project. Love the wood box that you guys made to frame out the rustic rake. It makes the succulents pop. I would love to do something similar on my porch. Too pretty!
Thanks Tammy! You’ll have to let me know if you try it! Have a great day!
Love the way this came together, Donna. It’s so cute! Using the pallet as a backdrop was such a creative idea and I love that you can use it throughout the year too. Can’t wait to see more of your spring ideas, CoCo
Thanks CoCo! Since we’re in Florida, I plan to use it on the lanai year round!
So cute Donna! I see these rakes all the time when I am thrifting and now I am going to get the next one I see. Thanks for sharing!
Thanks! So glad you like it Amy! Would love to see what you would do with one! Happy Day!
Thanks for sharing with us, I’m featuring you this week when the next To Grandma’s house we go link party starts!
That’s so wonderful! Thanks a bunch! I’ll see you at the party!
This turned out so cute Donna! Succulents are my favorite, since it seems to be the only thing we can really grow here. We are finally getting a Michael’s here, so I am looking forward to checking out their store when it opens. So many find wonderful things there, and I hope I do too. Love the pallet frame, we made several pieces from pallets a few years ago, and had a lot of fun creating on a zero budget for Christmas presents.
Hi Cara! I enjoy going to Michael’s and looking at all their pretty decor every season! I get lots of my inspiration from there and I bet you will too! So glad you like my succulent wall art! It was fun to make! Thanks so much for stopping by!
Cool idea and it turned out beautifully! Thanks for joining in on Home Matters Linky Party! I will be featuring your post this week! #HomeMattersParty xx
Hi Joy! That’s great news! It’s always an honor to be featured! Thanks and I’ll see you at the party!
Donna, that’s about the cutest rake I have ever seen and you handcrafted the wood box frame too! It’s the perfect accent above your shelves. Pinning!
Hi Michelle! So glad you like my creation! I’m very happy with how it turned out! Thanks a bunch!