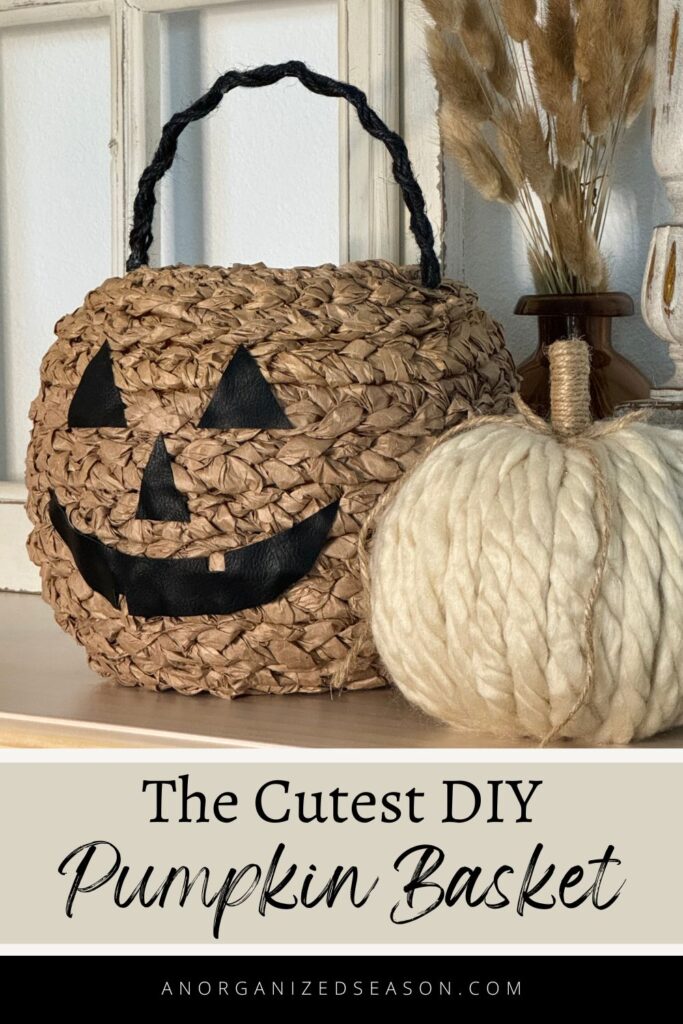
Are you looking to add a charming touch to your Fall or Halloween decor? Look no further! Today we’re crafting the cutest pumpkin basket you’ve ever seen.
If you’ve been around the blog awhile, you might remember how I upcycled packing paper to make a free basket!
**Some of the links in this post are affiliate links. This means if you click on the link and purchase the item, we will receive an affiliate commission at no extra cost to you. We appreciate your support. (disclosure policy)
Today I’m using that same technique!
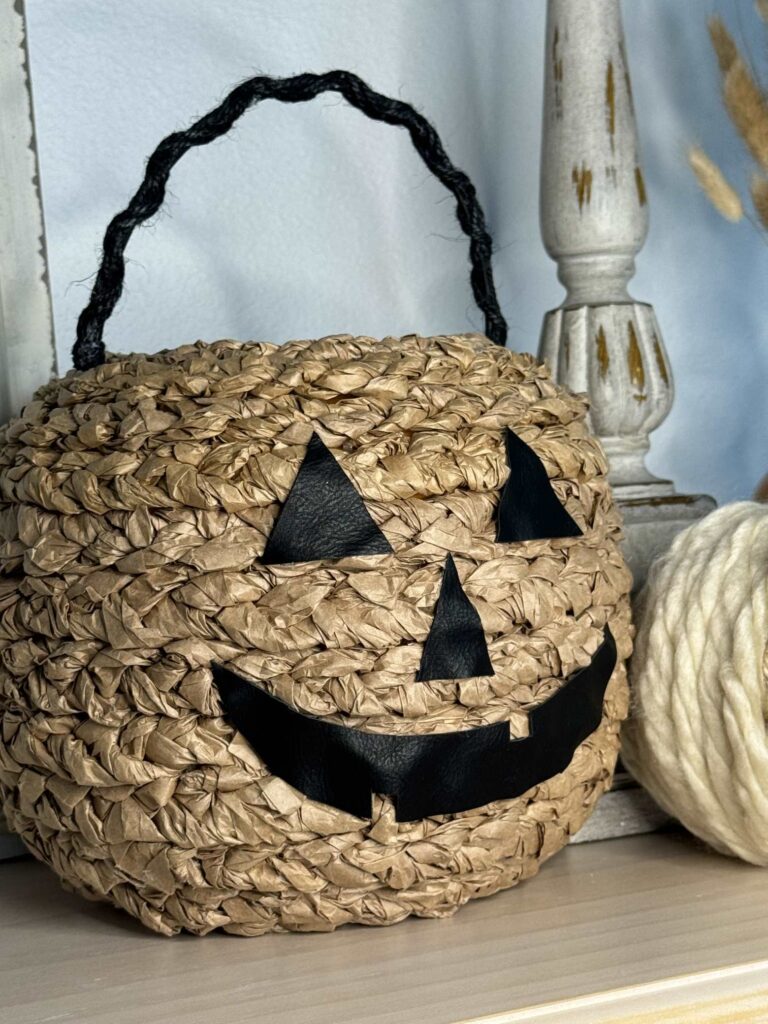
This pumpkin basket is perfect for Halloween, you can use it for trick-or-treat candy, a festive centerpiece, or a cozy accent piece.
When Halloween is over, turn it around so the face doesn’t show and display it for fall.
Crafting With Leather
Today is the monthly meeting of the Handcrafted Society and our challenge for October is to use leather or lace.
If you’re not familiar with The Handcrafted Society it’s a group of talented blogging friends who come together each month to share creations centered around a specific theme or craft medium.
At first, I thought I would use lace until I was browsing Home Goods one day and saw the cutest baskets with leather jack-o-lantern faces.
I pivoted because I knew I could easily recreate it for a couple of dollars using the technique I mentioned earlier!
So are you excited to create a pumpkin basket that’s inexpensive, adorable, functional, and perfect for the entire autumn season?
Let’s get started!
Steps to Make a Pumpkin Basket
Gather Materials
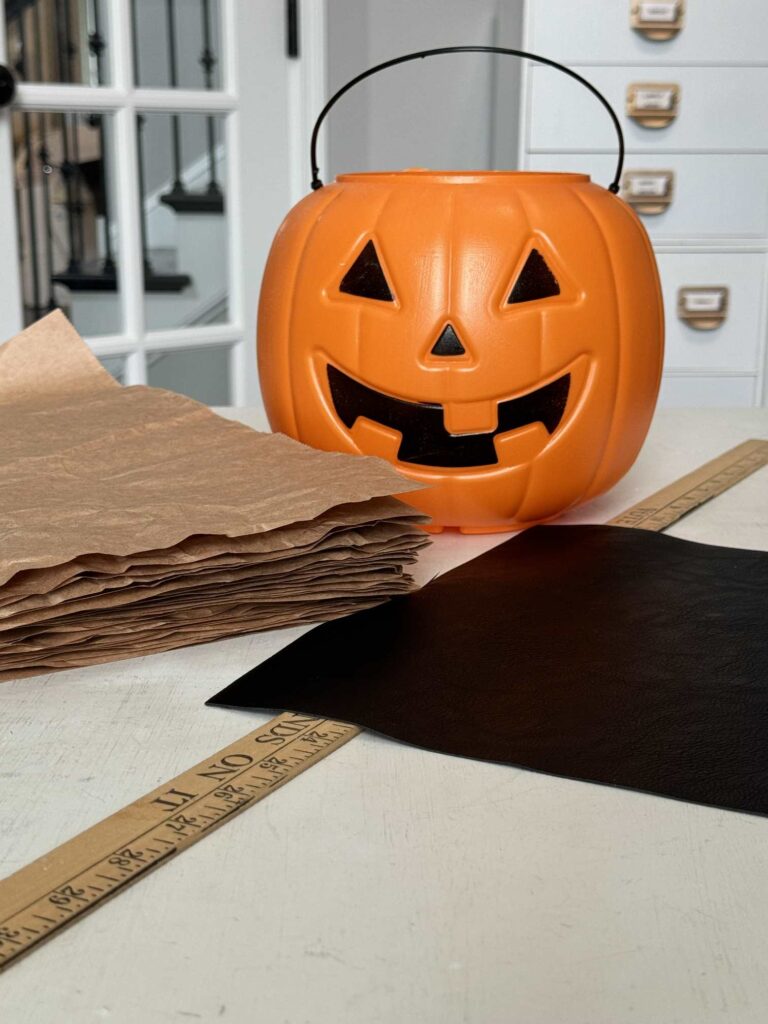
Gather the following materials to complete this project:
- Orange plastic pumpkin- Walmart
- Faux leather- Hobby Lobby
- Packing paper or brown craft paper
- Yard stick or measuring tape
- Rotary cutter and mat or scissors
- Hot glue gun
- Hot glue sticks
- Silicone finger protectors
- Black jute twine- optional
Prepare the paper
I always save the brown packing paper from my Grove shipments to craft with!
If you don’t hoard paper like me, you can purchase brown craft paper in a roll, lol.
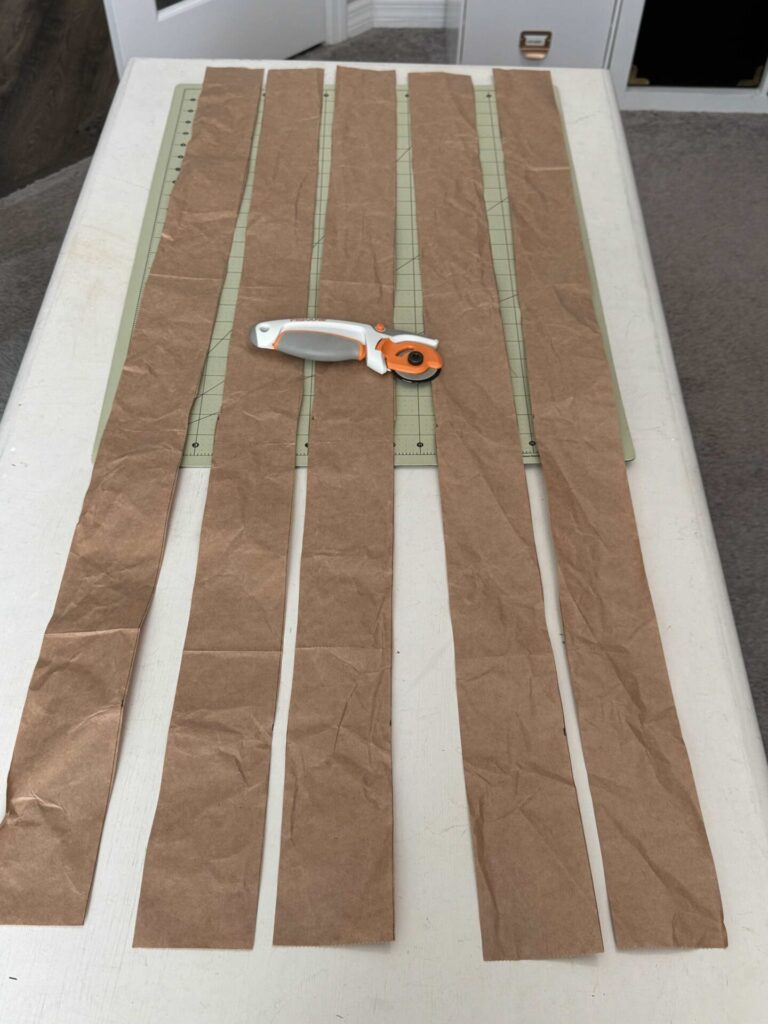
Cut 3-inch wide strips out of the paper.
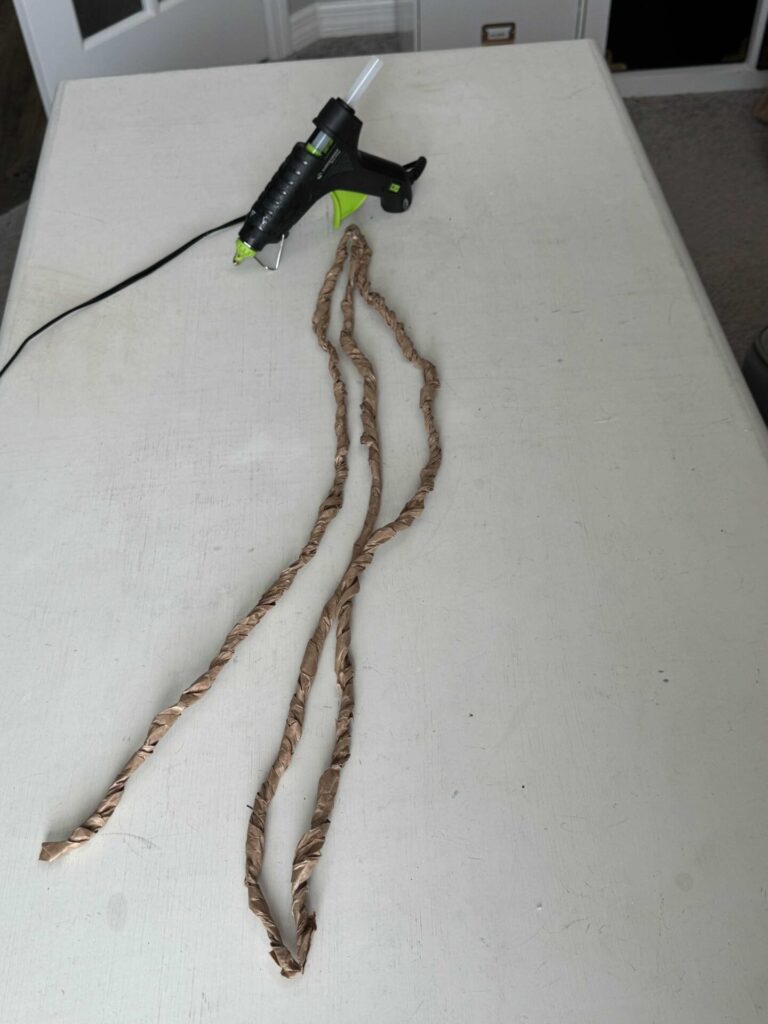
Twist each strip of paper and hot glue three pieces together.
Braid the strips and hot glue the ends together.
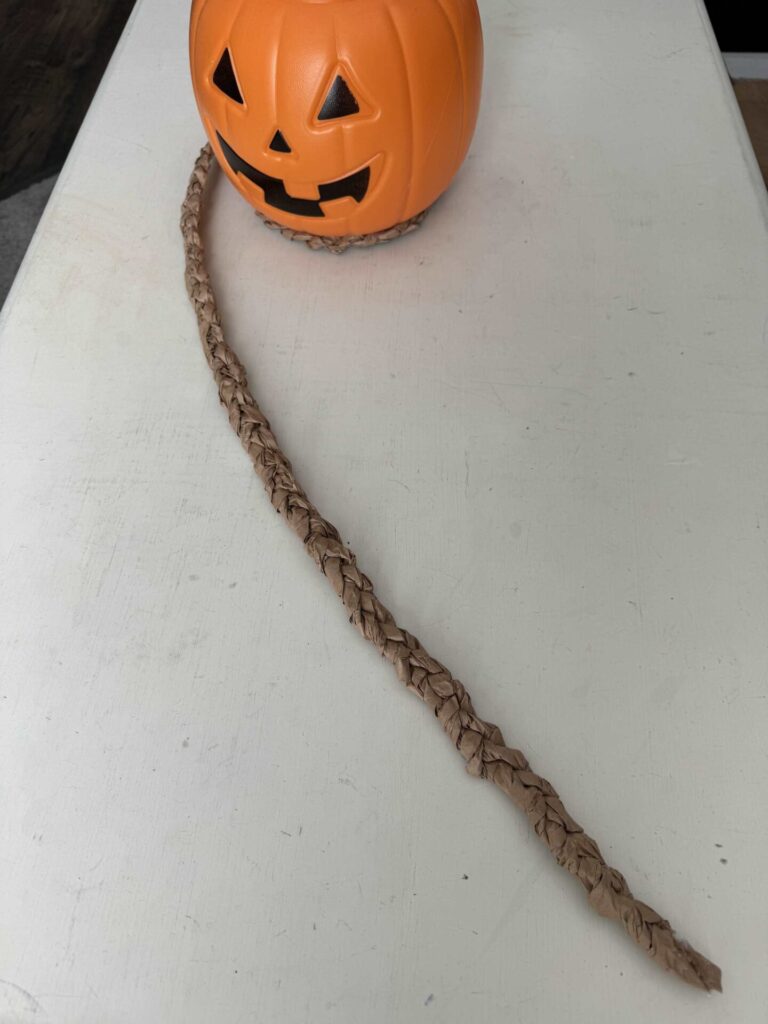
Adhere braids to the pumpkin
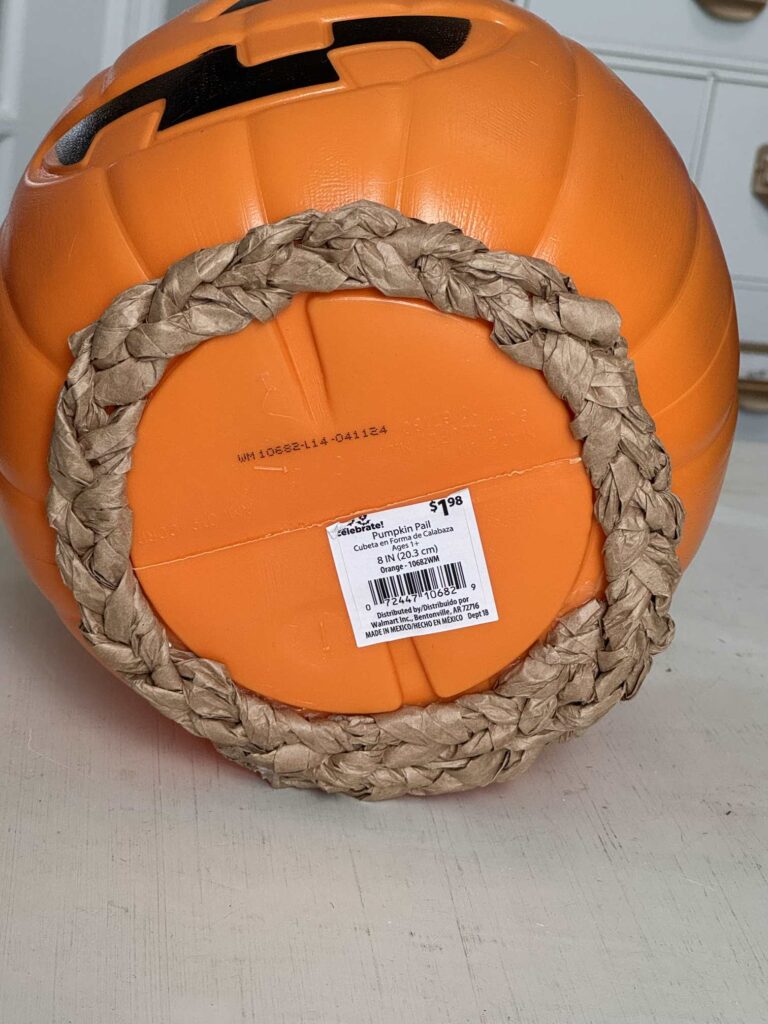
Start at the bottom and hot glue the braid to the pumpkin.
Be very careful as hot glue can burn your skin. We suggest using silicone finger protectors.
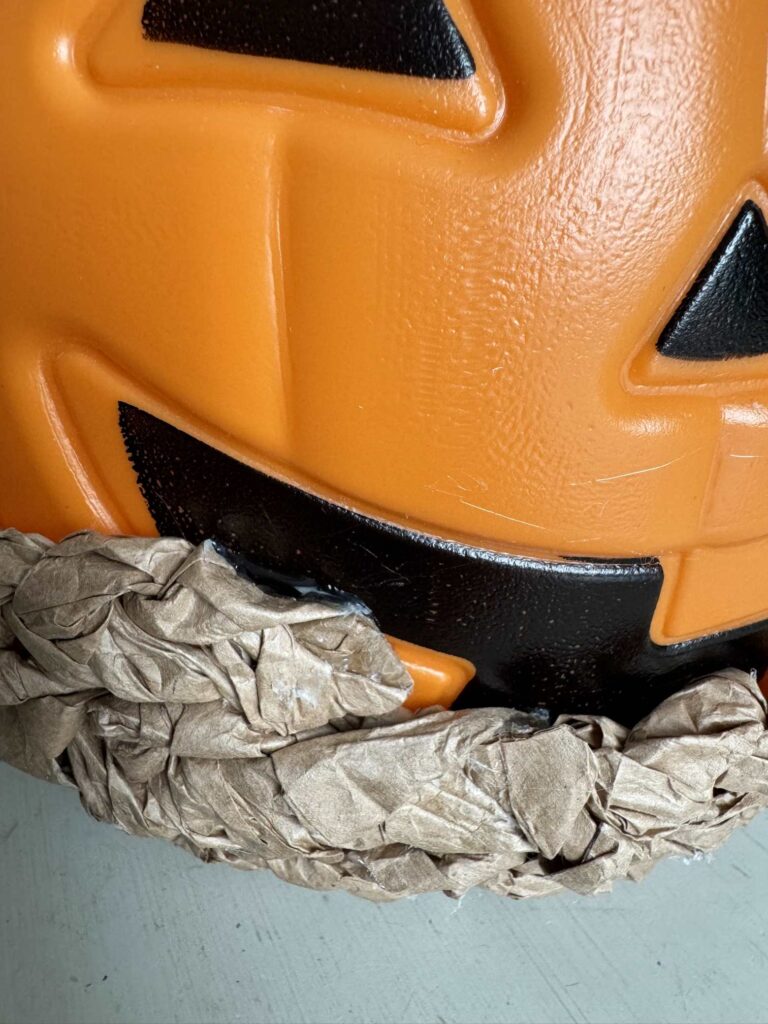
Glue the next braid on top of the last one so they overlap.
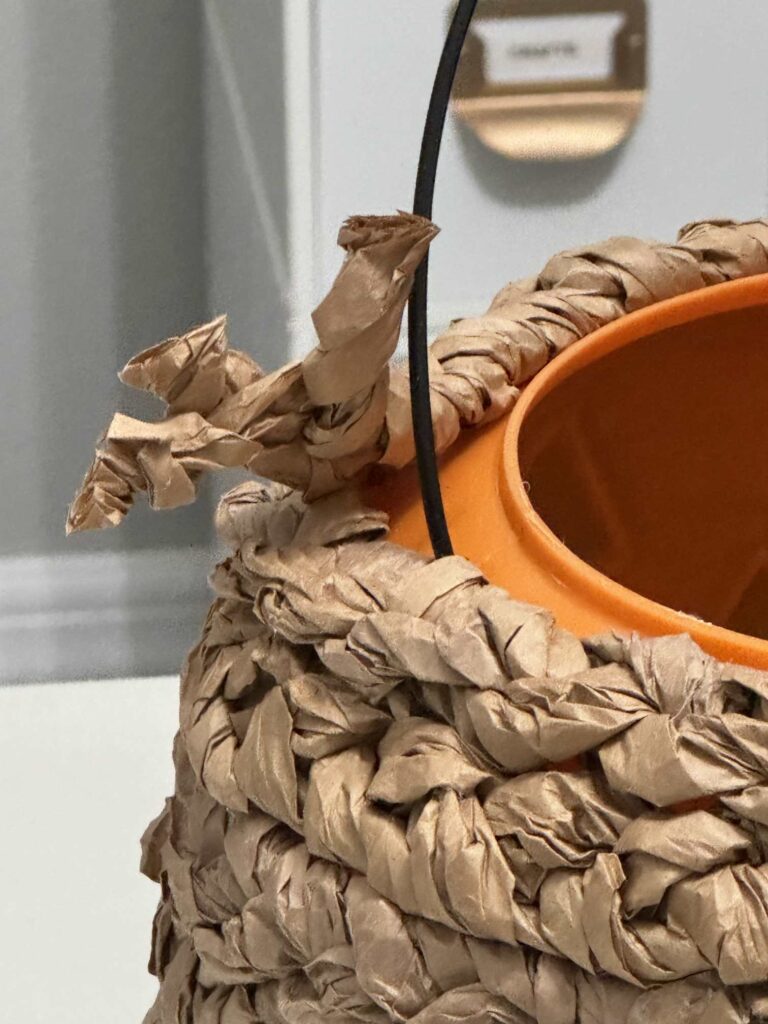
Continue gluing the braids until you reach the black handle on the pumpkin.
Cut the braid to the length you need and glue the ends down.
Finish the Top edge
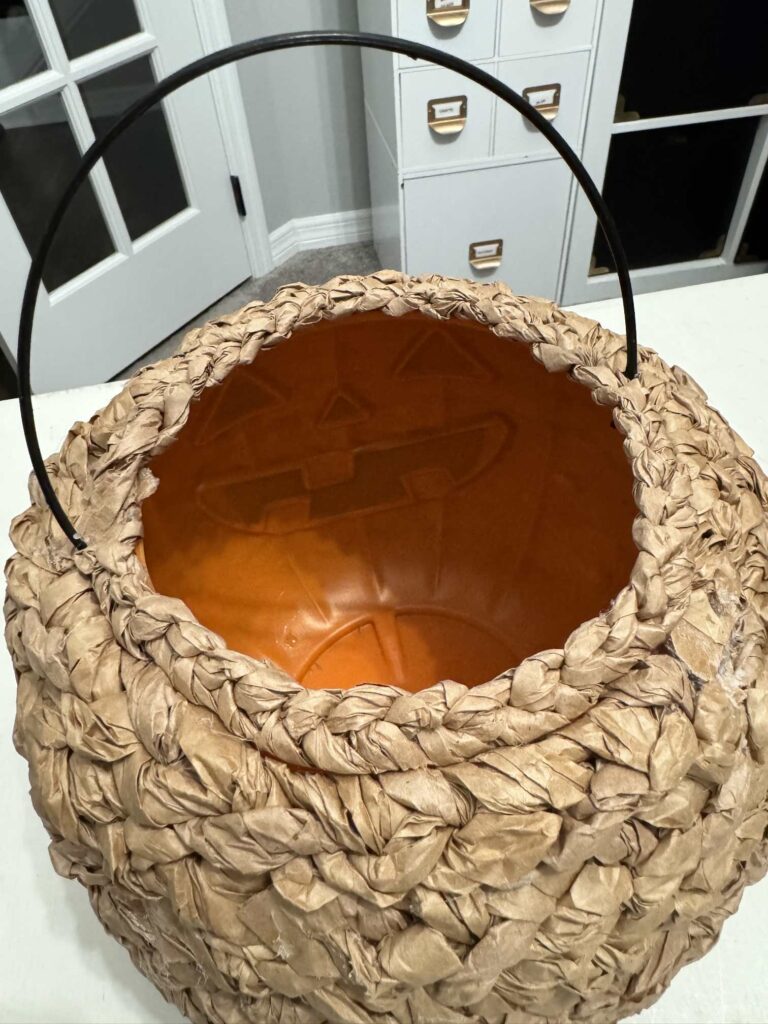
To finish the top edge of the pumpkin, make a smaller braid with 2-inch wide strips.
Adhere it with hot glue.
Dress up the handle
I thought the plastic handle made the pumpkin look cheap so I bulked it up with black jute twine.
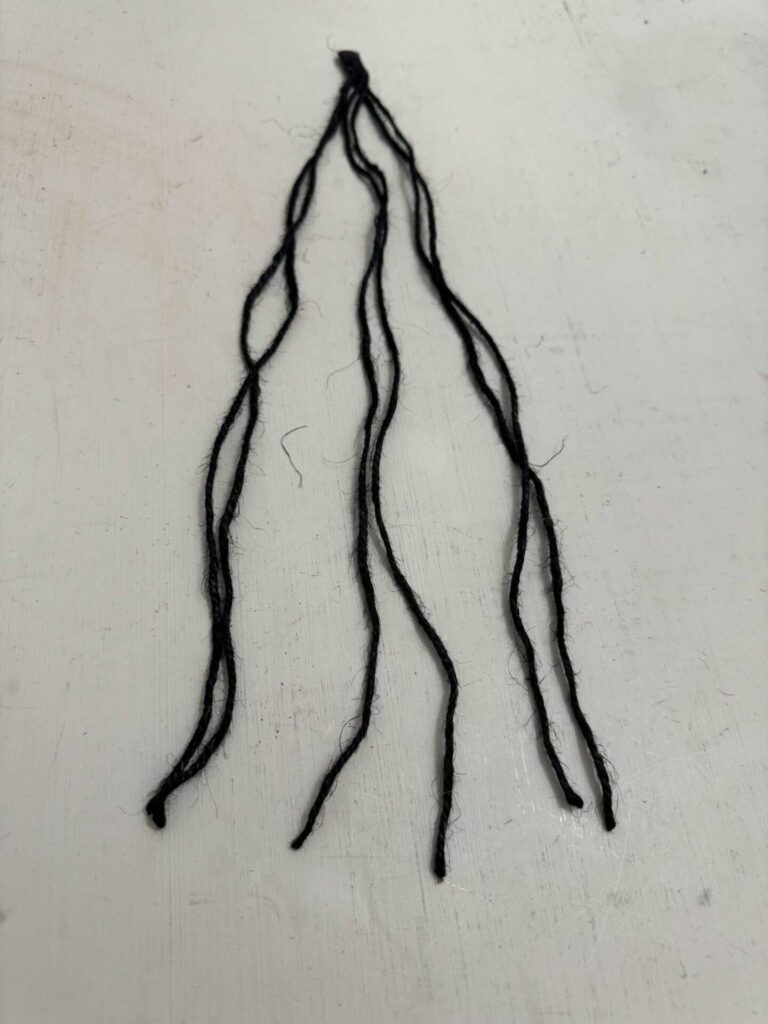
Cut six pieces of jute twine and glue the ends together.
Glue that to the outside of the handle,
Then, grab the two middle pieces of twine, and glue them across the top of the handle.
Criss-cross the outside pieces over each other and glue the ends.
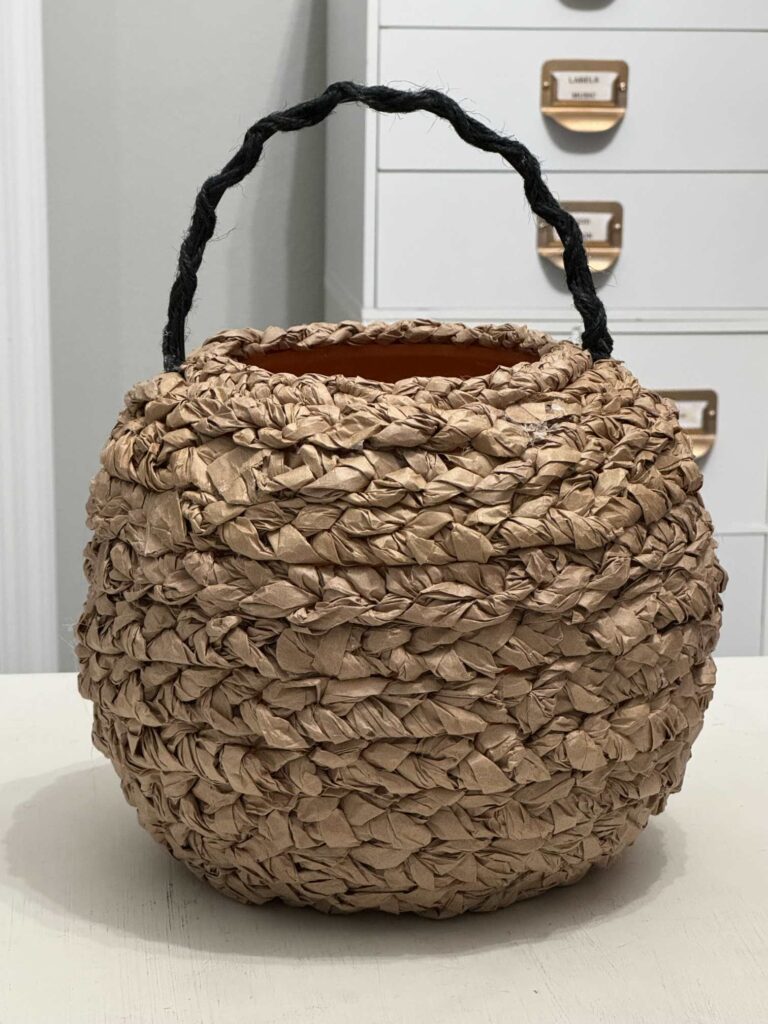
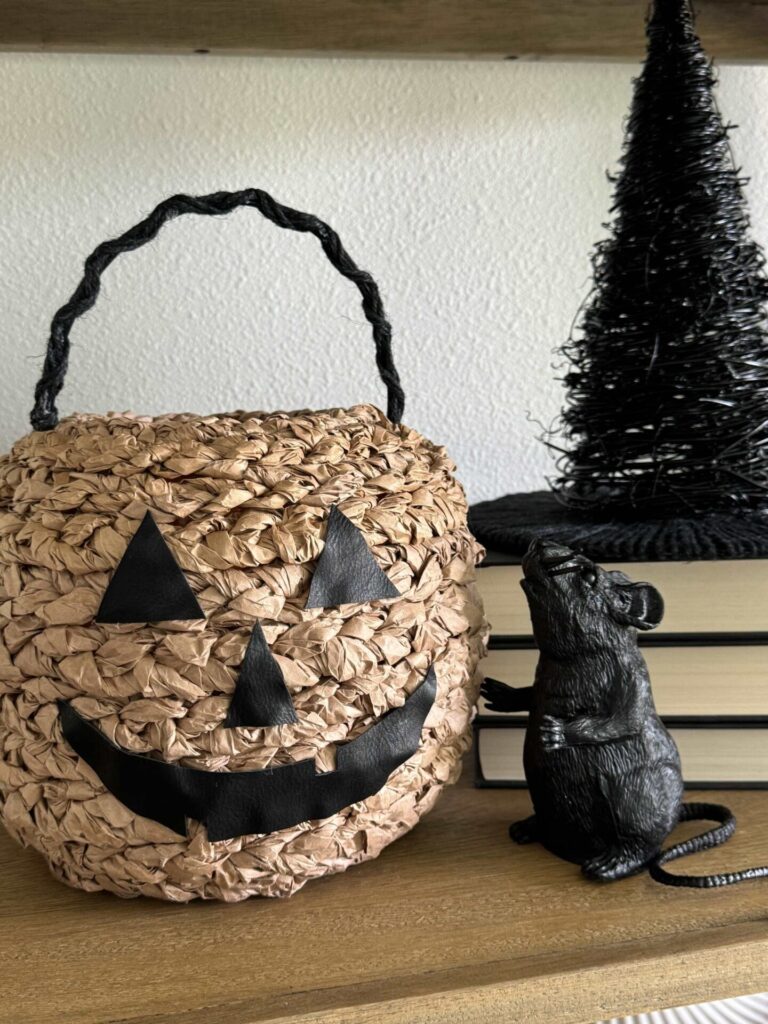
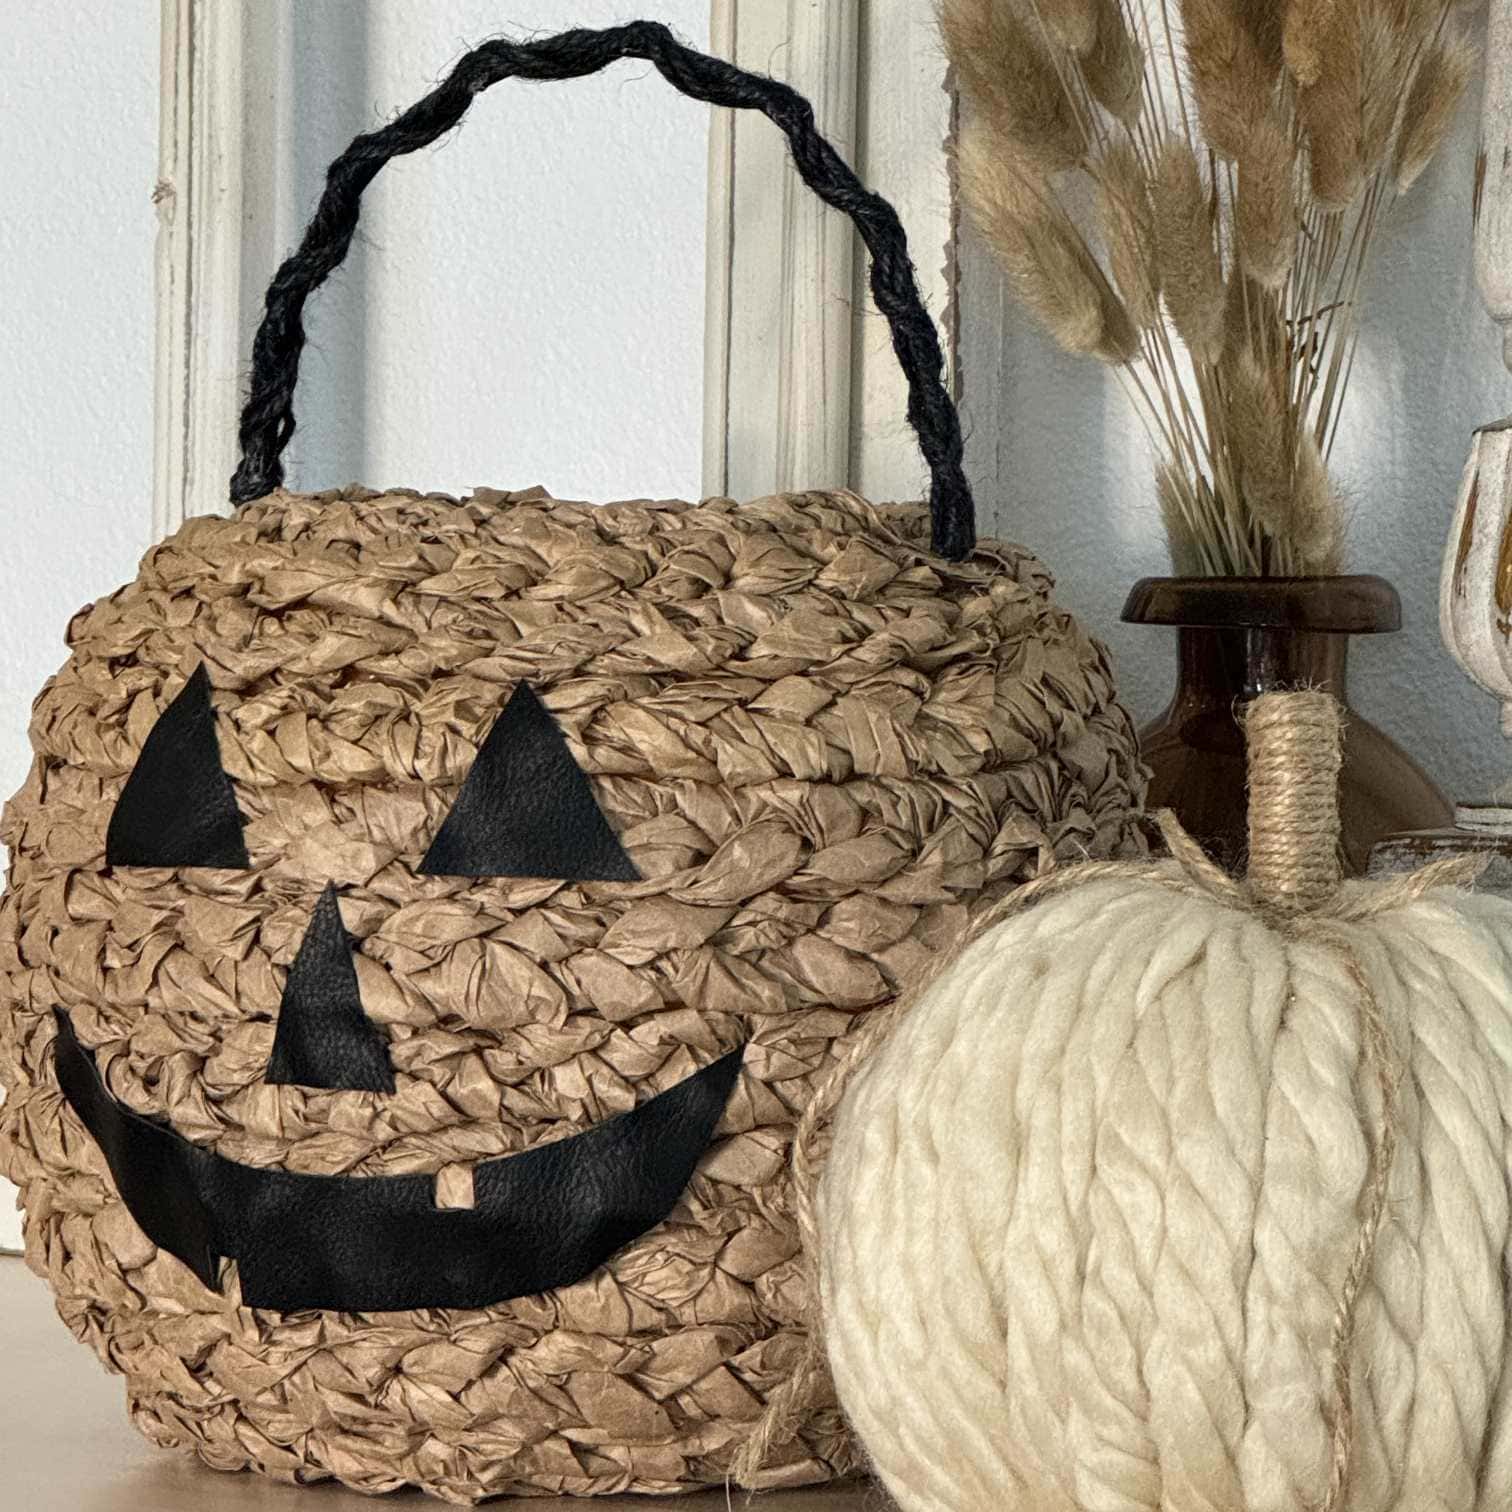
Make the pumpkin face
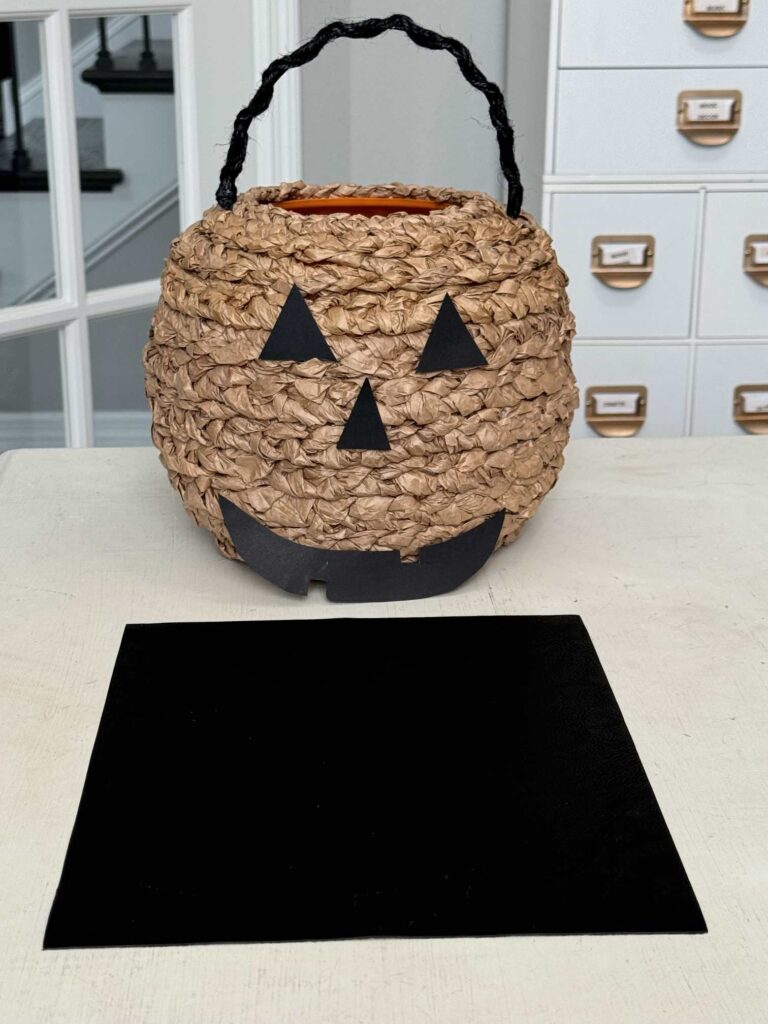
I used a piece of cardstock to make a template of the jack-o-lantern face.
When I got the size and shapes I liked, I used them to trace on the back of the leather.
Cut them out and then hot glue them to the front of the basket!
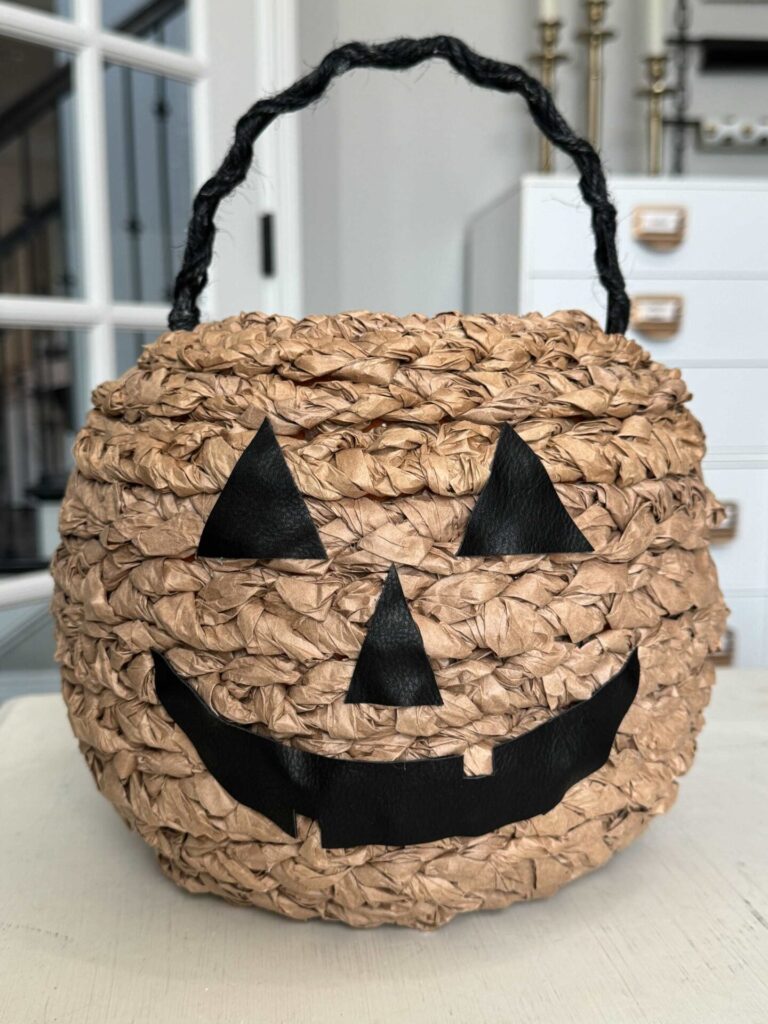
And here’s the finished product, look how cute he is!
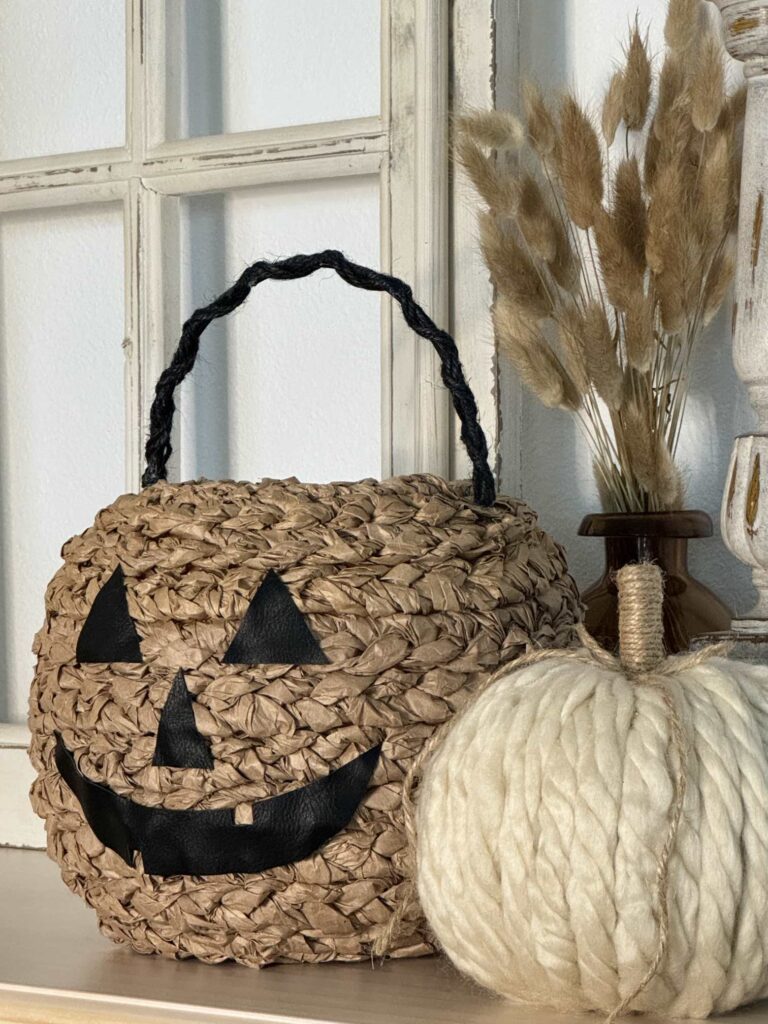
Style your pumpkin basket
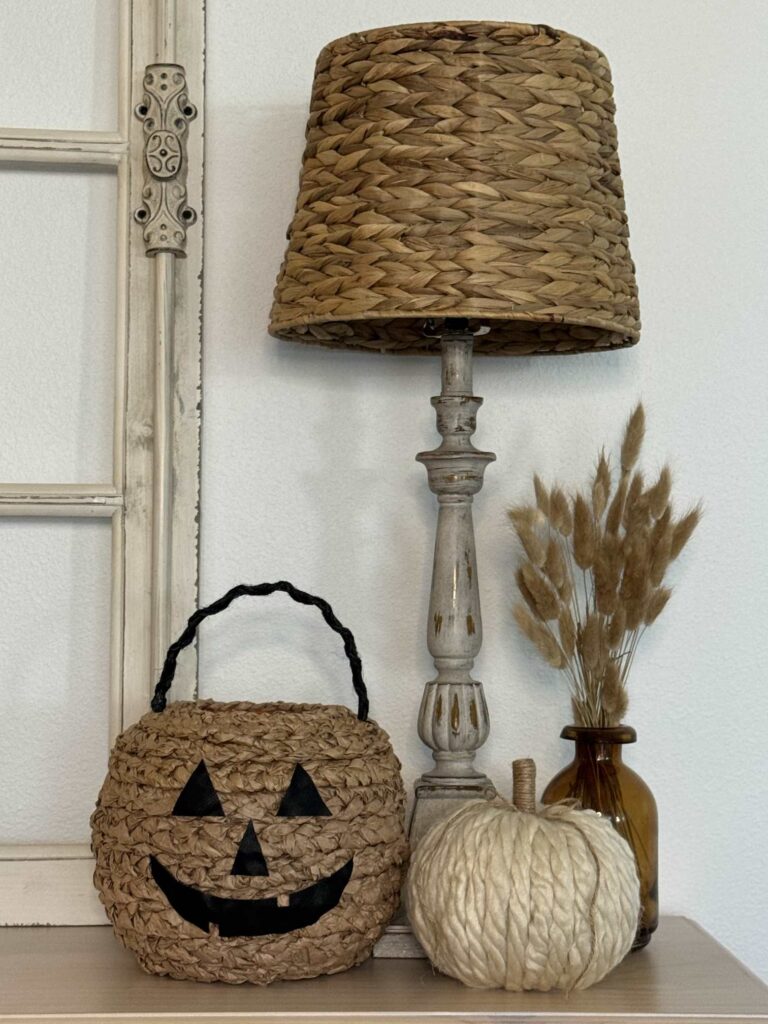
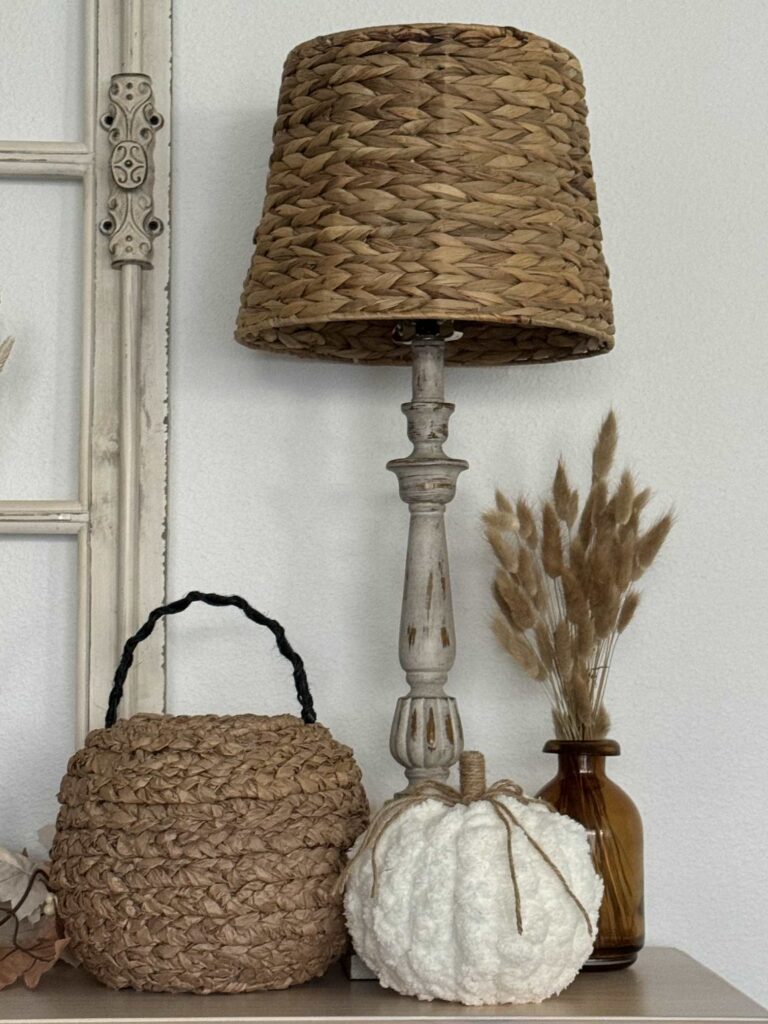
I bought the lampshades for spring and summer but they looked so good with my basket I decided to leave them on the lamps a bit longer!
We’ll leave it like this until Halloween and then in November, I’ll do this…
Turn the face to the back and enjoy the basket through Thanksgiving.
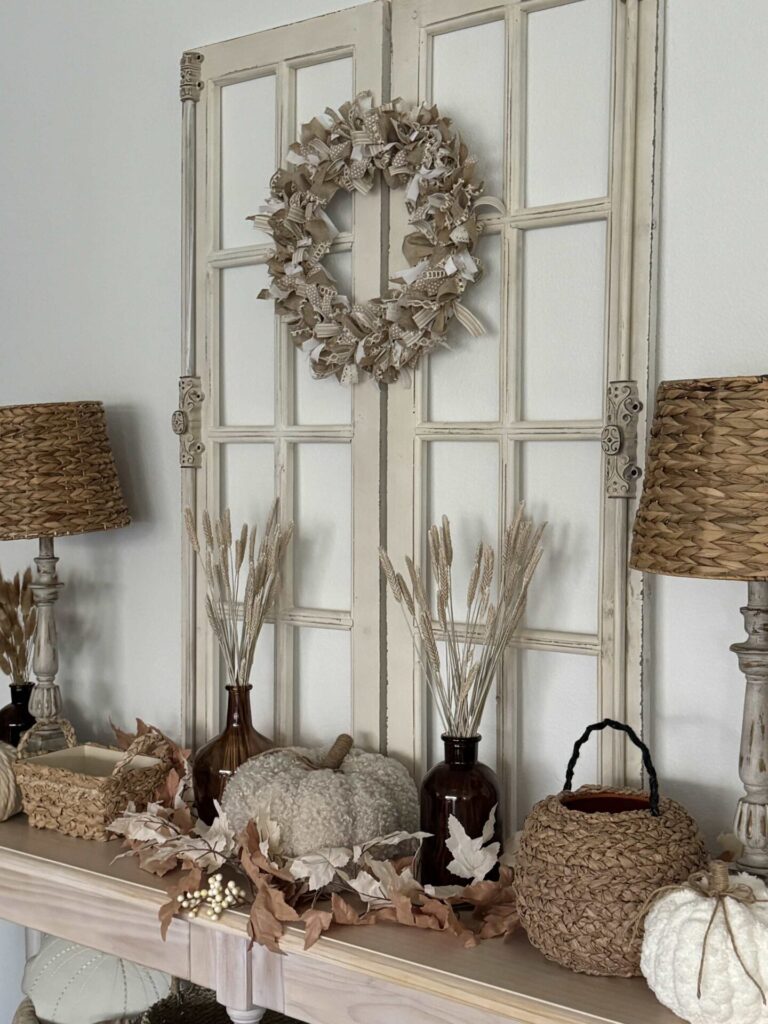
Look on the left side of the table to see the original basket I made by upcycling packing paper!
The Handcrafted Society
Now it’s time to see what my amazing friends in The Handcrafted Society have created with leather or lace!
Click on the image or the blog name to hop over to each post!

In Conclusion
Now that you know how to make the cutest pumpkin basket ever, it’s time to get crafting!
Whether you fill it with candy, use it as a centerpiece, or gift it to a loved one, your DIY pumpkin basket is sure to bring smiles and festive charm to any space.
So gather your supplies, embrace your creativity, and enjoy the process of making something truly special this autumn!
If you enjoy the blog, please sign up for our email list so you won’t miss a post!
Blessings, Donna and Rich
More Pumpkin DIY Inspiration
Don’t leave yet, if you love pumpkins as much as I do, you’ll want to check out the posts below:
- Super Easy Twine Pumpkins
- Tips to Make a Pumpkin Topiary
- The Most Popular Yarn Pumpkins
- How to Decoupage Elegant Pumpkins
- Create Velvet Pumpkins With Real Stems
Pin It For Later
Don’t forget to pin this to Pinterest!
Related Posts:

**Some of the links in this post are affiliate links. This means if you click on the link and purchase the item, we will receive an affiliate commission at no extra cost to you. We appreciate your support. (disclosure policy)
I love it Donna. Pinned. This look ms fantastic and you get 2 for 1. They are the best projects.
Prayers for the storm. Stay safe. I’ll check in on you.
Thank you Cindy, 2 for 1 is a great deal! Thanks for your concern! We are prepared as we can be!
Adorable, Donna!!! Looks SO cute…and I love how you made it for SO inexpensive..like free basically! Brown kraft paper is totally something I should be hoarding 🙂
Hope you guys are hanging in there with the storm on the way.
Yes, save that packing paper, you can do a lot of fun DIY projects with it! Thanks for your comment and concern! We have done all we can to prepare for the coming storm!
I would not have guessed that was packing paper! So clever! And the leather face is perfect! Great project for both Halloween and fall decor. Pinned!
Thanks Missy! Can you even believe how high-end that wrapping paper makes the plastic pail look! So fun!
This pumpkin is so stinking cute, Donna! I can’t get over how much texture you can create with paper for these baskets. It’s truly an art! Can’t wait to try this technique too. It’s fabulous. Big hugs and sending you tons of prayers as you prepare for Milton, CoCo
Isn’t it amazing how paper can look like a weaved basket! I hope you’ll try it sometime! Thanks for your concern, I sure hope your area is not negatively impacted, you all have been through so much already!
Donna, this is just the cutest thing ever!!!! I love that you used paper and made the basket. At first I thought it was a real woven basket. Very impressive. Thanks for hopping with us today.
Hi Wendy! So glad you like it! Isn’t it crazy how much it looks like a real basket! I love being a part of the Handcrafted Society! Thanks!
Wow Donna, this is quite the upcycling project, and such a clever way to incorporate leather for this month challenge! Your pumpkin basket is just the cutest!
Thanks so much Michelle, it was a fun way to use leather! I think it’s super cute too!
Oh wow Donna! This is fantastic. I loved your basket when you first shared this technique but this is a whole other level. I love how it can be used both for halloween and fall. Pinning for sure. Thanks for the inspiration always. Stay safe friends and I’ll be thinking about you and sending prayers. XO- MaryJo
Thank you Mary Jo I appreciate that so much! It’s going to be a long night! I’ll be so glad when hurricane season is over! So glad you like my cute pumpkin basket!
Donna, this is the cutest pumpkin basket!! What a fabulous upcycled project, and how perfect that you can turn it around to use through Thanksgiving! What a creative project!
Thank you Kim, I’m so happy with how it turned out and excited to use it all season!
Donna – This is such a cute idea! I would fill the pumpkin basket with Halloween candy to hand out to the kids. Thank you for the inspiration and for such detailed instructions. I also love that you hoard craft paper. 🙂 Let’s just say you are in good company.
Hey Anna! Glad to know I’m not the only hoarder, lol! So glad you liked my cute little pumpkin! Thanks so much!
That is super cute!!now I need to find another pumpkin since mine is the head frame under my porch light up ghost you posted last month. All so cute and perfect for this Fall loving girl!
Hi Elizabeth! So glad you are enjoying my fall posts! It’s my favorite time of year to decorate! I have to make it look like fall since the weather doesn’t feel like it at all! I do miss seeing the leaves change color and fall off the trees! Thanks so much!
OMG! I thought you just added to a basket…. oh no, you made this using kraft paper. What a fantastic idea and project, Donna. Color me impressed. Love this.
Hi Kelly! My first thought was to add the leather face to a regular weaved basket, but then I remembered this technique, and thought it would be cuter in the shape of a pumpkin! So glad you like it and thanks!
This is such a fun tutorial and an awesome recycled project, Donna! Thanks for sharing! Creatively, Beth
Thank you Beth, it was fun to make!
Thanks for sharing with us, I’m featuring you when our next To Grandma’s house we go party starts this week!
That’s such great news! Thanks so much and I’ll see ya at the party!
Great project Donna! It looks like a real woven basket you purchased. This post will be a feature this week. #HomeMattersParty
Hi Donna! That’s such exciting news! It’s always an honor to be featured at your party! Thanks and I’ll see you there!
I really thought this was rope or rattan, Donna! Just BRILLIANT! Thanks for sharing! Creatively, Beth
I know, it’s hard to believe it’s made from paper that most people would just discard! So glad you enjoyed the post! Thanks and have a great day!
Thanks for sharing with us, I’m featuring you next week when the next To Grandma’s house we go link party starts!
Hi Tarahlynn! It’s always an honor to be featured! We appreciate it so much! Have a wonderful week!