Have you ever wondered how to make a pumpkin topiary? It’s easier than you might think! Let us show you how to stack pumpkins for beautiful Fall decor!
If you’ve been around the blog for a while, you might have noticed I have a love affair with all kinds of topiaries!
**Some of the links in this post are affiliate links. This means if you click on the link and purchase the item, we will receive an affiliate commission at no extra cost to you. We appreciate your support. (disclosure policy)
So, I figured why not make one out of pumpkins?
The colors I plan to use on our porch this year are green, white, and black, so I decided to go with a neutral topiary!
I hope you love it as much as I do!

I’m so excited to share this DIY with you, so let’s get started!
Here’s how we made our pumpkin topiary!
Choose your pumpkins

For this project, you will need three faux pumpkins. Choose a small, medium, and large size. I bought mine from Michaels.
Gather Materials

Gather the following materials to complete this project:
- three pumpkins in varying sizes
- dowel rod
- planter
- dirt
- drill-if you don’t have one use a sharp knife
- hole saw drill bit set
- regular drill bits
- miter box
- saw
Steps to Make A Pumpkin Topiary
Cut holes in the bottom of pumpkins

Cut a hole in the bottom of each pumpkin with a hole saw drill bit.
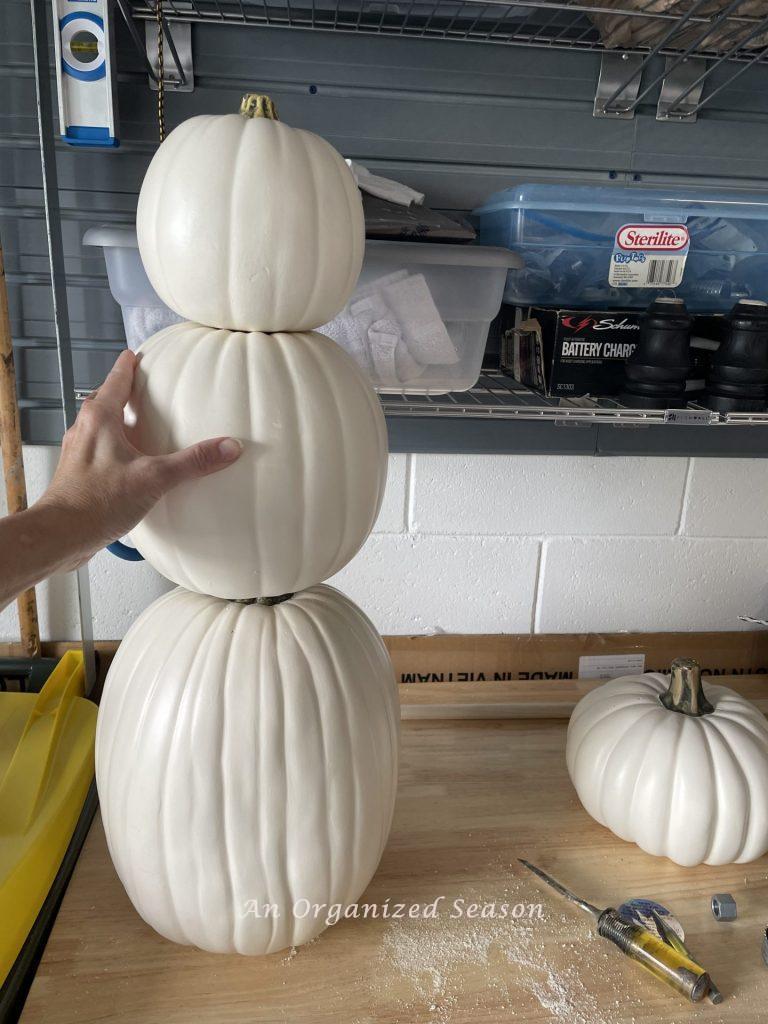
Stack the pumpkins to make sure the holes fit over the stems.
Cut holes in stems of pumpkins
We will insert a dowel rod through the pumpkins, so we need to cut a hole through the stems of the medium and large pumpkins.

Rich used a drill to cut a hole in the center of the stem and then he drilled it out wider.

He did the same thing to the medium pumpkin.
Do not cut the stem of the smallest pumpkin.
First, arrange the pumpkins on the dowel rod to make sure they fit.
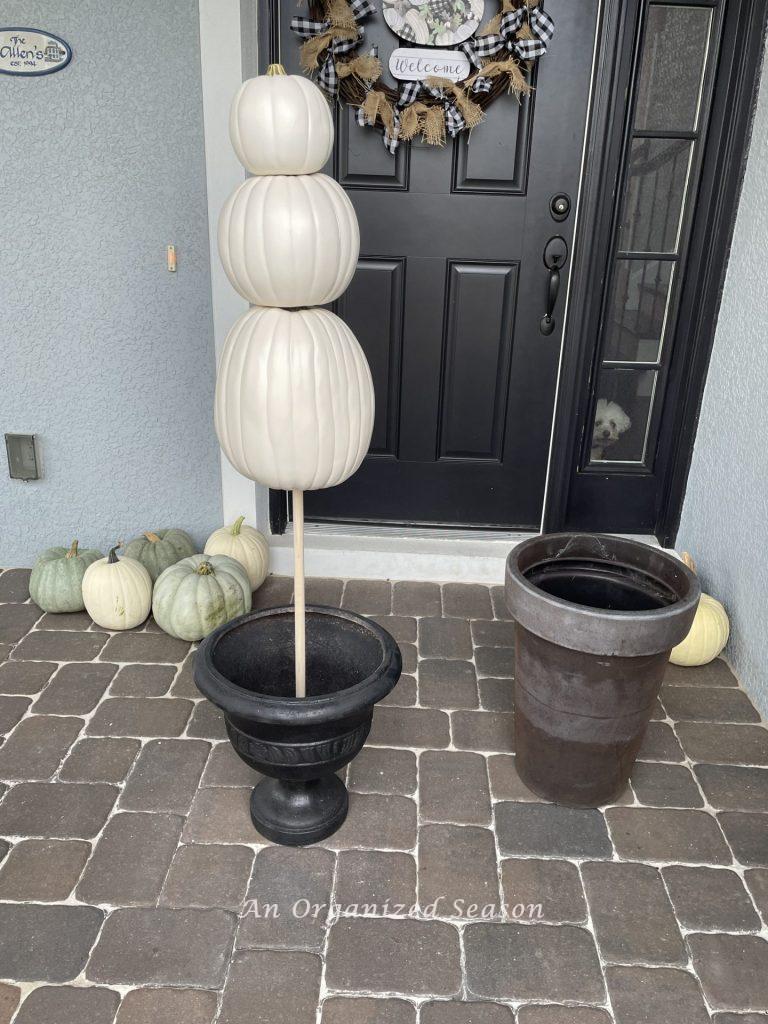
I had to decide which of the two planters I wanted to use and the black planter won out.
Cut the Dowel Rod

Mark the rod to the desired length you need.

Cut the rod using a miter box and saw.

Insert the rod through the hole in the planter.
Assemble the Topiary

Put pumpkins back on the rod.

Pack dirt into the planter.
Embellish Your Topiary
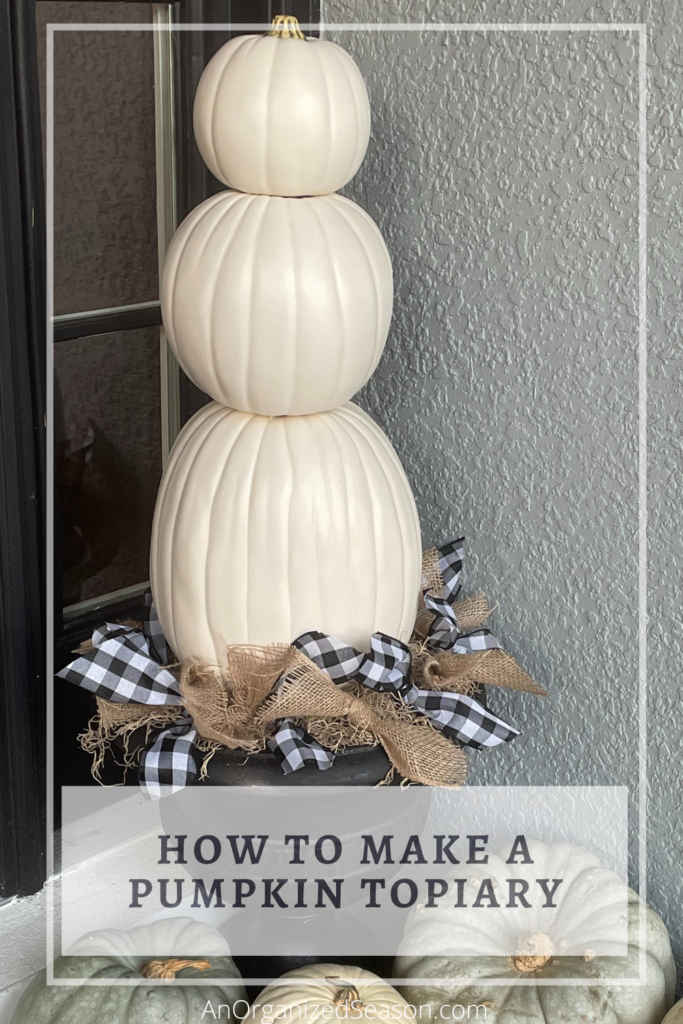
I want my topiary to look cohesive with the other items on my porch, so I will embellish it a bit!

I started by adding Spanish moss around the base to hide the dirt.

Next, I added black and white buffalo check and burlap bows around the base.
To see how I made the bows click here.
Display your Pumpkin Topiary
I placed the topiary on the right side of my front door.

Next, I added pumpkins around the base!

If you need tips on how to decorate a fall porch we’re sharing seven simple steps here!
Conclusion
I’m so pleased with how my topiary turned out.
I think this is such a fun and beautiful addition to our porch!
Now that you’ve seen how simple it is to make a pumpkin topiary, will you try it??
If you enjoy the blog, please sign up for our email list so you won’t miss a post!
Until next time, follow us on Pinterest, Facebook, and Instagram!
Blessings, Donna and Rich
More Inspiration
If you’d like more inspiration for Fall, check out the posts below:
- How to Make Two Types of Twine Pumpkins
- Six Easy Steps to a Fall Coffee Bar
- How to make Rae Dunn Inspired Candles
- Inexpensive Halloween Decor for your Kitchen
- How to Make a Halloween Wood Bead Garland
Get the look
Here are items similar to those we used in this project.

Save it For Later
Pin this to a Pinterest board so you will always remember it!
Related Posts:


**Some of the links in this post are affiliate links. This means if you click on the link and purchase the item, we will receive an affiliate commission at no extra cost to you. We appreciate your support. (disclosure policy)
Leave a Reply