Creating a paper leaf garland is a fun and easy DIY project that can add a touch of nature-inspired charm to any space. Whether you’re looking to decorate for a special occasion or want to bring a bit of the outdoors inside, this craft is perfect for all skill levels.

I’m gathering inspiration for Fall decor on blogs, Pinterest, and Instagram.
**Some of the links in this post are affiliate links. This means if you click on the link and purchase the item, we will receive an affiliate commission at no extra cost to you. We appreciate your support. (disclosure policy)
I’ve seen a lot of gorgeous neutral-colored leaf garlands, but have not seen anything like that in stores around here!
So, I wondered if there was any way that I could make something similar.
The leaves on most garlands reminded me of paper, so I thought, “How hard could it be?
Surely, I can figure out how to create a simple leaf garland from brown craft paper!”
Well come along and see how I pulled it off!
Gather

Gather all of the materials you’ll need for this project
- an outdated leaf garland OR wired jute twine
- roll of brown packing paper
- pencil
- scissors
- ruler
- paper clips
- glue gun
- glue sticks
Prep
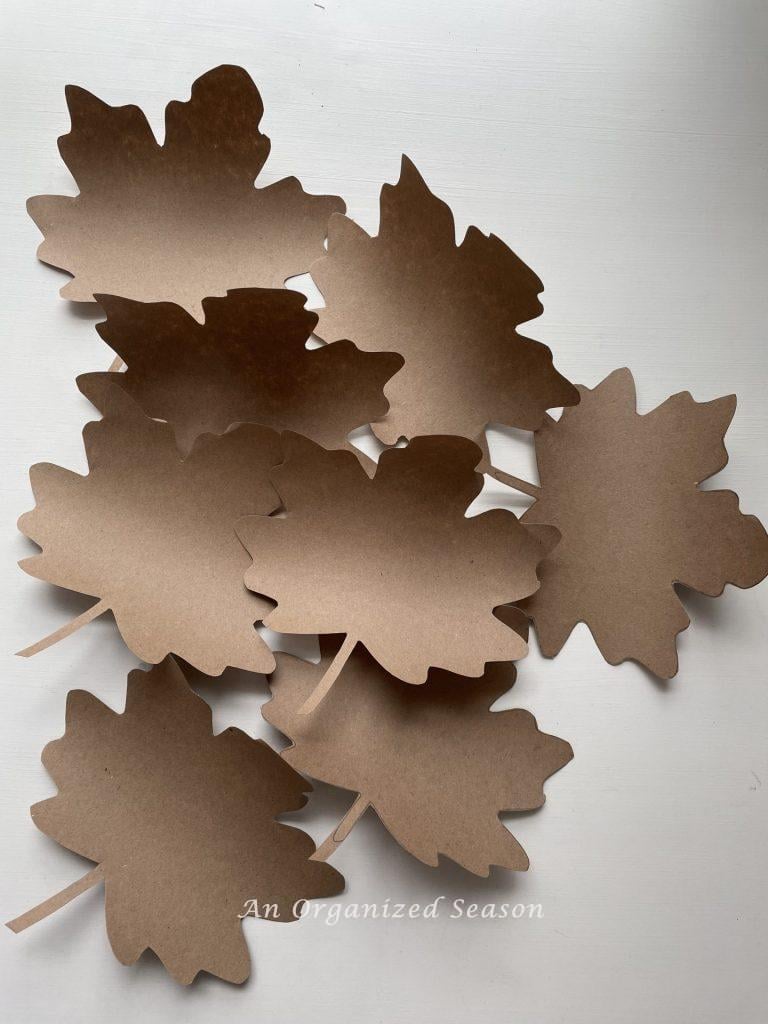
The first thing you need to do is prepare the leaves.
If you have a Cricut cutting machine, use it to cut out leaf shapes.
Here are instructions if you don’t have a Cricut and need to cut the leaves by hand:

Trace the shape of a leaf on a roll of brown craft paper.

Measure the leaf with a ruler.
Add at least one inch and mark lines for the width and height.
I measured 7 inches high and 7-1/2 inches wide.

I was able to have four squares across the paper roll.
Cut down the length of the paper roll.

Cut out the four squares.
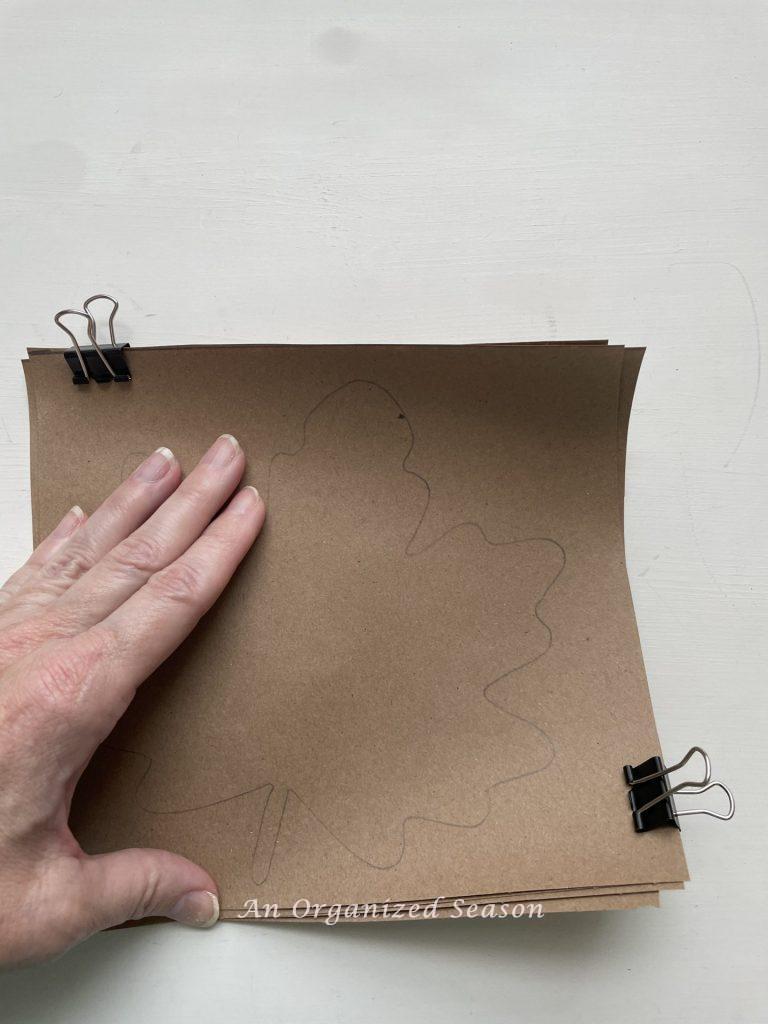
Stack four squares of paper, put the leaf on top, and clip together.
Cut out the shape of the leaf.
I have arthritis in my thumb, and four sheets are the thickest I could comfortably cut.
You may be able to cut more than that!
Repeat the steps to make more leaves.
My garland has thirty leaves!

Make sure your stem is approximately 2 inches long.
Make the paper leaf garland
If you don’t have an old garland, consider using wired jute twine instead.

Remove the leaves from your outdated garland.

Very carefully put hot glue on the plastic piece that sticks out.

Lay the leaf on the glue, but DO NOT touch the hot glue with your fingers; it will burn you.
I use an orangewood stick to keep from burning my fingers!

Apply hot glue to the main part of the garland and twist the paper stem around the plastic.

Continue adding glue and wrapping until the end is secure.
Hang the paper leaf garland

I hung my garland over a mirror in my kitchen eating area.
I think it looks fantastic with the yarn pumpkins I made.
If you’d like to learn how I made them, click here!

Well, what do you think???

Do you like it, or does it look like something a grade-schooler made?

I happen to love it, and I guess that’s all that matters!
But, if you love it too, I hope you’ll follow my simple steps and create a paper leaf garland all your own!!
Happy Fall!
If you’d like to get on our email list so you never miss one of our DIY projects, click here.
Don’t forget to follow us on Pinterest, Facebook, and Instagram!
Blessings, Rich and Donna
More DIY Inspiration
- How to Make Adorable Yarn Pumpkins
- Four Beautiful Living Room Table Makeovers
- How to Build a Shelf Using Corbels
- Paint Upholstery-The How-to Guide for Beginners
- How to Make a Wood Bead Garland with Tassels
Items To Make this DIY
Here are links to similar items we used to create this paper leaf garland!
Click the blue link to get info on each item!
Kraft Paper Roll / Surebonder Hot Glue Gun / Surebonder Hot Glue Sticks
Cricut Cutting Machine / Orange Wood Sticks / Binder Clips
Related Posts:


**Some of the links in this post are affiliate links. This means if you click on the link and purchase the item, we will receive an affiliate commission at no extra cost to you. We appreciate your support. (disclosure policy)
Love how you used one garland to stabilize another, Donna, that is such a genius idea! The shape of your leaves is so pretty too. Everything about this vignette is fabulous and the perfect way to kick off the Thanksgiving season. Hope you’ve had a fun week, CoCo
Thank you so much, I appreciate your comment! Take care, Donna