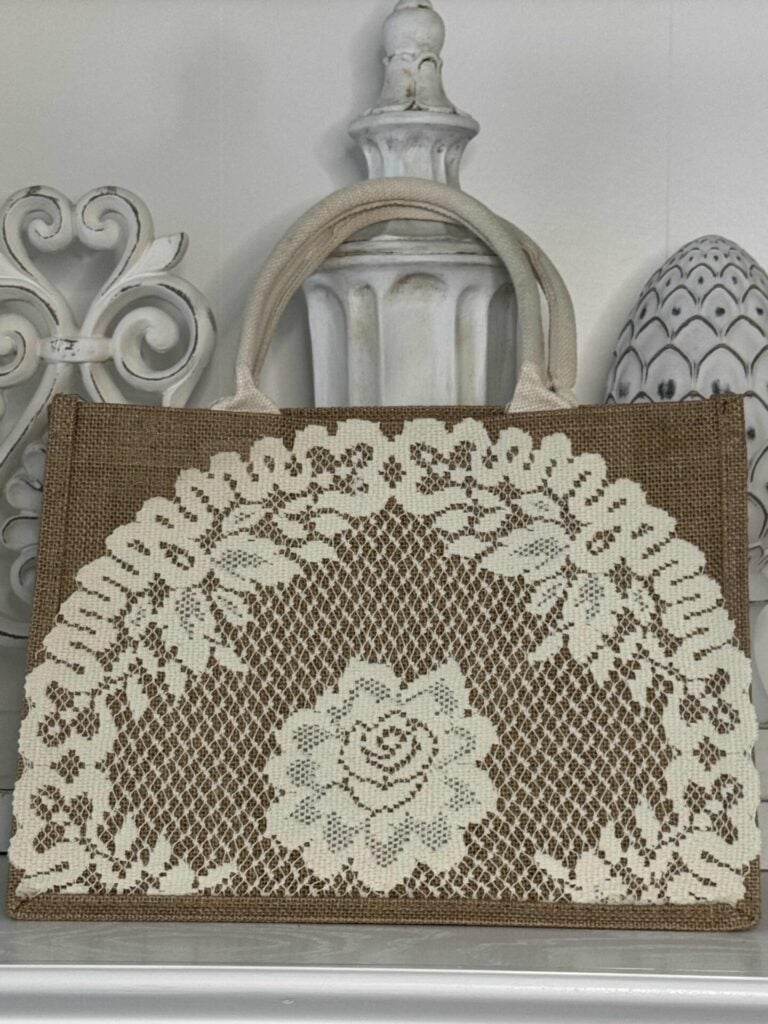
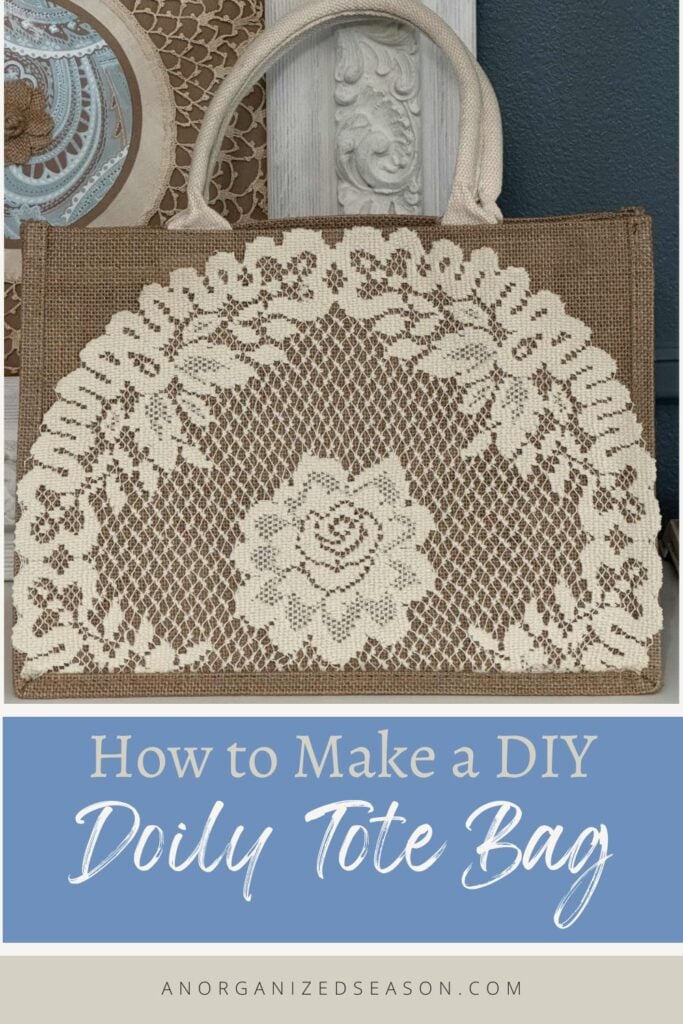
Do you have a lace doily tucked away in a drawer or box, forgotten and unused? Today, I’m sharing a fun way to give it new life by turning it into a DIY doily tote bag.
This project is part of the Handcrafted Society, and our 2026 season officially begins today.
**Some of the links in this post are affiliate links. This means if you click on the link and purchase the item, we will receive an affiliate commission at no extra cost to you. We appreciate your support. (disclosure policy)
Each month, members are given a creative challenge, and this month’s theme is titled Lace and Lovely (Sustainable Edition).
The focus is on vintage lace, table linens, trim, or lace doilies.
The challenge: use what you already have to create something new and beautiful.
So here’s a look at what I came up with!
I absolutely adore how this turned out, and I can’t wait to show you how it came together!
And don’t forget, at the end of my tutorial, you’ll get to see what all my talented friends created for this fun challenge!
My Inspiration for This DIY Doily Tote Bag
My inspiration for this project came from a trip to my restored vintage trunk, which is filled with sentimental family pieces I’ve saved over the years.
Inside, I found several items that once belonged to my maternal great-grandmother.
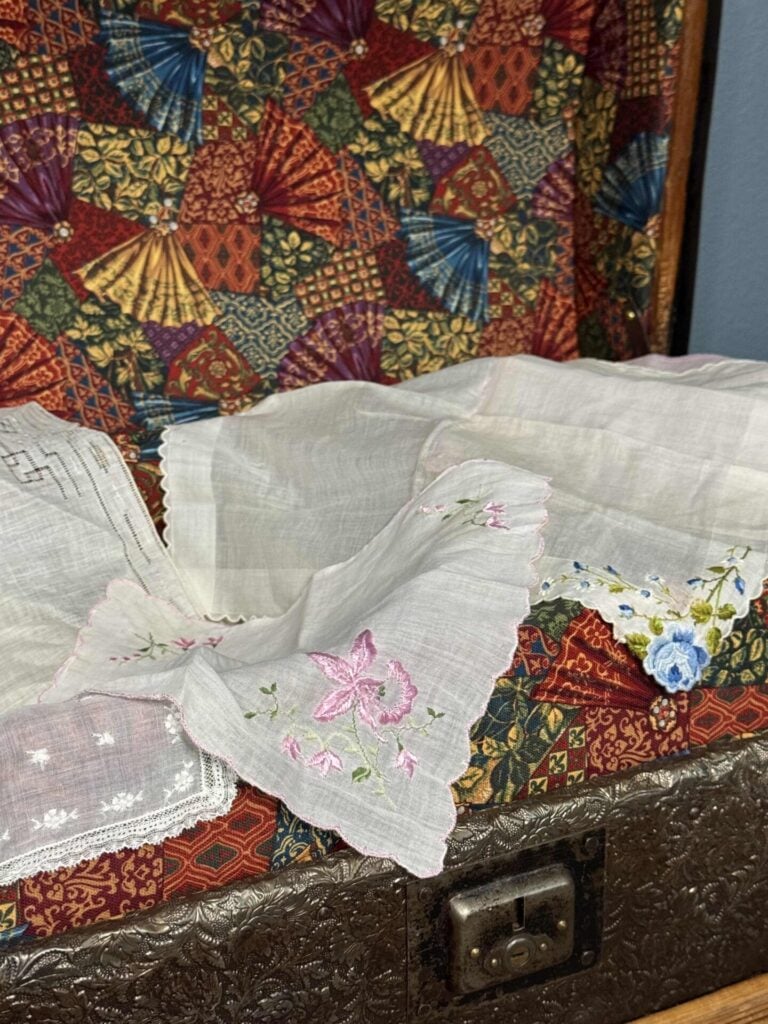
At first, I thought I would use a few vintage hankies, but then I noticed a damaged lace doily.

If you look closely at the bottom, you’ll notice it’s ripped in two places, but rather than setting it aside, I decided it’s the perfect piece to repurpose.
Using a damaged heirloom felt like a meaningful way to honor its history while giving it a brand-new purpose.
And I knew exactly what I wanted to do with it.

Last year, I ordered this burlap tote bag but never got around to embellishing it.
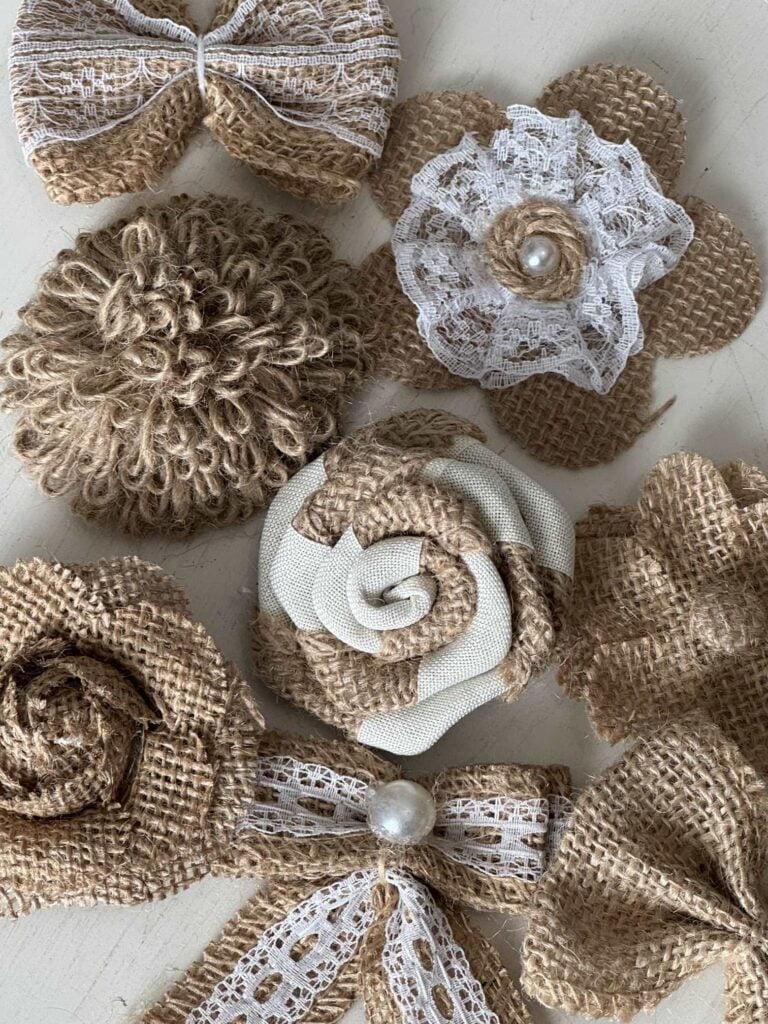
I had planned to decorate the tote with these flowers and/or the leftover bows from my DIY sweater pumpkin tutorial.
That was in the fall, and then the holidays rolled around.
My tote bag sat in my office unopened, and I immediately knew that the delicate doily would look beautiful paired with the bag’s rustic texture.
So, I changed my mind and decided to use the doily on the tote bag instead.
Now, let me show you how I brought the two pieces together.
Steps to Make a DIY Doily Tote Bag
Gather Materials

Gather the following material;s to complete this project:
- Doily
- Tote bag
- Scissors
- Spray adhesive
- Fabric glue
- Cuticle stick
- Painters tape
- Cardstock
- Wax paper
Position the doily

Start by laying the doily on the tote bag to decide where you want it to sit.
My doily was larger than the tote, so I knew I would need to trim it to fit.
Cutting a vintage doily can feel a little scary, but since this one was already damaged, that took away some of the hesitation.
As I examined the tote bag more closely, I noticed a seam along the bottom.
I was able to gently pry it open and realized I could tuck the cut edge of the doily inside.
Knowing the raw edge would be hidden—and protected from fraying—made me feel much more confident about trimming the doily.
Cut the doily
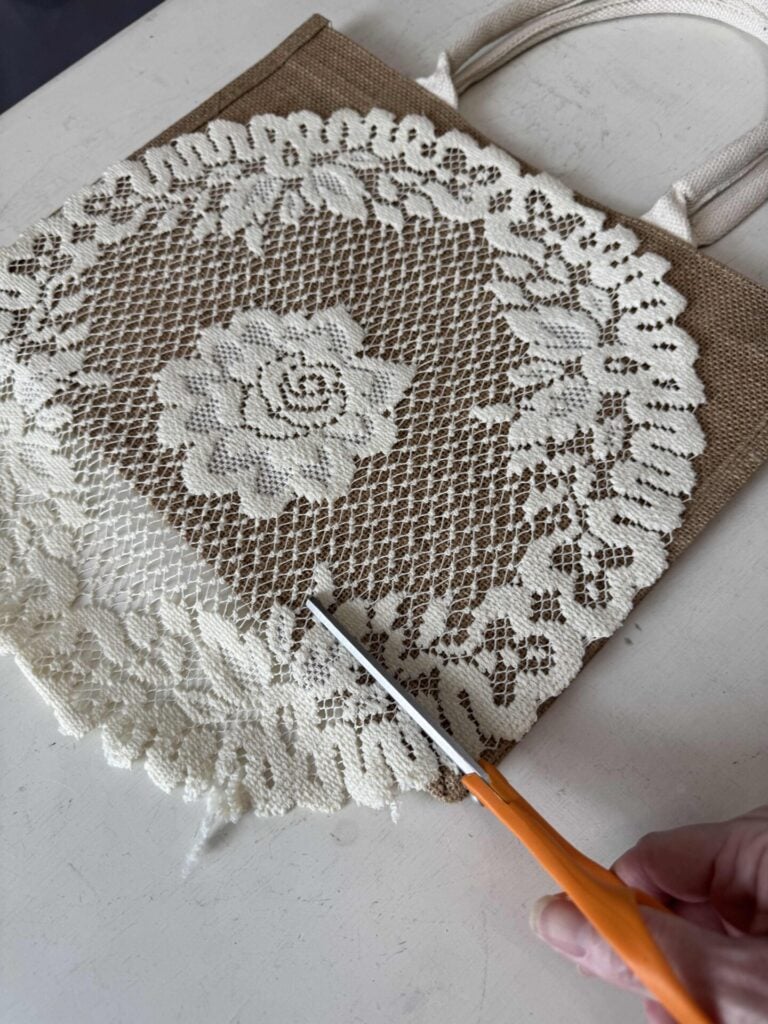
I laid the doily flat on top of the tote bag and positioned it exactly where I wanted it.
Using the tote bag’s bottom seam as my guide, I carefully placed my scissors along the seam and trimmed away the excess lace from the bottom edge of the doily.
Adhereing the Doily
My original plan was to spray the back of the doily with adhesive and attach it to the tote bag.
I should have known that would be too easy.
Attach The Bottom First
I quickly realized it would be difficult to tuck the bottom edge of the doily under the tote’s seam once the rest of it was sticky.
So I pivoted.
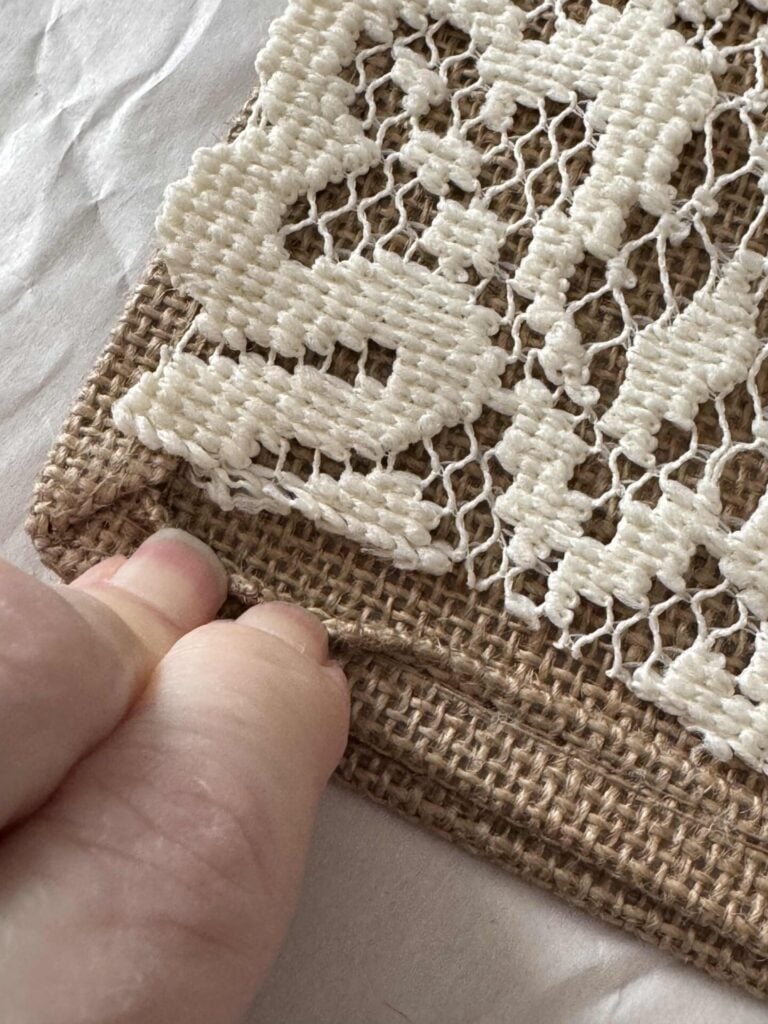
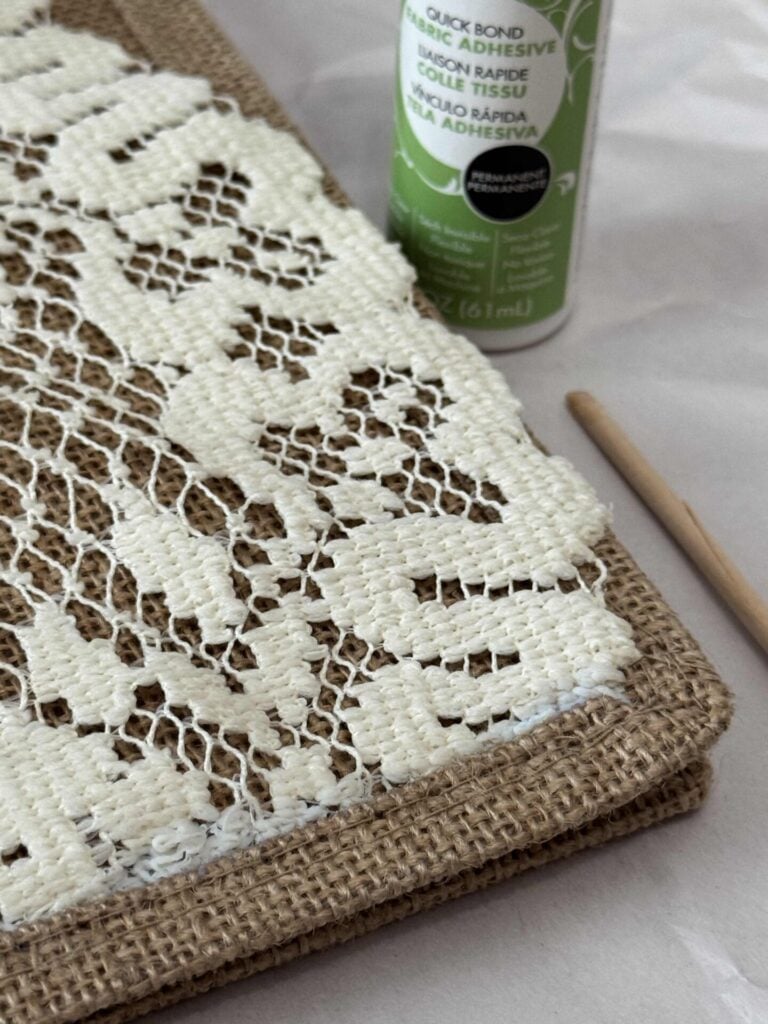
Instead, I applied fabric glue directly inside the bottom seam of the tote.
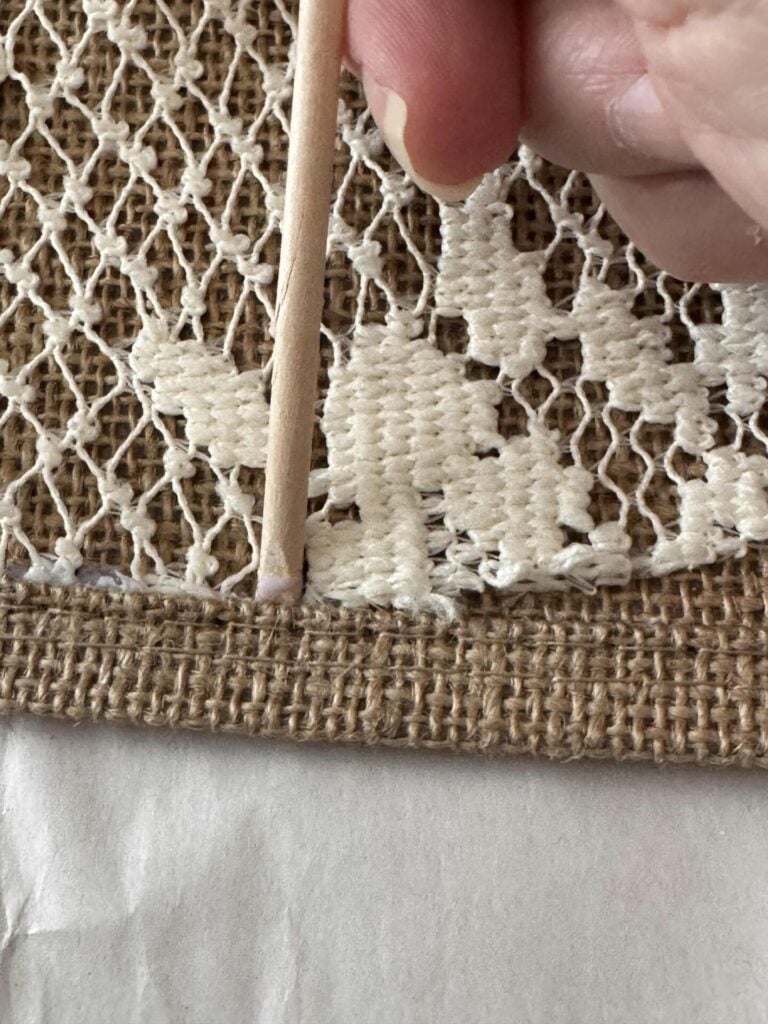
Using a cuticle stick, I gently pushed the cut edge of the doily under the seam, then left it to dry overnight.
It worked beautifully!
Adhere The Rest Of The Doily
The next day, I needed a plan to attach the rest of the doily with spray adhesive—without turning the tote bag into a sticky mess.
Here’s what happened…
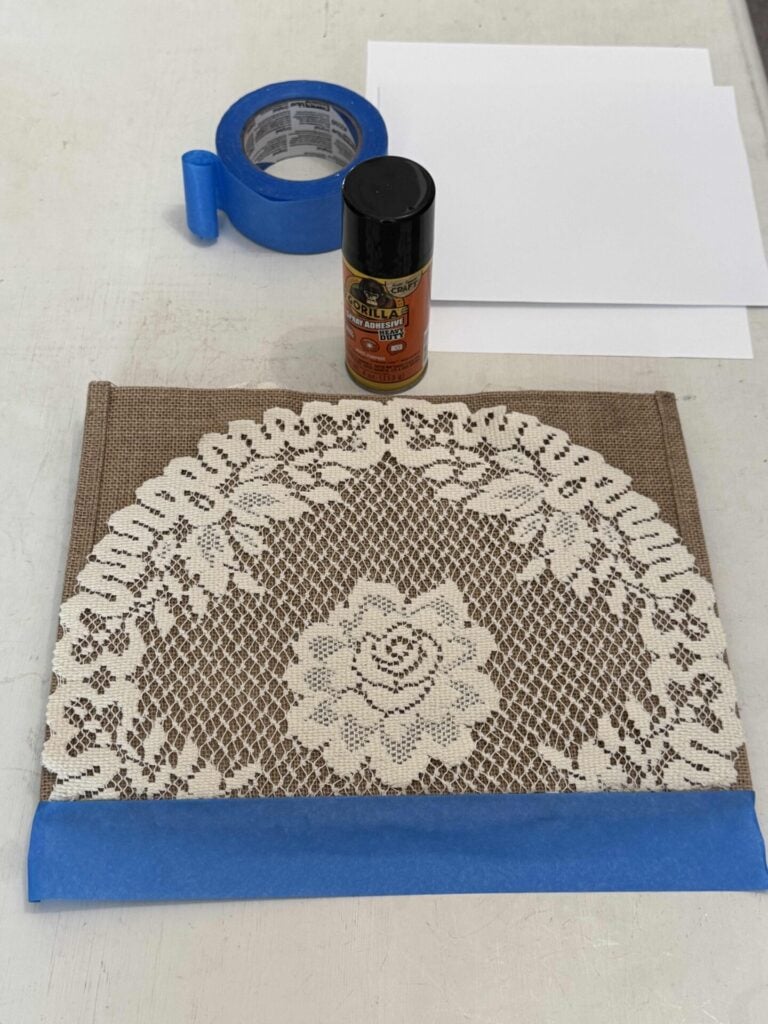
First, I covered the bottom seam of the tote bag with painter’s tape.

Then I flipped the doily over and protected the tote by taping two sheets of cardstock to the bag as close to the seam as possible.
Now that the tote is protected, the doily is ready to spray.
As I headed to the garage, I realized the doily might pick up dirt if I laid it on old cardboard.
So I grabbed some paper I had saved from HomeGoods purchases and placed the tote on that.
I laid everything on the cardboard on the garage floor and sprayed the back of the doily several times with spray adhesive.

Because the temperature had dipped below 32 degrees overnight (which I’m definitely not used to!), I brought everything back inside.

After removing the cardstock and painter’s tape, I carefully positioned the doily using wax paper in case any adhesive seeped through.

I left the wax paper in place, laid two books across the tote, and let it dry overnight.
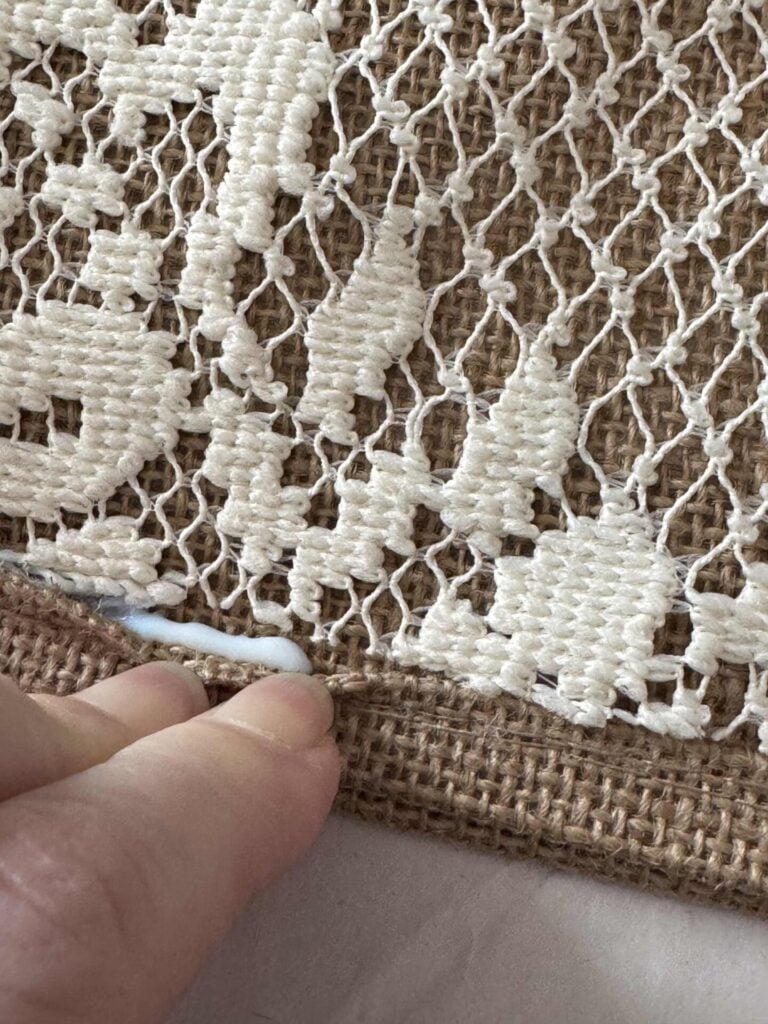
Reinforce The Edges of The Doily
The next day, the doily was well adhered to the tote.
However, the bottom edges slightly overlapped the sides of the bag, and I worried they might loosen with use.
To prevent that, I reinforced the doily’s edges along the sides of the tote with a small amount of fabric glue.
Closing Thoughts

This DIY doily tote bag was such a special project, not just because of how it turned out, but because of the story behind it.

Using a damaged doily that once belonged to my great-grandmother felt like a meaningful way to preserve a family heirloom!

It’s a reminder that the items we already have—especially the sentimental ones—can still be used, enjoyed, and loved in new ways.
If you have a vintage doily, table linen, or lace piece tucked away, I hope this inspires you to look at it with fresh eyes and create something new and lovely of your own.
To get more inspiration, scroll to the bottom of this post to see my friends’ beautiful creations for the challenge.
If you enjoy the blog, please sign up for our email list so you won’t miss a post!
Blessings, Donna and Rich
More DIY Inspiration
Do you love to see items transformed into something new? Check out these DIY posts:
- Here’s another post using vintage doilies. See how I turned them into stunning wall art!
- How I turned sentimental piano pieces into meaningful keepsake ornaments.
- Learn four easy ways to transform thrift store/yard sale finds with paint!
- Tips to turn a frame into a beautiful decorative tray.
Pin It For Later
Don’t forget to pin the image below to one of your Pinterest boards (hover over the picture and click the red Pin button in the top left corner).
The Handcrafted Society
The Handcrafted Society is made up of a talented group of friends who love creating and sharing inspiration through monthly themed challenges.
For February, we were challenged to use vintage lace, linens, trim, or doilies and transform them into something new using what we already had on hand.
I hope you’ll take a few minutes to visit each link below and enjoy the creativity and inspiration my friends shared.


Related Posts:


**Some of the links in this post are affiliate links. This means if you click on the link and purchase the item, we will receive an affiliate commission at no extra cost to you. We appreciate your support. (disclosure policy)
Such a cute bag, Donna! Don’t you love how things come together when you step back and really look at them with fresh eyes? Such a clever way to be able to honor your grandmother’s damaged lace doily. Super fun.
Thanks Diane! It was too pretty to discard and now I can admire it when I use the tote bag! I love how these challenges make me look at items in a new light!
LOVE this, Donna!! What an amazing way to re-purpose this beautiful linen!! Your bag turned out so lovely…what a fun thing to be able to use for summer!
Thanks Rachel! I’m thrilled with how it turned out and can’t wait to use it!
This is so pretty, Donna! I love that you used a piece from your great-grandmother. It’s such a fun way to give a piece of family history fresh life too. I love all the heirloom pieces you’ve created lately. They’re a treasure! Hugs, CoCo
Thank you CoCo, It’s been so satisfying to give new life to family treasures that were just sitting in the chest! It makes my heart happy! Have a great night!
Donna, I love your burlap bag. It turned out amazing.
Thank you Tammy, I’m so happy with it!
Donna your darling tote looks like something I might see in an exclusive boutique! I love it! Excellent tutorial and easy to follow. 😊
Thanks so much for that wonderful compliment! I’m so glad you enjoyed the post!
This is so pretty, Donna. And you look very stylish holding it! What a great way to showcase beautiful lace!
Aww thank you Missy! You are too kind!
Donna – This project is so elegant and beautiful. It looks so professional! I love that you were able to honor the history of and save a vintage doily. Your technique for adding the spray adhesive was so smart. Hopefully, the temperature in Florida has warmed up! Always fun participating in the Handcrafted Society with you.
Hi Anna! I was so happy to find a way to save the doily and be able to admire it as well! It is warming up here, but we may have to replace some of our landscaping because of the freezing temps. Thanks so much!
That turned out just lovely! Thanks for joining in on Home Matters Linky Party! I will be featuring your post this week! #HomeMattersParty xx
Hi Joy! So glad you like it! I’m honored you’ll be featuring it at your party! Thank you so much!