Do you want to add a touch of decor for St. Paddy’s Day but don’t want to spend much? We have the answer — let’s make a DIY St. Patrick’s Day topiary using an inexpensive Dollar Tree find!
I love decorating for every holiday, but I don’t love the price tags that come with it.
**Some of the links in this post are affiliate links. This means if you click on the link and purchase the item, we will receive an affiliate commission at no extra cost to you. We appreciate your support. (disclosure policy)
The truth is, buying brand-new retail decor for each season isn’t in our budget.
So, I’ve had to find a creative way to get a high-end look without the high-end cost.
That’s where Dollar Tree makeovers come in.
With a little imagination and a few simple supplies, inexpensive pieces can be transformed into beautiful decor that looks anything but budget.
I’m excited to show you how to turn a sparkly store-bought leprechaun hat into a charming DIY St. Patrick’s Day topiary that fits perfectly with our home — no big spending required.
What I started with

This project started with a festive little St. Patrick’s Day decoration from Dollar Tree — a sparkly green tinsel leprechaun top hat mounted on a stick and set inside a small pot.
It was definitely fun and eye-catching, but didn’t quite fit with my usual decorating style.
Still, I loved the shape and structure.
Especially since it already resembled a topiary, which meant it had great potential — it just needed a complete style makeover.
Sometimes the best DIY projects begin with seeing past what something is and imagining what it can become.
So let’s get this makeover started!
Gather Materials
- Top hat topiary – Dollar Tree
- Wire cutters – Home Depot
- Sheet moss – Michael’s
- Hot glue gun & glue sticks -Amazon
- Finger protectors – Amazon
- Black faux leather – Hobby Lobby
- Gold Cardstock – to make buckle
- Black cardstock – to cover the underside of the hat
- Scissors -Walmart
- Jute twine – Walmart
- Small flower pot – Walmart
- Styrofoam pieces – to secure topiary in the flower pot
Steps to Make a DIY St. Patrick’s Day Topiary
Follow these simple steps to transform a sparkly Dollar Tree decoration into a charming topiary with natural texture and timeless style.
Remove the Original Tinsel

Begin by removing all sparkly tinsel from the hat, stem, and base, and set the buckle aside.
I found the easiest way to start was to use wire cutters to snip the thin wire tinsel, then carefully unwrap it from the form underneath.
The gold section inside the pot was a bit more stubborn.
To remove it, I gently used the tips of my scissors to pry up the wired tinsel before pulling it away.
Take your time with this step so you don’t damage the base — once everything is removed, you’ll have a clean foundation ready for its makeover.
Cover the Hat with Moss

Start by hot-gluing moss around the hat’s brim.
Once the brim is covered, move on to the sides, and finish with the top.
Working in sections makes it easier to get smooth, full coverage.
Press the moss firmly on the base to ensure it sticks.
Tip: Be careful using hot glue, it can burn the skin, causing blisters; we recommend silicone finger protectors.
Trim any excess moss as you go for a neat finish.
Add a Bottom Circle for a Finished Look

To give the hat a polished, professional look, add a round piece of black cardstock to the bottom.
Cut a circle slightly larger than the hat’s base, then cut from the edge to the center so it fits snugly around the stem.
Push it into place and hot-glue the edges to secure it.
Tip: You can attach the bottom circle before covering the hat with moss if you prefer — it might be easier to work with a clean surface. Either way, it hides any visible glue or imperfections and gives the topiary a finished look.
Add the Hat Band and Buckle
To create a classic hat band, I used the original buckle as a template.
It was sparkly, and I wanted a plain gold buckle, so I grabbed a piece of cardstock from my scrapbooking supplies, traced the buckle onto it, and cut it out.
Next, I used a scrap piece of faux leather and cut a long strip to match the hat band’s width.
Wrap the strip around the hat’s base and secure it with hot glue.
Finally, attach the cardstock “gold” buckle to the front with hot glue.
Wrap the Stem with Jute Twine
To give the stem a natural, rustic look, start by hot-gluing the top of the stem (at the base of the hat) to the black cardstock circle.
Begin wrapping the jute twine tightly around the stem, adding a small dot of hot glue as you go to secure it.
Continue wrapping until you reach the bottom.
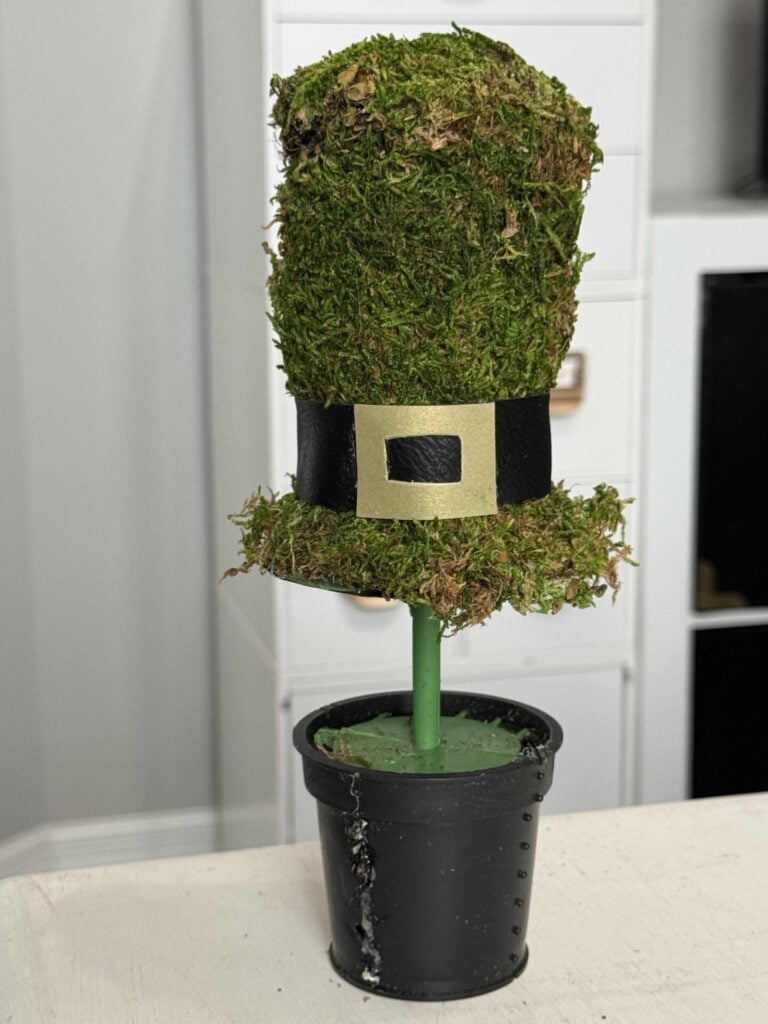
Pot the Topiary

Place the topiary into a flower pot.
Since my pot was a bit larger, I added scrap pieces of Styrofoam inside to give the topiary extra height and keep it upright.
Once the topiary is secure, cover the Styrofoam and base with additional moss to hide the filler and create a polished, natural look.
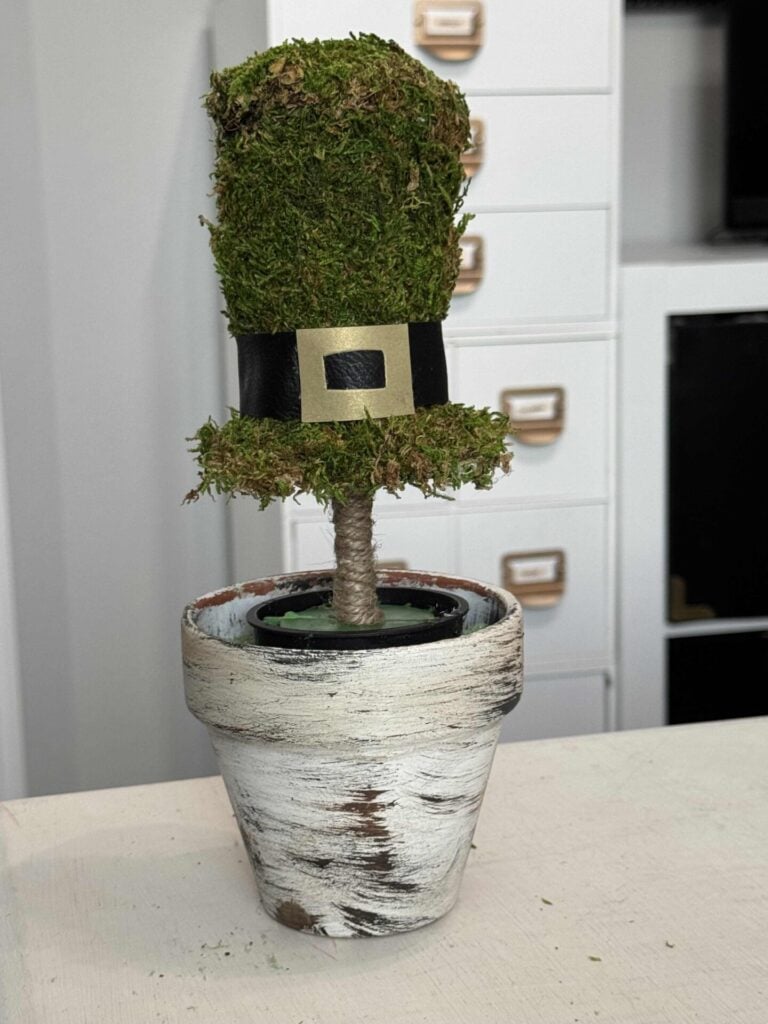
After all the steps, the transformation is truly amazing.

What started as a sparkly Dollar Tree hat is now a charming, moss-covered topiary!
It’s subtle enough to blend with everyday pieces but still festive enough to celebrate St. Patrick’s Day — proof that with a little creativity, budget-friendly decorations can look anything but cheap.
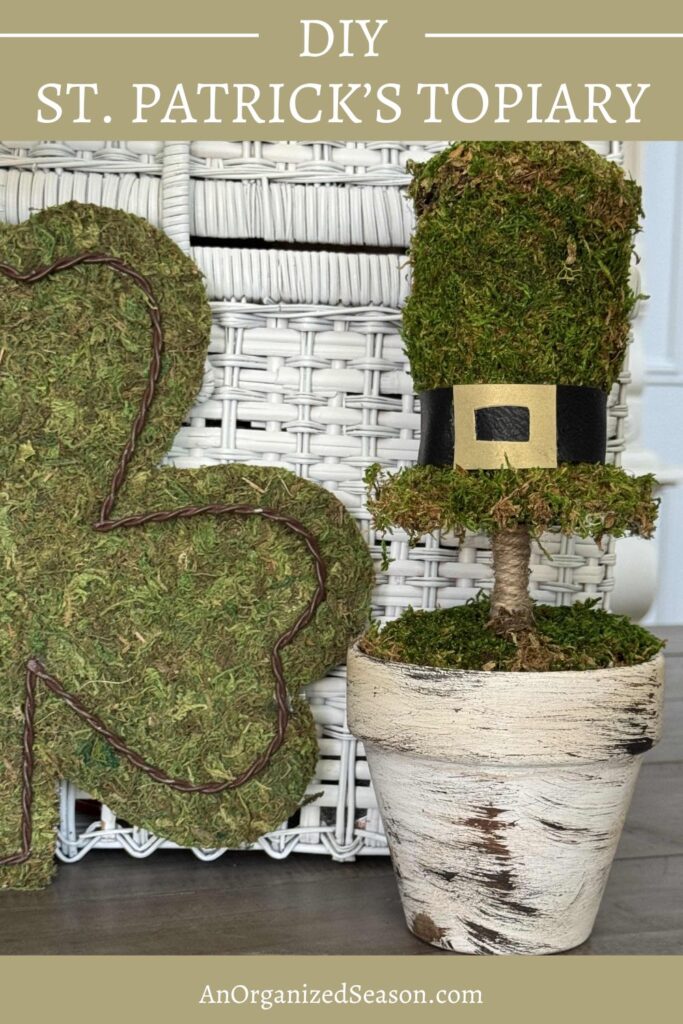
Styling a DIY St. Patrick’s Day Topiary

I styled my adorable topiary in a vignette on our dining room table.

Doesn’t it look fabulous next to the DIY moss shamrock I upcycled a few years ago?

I’m so thrilled with how cute this turned out.
Oh yes, if you’d like to know how I painted the flower pot (it has a stencil on the back, but let’s keep that our little secret), click here.
Other Ways to Style a DIY St. Patrick’s Day Topiary
Here are some other ways you can display this adorable decor item around your home:
- Entryway Table: Add a touch of spring as soon as guests walk in.
- Tiered Tray or Shelf: Pair with small candles, greenery, or seasonal decor.
- Kitchen Counter or Island: Brighten up everyday spaces with subtle holiday cheer.
- Bookshelf or Mantel: Add height and texture among your existing decor.
- Centerpiece Option: Combine with fresh or faux flowers for a festive dining table display.
Closing Thoughts
Transforming a simple Dollar Tree hat into this DIY St. Patrick’s Day topiary shows that you don’t need to spend a fortune to create charming, high-end-looking decor.
With a few supplies, a little creativity, and some time, inexpensive items can become beautiful, personalized pieces that fit your style.
I hope this project inspires you to look at ordinary decorations in a new way — and maybe even try a few Dollar Tree makeovers of your own!
If you enjoy the blog, please sign up for our email list so you won’t miss a post!
Until next time, follow us on Pinterest, Facebook, and Instagram!
Blessings, Donna and Rich
More St Patrick’s DIY Inspiration
Looking for other budget-friendly St Patrick’s Day decor ideas? Check out these DIY projects:
- Quick and Easy St Patrick’s Garland
- St Patrick’s Day Shamrock Upcycle With a Dollar Tree Hanger
- St Patrick’s Day DIY Sign Makeover
Pin It For Later
Don’t forget to pin the image below to one of your Pinterest boards (hover over the picture and click the red Pin button in the top left corner).
Related Posts:


**Some of the links in this post are affiliate links. This means if you click on the link and purchase the item, we will receive an affiliate commission at no extra cost to you. We appreciate your support. (disclosure policy)
Love it, Donna!! What a transformation!! It’s amazing what some moss and hot glue can do.
I know, it’s crazy how different it looks now! Thanks so much for stopping by!
Omgosh Donna!! This is genius and totally adorable. It came out great & agree I love the shape of the hat. I haven’t been to DT in awhile but pinning this for future. I love all things moss & topiaries so this is totally up my alley. Thanks for the inspo friend. XO- MaryJo
Thanks a bunch! I’m so glad you like it MaryJo! It was so easy and fun to make! Happy St Patrick’s Day to you!