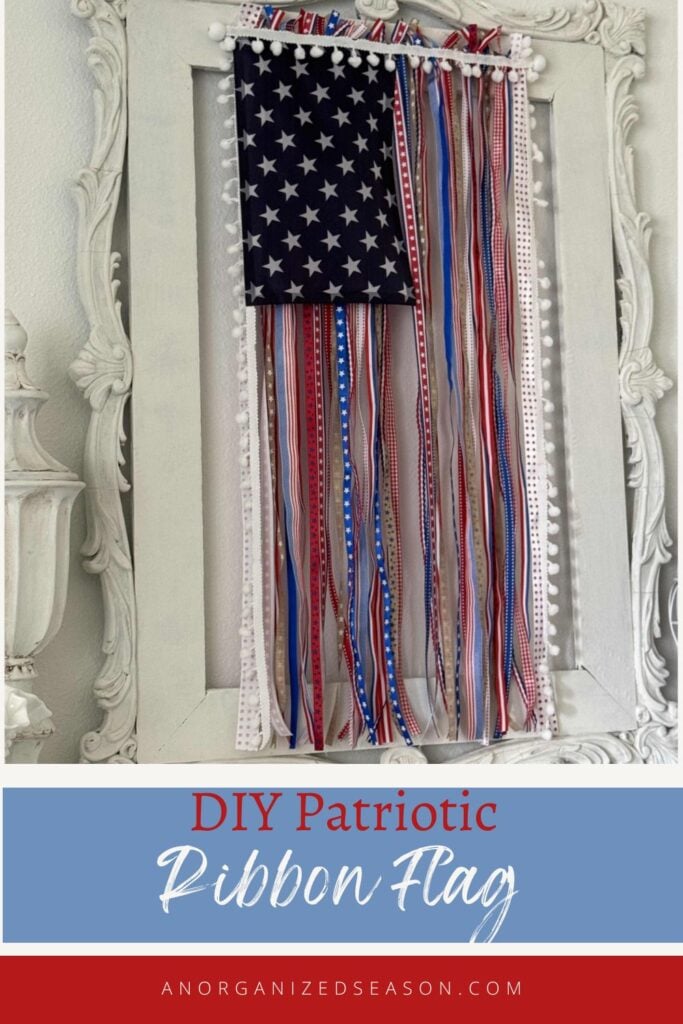
Have you ever saved a DIY idea because you loved it, only to wait too long before finally making your own version? That’s exactly what happened with this DIY patriotic ribbon flag.
My friend MaryJo from Masterpieces of My Life created a beautiful vintage ribbon flag a couple of years ago!
**Some of the links in this post are affiliate links. This means if you click on the link and purchase the item, we will receive an affiliate commission at no extra cost to you. We appreciate your support. (disclosure policy)
As soon as I saw it, I immediately pinned it to remember it.
On a recent trip to Michaels, I spotted a bundle of patriotic ribbons and thought of her flag!
I knew it was finally time to create my own version.
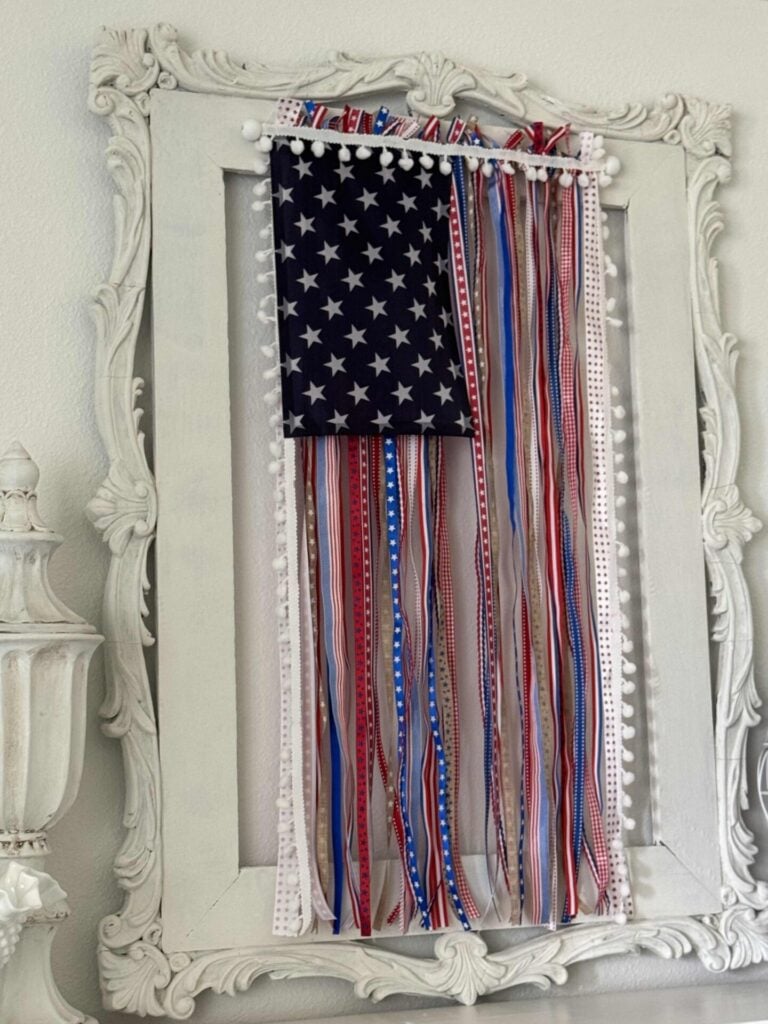
While my flag was inspired by MaryJo’s design, I added my own twist by using different colored ribbons, repurposing fabric from an old Dollar Tree flag chair cover, and displaying it over a vintage frame.
The result is a unique piece of Americana decor that adds a fun, festive touch for the summer season.
Gather Materials
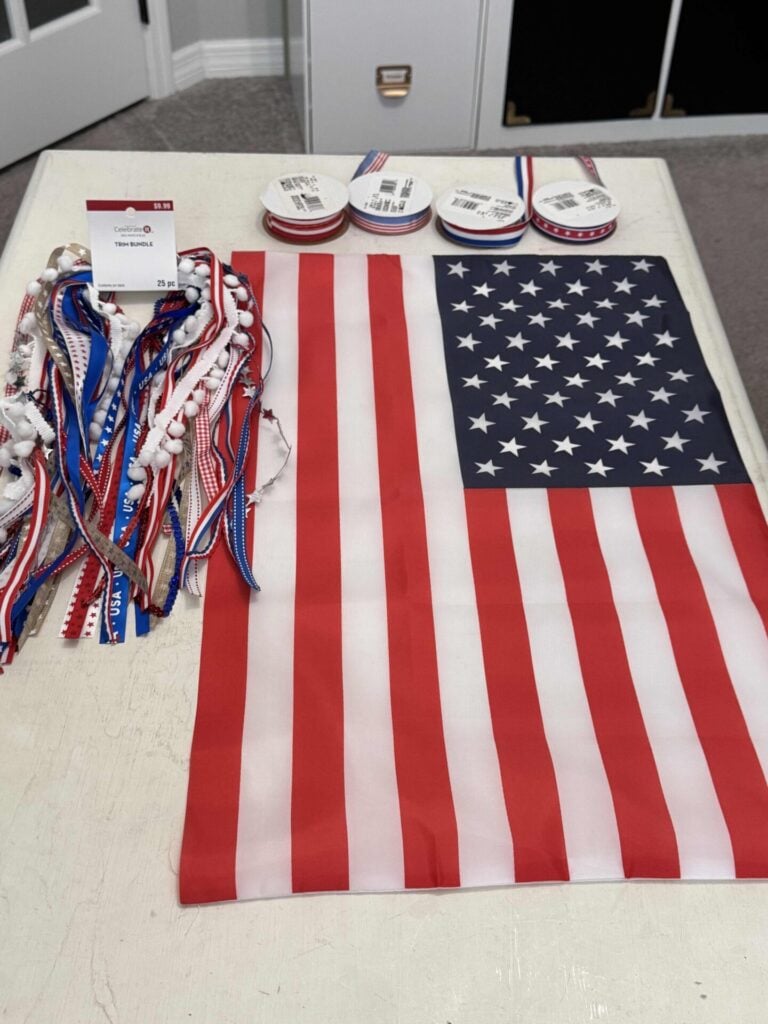
To make this DIY patriotic ribbon flag, gather the following supplies:
- Red, white, and blue ribbons- Michaels
- Navy fabric with white stars for the canton section
- 7/16-inch wooden dowel rod
- Two wooden beads
- White chalk paint
- Paintbrush
- Cutting mat, rotary cutter, and lip-edge ruler (or sharp fabric scissors)
- Heat-n-Bond tape
- Iron
- Hot glue gun and glue sticks
- Silicone finger protectors
- 1/4-inch white organza ribbon for hanging
Steps to Prepare Your DIY Patriotic Ribbon Flag
Before assembling your DIY patriotic ribbon flag, you’ll want to gather your supplies and prepare each of the individual elements.
The best part about this project is that there are no strict rules.
Mix different ribbon patterns and textures, repurpose items you already have on hand, and create a one-of-a-kind Americana decoration that reflects your own style.
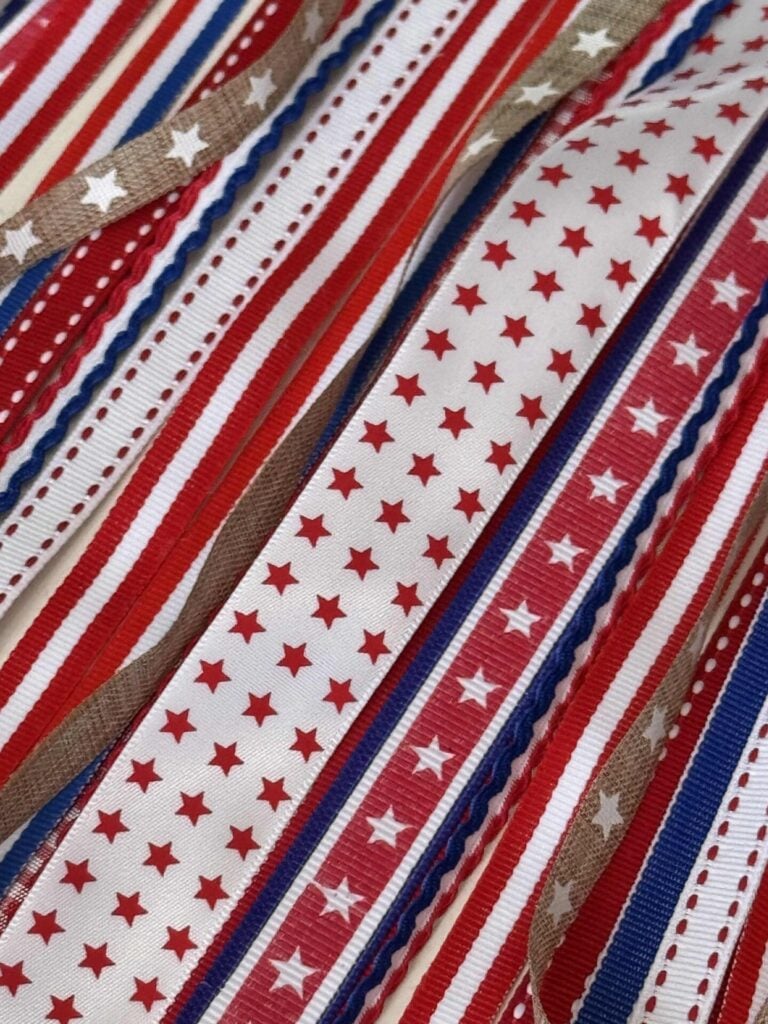
Choose Your Ribbon
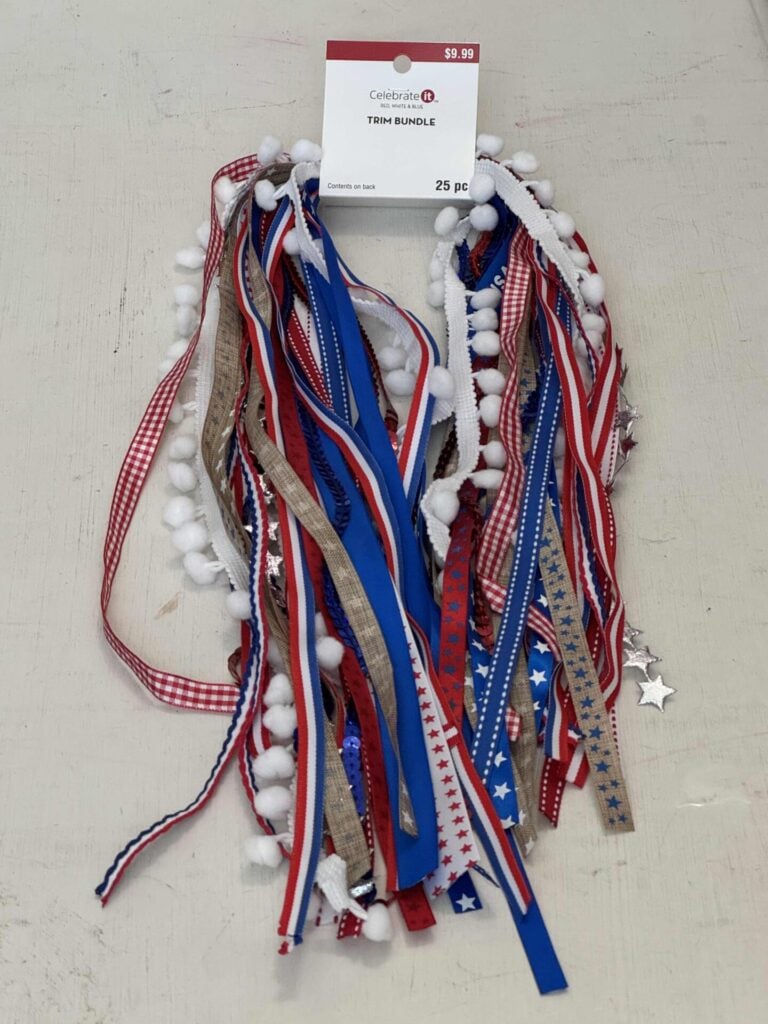
Here is the beautiful bundle of red, white, and blue ribbons at Michaels.
They were on sale, so I purchased two bundles because I wasn’t sure if one would provide enough ribbon for the size I wanted to make.
Each bundle included 25 one-yard pieces, which I hoped would give me plenty of options to customize the design.
When I got home and started arranging the ribbons, it occurred to me that many of them included blue.
Since the stripes of a traditional American flag are red and white, I had to decide whether to return them and search for more traditional ribbon choices or embrace the mix of colors and make the flag my own.
I decided to step outside my comfort zone and keep the ribbons, and I’m so glad I did!
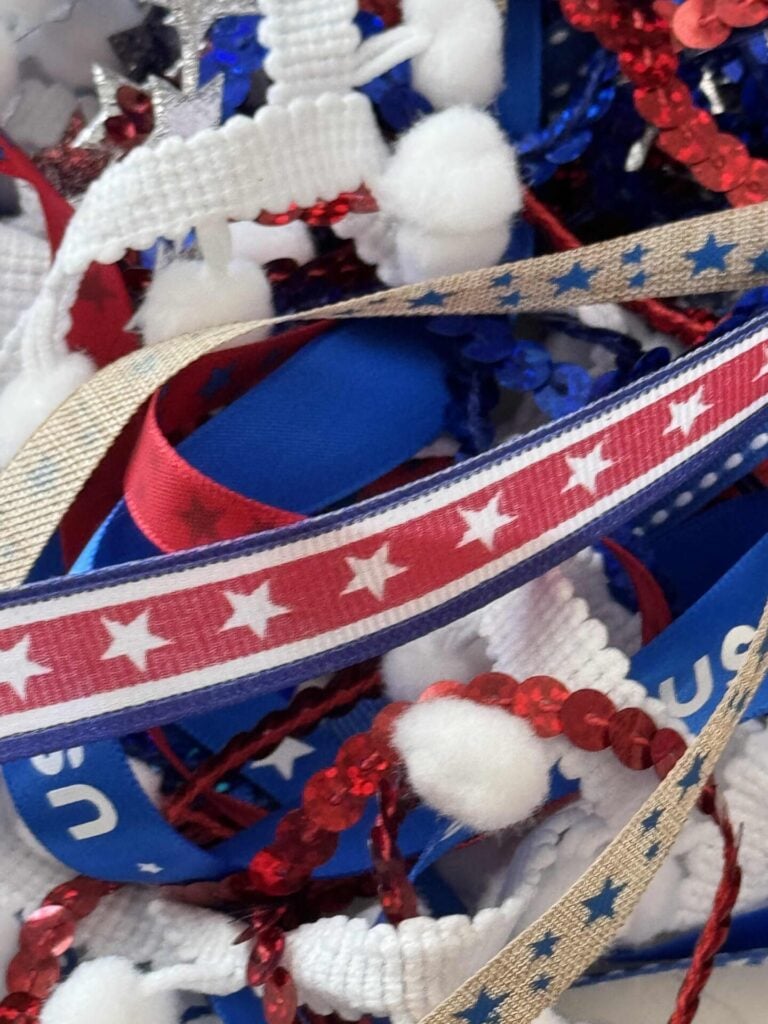
A few of the ribbons in the bundle, like the silver star ribbon, sequin trim, and a blue ribbon with large “USA” lettering, felt a little too bold for the look I was creating.
Instead, I left those out and mixed in a few red, white, and blue ribbons I already had at home.
Choose and Prep Material for the Canton Section
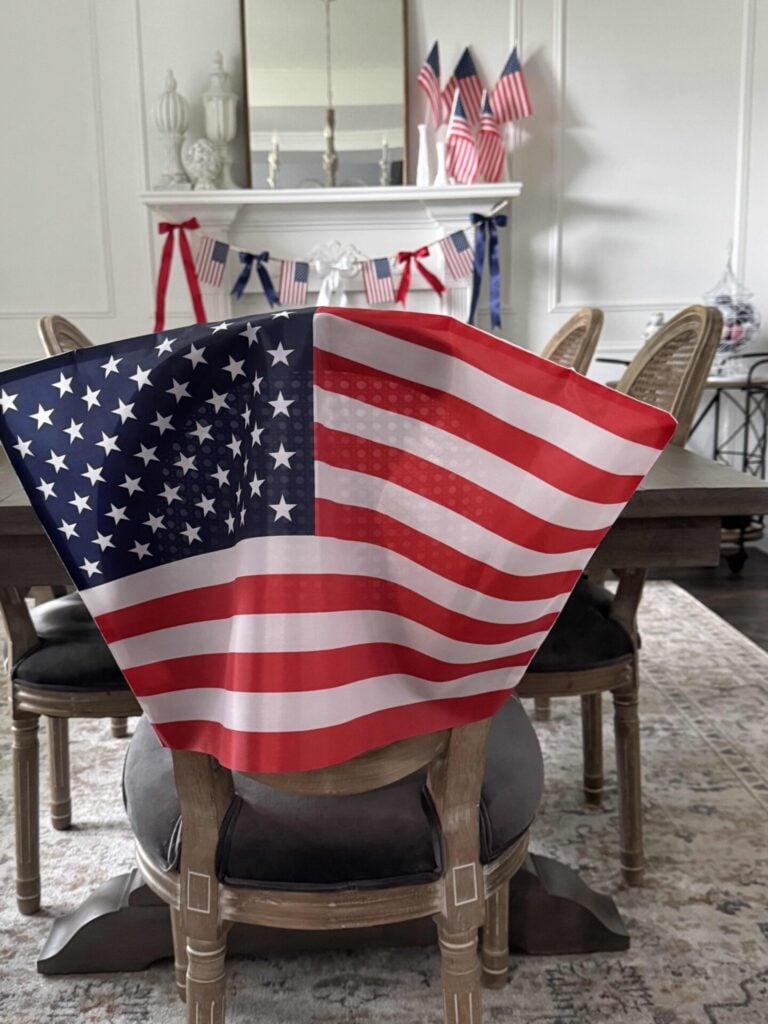
When I searched through my patriotic decor box, I found a flag-shaped chair cover I had purchased from Dollar Tree several years ago and never used.
Since I planned to display my DIY patriotic ribbon flag above my mantel, I held the chair cover up to see if the size would work and decided the navy-and-white star section was the perfect fit.
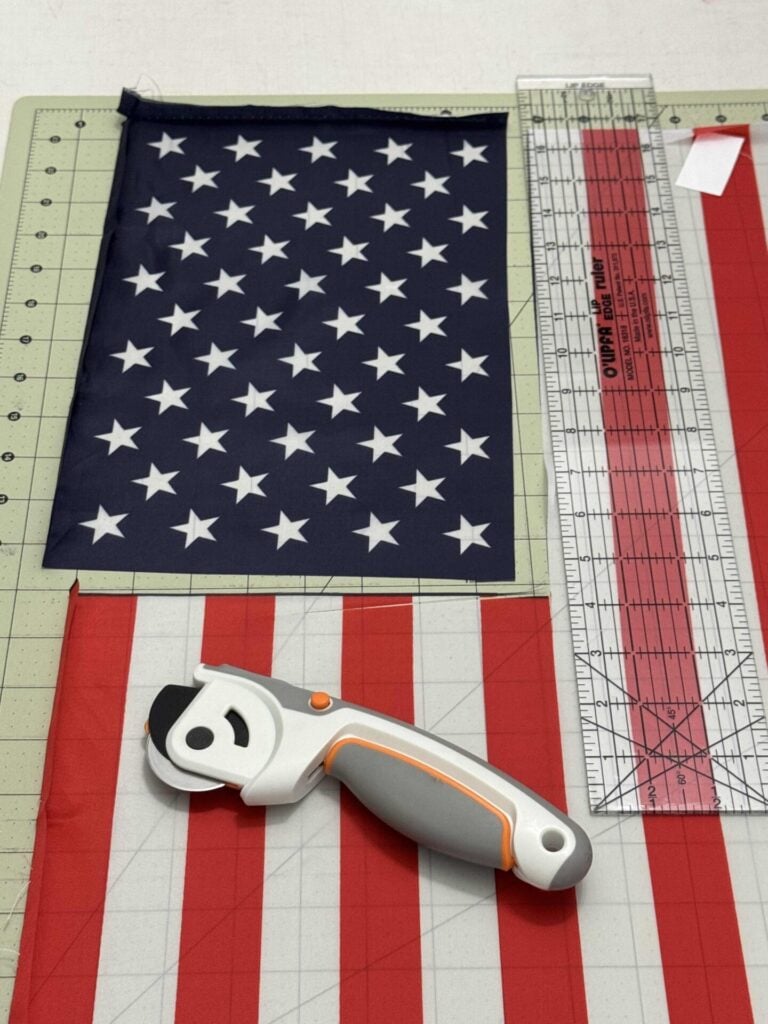
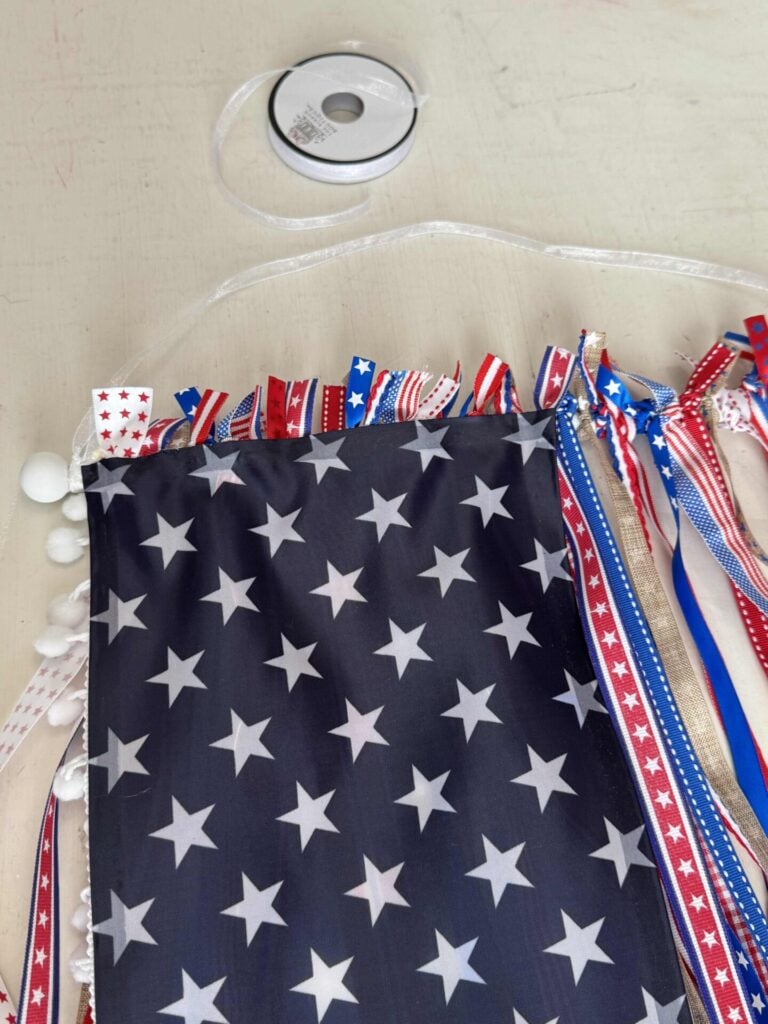
I carefully took the chair cover apart with a seam ripper and cut out the fabric for the canton section (the blue field of stars in the upper left corner of the American flag).
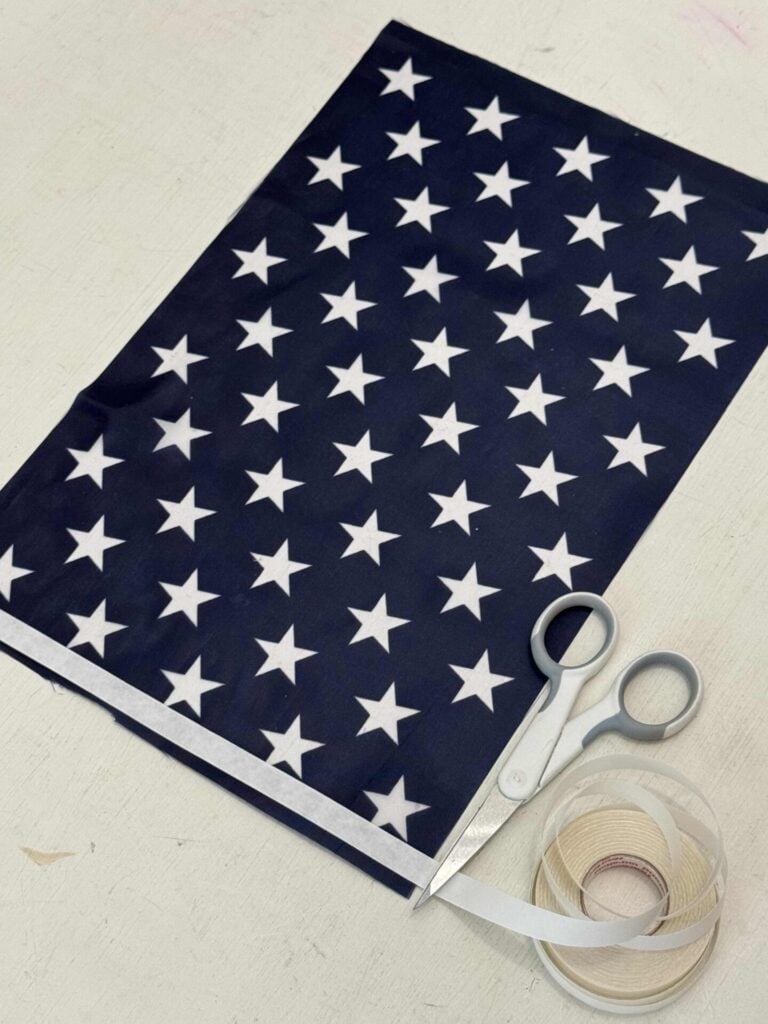
To keep the fabric from unraveling, I used Heat-n-Bond tape to create a simple hem around the edges.
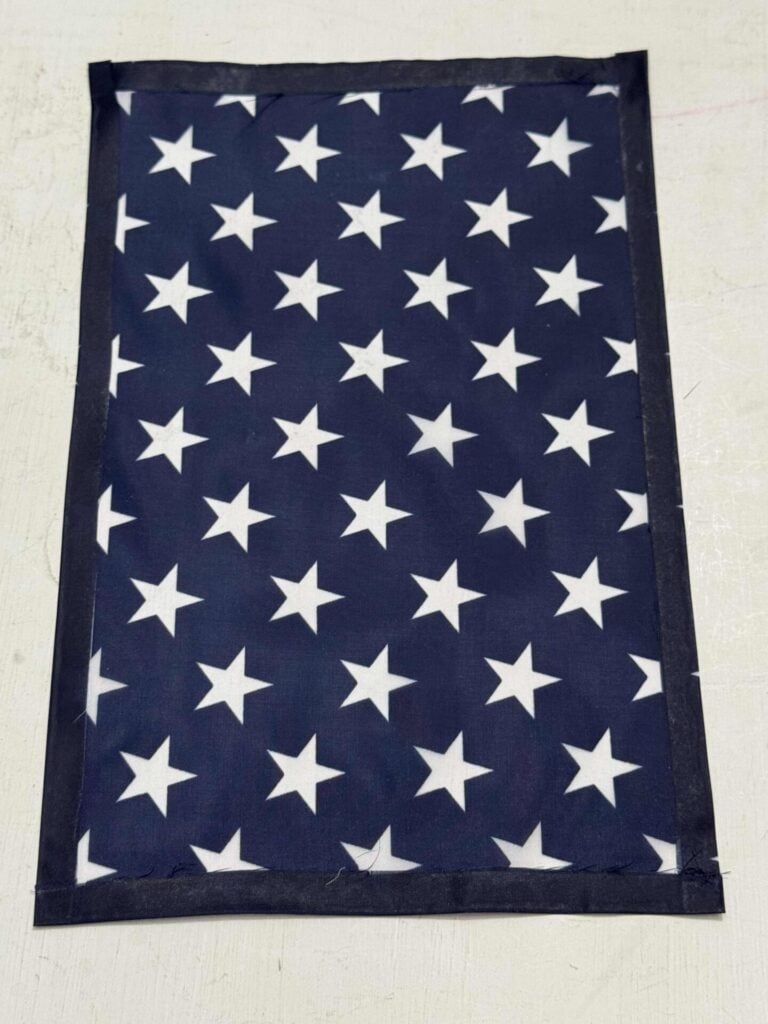
No sewing machine or sewing skills were required—just follow the instructions and iron the tape on!
Prepare a dowel rod
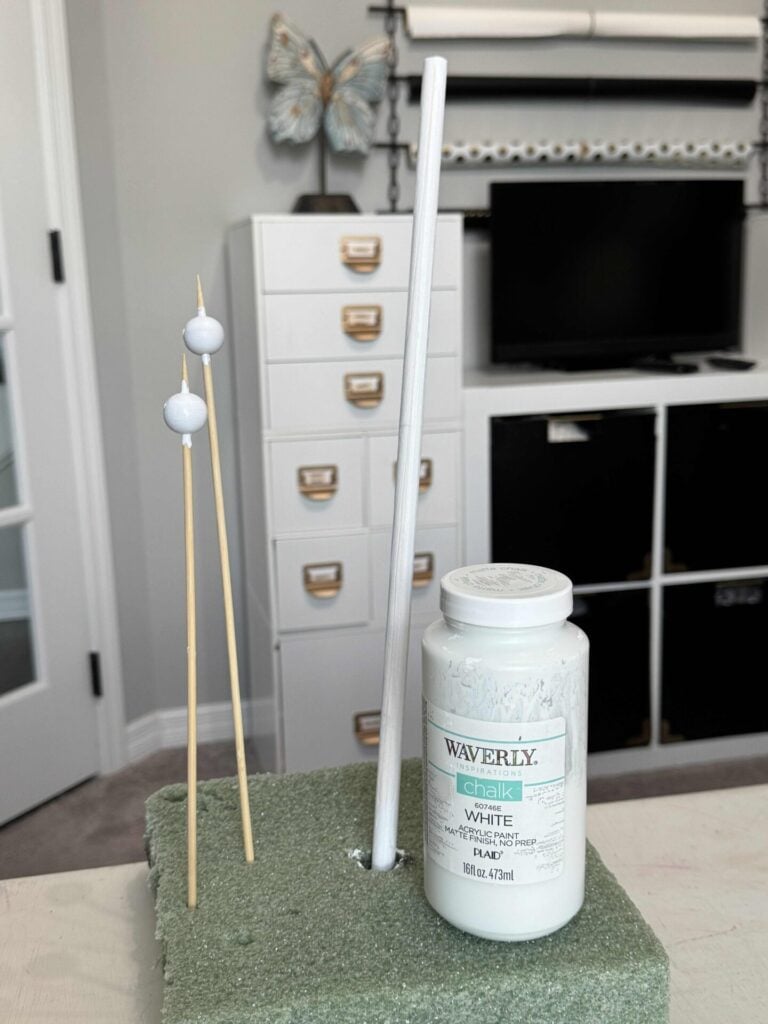
To create the hanger for my DIY patriotic ribbon flag, I started with a 7/16-inch x 17-inch wooden dowel rod and two wooden beads.
I painted both the dowel rod and the beads with Waverly white chalk paint, applying two coats for full coverage.
A little tip: I love using a piece of styrofoam and wooden skewers to hold small pieces of wood while painting. I placed the wooden beads on skewers and inserted them into the styrofoam block to keep them upright. For the dowel rod, I inserted one end into a hole in the center of the styrofoam and painted the exposed portion, leaving the tip inside the styrofoam unpainted. Once it dried, I turned the dowel over, inserted the painted end into the styrofoam, and painted the remaining section.
Steps to Assemble your DIY Ribbon Flag
Now that your ribbons, canton section, and dowel rod are ready, it’s time to assemble your DIY patriotic ribbon flag.
This is where your creativity can shine!
Arrange the ribbons in a way that feels balanced to you, mix different textures and patterns, and don’t be afraid to make the design your own.
Attach Ribbons
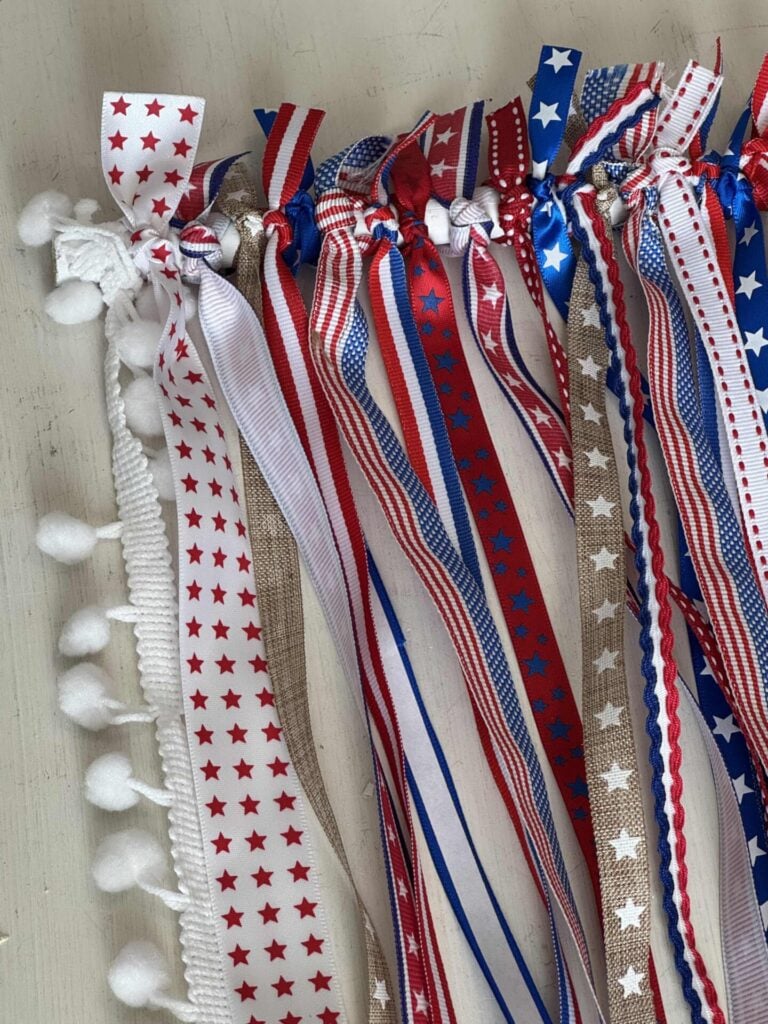
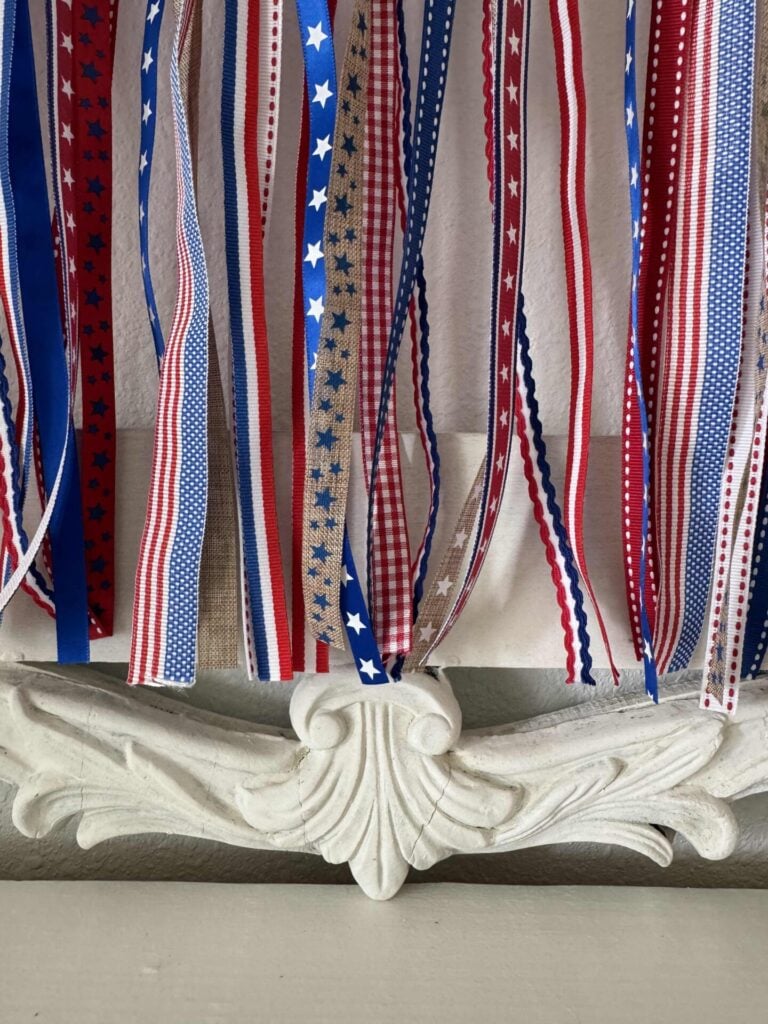
Open your ribbons and lay them out on a table, arranging the colors, patterns, and textures until you are happy with the overall design.
My ribbon bundles included pom-pom trim, so I placed one piece on each side of the flag to create a fun border.
Originally, I planned to hot-glue the ribbons to the dowel rod, but after seeing how long they were, I decided tying them on would be faster and add a charming, handmade look.
Simply tie each ribbon onto the dowel rod and continue adjusting the placement as you go.
Once all of the ribbons were attached, I noticed there was more space between them than I liked.
So, I scooted the ribbons closer together and trimmed 3 inches off the dowel rod, changing the final length from 17 inches to 14 inches.
Adhere the Canton Section
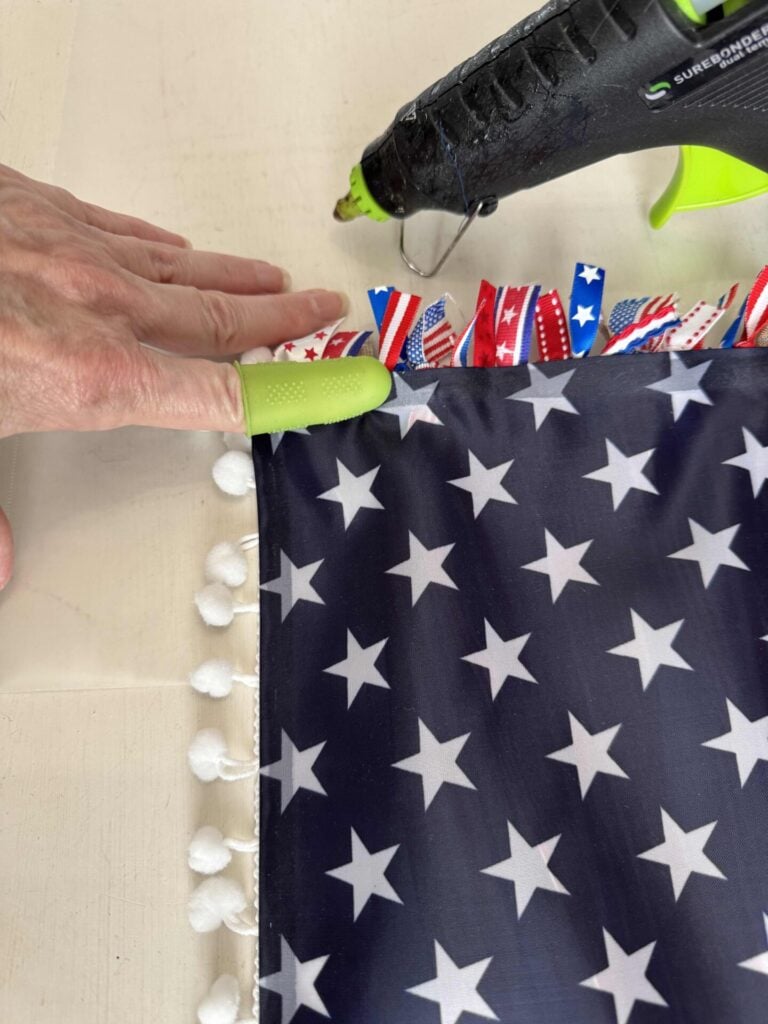
Now it’s time to add the canton section to transform the ribbons into a flag.
Position the navy-and-white star fabric in the upper left corner and use hot glue to secure it to the ribbons.
One detail I especially loved about MaryJo’s ribbon flag was the tassel trim along the top.
Since my ribbon bundles included pom-pom trim, I used it instead.
I carefully hot-glued it across the top edge of the canton section and over the knots of the ribbons.
Safety Note: Hot glue guns can cause burns, so use caution when working with them. We recommend using silicone protectors to help protect your fingers.
Prepare the Flag for Hanging
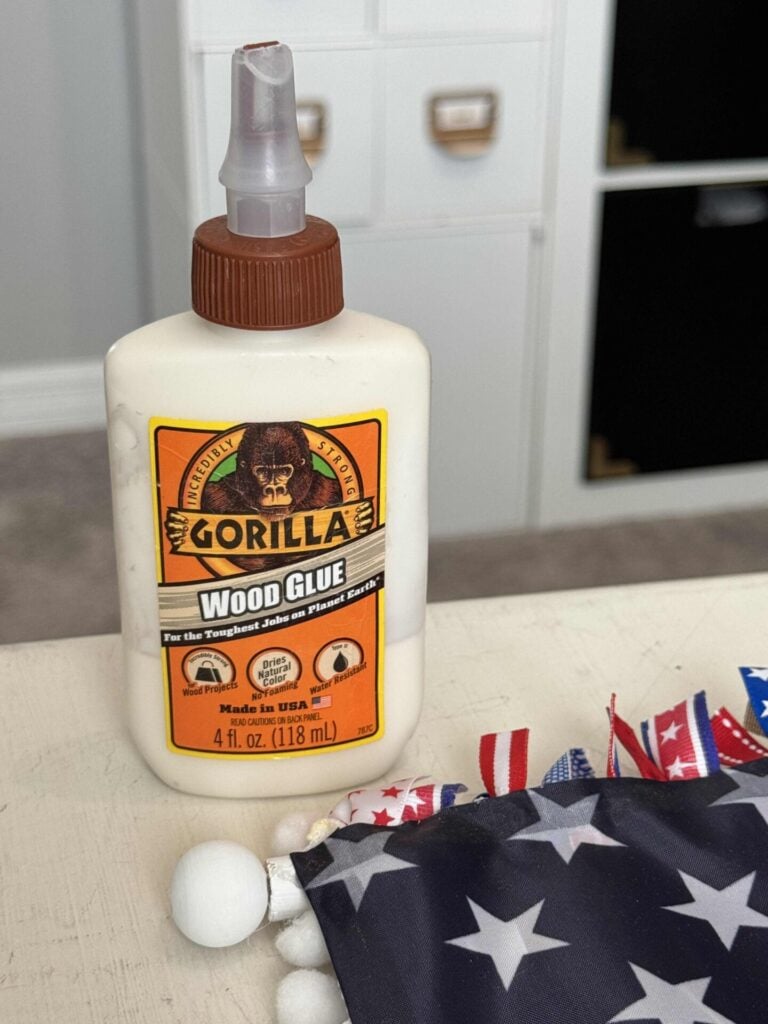
To keep the ribbons from sliding off the ends of the dowel rod, I used wood glue to attach a painted wooden bead to each end.
Allow the glue to dry completely before moving the flag.
I like this detail because it gives the rod a more finished look!
Next, cut a piece of 1/4-inch white organza ribbon to the desired hanger length and tie each end securely around the dowel rod, just inside the wooden beads.
I like how the sheer white ribbon blends beautifully with the design and almost disappears when you hang your flag.
Determine the Ribbon Length
Once the hanger was attached, it was time to decide on the final ribbon length.
I hung my DIY patriotic ribbon flag to see where the ribbons would fall.
Originally, I planned to display it on a mirror, but after trying it, I realized it wasn’t the right fit for my space.
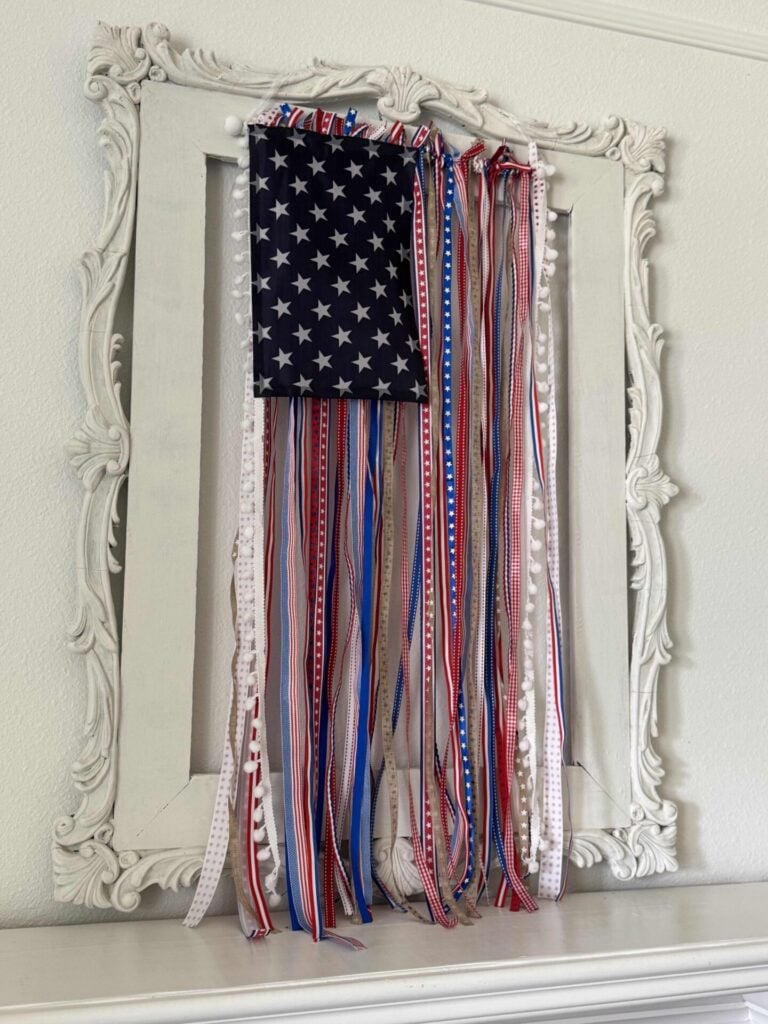
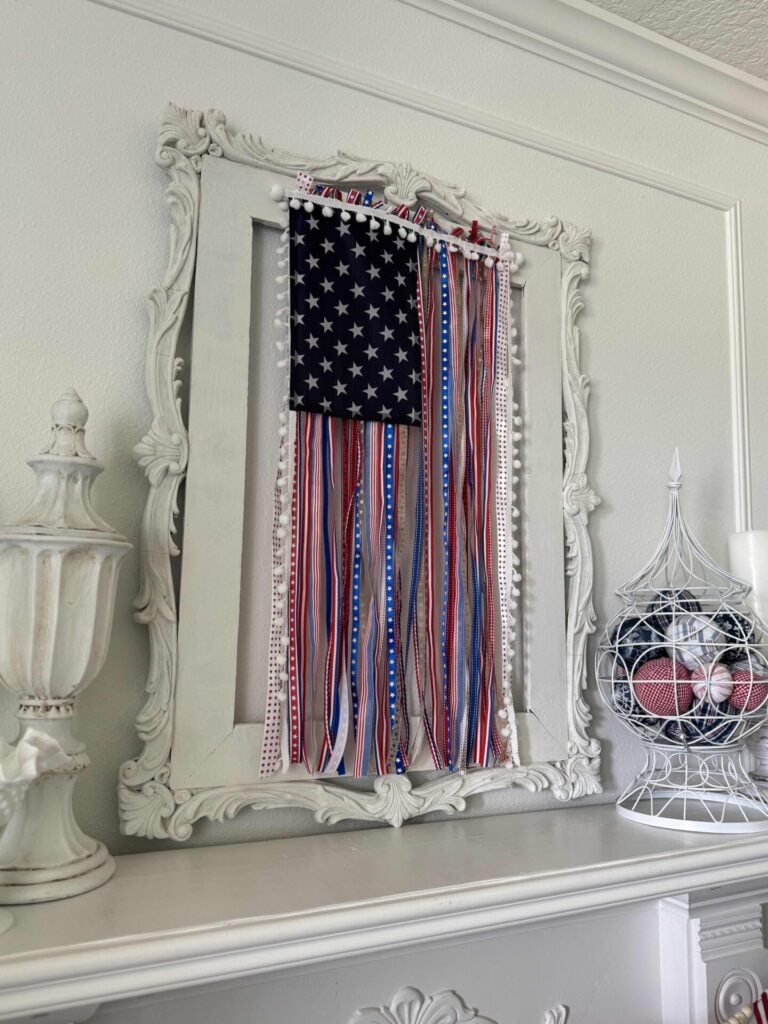
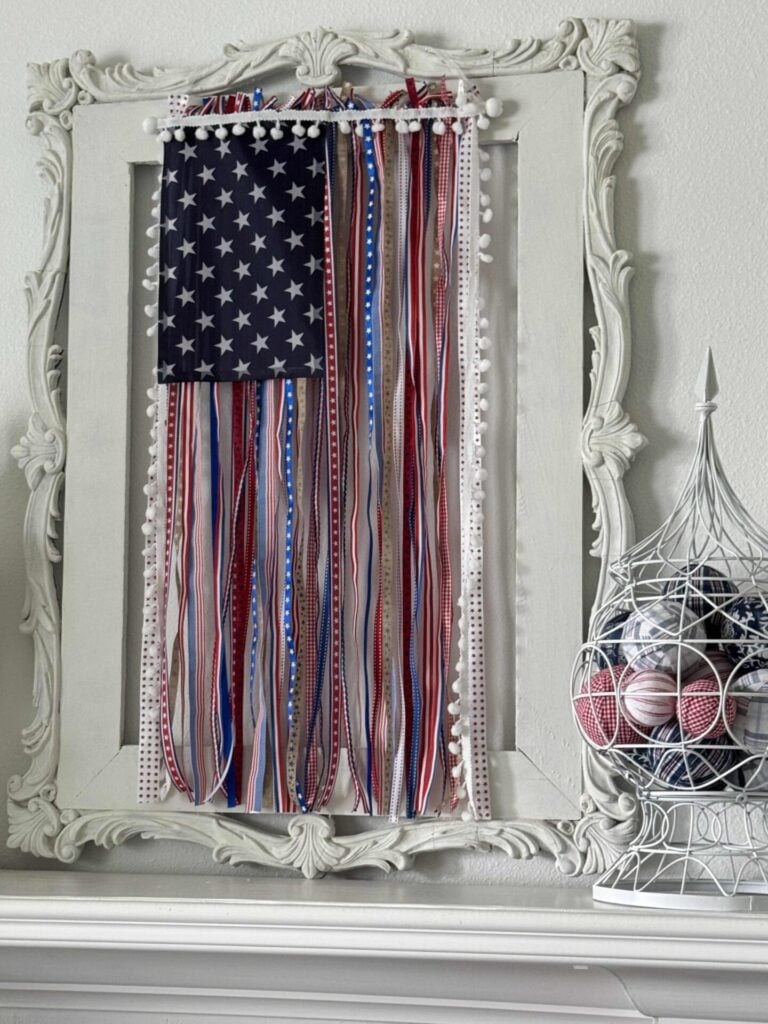
I looked around my home for another option and decided to try hanging the flag over a vintage frame.
I loved how the frame added an extra layer of charm, making the ribbon flag feel like a unique piece of Americana decor.
The intricate trim along the bottom of the frame gave me the perfect guide for trimming the ribbons.
Using sharp fabric scissors, I cut each ribbon so that it ended just above the decorative trim.
A Unique Way to Display a DIY Patriotic Ribbon Flag
I’m so thrilled with how this DIY patriotic ribbon flag turned out, and I think it looks even more special hanging on the frame!
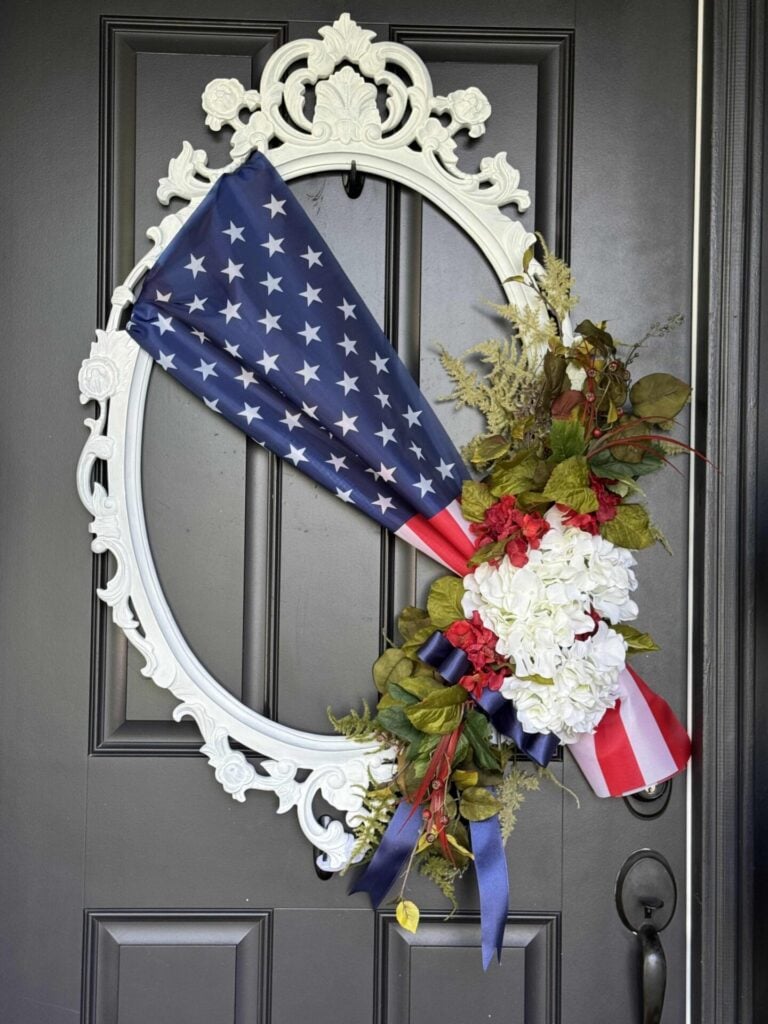
However, if you don’t have a frame that will work, it will look beautiful hanging on a mirror, front door, or wall!
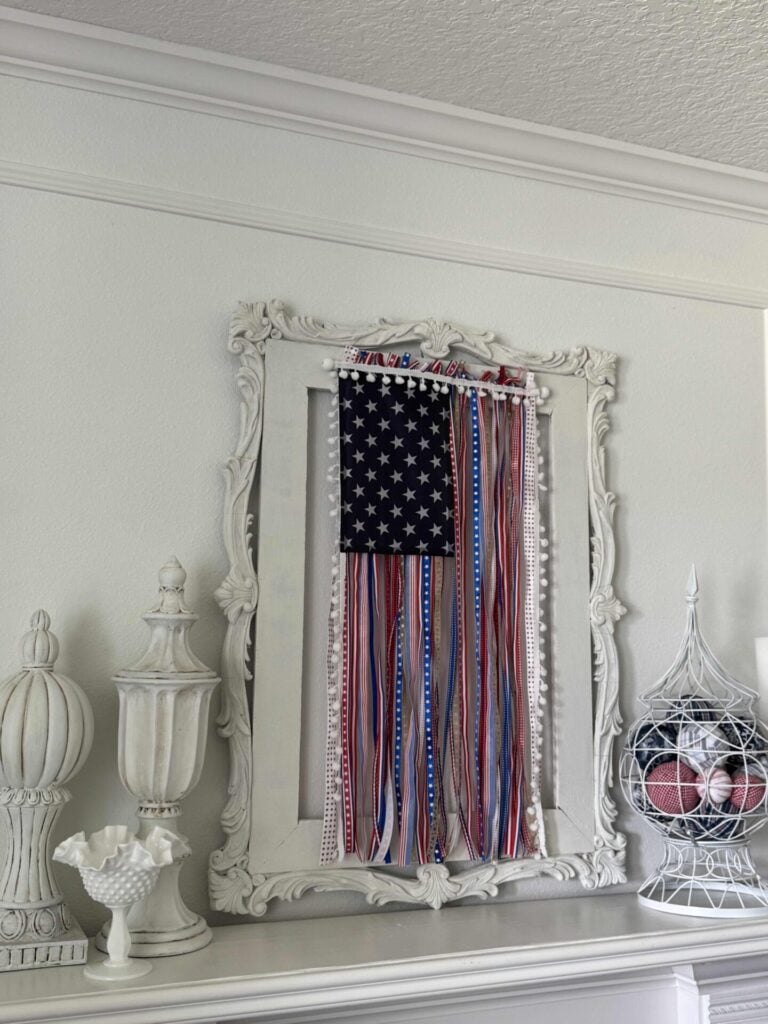
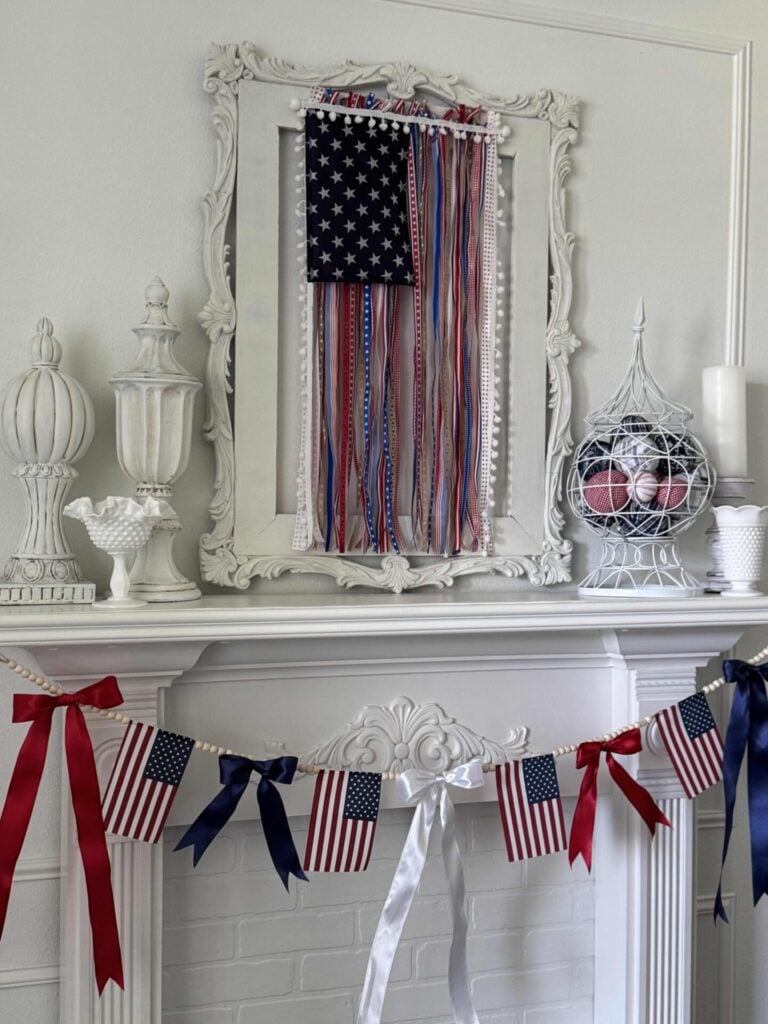
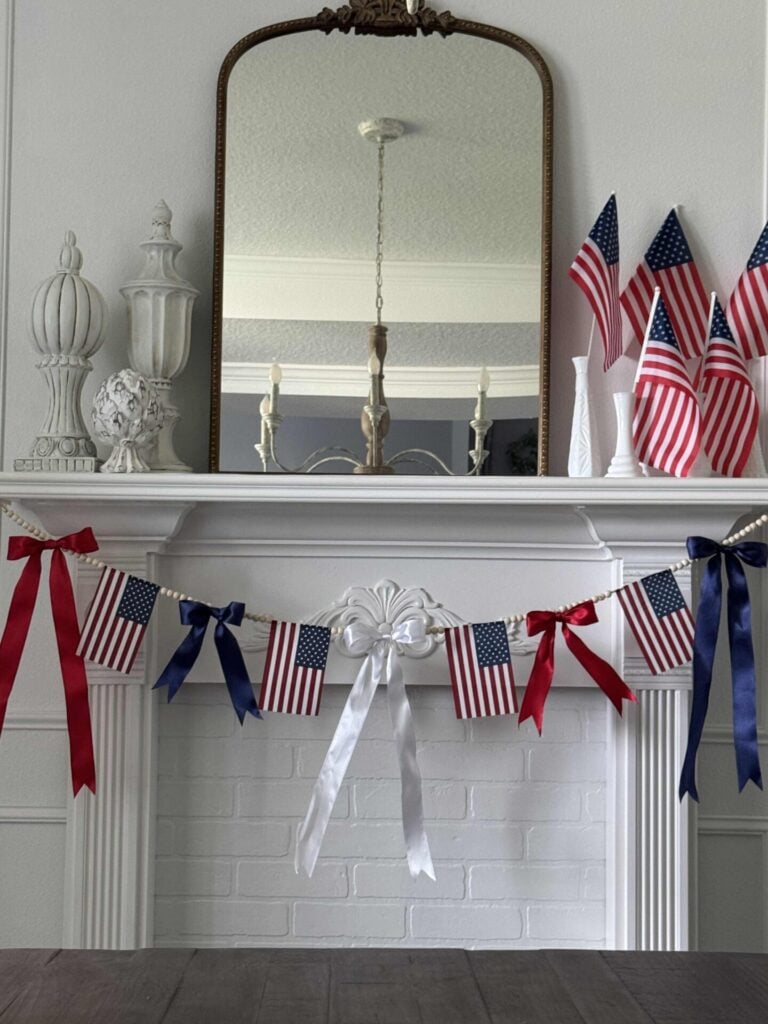
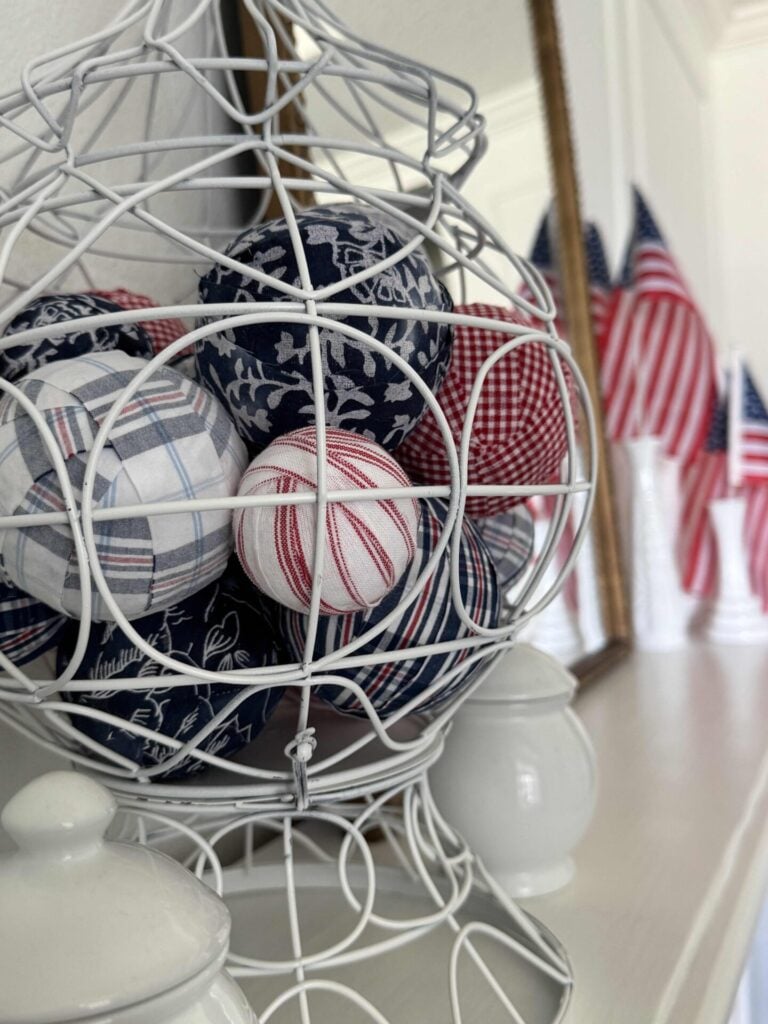
I think it adds a touch of charm to our summer mantel and coordinates beautifully with the DIY fabric orbs I made.
I was so excited to hang it above the adorable DIY ribbon and flag garland I created, but when I stepped back to take it all in, I noticed something was off…
Do you see what I see?
It’s the placement of the star canton section.
I followed MaryJo’s original design (and most other ribbon flags I saw on Pinterest) and placed the stars on the upper left side.
However, once I displayed it on my mantel next to my DIY patriotic garland, I realized the stars on the garland are on the opposite side.
If you know me, you know I love for everything to coordinate, so it has been a little hard for me to let that go!
By the time I noticed, the star fabric was already hot-glued in place, and I didn’t want to risk damaging the ribbons or the fabric by pulling it apart.
So, I decided to leave it as is.
Would you have even noticed that detail if I had not mentioned it?
What side would you put yours on?
Be sure to let me know in the comments below!
Closing Thoughts
I’m so glad I saved the inspiration for this DIY patriotic ribbon flag because creating my own version turned out to be such a fun project.
What started as a simple bundle of ribbons from Michaels became a one-of-a-kind piece of Americana decor.
The best part about making this ribbon flag is that there is no right or wrong way to design it.
Choose ribbons you love and make it a reflection of your own style.
I hope this has inspired you to add some red, white, and blue charm to your summer home decor.
If you enjoy the blog, please sign up for our email list so you won’t miss a post!
Until next time, follow us on Pinterest!
Blessings, Donna and Rich
Pin It For Later
Don’t forget to pin the image below to one of your Pinterest boards (hover over the picture and click the red Pin button in the top left corner).
More Patriotic DIY Inspiration
If you’re looking for more red, white, and blue inspiration, take a look at these easy patriotic DIY ideas:
Related Posts:


**Some of the links in this post are affiliate links. This means if you click on the link and purchase the item, we will receive an affiliate commission at no extra cost to you. We appreciate your support. (disclosure policy)
It looks so good, Donna!! Love all the different ribbon pieces…it looks so good on the mantel!!
Thanks so much! I’m glad you like it! It was so fun to make!