Want a pretty wreath for winter but don’t want to spend the money—or maybe it’s just not in the budget right now? Here’s a little secret: you can make a DIY winter wreath using a Christmas garland.
This is one of those simple projects that doesn’t take much time and uses items you may already have on hand.
**Some of the links in this post are affiliate links. This means if you click on the link and purchase the item, we will receive an affiliate commission at no extra cost to you. We appreciate your support. (disclosure policy)
In fact, it’s so easy it almost doesn’t need a tutorial—but I realized not everyone would think to do this, so I wanted to share it anyway.
Here’s a look at this gorgeous wreath!

Would you ever believe that it used to be a garland?
I know, plus you’re not going to believe how easy this is!
Let’s get started.
Gather Materials

Gather the following materials to complete this project:
- Real touch Norfolk garland- purchased from Walmart by My Texas House
- Circle wreath form
- Brown chenille stems- Hobby Lobby
- Wire cutters
- Battery-operated fairy lights
- White velvet ribbon- Hobby Lobby
Don’t worry if you don’t have these exact items—this wreath is very forgiving, and you can easily swap in what you already have.
Steps to Make a DIY Winter Wreath
Prep

Before you get started, cut the brown chenille stems (also known as pipe cleaners—if you grew up calling them that, like I did) in half.
I prefer brown because it blends with the base of the garland.
Having the stems pre-cut and ready makes attaching the garland quick and easy as you go.
Attach the Garland to the Wreath Form

For my wreath base, I used a round trim piece from one of our wall clocks after it fell and broke.
I liked the size and shape, so I saved it knowing I’d find a use for it someday—and it worked perfectly for this project.
If you don’t have a trim piece like this, no worries at all.
A basic wire wreath form from Dollar Tree works just as well, or you can check a thrift store for something round that can be repurposed.
The key is simply having a sturdy base to wrap the garland around—nothing fancy required.

To get started, attach one end of the garland to your wreath form using a chenille stem, twisting it tightly to secure it in place.
Then continue working your way around the form, attaching the garland at 4-inch intervals until the entire wreath is covered.
Fluff the Wreath

Once the garland is fully attached, you’ll notice thin spots where the form shows.
Take a few minutes to fluff the branches by gently pulling and shaping the greenery so it looks full and balanced all the way around.

A little fluffing goes a long way in making the wreath look finished and natural.
Add the Fairy Lights
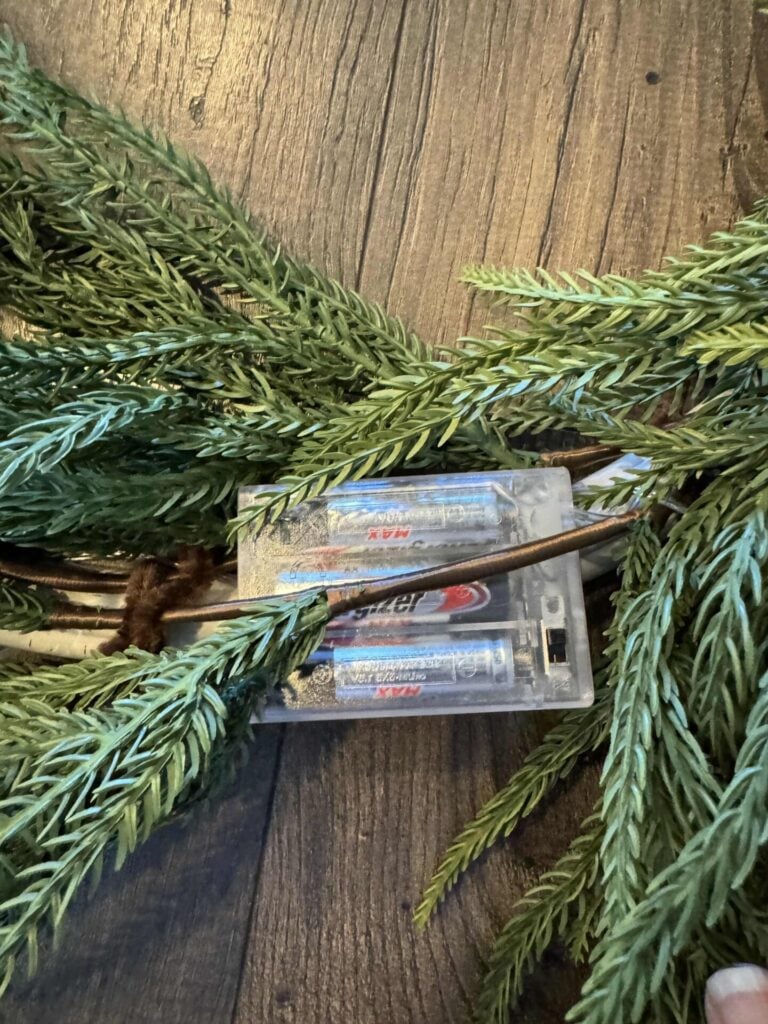
Next, it’s time to add the fairy lights.
Start by attaching the battery pack to the back of the wreath form using a chenille stem.
Be sure to position it so the switch faces outward and is easy to access—this makes turning the lights on and off much easier.
Carefully weave the lights in and out of the garland, working your way around the wreath.

As you go, tuck the wire between branches so it stays hidden, with only the soft glow visible.
There’s no right or wrong way to do this—just aim for even lighting and a natural look.
Finish with a Bow

To finish the wreath, tie a bow using the white velvet ribbon.
For a little extra stability, attach the bow to a floral pick so you can place it exactly where you want it.
You can adjust the surrounding branches to make it look natural and cozy.
This small detail really pulls the whole wreath together and adds a soft, finished touch.
Display The Wreath
Once your wreath is finished, it’s time to show it off!

I hung mine on a mirror in our living room, which instantly adds a cozy, seasonal touch without feeling like holiday decor.

You can also display your DIY winter wreath in other places around your home:
- On your front door to greet guests
- On an interior door for a subtle pop of greenery
- Over a fireplace mantel or mirror
- Inside a frame for a simple, neutral vignette
- On a wall hook or coat rack in an entryway
The beauty of this wreath is that it’s versatile—you can move it around and find the spot that works best for your space.
Closing Thoughts

And that’s it!
A simple DIY winter wreath using a garland that’s cozy, neutral, and perfect for decorating after Christmas.
It’s easy to make, looks beautiful, and uses items you may already have at home.
I hope this inspires you to add a soft, seasonal touch to your space this winter.
If you loved this idea, be sure to check out our Simple & Cozy Winter Decor Ideas to Use After Christmas post for even more inspiration to make your home feel warm and inviting all winter long.
If you enjoy the blog, please sign up for our email list so you won’t miss a post!
Until next time, follow us on Pinterest, Facebook, and Instagram!
Blessings, Donna and Rich
More Inspiration
Looking for more cozy DIY projects that are perfect for the winter months? Check out these posts:
- How to Make a Winter Simmer Pot
- Cozy Winter Wreath Made From Old Sweaters
- Super Easy Cinnamon Stick Candles
- Create a Winter Pinecone Wreath
- Tips to Make Cozy Home Decor With Old Sweaters
Pin It For Later
Don’t forget to pin the image below to one of your Pinterest boards (click the red Pin button in the top left corner).

Related Posts:


**Some of the links in this post are affiliate links. This means if you click on the link and purchase the item, we will receive an affiliate commission at no extra cost to you. We appreciate your support. (disclosure policy)
Simple, elegant and beautiful, Donna! This would fit right in around here…we are covered in snow. The evergreens are center stage!!
Thanks and enjoy the snow! It’s been so cold here I actually had to wear my winter coat, hat, and gloves to EPCOT yesterday, lol!!