Halloween is right around the corner, and I’m excited to share a DIY Halloween wreath that’s cute, playful, and perfect for your front door.
You see, I’ve never been a fan of scary Halloween decor—I like my Halloween to be fun, playful, and on the cute side.
**Some of the links in this post are affiliate links. This means if you click on the link and purchase the item, we will receive an affiliate commission at no extra cost to you. We appreciate your support. (disclosure policy)
This DIY Halloween wreath is precisely that: no creepy monsters, just cheerful ghosts, friendly bats, and textures that make it feel festive without being spooky.

It’s the kind of project that makes me happy every time I see it on my front door!
Whether you’re looking for a simple craft to add a cheerful Halloween touch or a unique project to try, this wreath is easy to recreate and sure to bring a smile!
Inspiration for My DIY Halloween Wreath
I knew I wanted to make a new wreath for our front door this Halloween, but honestly, I kept coming up blank.
So Rich and I headed to Michael’s for a bit of inspiration.
They had so many cute things this year that it was hard to decide, but I kept coming back to the bat and ghost picks.
Since I’d already made a couple of ghost DIYs for inside the house, I figured—why not keep the theme going?
I also loved the look of several of their black garlands and finally settled on one.
I still had no idea exactly how I would use everything, but into the cart they went!
Back at home, I told Rich it was time to pull out the Halloween storage tubs so I could do a little digging for inspiration.

After a few days, I decided to use one of my old wreaths as the base.
The rest of the project slowly came together from there.
I thought it would be fun to share the process with you, so that you can see how my creative brain works sometimes!
Now that you know the story behind this wreath, let’s take a look at the supplies I used to bring it all together.
Gather Materials

Gather the following materials to complete this DIY project:
- Base wreath- I’m using a DIY foraged moss wreath that I made last fall. You can use a grapevine wreath by itself or add some Spanish moss to it to get a similar look.
- 2 Black leaf garlands– Michael’s
- 6 Ghost/bat picks– Michael’s
- U-shaped floral pins– Michael’s
- Hanging ghost- Dollar Tree OR white fabric and a 2.8 x 5.8 inch styrofoam half ball
- Black felt- optional
Step-by-Step Instructions
Making this DIY Halloween wreath is easier than it looks!
In just a few simple steps, you can transform a basic wreath into a playful, cute Halloween decoration that’s full of texture and fun details.
Follow along below to see how it all comes together.
Prepare the Base

I’m starting with a DIY foraged moss wreath that I made last fall—its color and texture will be the perfect base for a cute Halloween wreath.
If you live in the South and have access to Spanish moss, you can check out my tutorial here to learn how to make your own.
If Spanish moss isn’t an option, no worries!
You can use a grapevine wreath by itself, or add a touch of store-bought Spanish moss on top to achieve a similar look.
I grabbed my Spanish moss wreath and started playing around with placement right on my driveway—this wreath does shed a bit, so I wanted to keep the mess outside!
Add the Garlands
Now it’s time to add the black leaf garland.

Using a U-shaped floral pin, I secured it to the back side of the wreath.
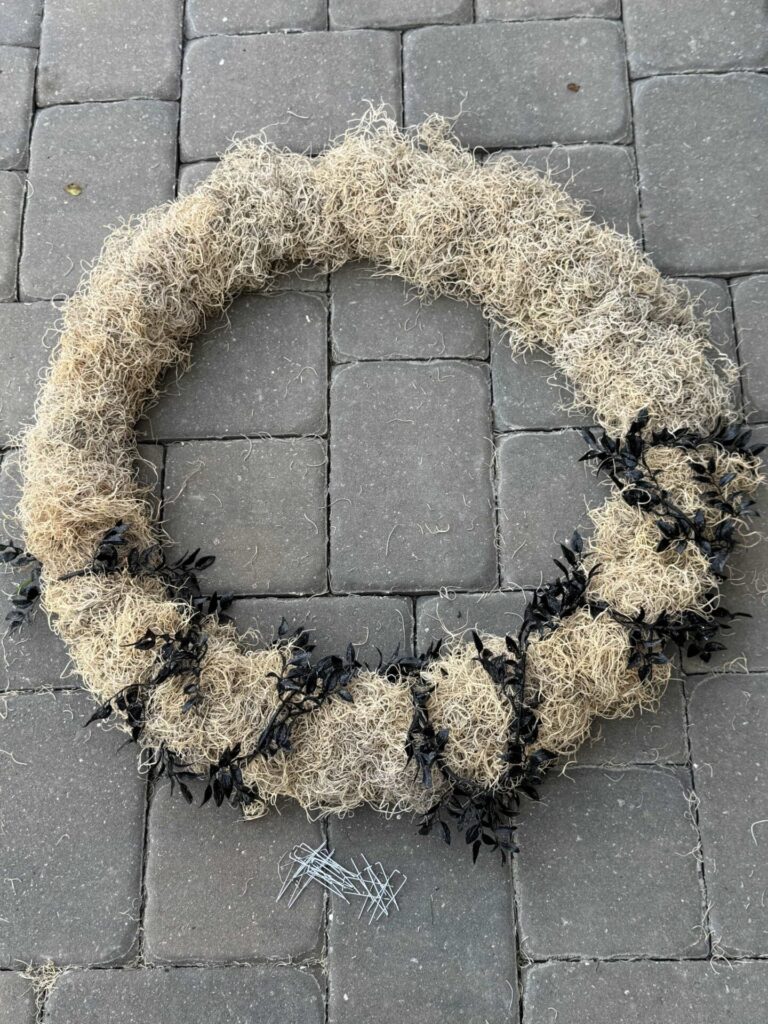
Instead of wrapping the garland around the entire wreath form (which wastes a lot of garland), run it in a zig-zag pattern across the front of the wreath.

One garland will cover about half of the wreath, so I used a second garland to fill in the rest.
Brainstorming the design
Before moving on, I had a brief brainstorming session to determine how I wanted this wreath to come together.

First, I laid the picks on one side of the wreath, but that felt too plain.

Then, I tried scattering the picks all the way around, and while it looked better, it still seemed like something was missing.
From the street, no one would even notice the details.

So, I went inside and started going through my Halloween storage tubs, bringing out this DIY bat from last year.
It’s cute, but I think it will blend too much with our black door.

Then. I tried this ghost I purchased from Dollar Tree.
I liked the contrast of the white ghost on the black door, but it just felt too small.
And then it hit me—I could reuse the hanging ghost from my Pottery Barn Lighted Ghost dupe I made last year!

As soon as I laid it down on the wreath, I knew we had a winner.
The only catch?
The ghost fabric is longer than the wreath itself, so I decided not to insert the picks just yet.
Instead, let’s attach the ghost centerpiece first and circle back to the picks afterward.
Attach the Ghost Centerpiece

Here’s the foam form that goes underneath the hanging ghost.
When I used this Dollar Tree hanging ghost last year for my Pottery Barn dupe, I couldn’t keep the original face—it didn’t quite match the look I was going for.
Instead, I glued on simple felt eyes so it resembled the Pottery Barn version.
Since they’re already in place, I’m using the same face this time, too. (If you’d rather keep things simple, you can skip the felt eyes and stick with the original face!)
Because the face I’m using sits in a slightly different spot, I need to cut a new hole for the string to pass through.

The new hole will be where the scissors are pointing.
Once that’s done, lay the ghost fabric over the foam and pull the strings through the hole.
If your ghost is as wrinkled as mine was, you will want to iron it. I used the satin setting, and it worked great!

Then, tie the ghost securely to the back of the wreath form and hang it on the door to make sure it’s positioned correctly.

Move the arms out to the sides of the wreath and use the floral pins to secure the ghost so it stays in place.
Insert the Picks
Now that the ghost centerpiece is secure, it’s time to add the picks.
The nice thing about using a Spanish moss base is that the picks slide in easily—no glue needed!
I started at the top and placed three picks down the right side of the wreath, then mirrored that with three more down the left side.

This keeps the design balanced while still letting the ghost in the center shine as the star of the show.
Feel free to play around with placement until you’re happy with the look—this is where your wreath really comes to life!
Display Ideas

Here’s our Halloween wreath hanging on our front door.
Since the Spanish moss tends to shed a bit, I prefer to keep it outside rather than risk little pieces ending up all over the house.

If you’d like to display yours indoors, consider placing it above a mantel, on an accent wall, or even layering it over a mirror for a festive touch.
Just keep in mind the shedding factor if you’re using real or foraged moss.

No matter where you hang it, this wreath makes such a cute statement piece for Halloween.
It’s playful, eye-catching, and adds just the right amount of seasonal charm!
Final Thoughts

I had a great deal of fun putting this project together, and I hope you enjoyed not only the finished product but also the brainstorming process that led up to it.
Sometimes my creative mind takes a few twists and turns before landing on the final design, and I thought it would be fun to bring you along for the ride.
This wreath turned out to be such a cute and playful addition to our front door, and I love how it continues the ghost theme I’ve been using this year.
I hope it inspires you to experiment with your own ideas and create Halloween decor that fits your style.
Remember, Halloween decor doesn’t have to be scary—it can also be charming, creative, and full of personality.
I’d love to know—do you prefer your Halloween decorations spooky or cute? Tell me in the comments below!
If you enjoy the blog, please sign up for our email list to stay informed about future posts.
Until next time, follow us on Pinterest, Facebook, and Instagram!
Blessings, Donna and Rich
More DIY Halloween Inspiration
If you enjoyed seeing this cute Halloween wreath, I’ve got plenty more festive ideas for you!
Here are five of my favorite Halloween DIY projects that are just as fun, creative, and budget-friendly:
- How to Make the Cutest Pumpkin Basket Ever
- Super Fun Ghost Painting DIY Art Project
- Simple DIY Halloween Ghost Apothecary Jars
- Festive DIY Halloween Bat Transformation
- DIY Rope and Twine Pumpkins
Pin It For Later
Love this idea?
Don’t forget to save it for later by pinning this picture to your favorite Halloween or DIY board on Pinterest.
That way, you’ll have it handy when you’re ready to make your own cute Halloween wreath!

Related Posts:


**Some of the links in this post are affiliate links. This means if you click on the link and purchase the item, we will receive an affiliate commission at no extra cost to you. We appreciate your support. (disclosure policy)
Love how this came together, Donna. It’s so cute and festive! It’s been so much fun to see how everyone is getting into Halloween lately. I love that this is quick easy for busy families too. It’s fabulous! Hugs, CoCo
Thanks, CoCo! Seems to get earlier every year. Several of our neighbors have already decorated outside their homes, so I feel like I’m behind, lol!!! Take care!
Super creative!! Love the use of the Spanish moss…kinda gives it that spooky cemetery vibe 🙂
Thanks! I had a blast brainstorming how to put it together!
I am with you Donna, I am not one for scary Halloween decor either. You made the perfection selection with the ghost front and center. I do love a good ghost project for Halloween, and yours is adorable, not to mention fun.
Hi Cara! So glad you like my cute Halloween decor! Now I just have to figure out how to decorate the rest of the porch! Take care!
Thanks for sharing with us, I’m featuring you when the next To Grandma’s house we go link party starts!
Hi Tarahlynn, That’s great news! It’s always an honor to be featured at your inspiring party! I’ll see you there! Thanks so much!