Seeking beautiful yet affordable summer decor? Transform empty bottles into beautiful DIY sea glass bottles with this easy coastal craft.
Summer is just around the corner, and what better way to kick off the season than with a breezy beach-inspired DIY?
**Some of the links in this post are affiliate links. This means if you click on the link and purchase the item, we will receive an affiliate commission at no extra cost to you. We appreciate your support. (disclosure policy)
Today, I’m joining the Celebrate the Holiday Blog Hop – Celebrating Summer Edition, where my talented blogger friends share their best ideas for making this season extra special.
Thanks to my friend Carol from Blue Sky At Home for hosting this inspiring blog hop!
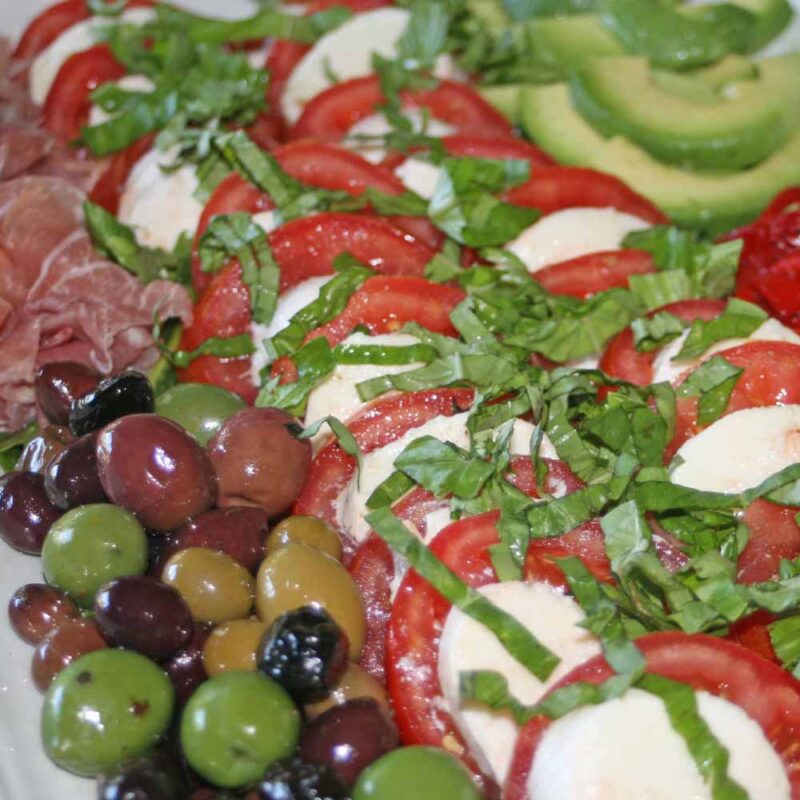
If you’re coming from my friend MaryJo’s blog, Masterpieces of My Life, I know you’re excited to try some of the summer salad recipes she shared!
If this is your first time visiting An Organized Season, welcome—we’re so happy you’re here! We’re a husband-and-wife team on a mission to transform our builder-grade house into a home we love, one project at a time. Each season, we tackle home organization challenges, decorate our spaces, and create budget-friendly DIYs to bring our vision to life. Our goal is to inspire you with practical tips and creative ideas to help you craft a home you love, too!
Be sure to visit all the blogs at the end of this post for inspiring ways to celebrate the start of summer!
Now, back to our project!

These DIY sea glass bottles are super easy to make and such a fun way to repurpose old bottles.
Wondering where I got this idea?
My Inspiration
The idea for this project actually came to me back in January when I was wandering through Renninger’s Antique and Collectors Extravaganza.
When I walked into this booth, I spotted these pretty blue and clear bottles in a basket, giving off a beachy vibe.

They were so simple, but I knew I wanted to recreate this look!
Then, in another booth, I saw this…

An adorable small bottle topped with a pretty seashell!
I wondered if I could incorporate both ideas into a single project.
So I tucked the idea away and waited (not-so-patiently) for the warmer weather to arrive.
Now that summer’s on the horizon, it’s finally the perfect time to bring this coastal DIY to life!
Let’s get started!
Supplies Needed to Make DIY Sea Glass Bottles

Believe it or not, you can create these pretty coastal bottles from items you already have at home that you would normally toss in the trash or, better yet, the recycling bin!
- Empty glass bottles (such as liquor bottles, spice jars, and condiment bottles) – Look for interesting shapes and sizes to add variety.
- Sea glass spray paint – I used Krylon Sea Glass Paint in Aqua, which I purchased from Hobby Lobby.
- Twine- white jute twine
- Sand
- Seashells, Starfish, Miniature shells
- Drill
- Super glue
- Hot glue gun, glue sticks
- Finger protectors
- Scissors
- Paint (optional)- FolkArt Vintage White
How to Make DIY Sea Glass Bottles
This project is super simple and totally customizable!
Here’s how to turn those empty bottles into beach-inspired beauties:
1: Clean & Prep the Bottles

- Start by removing any labels from your bottles that can be peeled off.
- Some will be stubborn, so soak them in warm water for about 30 minutes, then peel off the labels.
- If any sticky residue remains, remove it with Goo Gone.
- Wash them in warm, soapy water and let them dry completely.
2: Spray with Sea Glass Paint
The color of your bottles will be determined by the number of coats of paint you apply to them.

The bottle on the left has one coat, the middle has two coats, and the right bottle has three coats of spray paint.
Here are the steps to spray paint your bottles:
- Take your bottles outside or into a well-ventilated area and place them on a protected surface, such as a cardboard box or drop cloth.
- Shake your sea glass spray paint until the balls inside rattle, and then continue shaking for an additional two minutes.
- Hold the can 10” to 12” away from the bottle and apply a light, slightly overlapping layer on each side.
- Let it dry for one minute, then apply a second coat (and a third, if needed) until you achieve the desired color and coverage. Remember, the bottle will look less translucent with each coat.
Tip: Don’t worry if the finish looks slightly uneven at first—it will even out as it dries, giving you that natural sea glass look.
3: Add Coastal Embellishments
Once your bottles are completely dry, it’s time to decorate!

If you don’t have shells to work with, I suggest the mesh bag from Walmart, pictured above.
If you want starfish or miniature shells (to go inside the bottles), check out Hobby Lobby!
Now we’re going to adhere shells to the top of our bottles.
Some have screw-on or wood lids, and others have corks.

- Drill holes into the lids that are not made of cork.
- Paint the lids- this step is optional, but I’m using white twine to cover them and don’t want the dark colors to show through.
- Use super glue to attach the shells to the lids and let them dry.

Wrap the painted lids with twine, securing it with hot glue.
Tip: Be cautious when working with hot glue, as it can cause burns. We highly recommend using silicone finger protectors to keep your fingertips safe while you’re pressing down twine or embellishments.

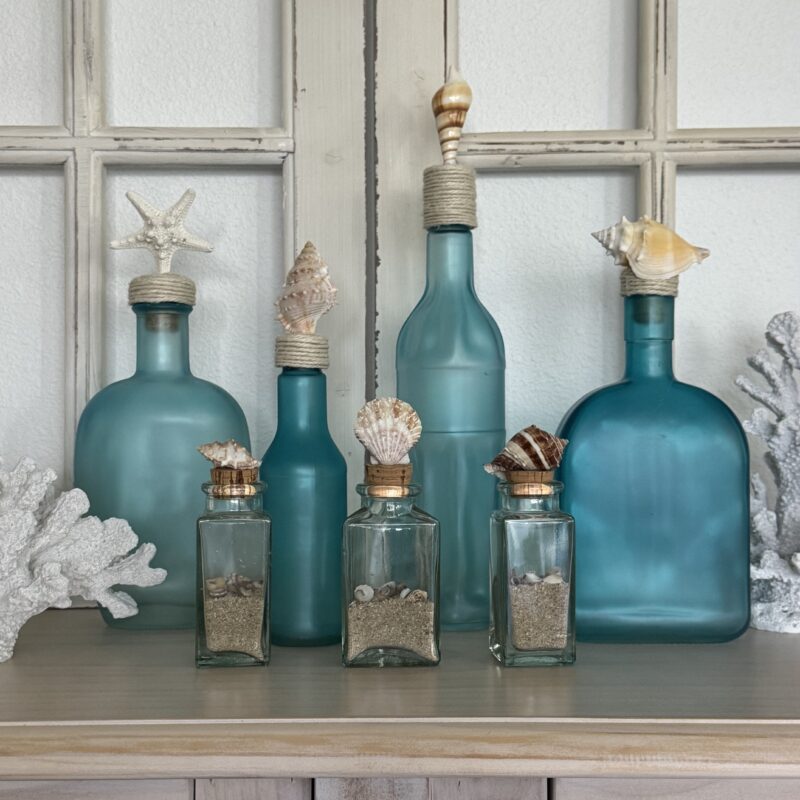
I’m thrilled with how my DIY seaglass bottles turned out!
How to Style Your DIY Sea Glass Bottles

Once your bottles are painted and prettied up, the fun doesn’t stop there!

I decided to create a coastal vignette with mine by placing them on a tray covered with a decorative fishing net.

Then I added a couple of pieces of coral to complete the look.
Here are some other simple ways you can decorate with them and bring that breezy, beachy vibe into your home:
- Use as Summer Centerpieces– Arrange your bottles down the center of a dining table or picnic table for a laid-back summer tablescape. You can leave them as is or add a few faux flowers, dried stems, or grasses inside.
- Brighten Up a Windowsill or Shelf– Place a row of bottles along a sunny windowsill or on an open shelf. The light filtering through the sea glass paint adds a soft, dreamy glow.
- Turn Them Into Candle Holders– Use larger bottles to hold taper candles or fill them with fairy lights for a magical nighttime glow—perfect for outdoor summer gatherings!
Closing Thoughts
I hope this simple DIY inspires you to save a few bottles and give them a beachy makeover.
It’s such an easy and affordable way to add a touch of summer to your home!
Don’t forget to check out all the fantastic ideas shared in the Celebrate the Holiday Blog Hop at the bottom of this post! Or you can hop over to see Missy from Sonata Home Design now and see how she made beautiful wall art from a tablecloth!
If you enjoyed this post, please consider joining our email list for more DIY inspiration, seasonal decorating ideas, and access to our free printables to help you organize your entire home.
Blessings, Donna and Rich
But wait, don’t leave yet, we have more DIY Coastal decor ideas we’d like to share with you!
More DIY Coastal Decor Inspiration From Our Blog
If you’re as excited for summer as we are, it’s time to make these beautiful decor items, so they’ll be ready when the season begins!
- DIY Coastal lantern made from a pickle jar
- Simple DIY rope wreath with a nautical vibe
- How to make seashell-themed candles
- Easy DIY oyster shell trinket dishes
- Create a gallery wall with inexpensive shell art
Pin It For Later
If you enjoyed this project, be sure to Pin it for later and share it with a friend who loves coastal decor (hover over the picture and click the red Pin button in the top left corner).

Celebrate The Holiday Blog Hop

Click each link below to see what my creative blogging friends are doing to kick off summer!
Bluesky at Home – Summer Picnic Ideas
Related Posts:


**Some of the links in this post are affiliate links. This means if you click on the link and purchase the item, we will receive an affiliate commission at no extra cost to you. We appreciate your support. (disclosure policy)
Your seaglass bottles are so “boutique chic!” Such a great idea for summer decorating! Thanks for a great tutorial!
Thanks so much Missy! I adore the phrase boutique chic! It’s always fun “partying” with you! Have a great day!
I love this Donna! As always you’ve outdone yourself. They look beautiful. They give perfect coastal vibes and I love how you styled them, You would never know they were recycle bin bound. I’ve been on a painted glass kick this year so this is inspirational. Pinning for later. Thanks for sharing friend. XO- MaryJo
Isn’t it amazing how a little paint can totally transform something so plain! I can’t wait to think of other ways to use it! Thanks so much MaryJo!
Thank you for sharing this idea with us! I can’t wait to try making a few of my own! Happy Summer!
Glad you like them Kimberly! I hope you’ll try it! Thanks!
Love it Donna. Great tutorial!
Thank you Cindy! I appreciate you stopping by!
I love how you found inspiration from objects at an antique fair and totally created your own!! Such fun decor pieces for the Summer!
Thanks Rachel! I’m thrilled with how they turned out! I wish you could go to Renninger’s with me sometime, you would absolutely love it! Thanks and have a wonderful day!
You explained making sea glass bottles so well The best thing are how you added the tops with twine and sea shells. So pretty and adds such a nice touch. I painted bottles with sea glass years ago, but never thought of the lids. Thanks for sharing this pretty summer project.
Thank you Carol, I thought the seashell toppers would add a fabulous touch! Glad you think so too! Now I can’t wait for summer!
Your bottles turned out spot on Donna. In my opinion, it is difficult to get the spray paint just perfect onto the bottles. I tried this years ago, and mine are quite opaque, but yours are a lovely sea glass color. I may have to give it another try and see if I can pull it off since I like to think I am a bit more experienced now. Love the way you look for inspiration, I do this too!
Thanks Cara! I’m always on the lookout for new ideas! I was surprised the instructions on the can said to shake until the balls rattled and then an additional two minutes. That’s a lot of shaking, but I wonder if that has something to do with the transparency? It was fun and I hope you’ll try it again! Great way to keep bottles out of the trash and recycling bins!
These are gorgeous, Donna! Congrats on your feature at Karin’s Kottage! I’ve pinned this to my Coastal board!
Thank you so much Julie! I just shared them on your link party! I’m so glad you like them! Have a great week!
This feels like such a special way to celebrate the summer season, Donna. I love that you found inspiration at Renningers too. I love that place! The spray paint color you chose looks just like sea glass which is wild to me. You totally nailed it lady! Thanks for giving us fun craft ideas to try. Big hugs, CoCo
Thank you my friend! Did you know Renninger’s is having a spring yard sale next weekend? I thought they only had them in the summer. We are going to go, I hope it’s as good as the summer ones! Glad you like the sea glass spray, it’s so easy to use!
Help, I can’t find sea glass paint anywhere. Could you help me out I am wanting to paint and place in groups of 3 for wedding table centrepieces with baby’s breath. Thanks for any help you can give me
Hello! I purchased mine from our local Hobby Lobby but don’t see it on their website. You can order from Amazon but I only see that it’s available in a 6 pack. Here’s the link if you’ll be spraying a bunch of bottles! Sea glass spray paint six pack Actually, I found a link for just one can! Hope this helps! Single can sea glass spray paint