Tired of your outdated bathroom but not ready to take on a complete renovation? A no-demo bathroom makeover might be exactly what you need!
We transformed our primary bathroom without tearing out tile, replacing cabinetry, or doing any major construction—and the results completely changed the look and feel of the space.
**Some of the links in this post are affiliate links. This means if you click on the link and purchase the item, we will receive an affiliate commission at no extra cost to you. We appreciate your support. (disclosure policy)
If you’re looking for simple, budget-friendly ideas that make a big impact, keep reading to see how we gave our bathroom a fresh new look without the mess or expense of a complete remodel.

I’m thrilled to reveal our master bathroom makeover!
If you’ve been following the blog since we moved to Florida, you already know that we bought this house, despite not liking any of the bathroom design choices.
If I had an infinite budget, I would renovate every bathroom in the house from scratch.
However, we’re living in real life here, and we have a limited budget, so there won’t be a demo happening during this bathroom makeover.
If you’re looking for great tips on how to makeover a bathroom on a budget, keep reading!
Before and after
Are you ready to see a before picture?
We don’t think the elements coordinate well with each other.
But I’ll let you be the judge, what do you think?

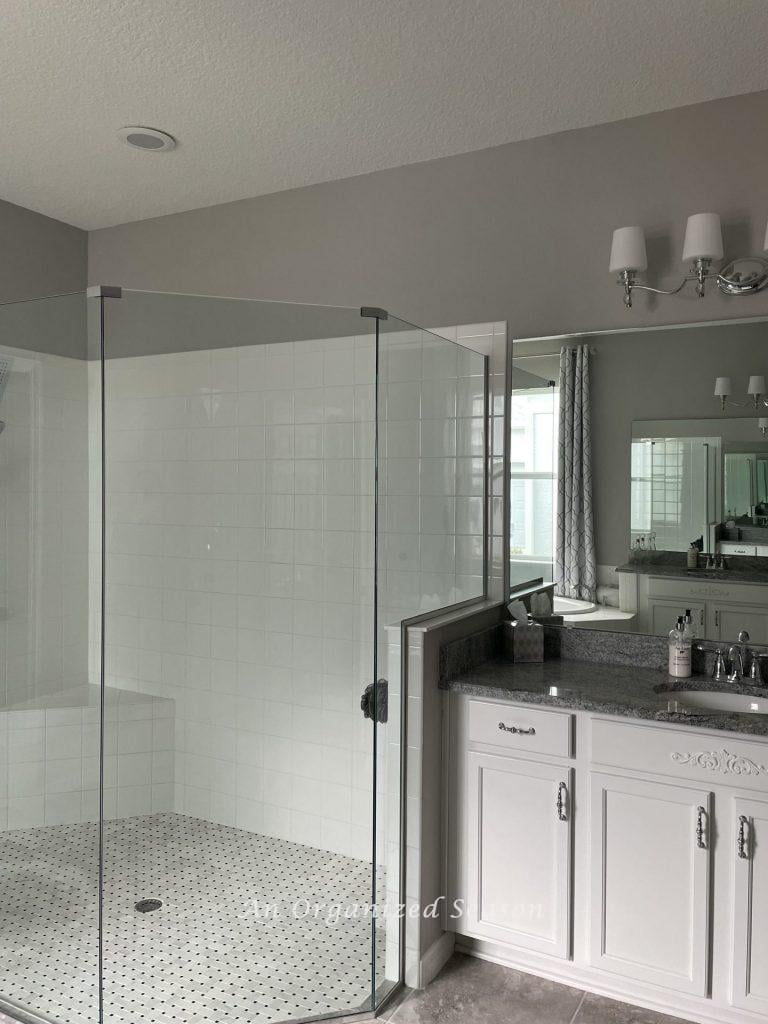
The brown cabinets don’t match the granite.
The shower floor features colors that match the vanity, but the style does not complement each other well.
The square white tiles, lack of hardware, and lighting all scream builder-grade and boring.
It’s unfortunate because you don’t have to use expensive products to achieve an elegant, more luxurious look in a bathroom.
But never fear, after several DIY projects, now it looks like this!
What do you think?
HOW TO BEGIN A BATHROOM no demo MAKEOVER

Starting a bathroom no-demo makeover might feel overwhelming at first, but don’t worry—take it one step at a time.
The key is to focus on cosmetic updates that make a significant visual impact without tearing anything out.
Here’s how to get started:
- Assess what you already have
Take a good look at your bathroom. What do you like? What feels dated or worn? Create a list of items you want to refresh, such as paint, lighting, mirrors, or hardware. - Pick a color palette
Choosing a cohesive color scheme will instantly make the space feel more polished. Think about the mood you want to create—calm and spa-like, bold and modern, or something classic and timeless. - Set a budget
One of the best aspects of a no-demo bathroom makeover is that it doesn’t require a significant investment. Decide how much you’re comfortable spending and prioritize the projects that will give you the most bang for your buck. - Gather inspiration
Scroll Pinterest, flip through magazines, or browse home décor blogs (like this one!) to spark ideas. Save photos that reflect the look you’re going for. - Start small
Begin with one easy update, like changing out cabinet hardware or adding a new shower curtain. Small wins build momentum!

Eight Areas TO address in a BATHROOM makeover
To give your space a fresh, new look without a complete renovation, focus your no-demo bathroom makeover on eight key areas: window treatments, walls, updating the shower head, lighting, floors, furniture, mirrors, and accessories.
Simple updates in each of these areas—such as swapping out outdated items or adding stylish touches—can completely transform the overall feel of the room without requiring demolition or significant expense.
Here are the tips and tricks that allowed us to completely makeover our bathroom without having to demo a thing.
1) Window Treatments
When we first moved in, privacy was my top priority, not style.

Our bathroom window is just a few feet from our next-door neighbor’s front porch, and it’s directly across from our glass-enclosed shower!

So, lined curtains were a must.
Since the walls are gray, I chose a white curtain with subtle gray embroidery that complements the space beautifully.

I love the simple design—it’s clean, classic, and still offers the privacy we need. I purchased them at Bed Bath & Beyond.
2) WALLs
Let’s talk about the walls—paint and tile!
First up, paint color.
When the house was built, the previous owners paid for a paint upgrade, so instead of builder-grade white, every room was painted Silverplate by Sherwin-Williams.
While we have plenty of other DIYs to tackle in this space, painting isn’t on the list just yet. So for now, I’m learning to love Silverplate!

Now onto the wall tile.
Honestly, it’s as basic as it gets—white 4×4 builder-grade squares.
Not my favorite, but at least they’re neutral and easy to decorate around.
As I like to say, sometimes you just have to make lemonade out of lemons!
Oh, and side note: I’m still not a fan of these textured walls.
I thought I’d get used to them, but nope! Florida builders, what’s the deal?
3) Update Shower Head
One of the easiest and most satisfying updates we made was replacing the builder-grade showerhead.

The original fixture was tiny, and in a large shower, it looked completely out of place!
We found an affordable rain-style showerhead with a detachable handheld sprayer, and it made such a huge difference.
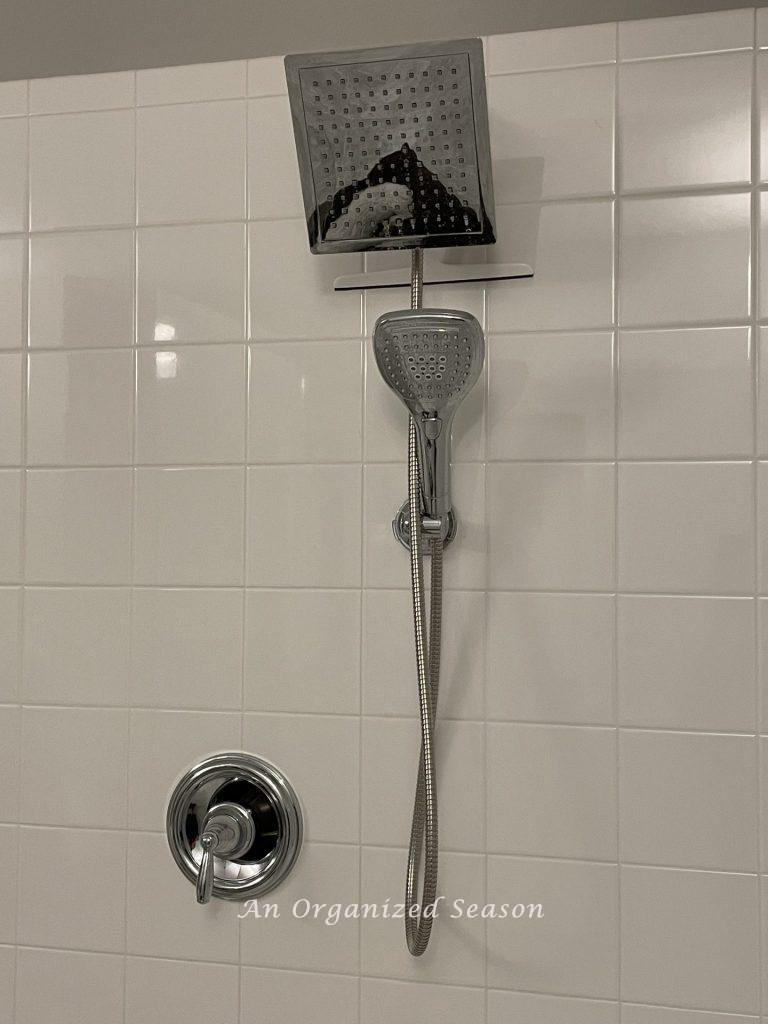
Not only does it look better, but it also feels more spa-like and luxurious.
This was a quick DIY project that required no demolition and minimal tools.
If you’re still using your original showerhead, this is definitely a change worth making.
Would you like to try it in your bathroom? Click to learn how to install a new showerhead!
4) Lighting
One of the easiest ways to reflect your decor style in any room—especially during a no-demo bathroom makeover—is through lighting.

And let me tell you, those builder-grade vanity bar lights had to go.

They were way too bright and didn’t convey the casual elegance I was aiming for.
I found the most elegant chrome light fixtures I could afford.

They’re the perfect blend of classic and charming.
I ordered them from Wayfair, and I couldn’t be happier with the result!
Want to try this easy update for yourself? Click here to learn how to replace a bathroom light fixture.
5) Floors
In this step of our no-demo bathroom makeover, we tackled both the shower floor and the main bathroom flooring.
Shower Floor
Did you know you can tile over existing tile?
Our builder recommended it as the easiest way to transform the space without tearing anything out.
The tile store agreed that it was a good option, as our shower was in great shape with no water damage.
That’s how we pulled off such a dramatic update—without demolition!
The original shower floor was actually an expensive upgrade, but it didn’t match our style at all.

It had a rustic, cabin-in-the-woods vibe, which just didn’t work with the rest of our home.
So, we tiled right over it.
Important note: Do not tile over tile if your shower floor has mold or mildew, is uneven, or is retaining moisture! Consult a builder or contractor before doing this in your home.
We chose a gray and white marble mosaic tile with a touch of black that ties in with our granite countertops.

It instantly gave the space a more refined feel.
Click here to learn our tips for tiling over existing tile.
Main Floor

The main floor tile is a very basic gray and, truthfully, not my favorite.
It even takes on a pinkish tone in certain lighting.
While it doesn’t clash with the new shower tile, it doesn’t precisely coordinate either.
I’m considering painting the tile white and stenciling a design over it!
I’ve just added that idea to my ‘Personalize the Master Bathroom’ printable.
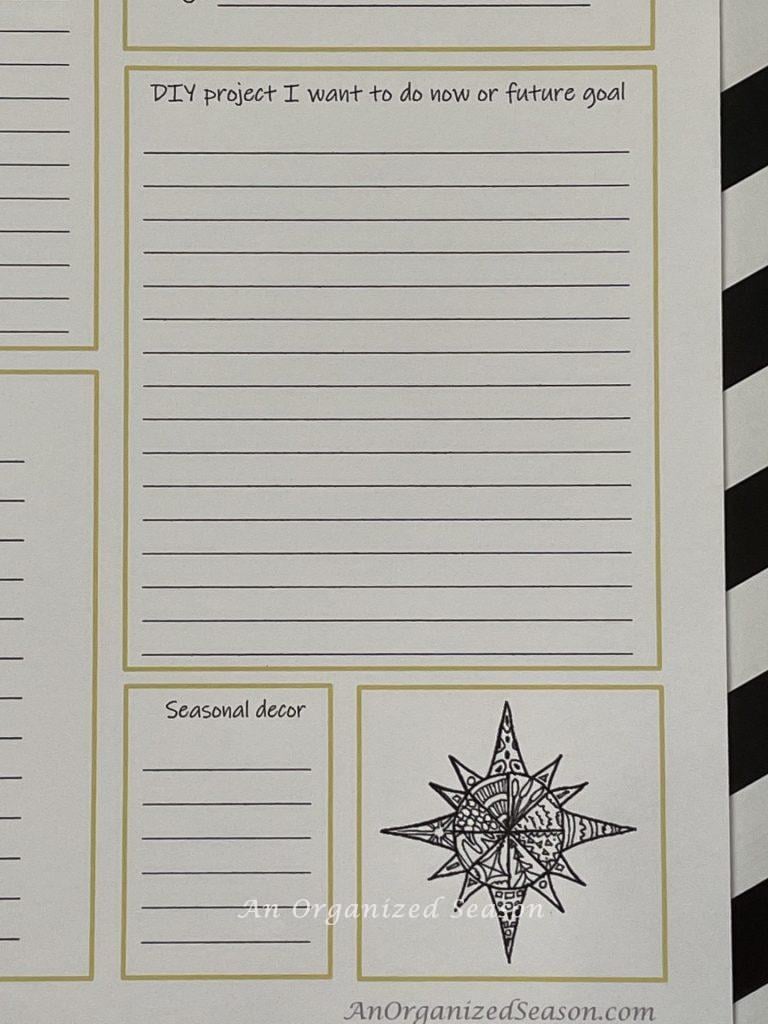
If you want a copy to help plan your own space, click HERE to sign up for our emails!
6) Furniture
Let’s count the bathroom cabinets as furniture for a moment, because updating them made a huge difference in this space!

The original finish was a dark brown that clashed with the granite countertops and felt way too heavy for the room.

We gave them a fresh new look with Sherwin-Williams Pure White paint.

Next, we added elegant chrome hardware.

Then, we finished them off with a decorative wood embellishment.
The transformation was incredible—light, bright, and so much more in line with the casually elegant look we were going for.

The only other real piece of furniture in the room is the vanity chair.
I had plans to paint it white, but didn’t quite get that far.
I did, however, recover the seat using some leftover fabric from my DIY cornhole beanbags (yes, really!).

The gray, white, and black tones in the fabric coordinate beautifully with the rest of the space.
It’s a small detail, but one that helps the entire room feel more cohesive.
To learn how to reupholster chairs, click here.
7) mirrors/wall decor
Initially, I had big plans to add decorative frames around the bathroom mirrors to give them a more finished, custom look.
However, after tackling numerous other DIY projects in this space, both time and budget were running low.
So, I jotted it down on my Personalize the Master Bath printable to revisit later.
Well… I’m happy to report that since publishing this post, we have finally completed the framed mirror project, and it has made a significant difference!

If you’d like to see how we did it (and how you can too!), click to see how to upgrade your mirror with a DIY frame.
We also added unique wall hooks that are both stylish and functional—a small touch that brought in character and charm.

You can see how we added framed DIY towel hooks next to the vanities.

And how we added personality with unique wall hooks made from wood molding over the tub.
8) Accessories
Accessories are one of the easiest and most budget-friendly ways to bring your decor style into a space, and they’re perfect for a no-demo bathroom makeover!
Before buying anything new, I always like to shop my home first.
You’d be surprised how many beautiful things you already own that can work in a new space.

To conceal an electrical outlet on my vanity, I borrowed a floral arrangement from another room.
I also added a few vintage perfume bottles that belonged to my great-grandmother—they’re not only beautiful but also hold a great deal of sentimental value.

I remember seeing them on a little shelf in her bathroom when I was a child, and now they bring such a sweet, personal touch to mine.

For everyday essentials, I grabbed a couple of apothecary jars to keep things tidy and pretty.
I also added a fleur-de-lis soap dish and some clearance finds from At Home, including candle holders, a dried floral arrangement, and
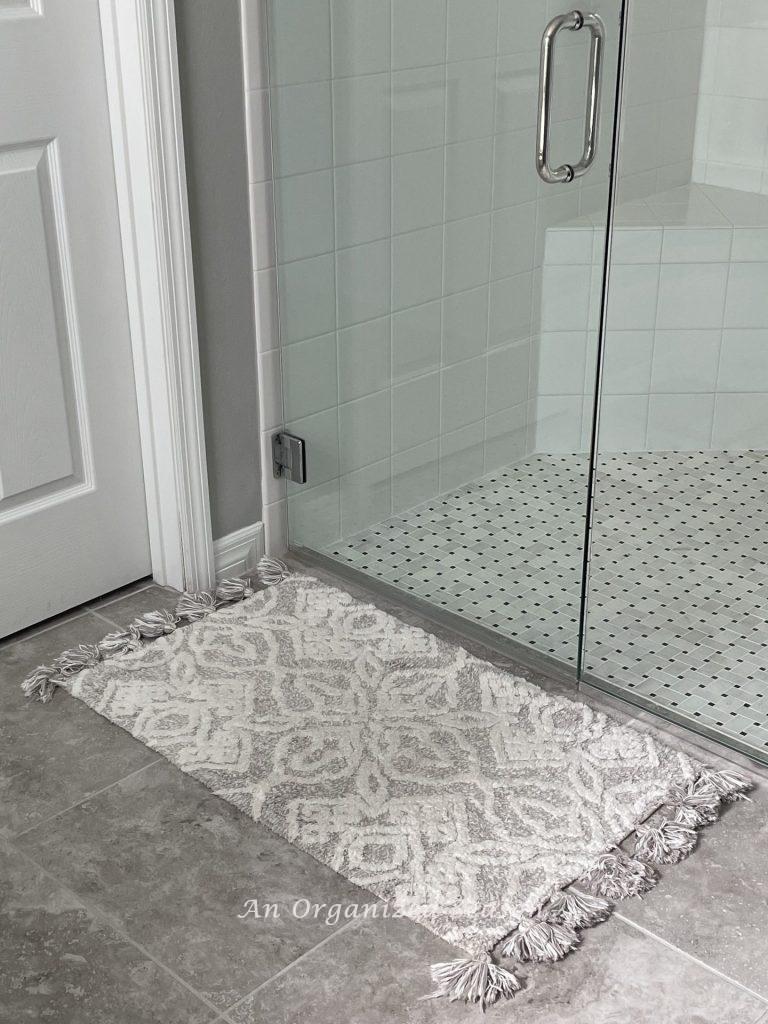
This gorgeous bath rug.

Since the mirror is just a bit too far away (a common struggle once you’re over fifty—can I get an amen?), I picked up a magnifying mirror along with some glass containers from HomeGoods.
I placed them on top of a white platter to create a functional and stylish little vignette.
In Conclusion
I hope this makeover shows you that it’s totally possible to transform a space without tearing it apart—just a little creativity, some smart updates, and a lot of love can go a long way!
This no-demo master bathroom makeover has made such a difference in how we use and enjoy the space every day.
And the best part?
We were able to work with what we had, stick to a budget, and still create a room that reflects our style.
If you’re planning a bathroom refresh, we’d love to hear about the projects you’re dreaming up—please share them in the comments!
If you enjoy the blog, please sign up for our email list to stay up-to-date with our latest posts.
Until next time, follow us on Pinterest, Facebook, and Instagram!
Blessings, Donna and Rich
More Room makeover inspiration
If you love to see room makeovers, check out these posts:
- Eat-in Kitchen Makeover
- How to Makeover a Bedroom into a Rustic Retreat
- Beautiful French Country Inspired Makeover
- Boring Bedroom Makeover for a Gamer
- Bedroom Makeover on a Budget
Related Posts:


**Some of the links in this post are affiliate links. This means if you click on the link and purchase the item, we will receive an affiliate commission at no extra cost to you. We appreciate your support. (disclosure policy)
So many really nice touches!
Thanks a lot, I think it looks so much better! Donna