Have you ever dreamed of transforming your bedroom into a rustic retreat? Today, we’ll walk you through the essential steps to makeover a bedroom—from choosing a color palette to incorporating rustic decor elements—so you can enjoy a peaceful sanctuary that feels like a retreat every day.


Our youngest son has been living in a very dull bedroom.
**Some of the links in this post are affiliate links. This means if you click on the link and purchase the item, we will receive an affiliate commission at no extra cost to you. We appreciate your support. (disclosure policy)
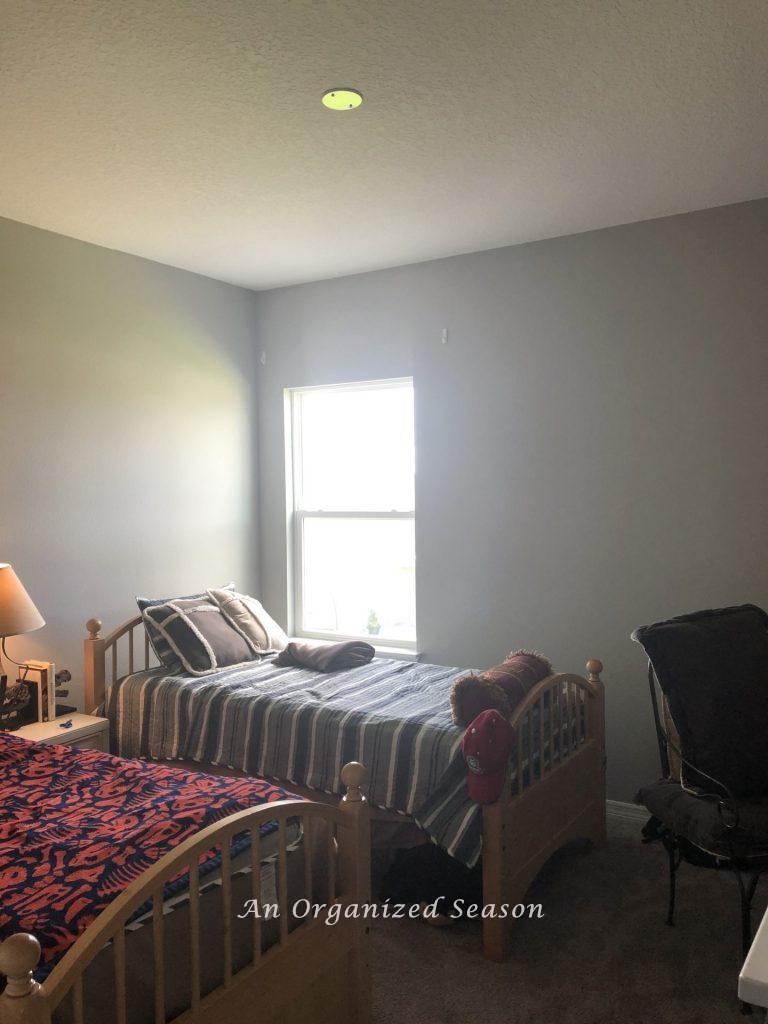
He had four gray walls, gray carpet, and hand-me-down furniture that didn’t match.
He goes to college in Montana but will be spending summers and holidays with us.
He’s a great student and hard worker, so I wanted him to have a bedroom he would love to visit and feel comfortable in.
I can’t wait to show you how I will make his bedroom a rustic retreat!
I have to do something to get him excited about coming home to visit!
Besides warm weather, theme parks, beaches, and bird watching!
A boring bedroom
When I described his bedroom as boring, I was not exaggerating!
Here are the “before” pictures to prove it!

We brought twin beds from Kentucky, but Harrison had no other furniture for his room.
I let him borrow a table from our bedroom to put between the beds.
The lamp was from our family room in Kentucky.

He was using our camping table as a desk and one of our kitchen chairs to sit on.
He added lots of pillows for comfort, lol!!
Poor kid has a mish-mash of items that don’t match and plain, gray walls!
That’s about to change!
Let’s get this bedroom makeover started!!
How to start a bedroom makeover
Before I decorate a room, I ask myself the following two questions.
Do I have a decor style?
My favorite decor style is French Country.
That is the direction I have taken with the main living areas of our home.
However, when it comes to the boys’ bedrooms, I want them to feel comfortable and at home in their personal spaces.
So, I asked our youngest son what he wanted his room to look like.
He said he loves wood paneling and wanted his room to feel cozy.
I knew then I wanted to do a feature wall with wood.
He needs furniture, so we’ll look for something rustic!
It will be so fun to make this bedroom a rustic retreat just for him!!
Do I have an inspirational piece or color?

We originally purchased the bedding to match the gray walls and carpet.
It’s new, so I’ll use it as my starting point!
I also plan to incorporate navy, tan, brown, and white and use black accents!
Seven steps to decorate a room
Now that I’ve answered those two questions, I have a definite direction to head.
But when a room is empty, or you want to change or update everything about it, where do you begin??
Here is the natural progression I determined worked for me.
I have seven easy steps to makeover this bedroom into a rustic retreat!
The seven steps include window treatments, lighting, walls, floors, furniture, wall art, and accessories.
1) Window Treatments

When you have an empty room, you first want to hang curtains to give you privacy.
In the “before” picture, you can see command hooks above the window on which the previous curtains were hanging.
Those curtains were brown and would have matched the room, but they were too short.
Harrison likes his room to be very dark when sleeping, so I bought blackout curtains.
I chose white to match the white stripes on his bedspread!

The curtain grommets are pewter, and I found an industrial-looking rod in the same color!
Lighting

Lighting is a focal point when theming or styling a room.
Harrison wanted a rustic, cozy feel, and this light gives that vibe!
I love how it looks, but I must be honest and say that it does not provide adequate light.
He liked it, so I kept it!

Since he needed more light, we kept this lamp on his bedside table.
It looks great now because I did a complete lamp makeover on it!!

Harrison did not want a desk lamp, but when I saw this lantern, I had to have it for his desk.
It adds so much character to the room!!
It doesn’t put out much light, so technically, it functions as a night light!
Below are two pictures with the lights on!

It truly is a cozy retreat!!

Here’s the cute lantern giving off a warm glow in his room!
Walls
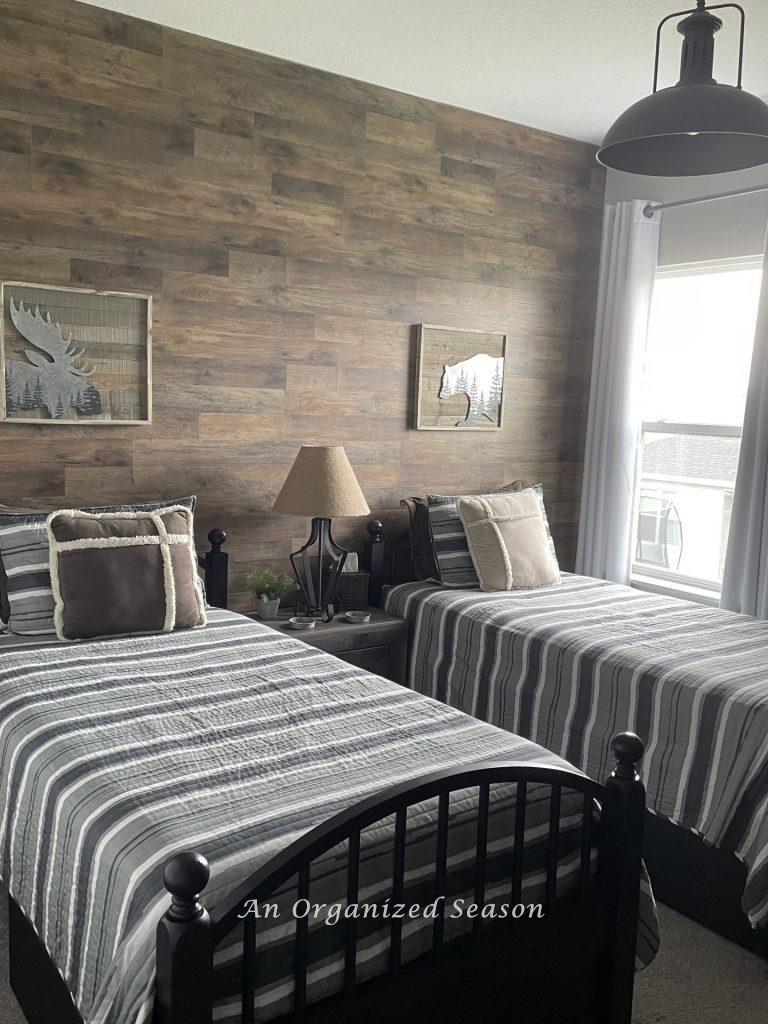
I am so excited about this wood-feature wall and adore how it turned out!

Believe it or not, it’s flooring, but we decided to put it on the wall instead!!
If you enjoy seeing DIYs, check out this post about installing flooring on a wall!
Floors
The floors are the only thing we did not change in the room.

We’re stuck with the carpet for now, so I worked around it!! Thank goodness it matches!
Furniture
Being the youngest kid meant Harrison often got hand-me-downs, from clothes to furniture!
I’m so excited he will get some new furniture for the first time!!

He opted for a desk and shelves instead of a dresser.
This setup is functional for him and allows him to display some of his favorite things.
The drawers are great for storage, and the desk is perfect for his laptop!

If you remember the “before” picture, these beds were light wood.
I know light-colored wood is coming back in style.
But we’ve had these beds for twenty years.
I was tired of them and thought painting them black would complement the black accents on his new furniture.
You can see how I refinished the twin beds with chalk paint here!
Wall art

We brought these prints with us from Kentucky.
The rustic wood frames and navy blue and white design match the room perfectly.

I gave this dinosaur canvas to Harrison years ago.
He loved it when he was younger, but it was not anatomically correct, so he refused to hang it in his dorm room.
That’s a paleontologist for you!!

Harrison wanted to display his Disney pins, so we bought this corkboard above his desk.
If you’re a Disney fan, you probably noticed he placed the pins in the center in the shape of a hidden Mickey!!

I bought the art above his beds before purchasing the wood flooring for the walls.
I could not believe how closely it matched.
At first, I thought it was too matchy and wanted to find something else to put above the beds, but after looking at it for a while, it’s growing on me!
Accessories
Accessories are like the icing on the cake!
They may be small, but they can make or break a room!

I added a rustic tissue holder and a small plant to the bedside table.
The coasters are mason jar lids with corkboard bottoms that are cute but very functional!!

He has some rustic pieces on the desk!
He still can’t bear to get rid of some of the Star Wars Legos!!

A few of his dinosaur books and collectibles!
Who knew he would never grow out of dinosaurs??
I can’t wait to see where life takes him as a paleontologist!
The finished Room
Here’s a look around the finished room!


Conclusion
Well, friends, our bedroom makeover is complete in seven easy steps!
Combining natural materials, earthy tones, and cozy textures made this space a rustic retreat that radiates warmth, charm, and relaxation.
Do you think our son will want to visit us more often to escape from the hustle of college life?
We sure hope so!
Blessings, Donna and Rich
want to see more makeovers
If you love before and afters, click the links below for other fun makeovers we’ve done!
- Eat-in Kitchen Makeover
- Beautiful French Country-Inspired Makeover
- No Demo Primary Bathroom Makeover
- Fabulous Table Set Makeover with a Stencil
- Four Beautiful Living Room Table Makeovers
If you enjoy the blog, please sign up for our email list so you won’t miss a post!
Until next time, follow us on Pinterest, Facebook, and Instagram!
**Some of the links in this post are affiliate links. This means if you click on the link and purchase the item, we will receive an affiliate commission at no extra cost to you. We appreciate your support. (disclosure policy)
New look is great for Harrison! I know you had a ball pulling it all together.
I had a great time putting this room together! It was a lot of work, but Harrison is worth it!! Thank you!!
Looks great! I love the Disney pin board. What a great idea. And the hidden Mickey is the best! XO- MaryJo
Thanks so much! My son loves visiting Disney and finding hidden Mickey’s throughout the park! Have a great day! Donna