If you’re looking for a fun and easy craft, this DIY seashell ball is the perfect coastal accent for your home!
I recently made one, and I’m so excited to show you how simple it is to put together.
**Some of the links in this post are affiliate links. This means if you click on the link and purchase the item, we will receive an affiliate commission at no extra cost to you. We appreciate your support. (disclosure policy)
Whether you’re decorating for summer or want to keep those breezy beach vibes going all year long, this project adds a beautiful touch of the coast to any space.
Grab some seashells (store-bought or collected from your favorite beach), and I’ll walk you through the steps!
Gather Supplies

Here’s everything you’ll need to create your own DIY seashell ball:
- Paper Mache Ball – I used a paper mache ball as the base. I purchased it at Hobby Lobby. It was meant to be an ornament, but the string was missing, so they discounted it! You can find these at most craft stores or online in various sizes.
- Seashells – I picked up a bag of assorted shells from Walmart, but you can also use shells you’ve collected or purchase them from a craft store or Amazon.
- Hot Glue Gun and Glue Sticks – I use my glue gun on the high setting, which works best for securing the shells.
- Finger Protectors – These little silicone covers are a game-changer for hot glue projects! They’ll help protect your fingers from burns while you’re placing the shells.
- Mason Jar Lid – This serves as a stand to hold the ball steady while you work.
- Paint – Choose a paint color that complements your shells best.
- Paintbrush
Steps to create a DIY seashell ball
This project comes together in just a few simple steps!
Here’s how to make your own beautiful coastal accent:
1: Paint the Paper Mache Ball

Place the papier-mache ball on a mason jar lid to keep it steady while you paint.
This little trick makes it so much easier to work with!
Start by painting the top half of the ball and let it dry.
Then carefully flip it over and paint the bottom half.
Painting the base helps any small gaps between the shells blend in, giving your finished project a clean, polished look.
I used white paint, but you should use whatever color matches your shells best.
Tip: You only need a light coat of paint—just enough to hide the brown paper.
2: Attach the Shells
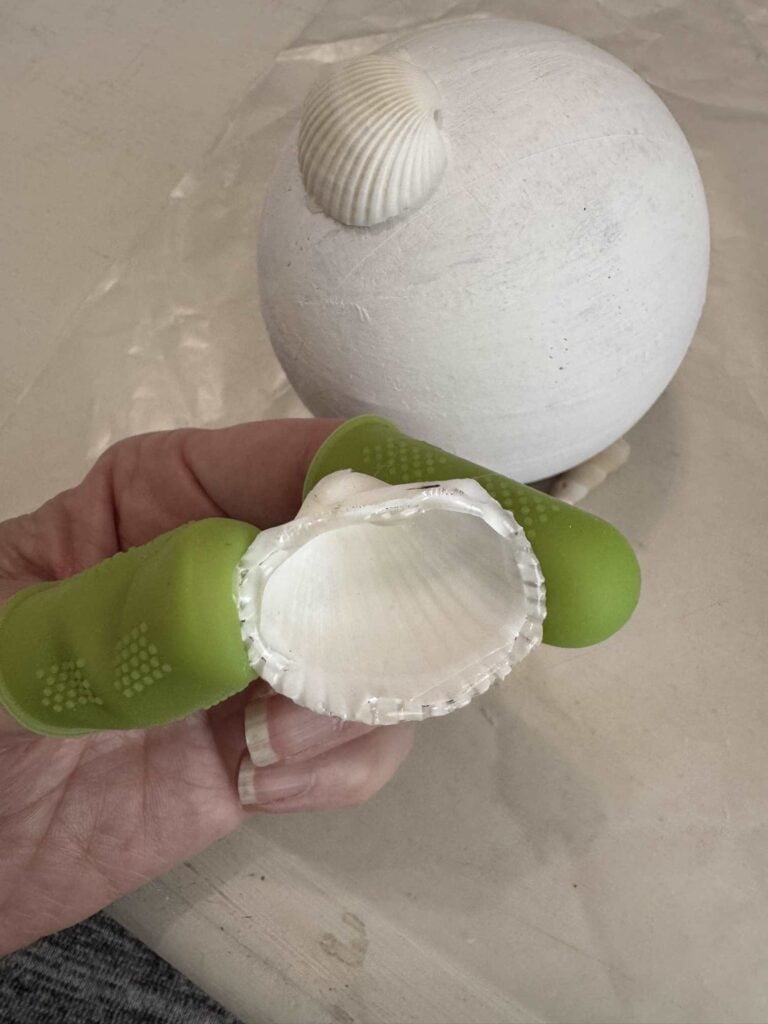
Once the paint is dry, place your ball back on the mason jar lid to keep it steady while you work.
Plug in your hot glue gun and have your finger protectors nearby—you’ll be handling small shells and hot glue, so a little protection goes a long way!
Start gluing shells onto the ball one at a time.
Apply a small amount of hot glue to the back of each shell and press it firmly onto the surface.
It’s easiest to begin at the top and work your way down in sections.
Place the shells close together, and vary the direction and type of shells to create a layered, natural look.
3: Fill in the Gaps
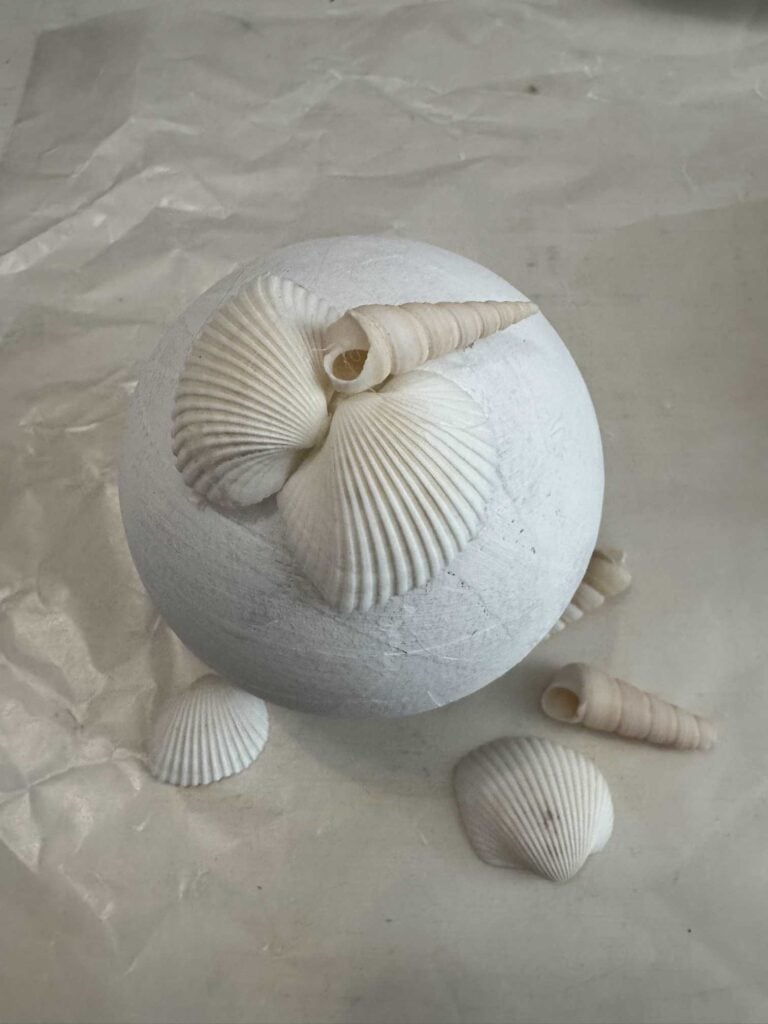
Once your larger shells are in place, go back and fill in any open spots with smaller shells.
This adds texture and helps cover the entire surface.
You can rotate the ball on the lid as you go to reach all sides evenly.
Tips & Tricks for Making a DIY Seashell Ball
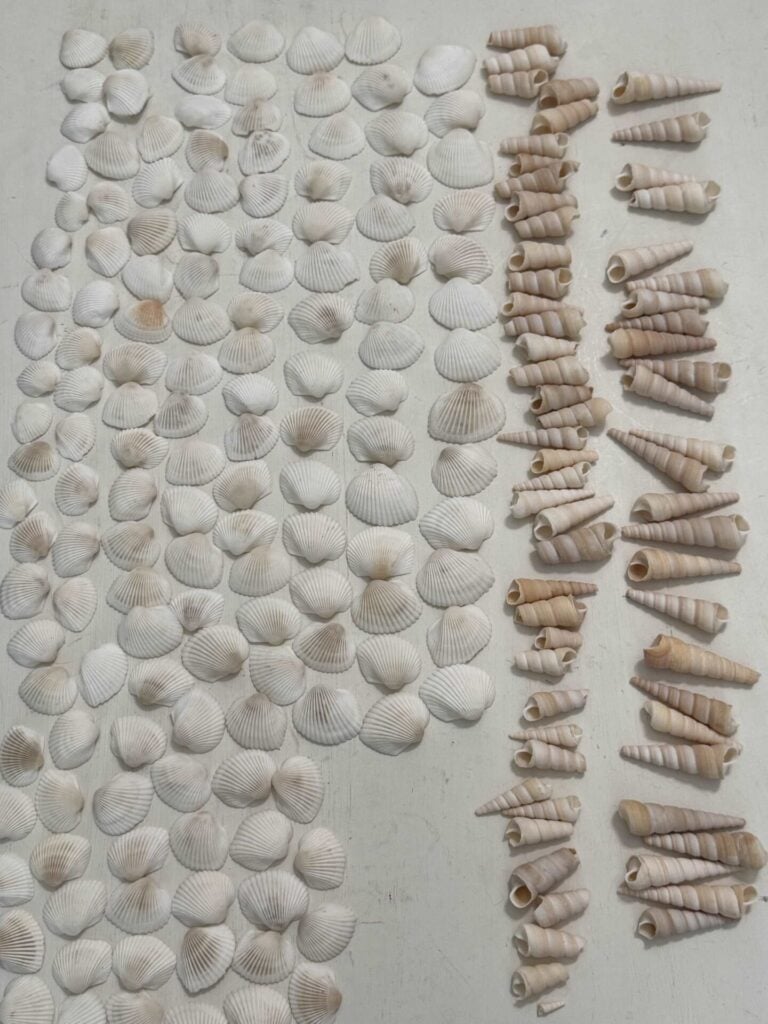
- Choose a variety of shell sizes and shapes. Mixing things up adds texture and interest to your design. Use larger shells as the base and fill in gaps with smaller pieces.
- Keep your glue gun on a low setting if you use styrofoam balls instead of papier-mache. The high heat setting can melt the styrofoam.
- Use finger protectors! They’re a lifesaver when working with hot glue and small shells. Nobody needs or wants a blister!
- Work in small sections. This keeps the glue from cooling too quickly, giving you time to arrange each shell just right.
- Let the ball rest in the mason jar lid while gluing. It keeps the project steady and prevents it from rolling around while you work.
- Don’t worry about perfection. Small gaps won’t be noticeable, and large ones can be filled in with shell pieces or tiny shells.
How to Style Your DIY Seashell Ball

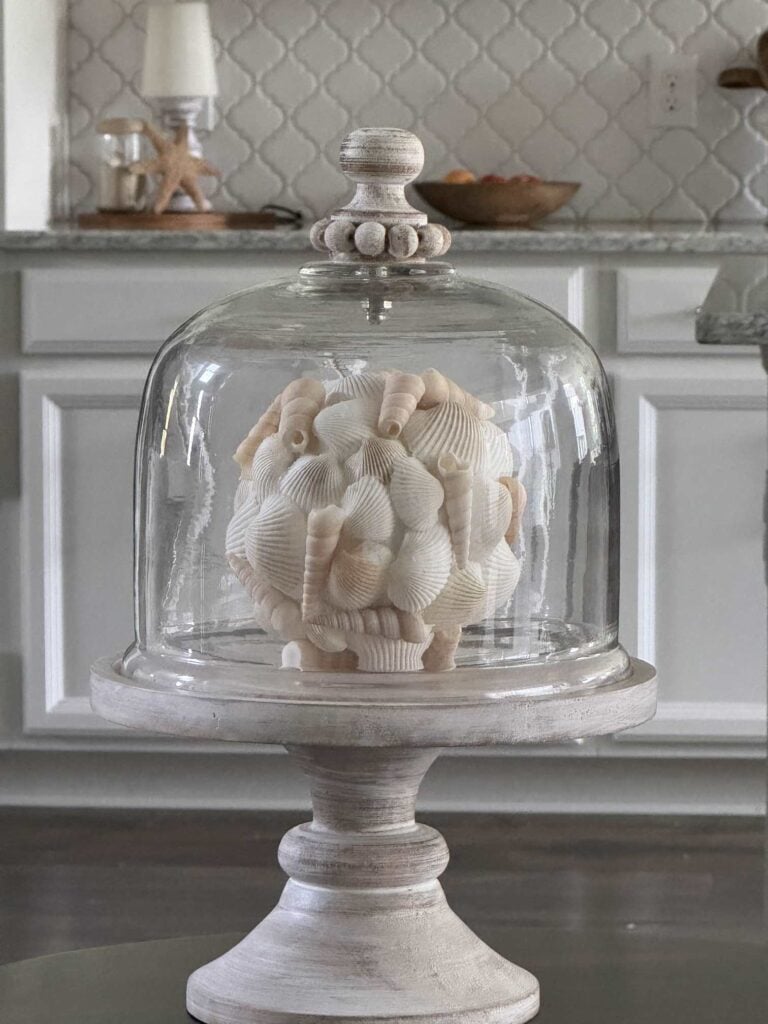
Once your seashell ball is complete, the fun part begins—finding the perfect spot to show it off!
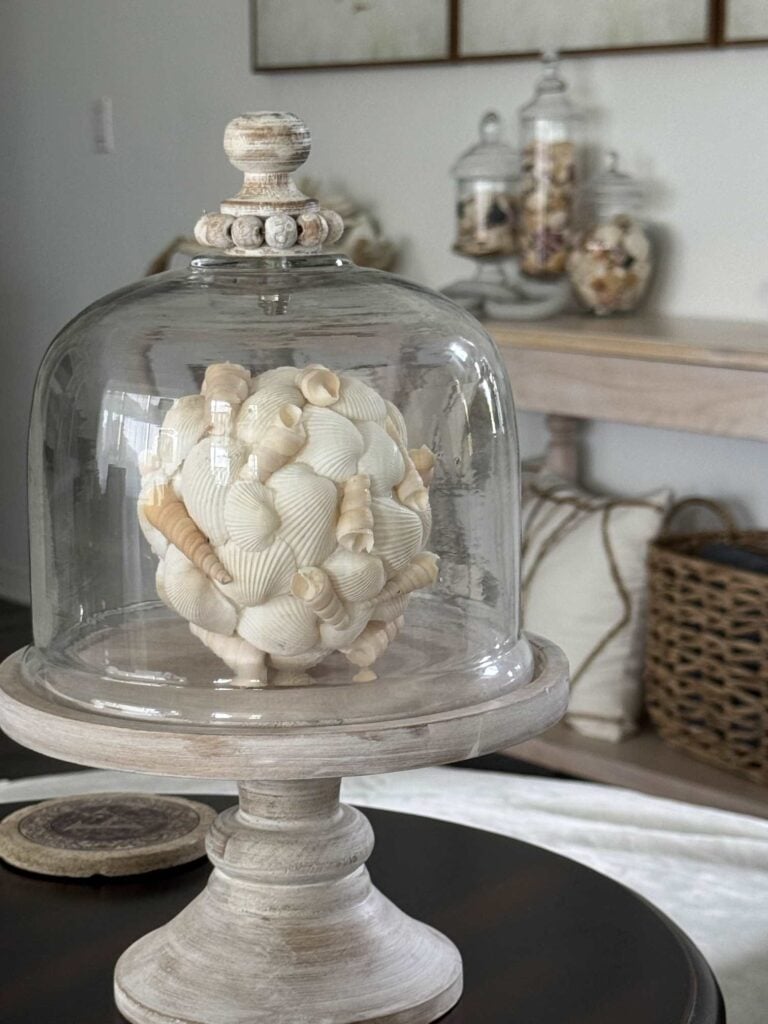
I placed mine on a small cake plate and covered it with a glass cloche, and I love how it turned out!
It’s currently sitting on an end table in our living room, and it adds just the right touch of coastal charm.
The raised base and glass cover make it feel like a special little treasure.
Here are a few more ideas for styling your DIY seashell ball:
- Display it in a decorative bowl or tray along with candles, driftwood, or sea glass for a layered coastal vignette.
- Place it on a bookshelf or mantel for a subtle beachy accent.
- Pair it with other natural textures, such as woven baskets, rope, or coral pieces, for a relaxed summer vibe.
- Cluster it with other decorative spheres of different textures (like moss or rattan balls) in a shallow dish for added visual interest.
No matter how you style it, your seashell ball will bring a soft, beachy feel to your home—and the best part is, you made it yourself!
Final Thoughts
I hope this DIY seashell ball inspires you to bring a little coastal charm into your home!
It’s such a simple project, but it makes a significant impact—and it’s a great way to use shells you’ve collected or picked up on a budget.
If you give it a try, I’d love to hear how you styled yours!
Feel free to leave a comment below!
If you enjoy the blog, please sign up for our email list to stay up-to-date with our latest posts.
Until next time, follow us on Pinterest, Facebook, and Instagram!
Blessings, Donna and Rich
Pin It For Later
Remember to pin the image below to one of your Pinterest boards (click the red Pin button in the top left corner) and follow us on Pinterest!

More Coastal DIY Inspiration
If you love the look of coastal decor, check out these DIY projects you can create:
- Beautiful Seaglass Decor Idea
- DIY Seashell Trinket Dishes
- Inexpensive Seashell Gallery Wall
- DIY Nautical Rope Wreath
- Coastal Lantern Made from a Jar
Related Posts:


**Some of the links in this post are affiliate links. This means if you click on the link and purchase the item, we will receive an affiliate commission at no extra cost to you. We appreciate your support. (disclosure policy)
This is so pretty Donna! I love how simple they were to make and how they can be used for summer decor or a beach house too. Honestly, I could see these as ornaments on a Christmas tree. They’re fabulous! Hugs, CoCo
Hi CoCo! When bought the ball, the cashier told me it was supposed to have a string because it was an ornament, so it did cross my mind that this would be pretty on a Christmas tree! Who knows, maybe I’ll do a coastal tree this year! Thanks so much!
Such a creative and unique DIY for the summer! I love how it looks inside the cloche…very chic!!
Thank you Rachel! It was so easy and fun that I’m looking forward to making more!