Creating stylish home decor doesn’t have to be expensive. In this DIY project, we’ll show you how to craft a beautiful concrete bowl using simple items found at Dollar Tree.
With just a few basic materials and this tutorial, you’ll have a stunning, handmade piece that looks like it came straight out of a high-end home goods store.
**Some of the links in this post are affiliate links. This means if you click on the link and purchase the item, we will receive an affiliate commission at no extra cost to you. We appreciate your support. (disclosure policy)
Crafting With Concrete
Today is the monthly gathering of The Handcrafted Society and our challenge medium this month is concrete!
We have never tried crafting with concrete and I was a bit nervous about this one.
Attempting a new DIY project can be scary, but we met the challenge, even though a few steps did not go as planned!
It’s important to remember that mistakes are part of the DIY process.
We will honestly share ours and hopefully, you can learn from them!
See how we embraced the bumps along the way, and how our persistence paid off with a beautifully unique creation.
If creating with concrete sounds interesting to you, we have six more projects to inspire you!
After you read our post to create a DIY concrete bowl, we invite you to hop to our friends’ blogs to see what they dreamed up!
Let’s get started!
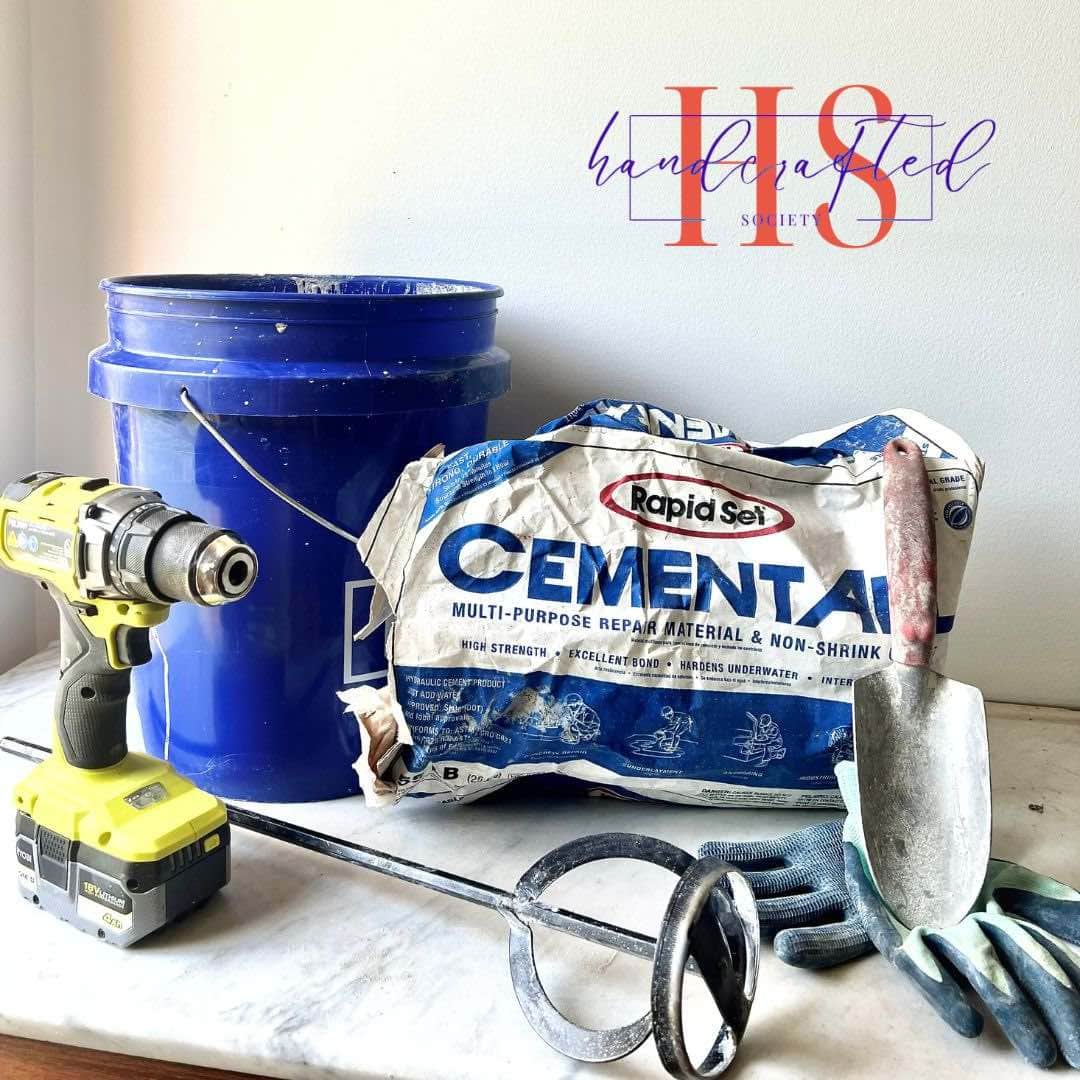
Gather Materials
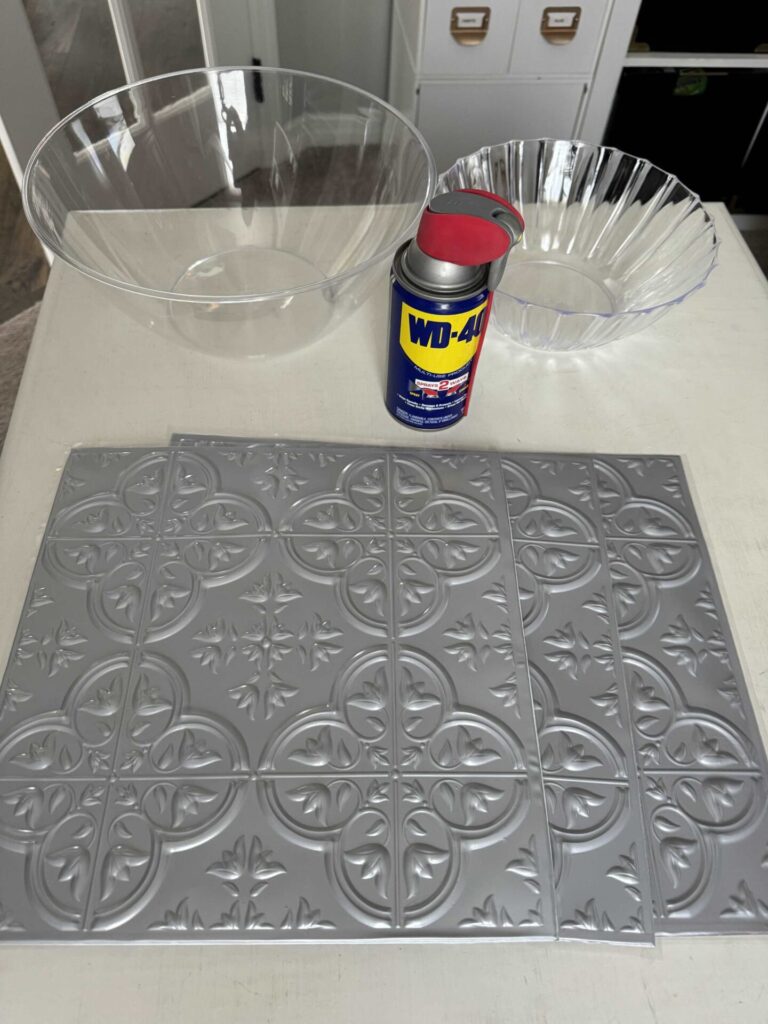
Gather the following materials to complete this project:
- Dollar Tree Plastic bowls- 2 different sizes
- Dollar Tree Faux Tiles- 3
- Dollar Tree Superglue
- Concrete mix- Rapid Set Cement
- WD-40 or cooking spray
- Sandpaper
- Mixing stick
- Disposable gloves
- Mallet
- Plastic or newspaper
- A weight- we used a large can of green beans, rocks, and a weight
Steps To Make a DIY Concrete Bowl
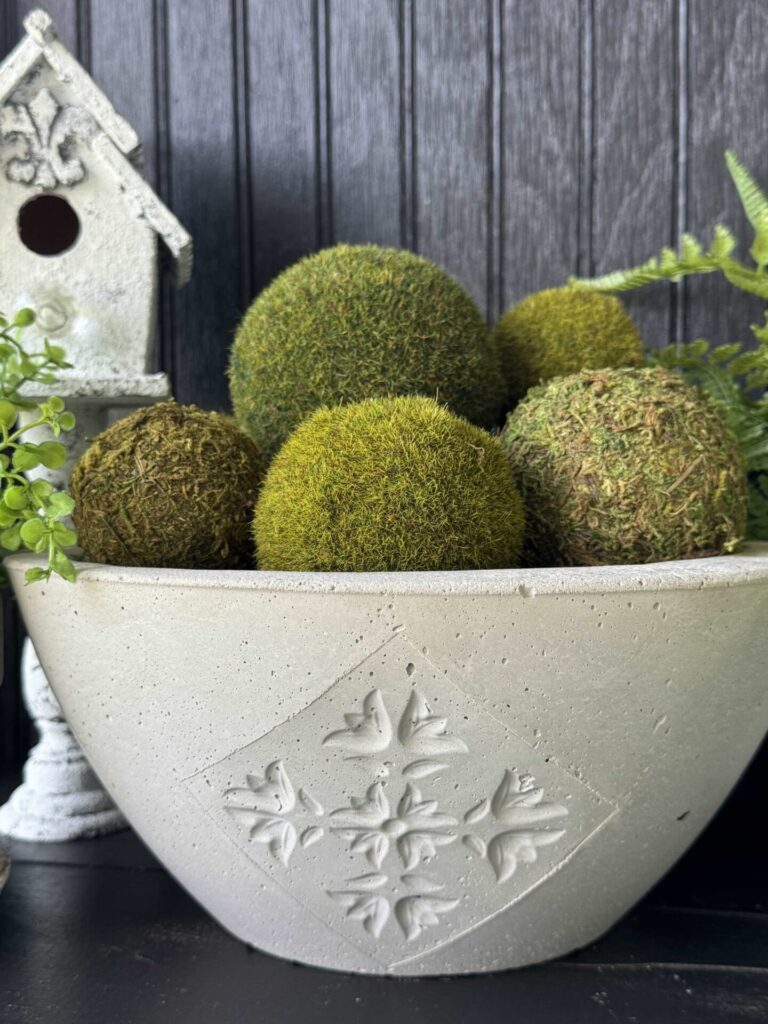
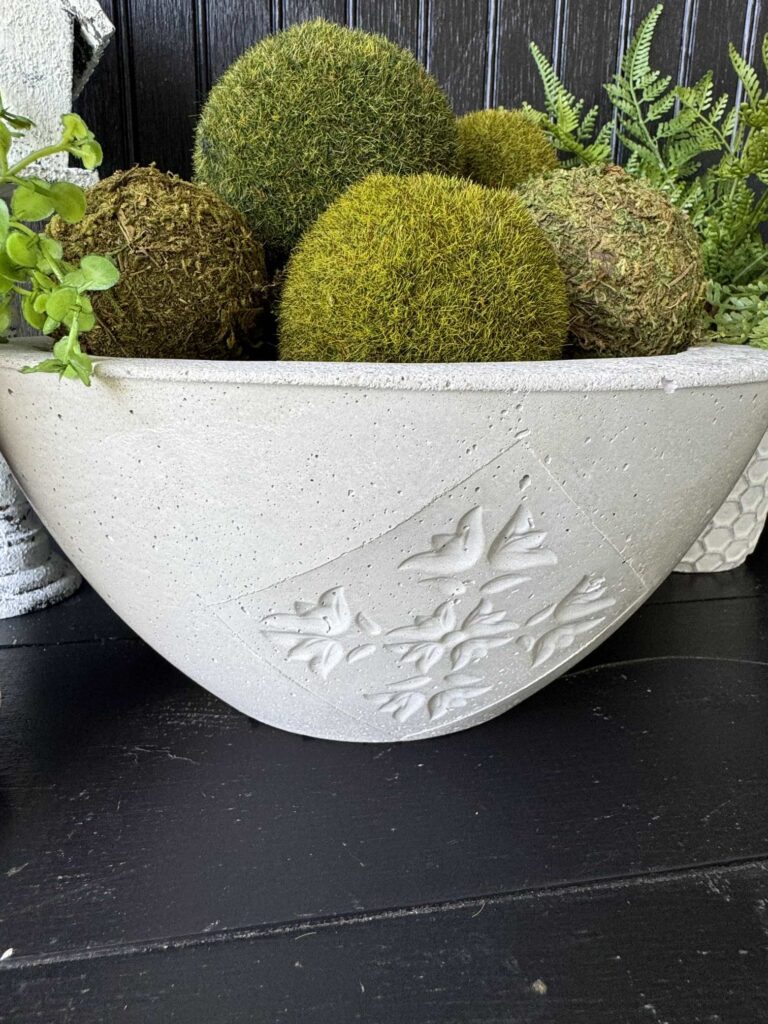
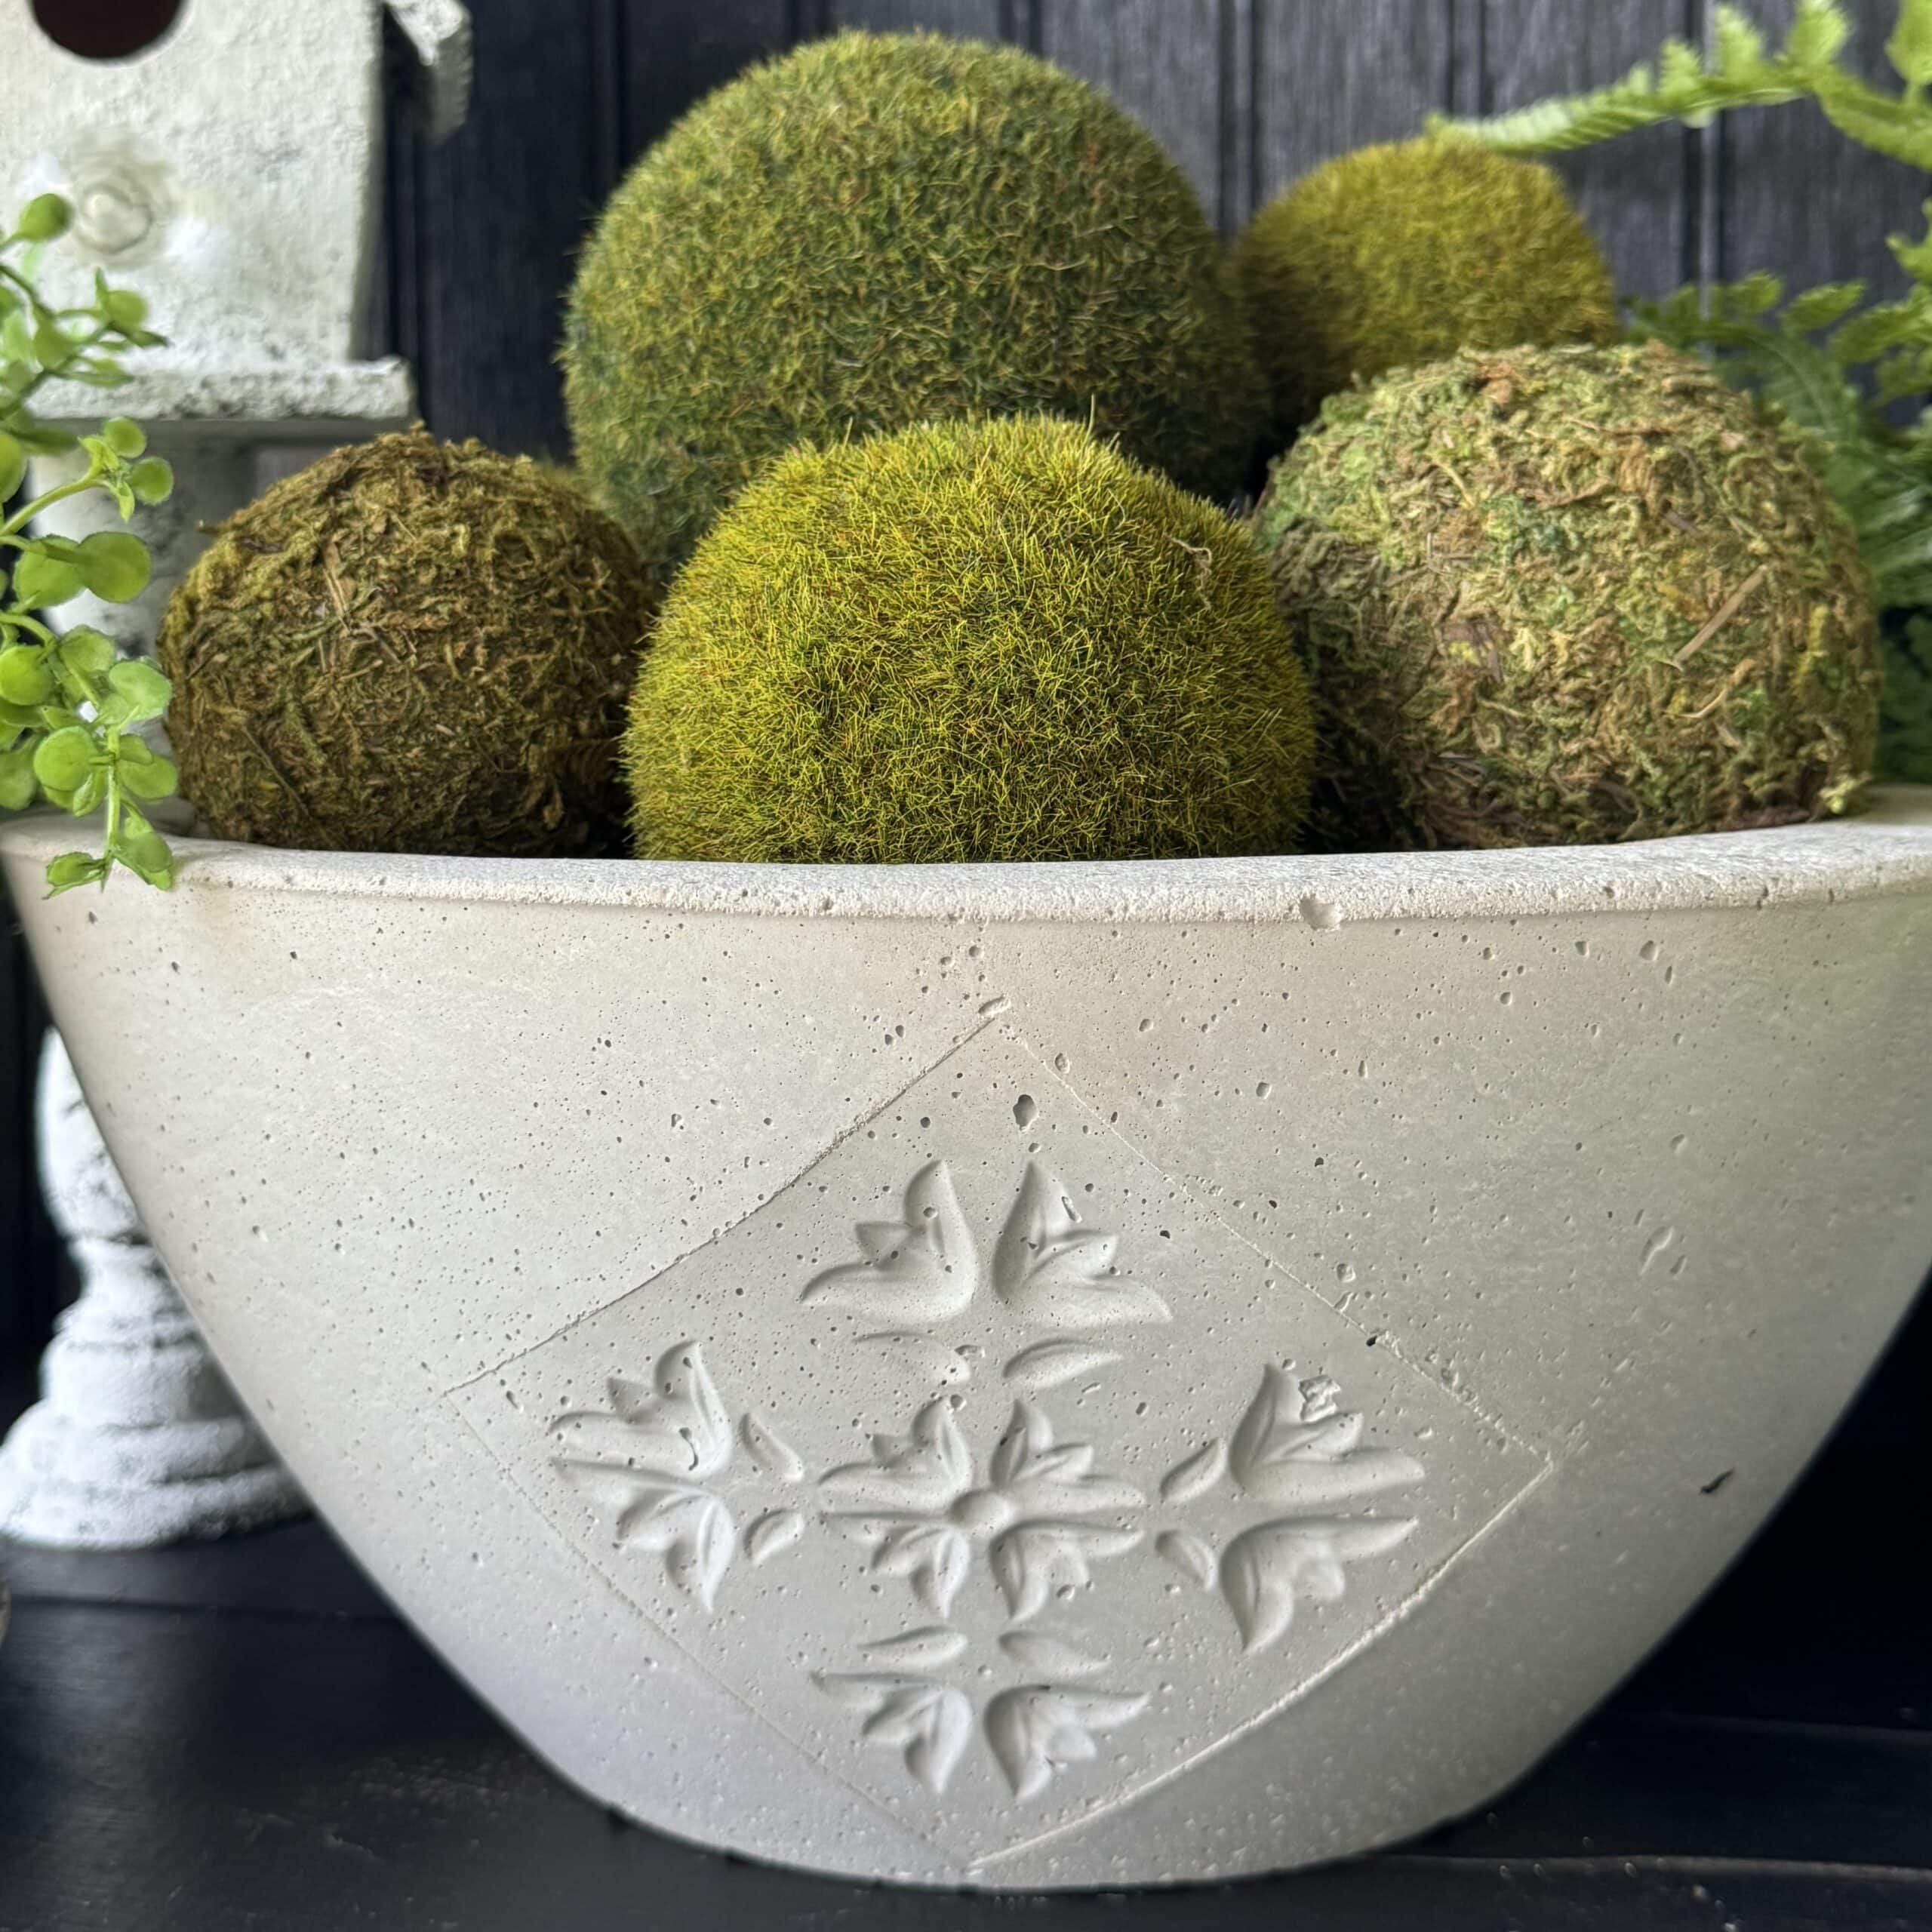
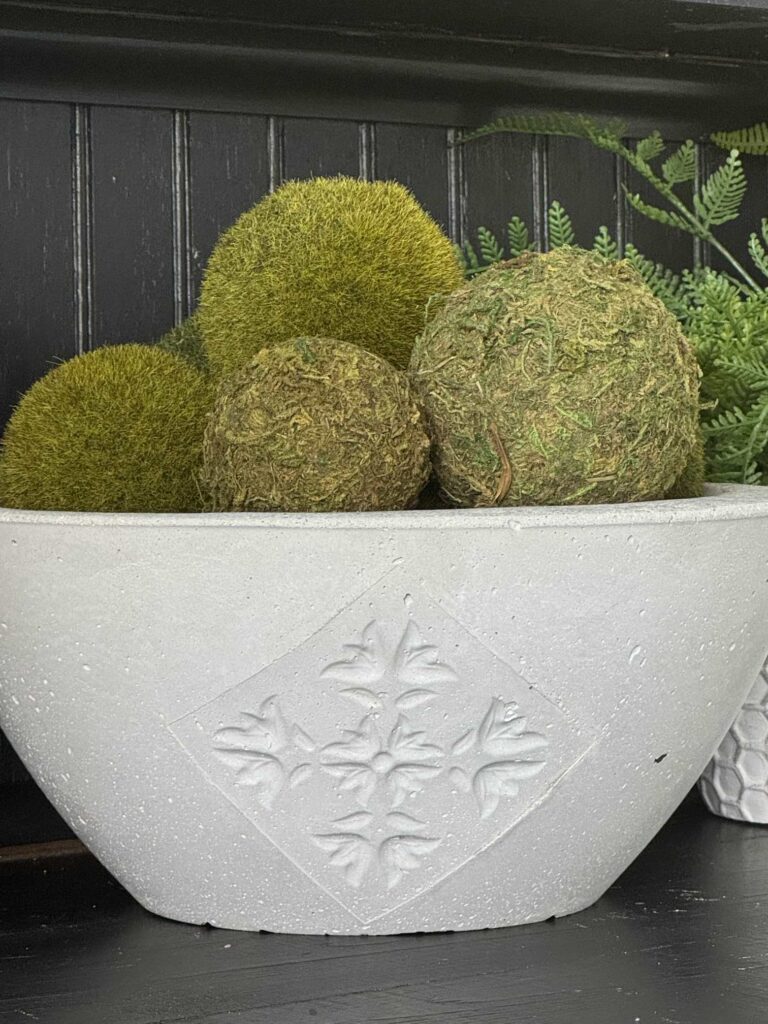
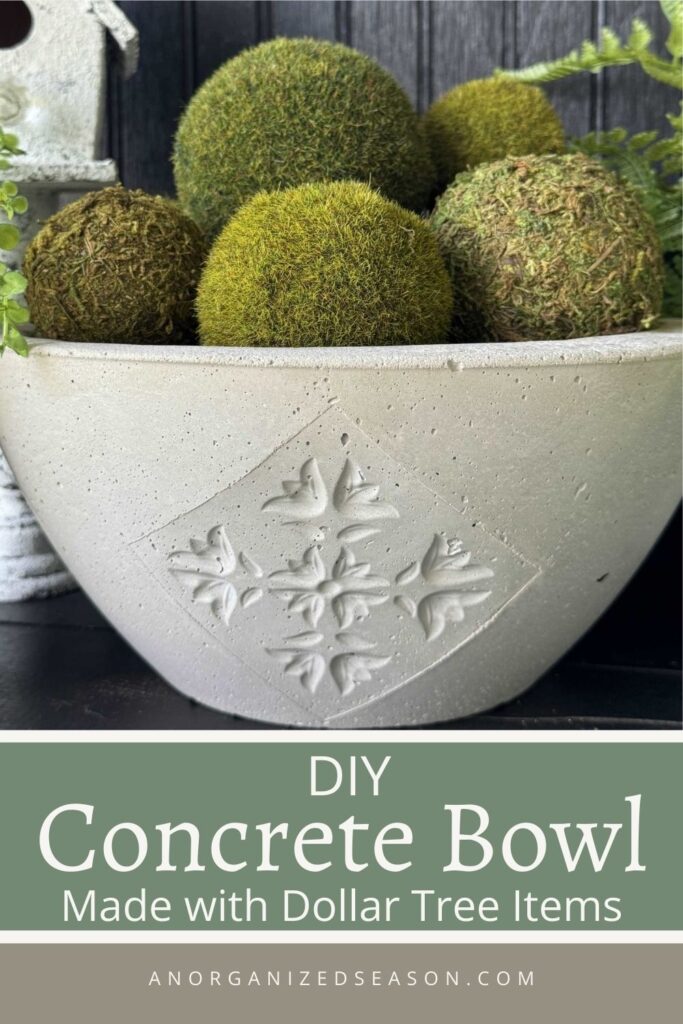
1. Add embellishment to the bowl
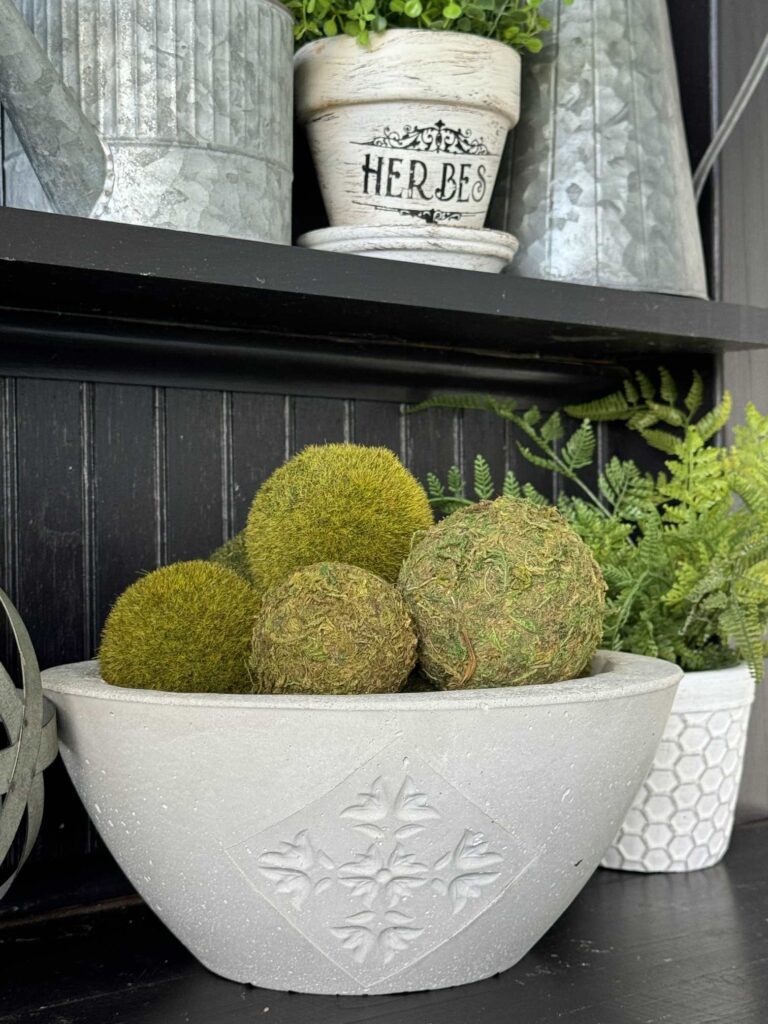
Plain concrete bowls look wonderful but I wanted to add a little “extra” to ours!
So I purchased faux tiles to add a design to the outside of the bowl!
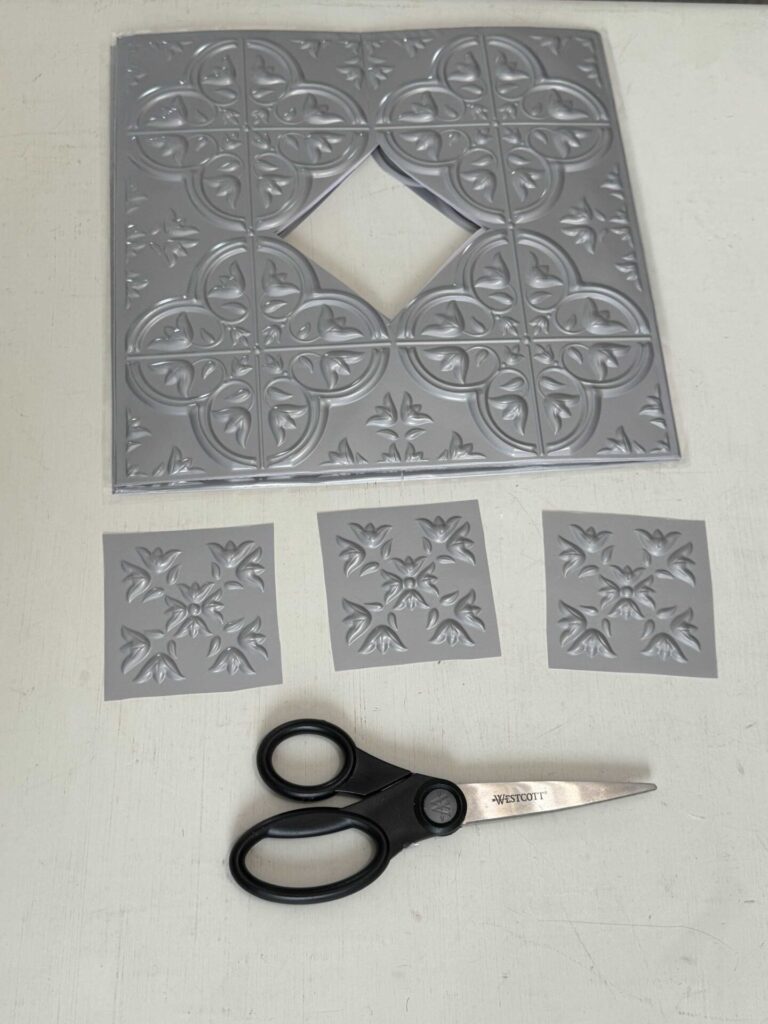
Cut the center section from a Dollar Tree faux tile and repeat twice.
Originally, the plan was to use the larger design on the tile but it was too big for our bowl.
So, I had to return to Dollar Tree and buy two more tiles.
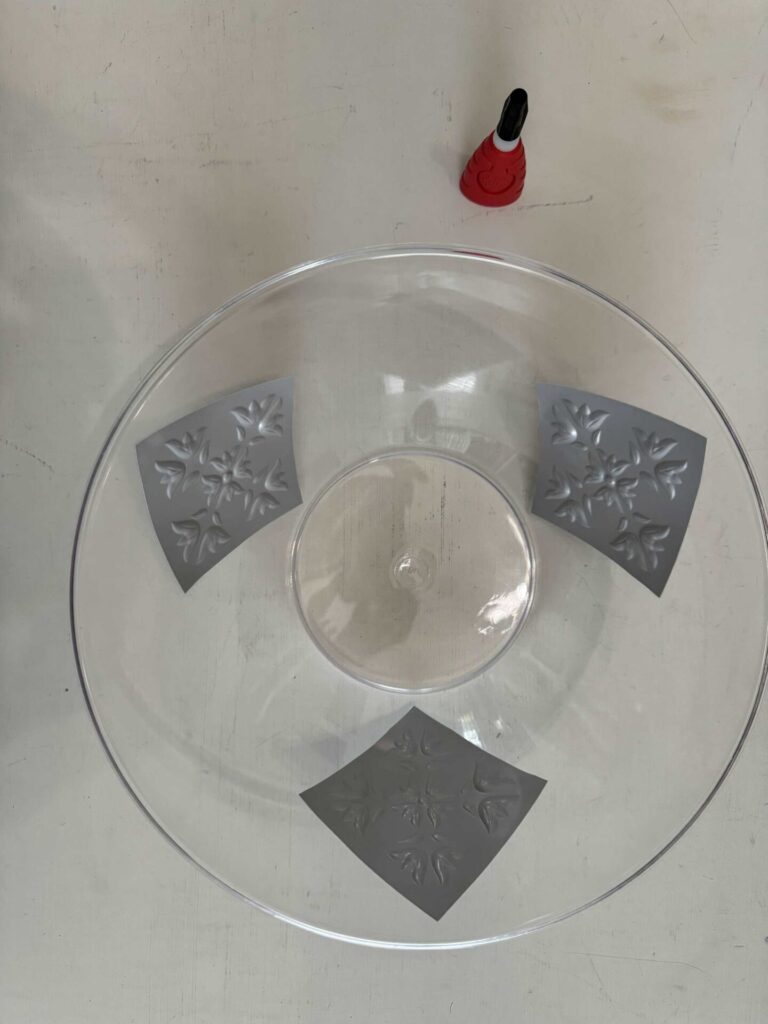
Adhere the tile pieces to the inside of the larger bowl with super glue.
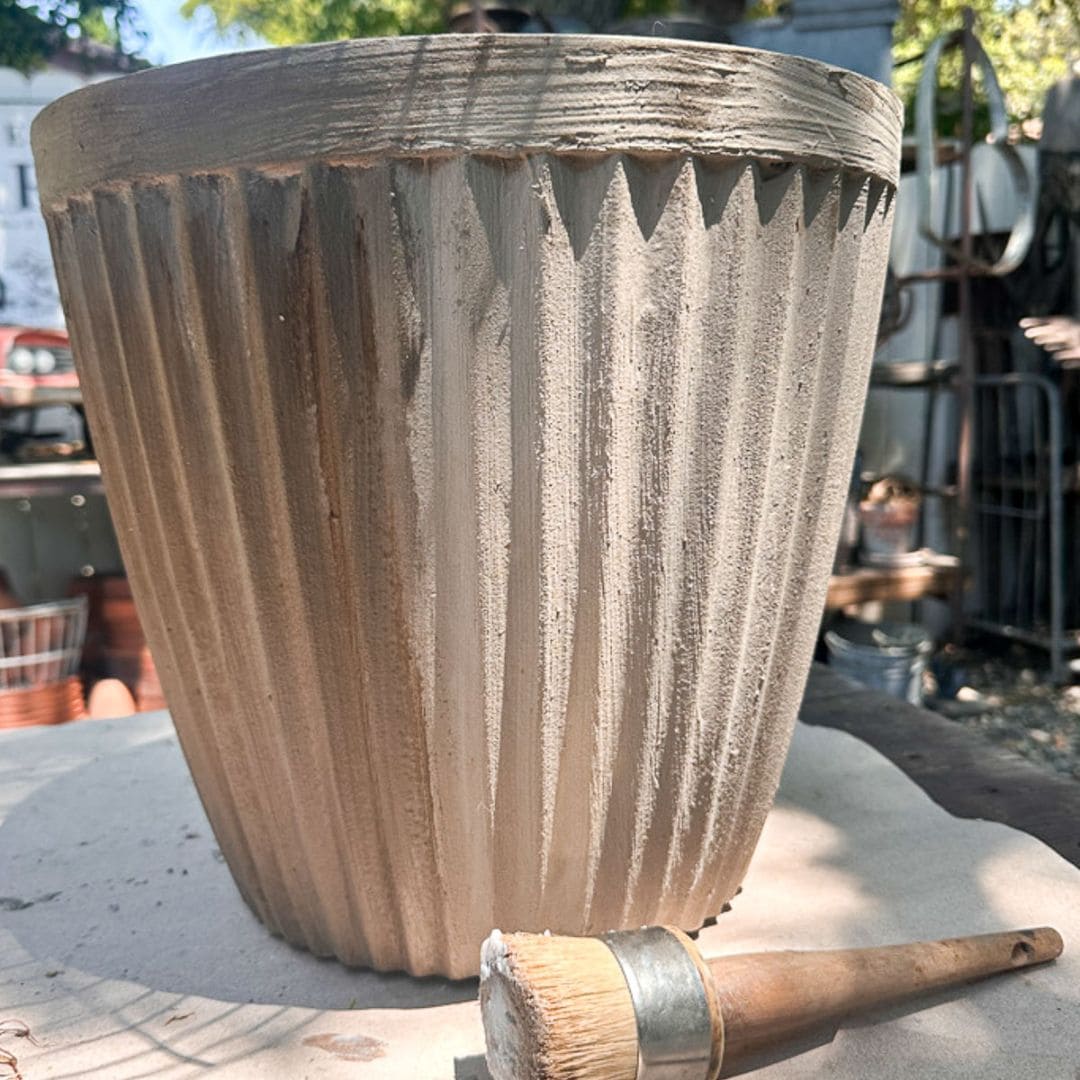
2. Prepare the molds
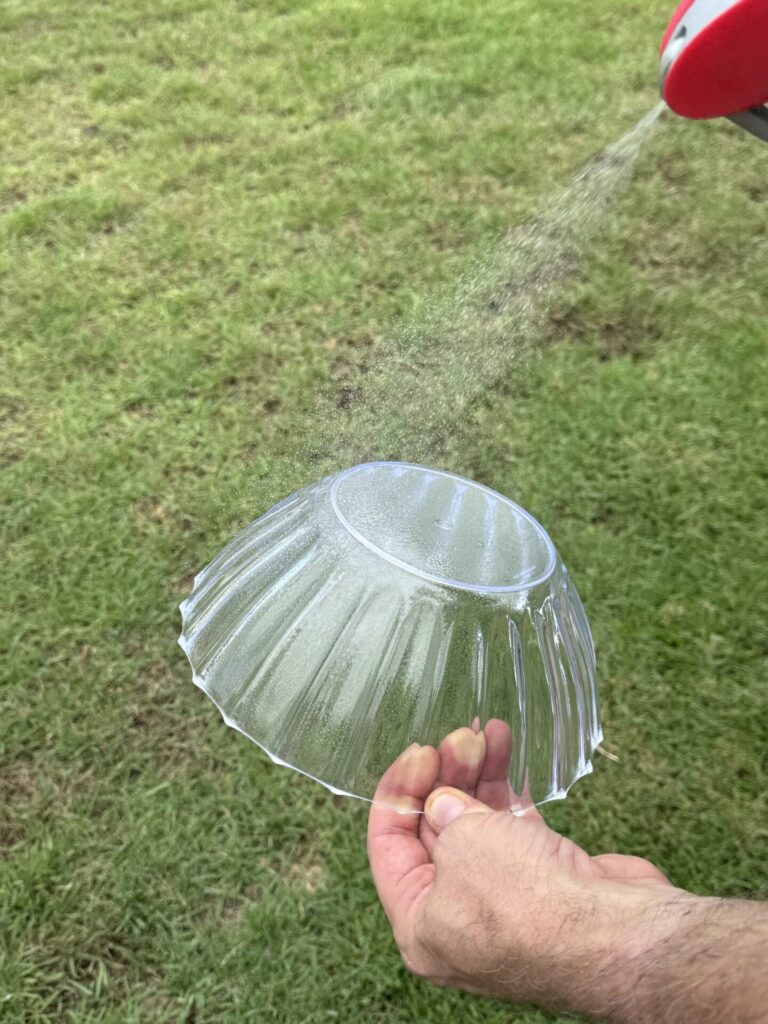
Using WD-40, spray the inside of the larger bowl and the outside of the smaller bowl.
If you don’t have WD-40 you can substitute cooking spray or vegetable oil.
This will let the concrete release from the bowls when it is dry.
3. Mix the concrete
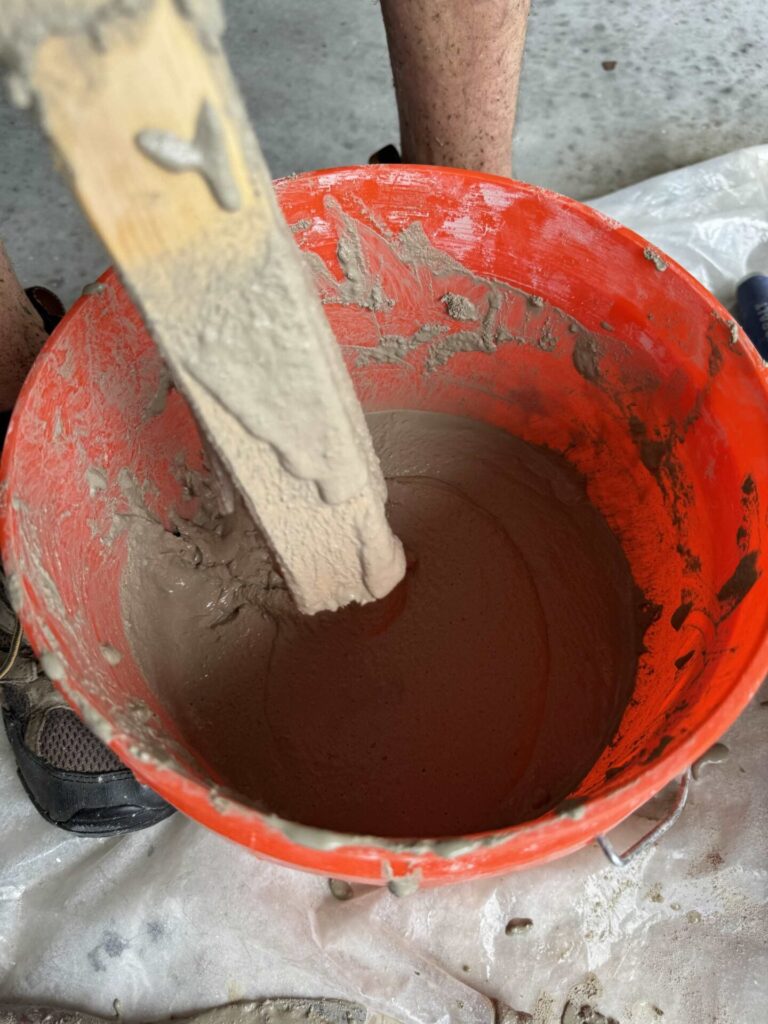
Follow the instructions on the concrete mix package.
We used approximately 4 parts of concrete to one part of water.
Mix thoroughly until there are no chunks in the bottom of the bucket.
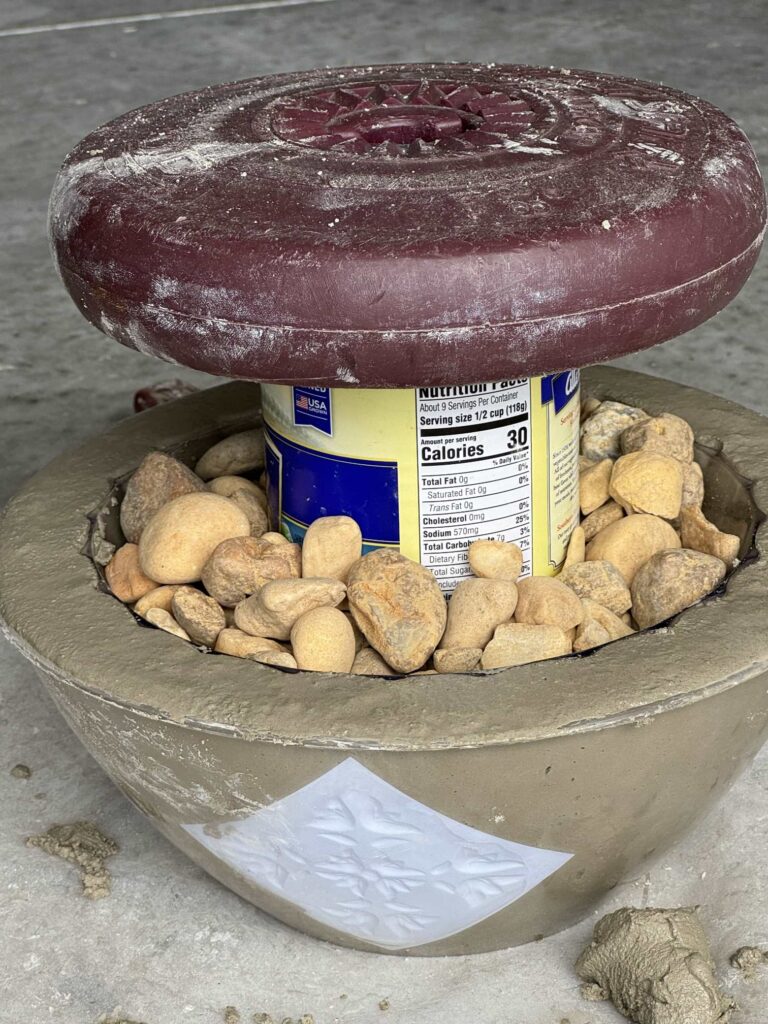
4. Pour the concrete
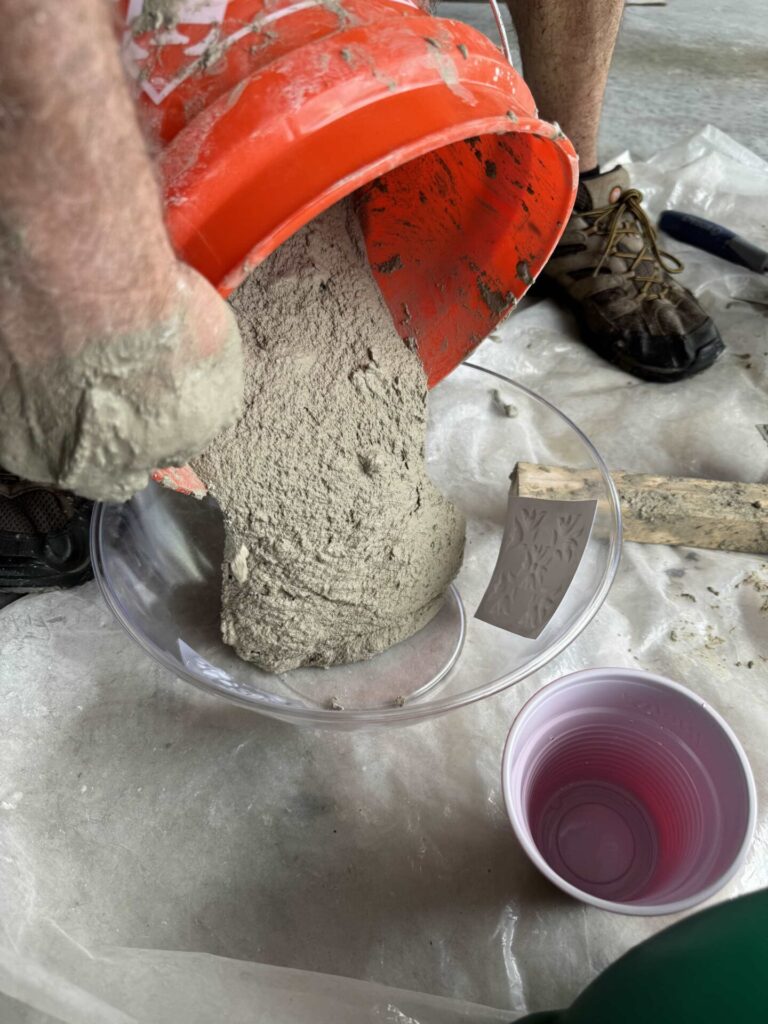
Fill the larger bowl halfway.
*Note- We filled ours approximately 3/4 full which was too much concrete.
Rich thought he had mixed well but we had a few chunks in ours.
*Note- If you see any chunks in the mixture pick them out,
Press the smaller bowl into the center to create the bowl shape. Sorry, we forgot to take a picture of this step since we were flustered about overfilling the concrete, lol!
5. Add weight to the small bowl
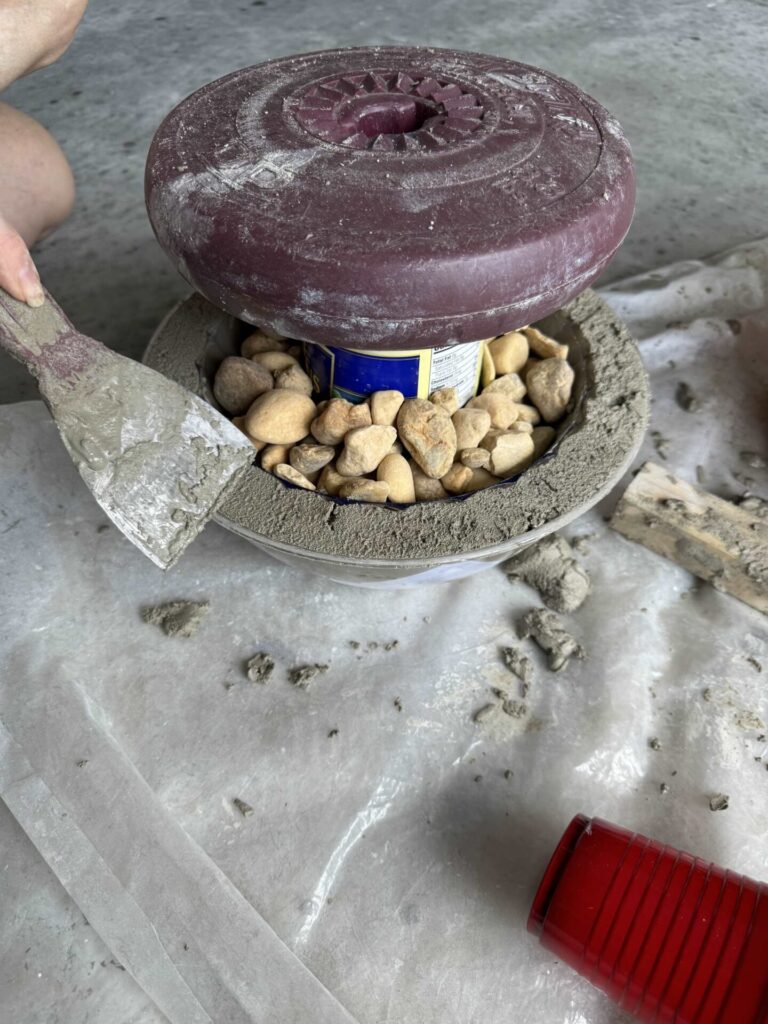
We used a large can of green beans and added rocks to the bowl, it needed more so Rich added the weight onto the can.
Since we added too much concrete, it spilled over the top and we had to scrap the excess off.
6. Remove Air Bubbles
Use a rubber mallet and gently tap the bowl to remove large air bubbles.
7. Let it Cure
Allow the concrete to cure for the recommended time.
We waited 24 hours.
The concrete expanded as it dried and came over the edge of the bowls.
This caused a big problem when we went to remove the molds.
8. Remove the mold
Here’s the part where you are supposed to be able to separate the plastic bowls from the concrete!
No way was that going to happen since our concrete expanded over the rim.
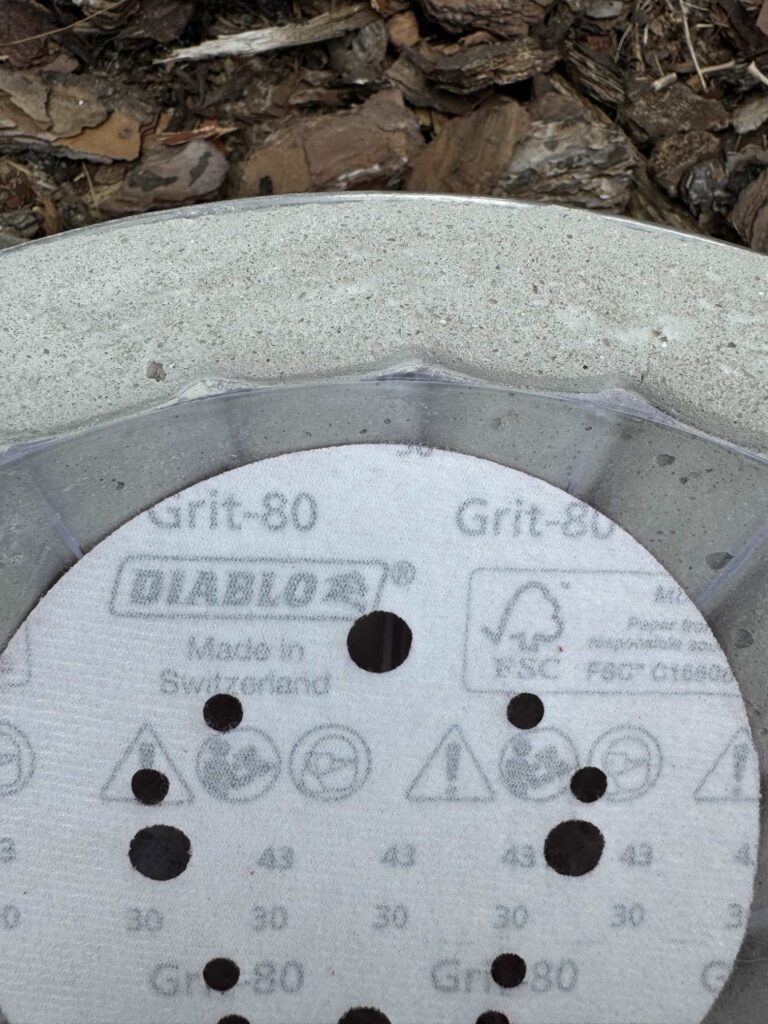
So I grabbed our hand sander and tried to sand the edges down.
It didn’t take long for me to get impatient so I decided to pry the bowl away from the concrete with a screwdriver!
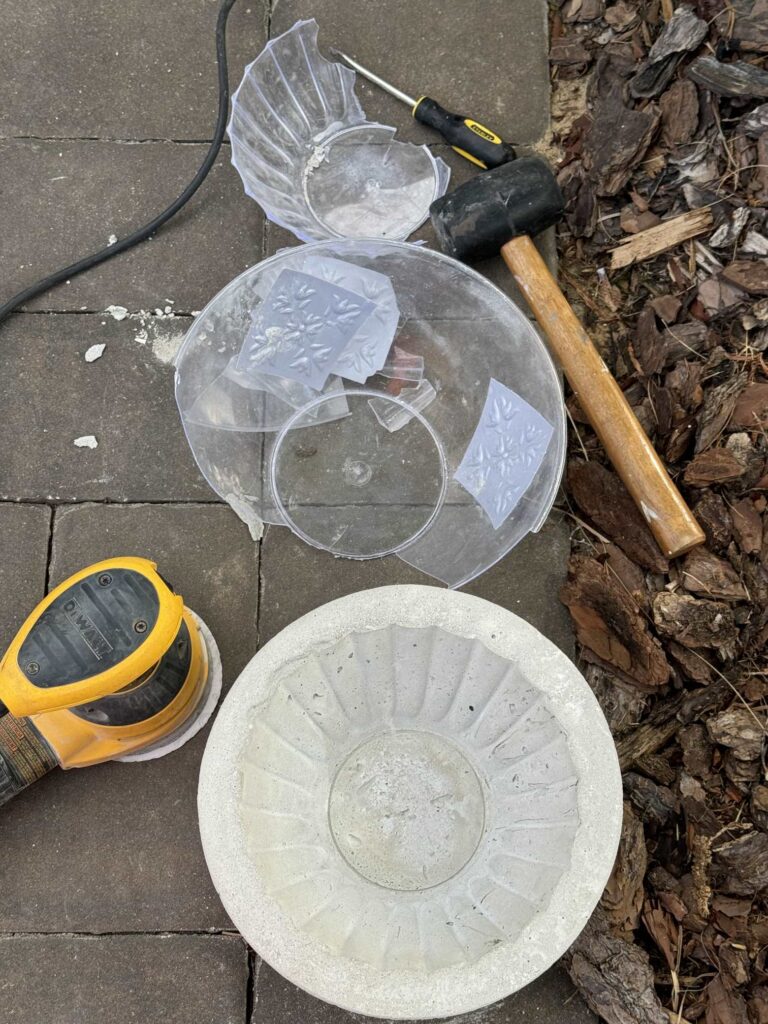
The bowl broke and unfortunately caused a few chips on the edge.
I’m so glad the bowls were plastic and only cost $1.25 so I did not feel a bit guilty about destroying them, lol!!
Remember how I told you to remove any chunks of cement from the mixture?
We didn’t bother and this is what happened.
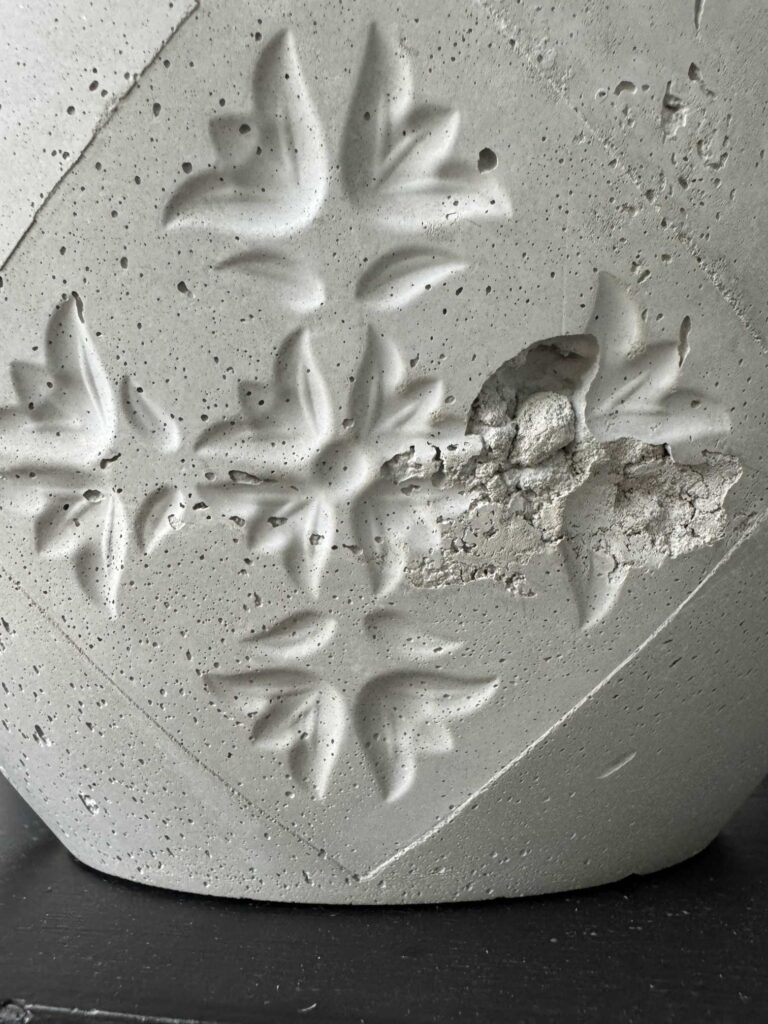
There’s an ugly chunk in the middle of the pretty design.
Oh well, we’ll turn this side to the back!
9. Sand the edges
If you have any rough edges smooth them out with sandpaper.
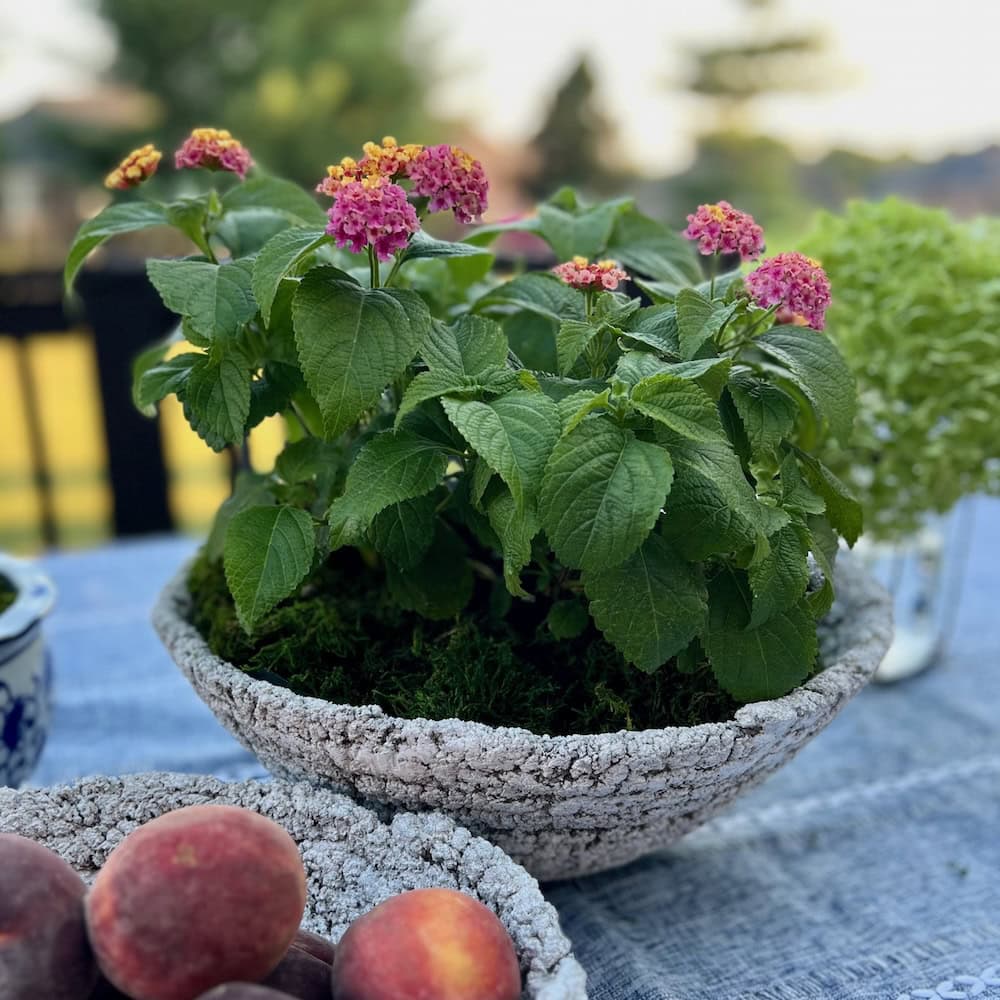
Display Your Concrete Bowl
Did our bowl turn out perfect?
No, it did not.
Do I absolutely love it?
Yes, I do!
Even with its imperfections, I think it looks fabulous!
Don’t let fear of a new medium hold you back from trying a DIY!
Challenges are common and provide valuable learning experiences.
Instead of seeing them as setbacks, view mistakes as opportunities to improve your skills and gain a deeper understanding of the materials and techniques you’re using
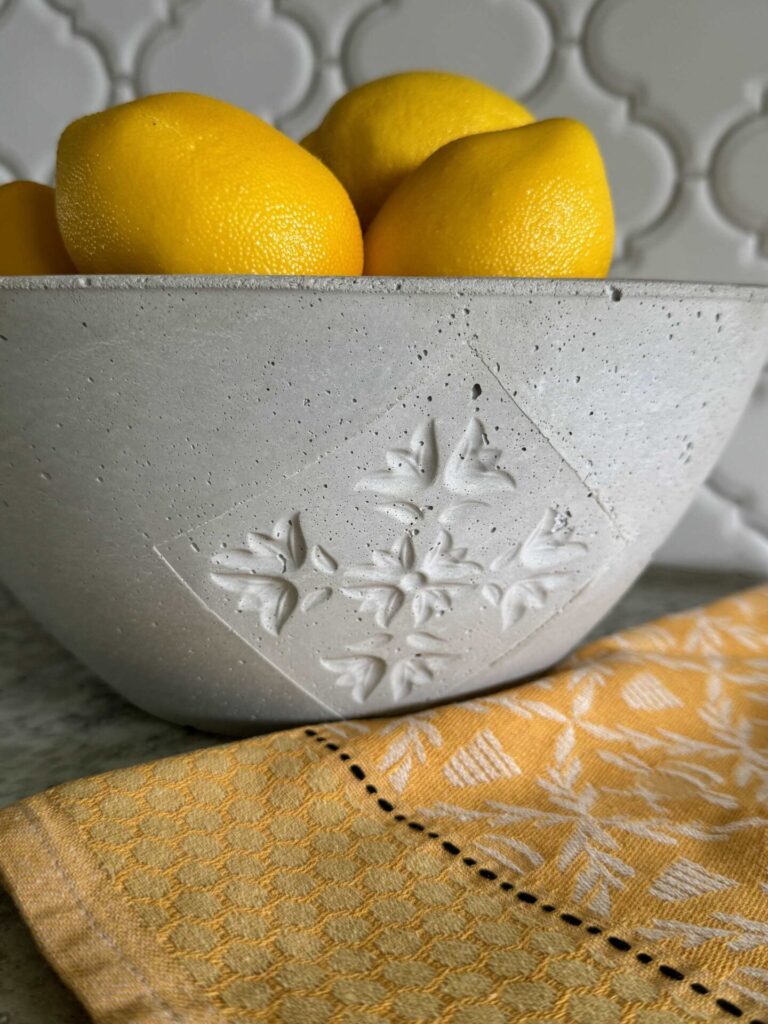
Creative Uses for A DIY Concrete Bowl
Concrete bowls are beautiful, durable, and can be used for many purposes.
Here are a few of my favorites!
- Store faux fruit- concrete is not food-safe so do not store real fruit in it
- Display it as a centerpiece
- Use it as a planter
- Contain small items like your keys or jewelry
- Place a large candle inside or melt some wax and make it into a candle
- Create a tabletop fire pit
The Handcrafted Society
Now it’s time to see what my amazing friends in The Handcrafted Society have created with concrete!
Click on the image or the blog name to hop over to each post!
Conclusion
We hope this post has inspired you to make something out of concrete.
Happy crafting, and stay tuned for more budget-friendly DIY projects that transform simple items into stunning decor pieces!
If you enjoy the blog, please sign up for our email list so you won’t miss a post!
Blessings, Donna and Rich
Pin It To Remember It
Don’t forget to pin this to Pinterest so you can easily find it when you’re ready to create a DIY project with concrete!
More DIY Inspiration
Don’t leave yet! We have more DIY inspiration to share with you!
- Three Ways to Create a Faux Topiary
- Neutral Ribbon Wreath DIY
- How to Make a Basket for Free
- Easy Basket Makeover With Paint
- How to Transform Ceramic Items with Spray Paint
Related Posts:

**Some of the links in this post are affiliate links. This means if you click on the link and purchase the item, we will receive an affiliate commission at no extra cost to you. We appreciate your support. (disclosure policy)
IT turned out great, Donna!! I LOVE the look of concrete bowls…there’s just something about them! I also think it’s amazing how you added that embellishment to the bowl. Thanks for sharing your mess ups in the process…it happens to all of us!
Thanks Rachel! Concrete bowls are amazing! I’m happy with the results and hopefully sharing our mistakes will help others!!
Donna – I love how your bowl turned out. Your idea of using the cut out sections from the tin tiles to create a design was fantastic. Also, thanks for the tips on picking out any chunks of cement. Mixing up the solution so it is uniform in consistency is definitely challenging! The moss balls in your bowl evoke a senes of RH design. Pinned!
Hi Anna! I thought the tiles added a little more interest to the bowl! So glad you liked it!
This is so beautiful, Donna! When I first saw it, I wondered how you got the fabulous impression on the sides. I would have never thought of dollar tree faux tiles. Brilliant!
Thanks Missy! I love to use those faux tiles in DIY projects! I think they made the bowl!!
Your concrete bowl turned out so pretty Donna! Love the tile embellishment detail! Pinning!
Thank you Michelle! I appreciate that so much!
Donna, your bowl turned out so pretty! I love how you added the design with the tile! How creative and it looks beautiful!
Thanks Kim! It was a challenge but I love how it turned out too!!
It’s perfectly imperfect! Your bowl is lovely, and using the faux tile for your design was fantastic. My experience with concrete has always been hit or miss. Thanks for the inspiration and tips!
Yes Kelly, I love how you described it, perfectly imperfect! Glad I’m not the only one that has had issues with concrete! Thank you!
Hey Donna! This came out great. I love how you used the Dollar Tree plastic bowls and tiles! So smart and it ended looking very hi-end. I love how you styled it and it will look fabulous with pumpkins, ornaments, etc. thru the holidays! Thanks for the inspo. Pinning although concrete scares me too. lol. XO- MaryJo
Hi MaryJo! I can’t wait to use it for all the seasons!! I am always amazed at the wonderful things that can be created from cheap Dollar Tree items! Thanks my friend!
I am in love with this Dollar Tree inspired bowl Donna, the ceiling tiles have never looked so good! It looks so high end, and yet so affordable. I can see this decorated throughout the seasons, it will go with everything! You always have such inspiring projects to share.
You are too kind Cara! Thanks so much! Gotta love those Dollar Tree tiles! Can’t wait to use the bowl all year round!
I have yet to be brave enough to try a concrete project but you have inspired me to consider it. I love how you added the embellishment to the design. Thanks for always sharing with us. This post will be a feature this week. #HomeMattersParty
Thanks Donna! I think the added design really makes it stand out! Let me know if you try it! So excited to be featured at your party! Thanks again!
wow – what a great result and tutorial. thanks for making it seem so doable and thanks for sharing with Create-it Link Party
Thank you Janet! It was fun to make!
Your bowl turned out fantastic! I’ve made stepping stones with concrete before but have always wanted to try making really large urns! But it seems intimidating! ….maybe I should start with a bowl!! Thanks so much for all of the tips you shared for making your bowl!! They are really helpful!
Yes, do a bowl first to get the hang of it and then try a larger urn! I hope you try it! Thanks for stopping by!