Do you ever pick up a greeting card at the store, glance at the price… and think “wait… this is HOW much?!” The good news is you can create handmade cards at home that are not only more budget-friendly but, honestly, more beautiful.
Card prices have gotten so high, and it’s hard to justify spending that much—especially if you need several throughout the year.
**Some of the links in this post are affiliate links. This means if you click on the link and purchase the item, we will receive an affiliate commission at no extra cost to you. We appreciate your support. (disclosure policy)
With the investment of a few simple supplies, like stamps, a black ink pad, and cardstock, you can create tons of cards for years to come that look like small pieces of art.
This project is part of the May Handcrafted Society challenge, where we’re creating paper stationery that feels artful and unique.
If you’re new here, each month, I join a talented group of bloggers for the Handcrafted Society Challenge, where we all create something using the same theme or material.
I can’t wait for you to see the amazing creations my friends came up with!
Why Handmade Cards Can Feel Like Art
There’s just something about a handmade card that feels a little more special—but with a few simple details, it can feel like so much more than just a card.
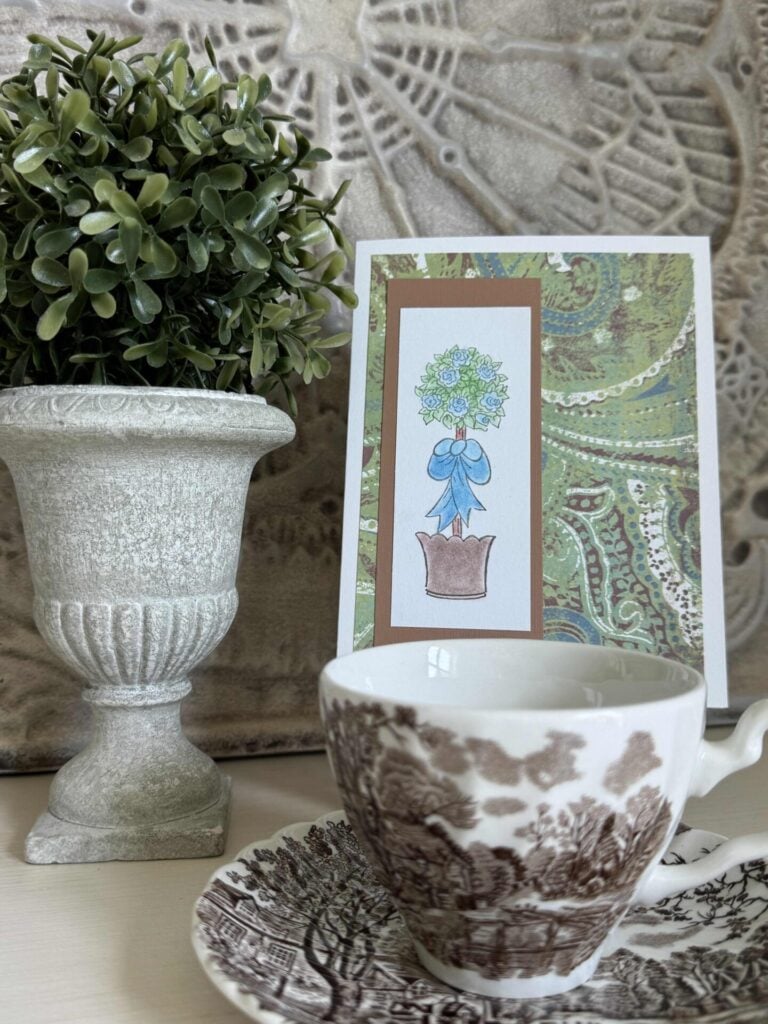
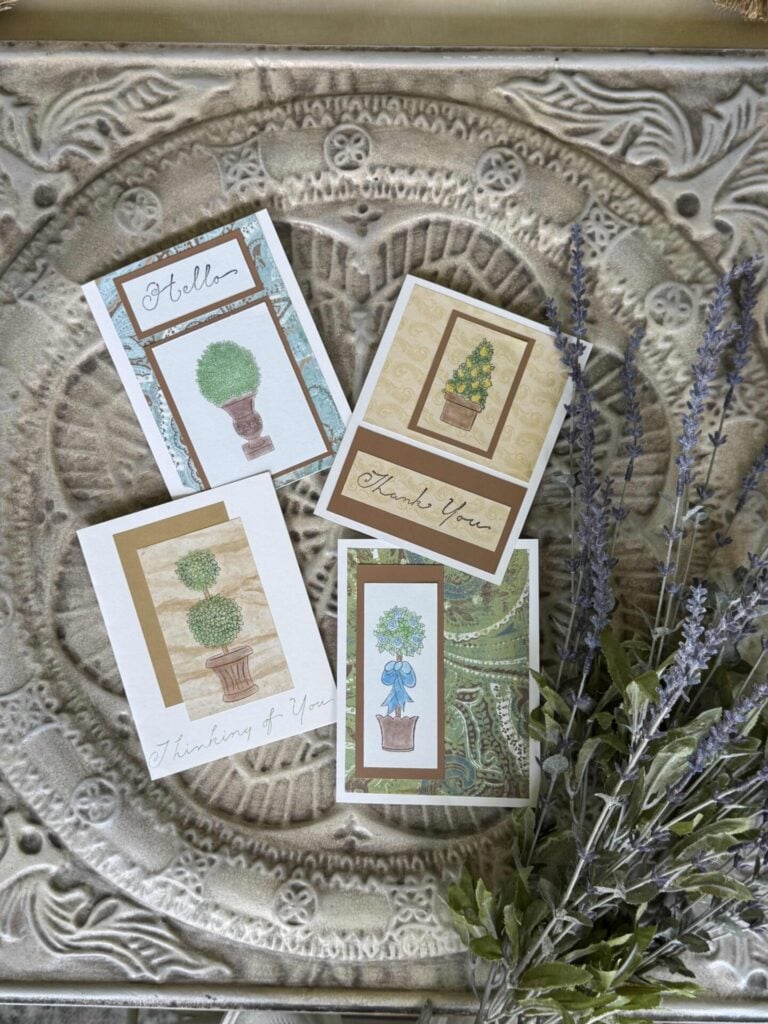
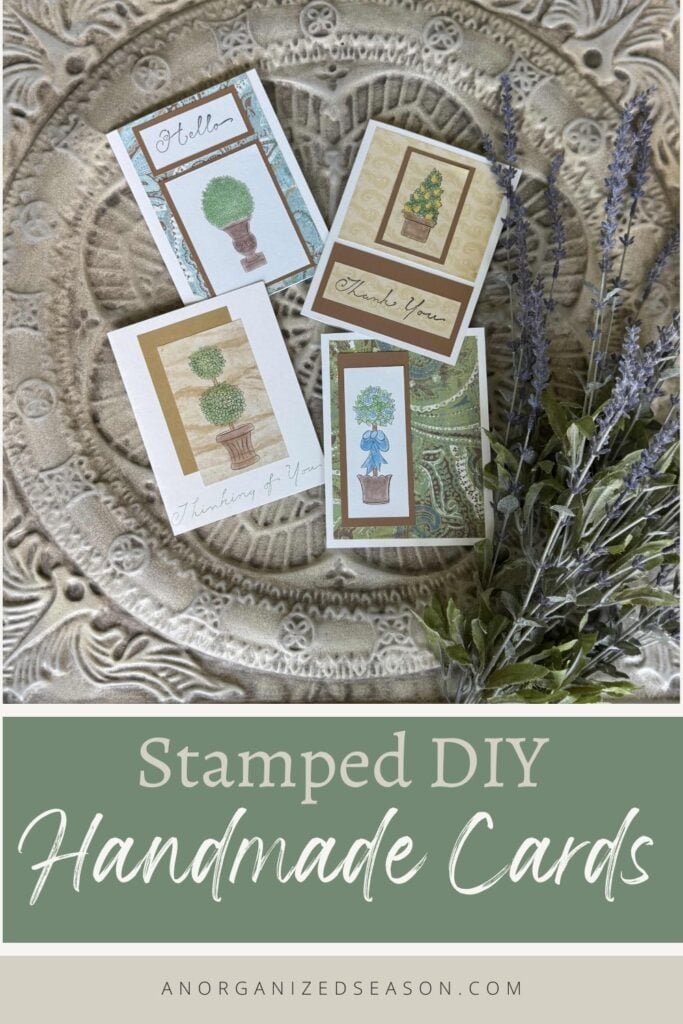
The layered cardstock, the clean stamped designs, and that soft touch of chalk all work together to give these a really pretty, almost painted look.
The chalk is my favorite part because it adds just enough color to bring the design to life without making it feel too bold.
I also love how easy it is to customize these handmade cards.
You can keep the front simple and let the design be the focus, or add a greeting depending on the occasion.
Either way, each one ends up feeling a little unique.
And honestly… they’re so pretty, you might not want to give them away.
They’re perfect for setting out on a shelf or table for a bit before sending them off—just like a tiny piece of art.
Gather Materials

Gather the following supplies to create handmade cards:
- Blank cards and envelopes
- Stamps -topiary stamp set and greeting stamp set (no longer available)
- Ink pad- black (other colors optional)
- Baby wipes (to clean stamps)
- Blending chalk
- Foam makeup applicators
- Coordinating patterned cardstock and solid cardstock
- Paper cutter (or scissors)
- Taperunner (or glue/double-sided tape)
How to Make Handmade Cards
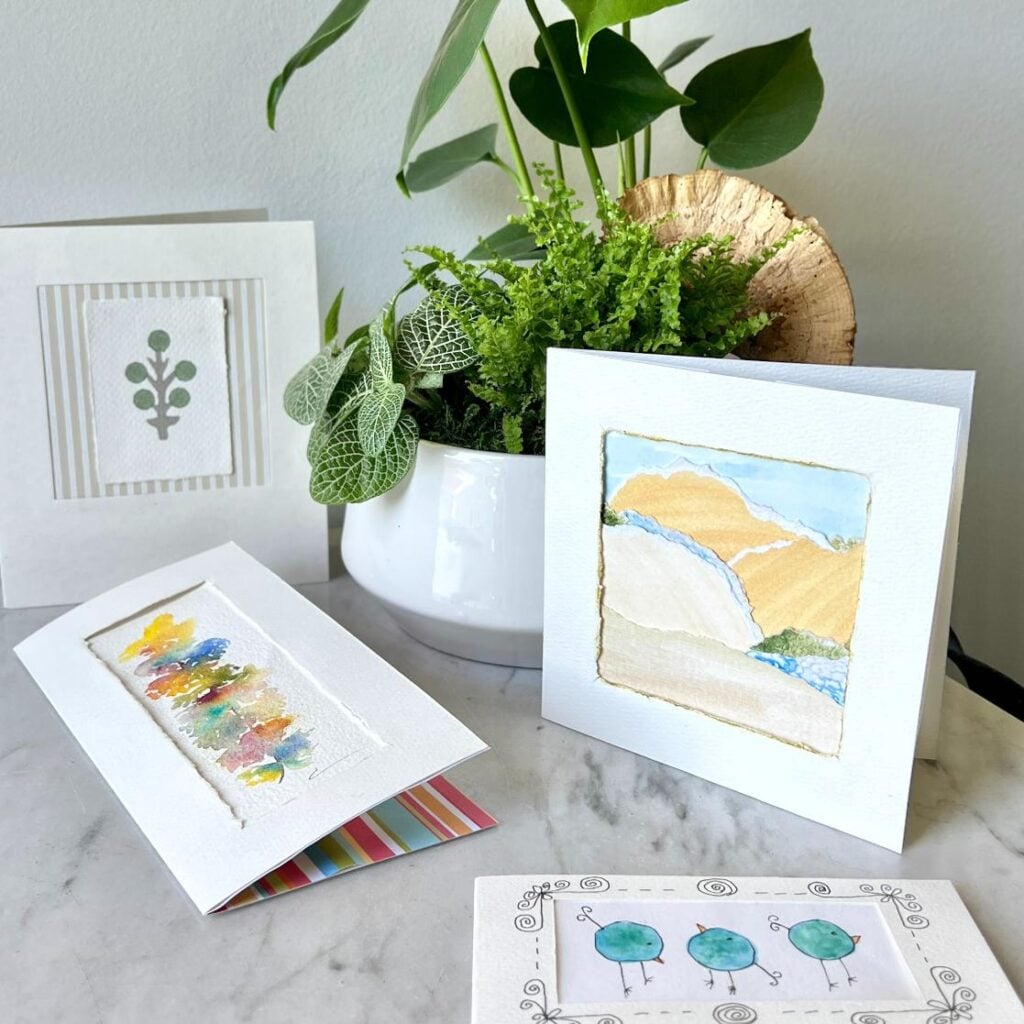
Step 1: Choose Your Cardstock
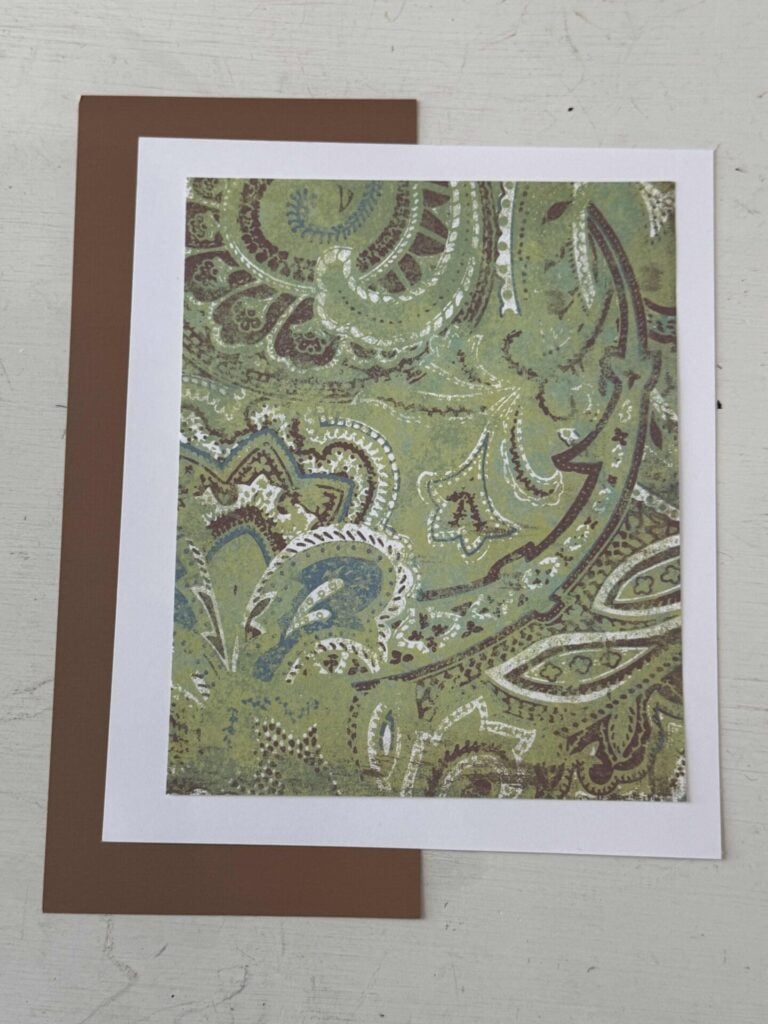
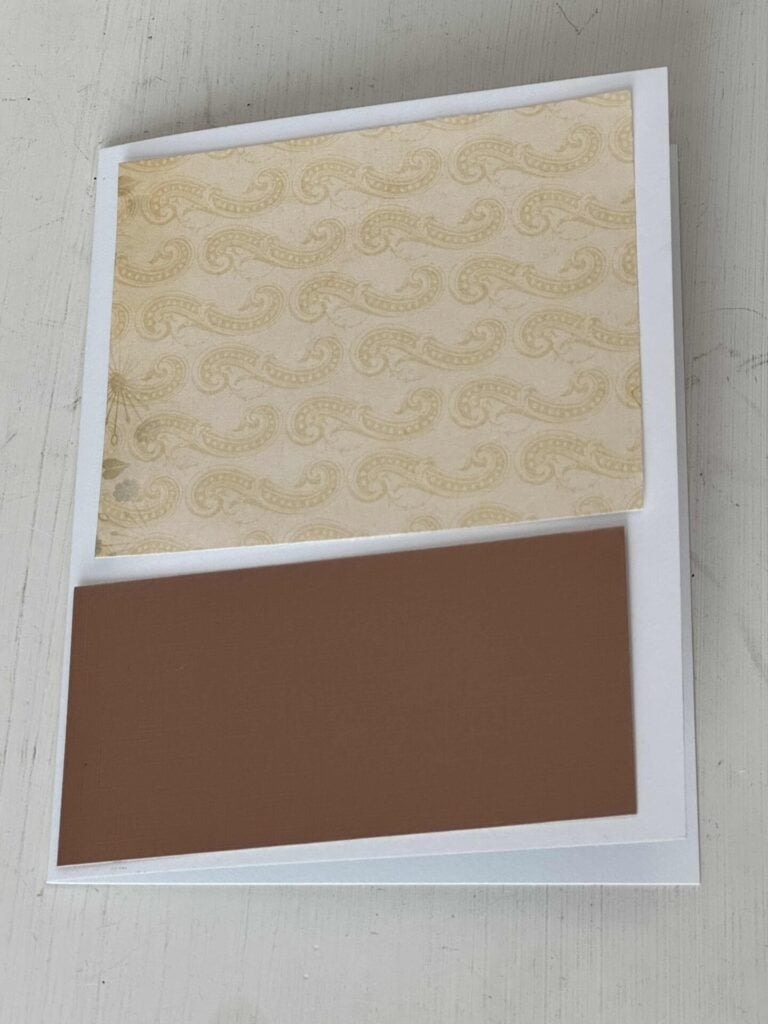
To get started, choose your patterned and solid cardstock.
I always choose one patterned paper and pair it with one, two, or more coordinating solid colors.
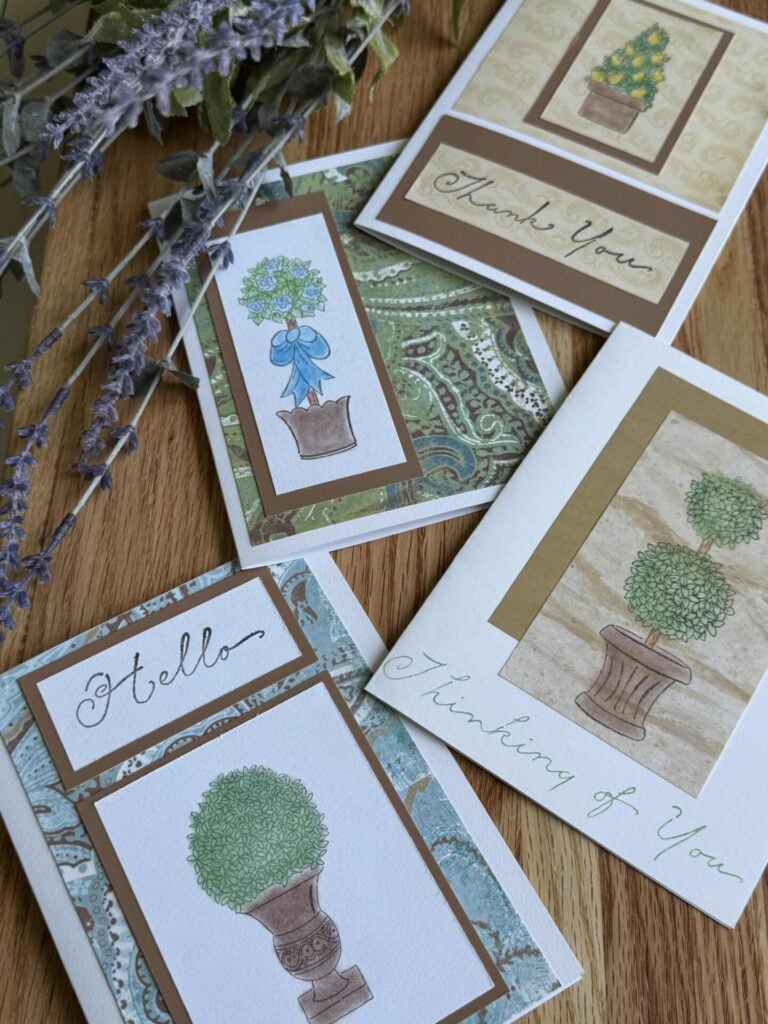
I made four cards with different patterned papers and tried to keep my colors cohesive, so they looked like a set, but you don’t have to do that.
Step 2: Plan Your Design
Before you start stamping or attaching anything, take a few minutes to play around with your layout.
Decide which paper you want to stamp on and how you want to layer your patterned and solid cardstock.
You can stack pieces to create a simple frame or use one as a base and layer the other on top.
This is also a good time to think about your greeting.
Do you want to add it to the front of the card or keep the front more like artwork and stamp your sentiment inside?
Laying everything out ahead of time makes the whole process easier.
Step 3: Stamp Your Design
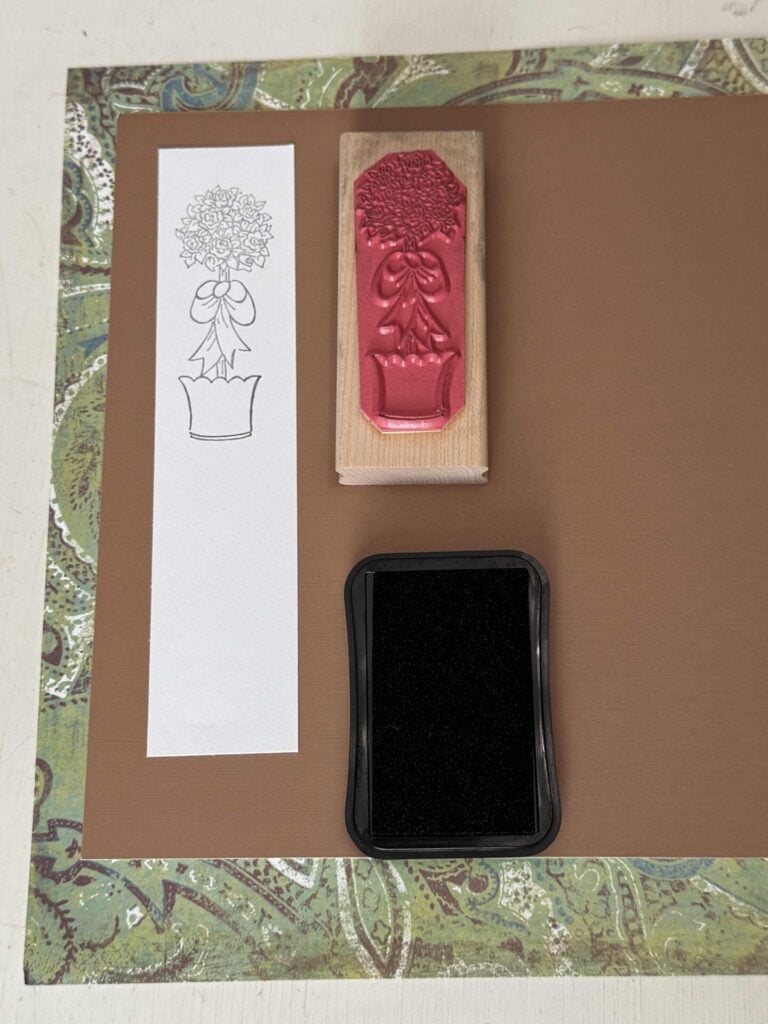
Once you’ve planned your layout, it’s time to start stamping.
Gently rub your stamp across the ink pad, making sure the surface is evenly covered.
Then place it on your paper and press down firmly.
Try not to shift the stamp while it’s on the paper, and lift it straight up when you’re done to avoid any smudging.
If you’re new to stamping, you might want to do a quick test on a scrap piece of paper first.
It helps you get a feel for how much pressure to use and how the ink will look.
As soon as you finish stamping, wipe the ink off with a baby wipe.
Step 4: Add Soft Color with Chalk
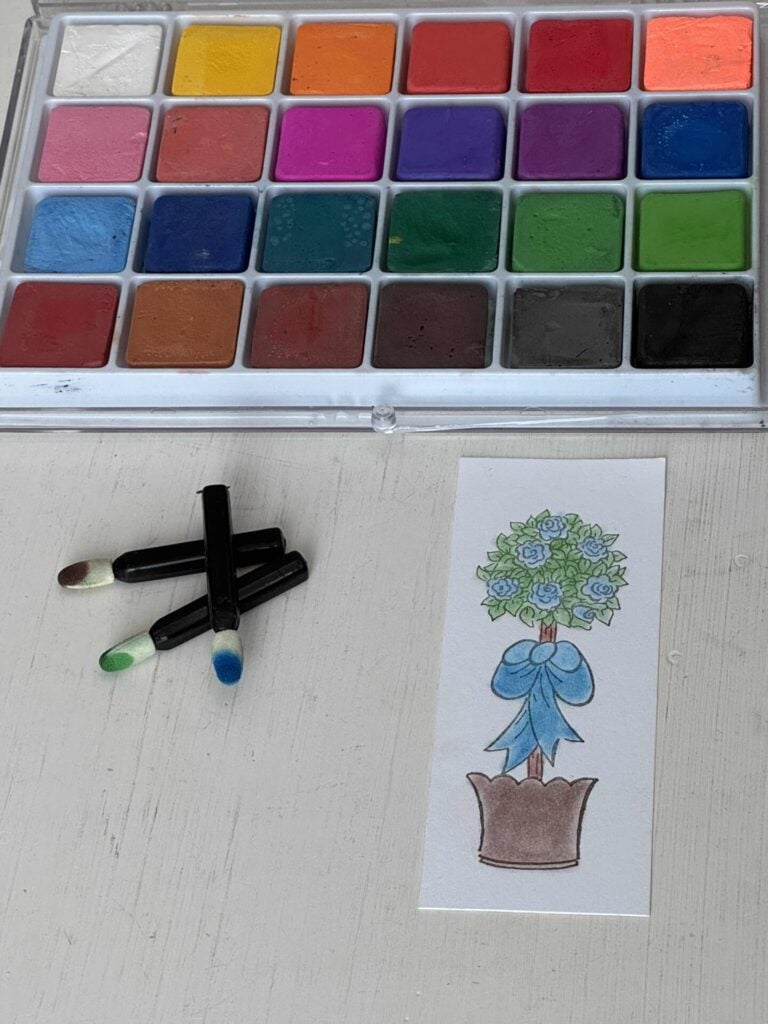
Once your stamped design is dry, you can start adding color with blending chalk.
Using a foam makeup applicator, gently pick up a small amount of chalk and lightly apply it to your stamped image.
You can blend colors together or build the color slowly until you get the look you like.
I love using chalk for this because it colors the image without covering the ink lines.
Plus, it gives a soft, subtle finish—almost as if you lightly painted the image.
It adds just enough color to bring the design to life without making it feel too bold.
If you don’t have a blending chalk palette like the one I used, you can get a similar look with chalk pastels.
Just scrape a small amount of powder from the chalk and apply it the same way with a foam applicator.
Take your time with this step and have fun experimenting with different shades.
It’s amazing how much this simple detail can elevate your handmade cards.
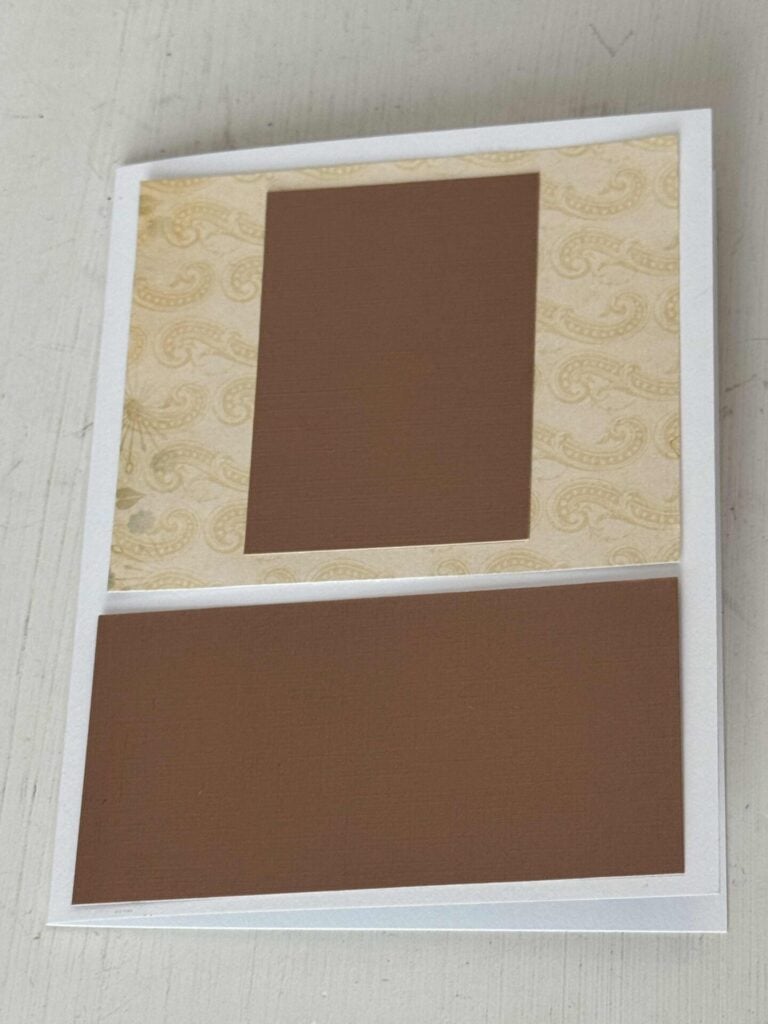
Step 5: Cut Your Paper
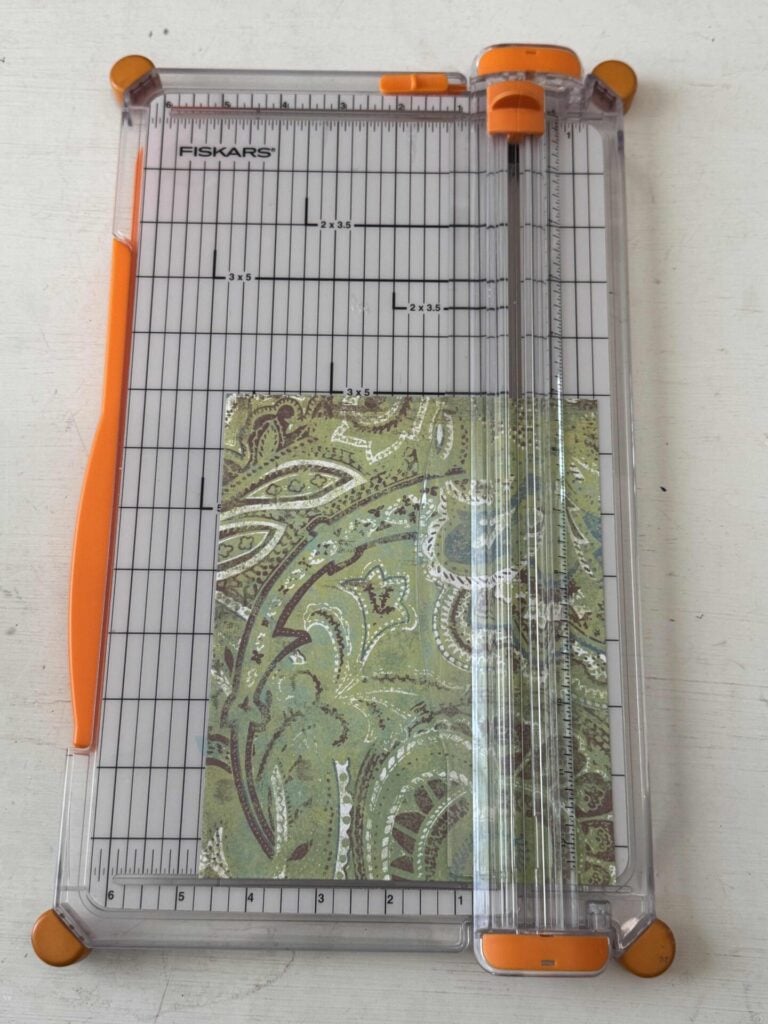
Once your design is finished, it’s time to cut your paper pieces to size.
You can keep it simple by using one piece as a base, or layer two pieces together to create a frame effect.
This is a great way to add a little extra interest and help your stamped design stand out.
I used a paper cutter to get clean, straight edges, but if you don’t have one, you can easily draw your lines with a ruler and cut them out with scissors.
Don’t worry about everything being perfectly exact!
Step 6: Assemble Your Handmade Cards
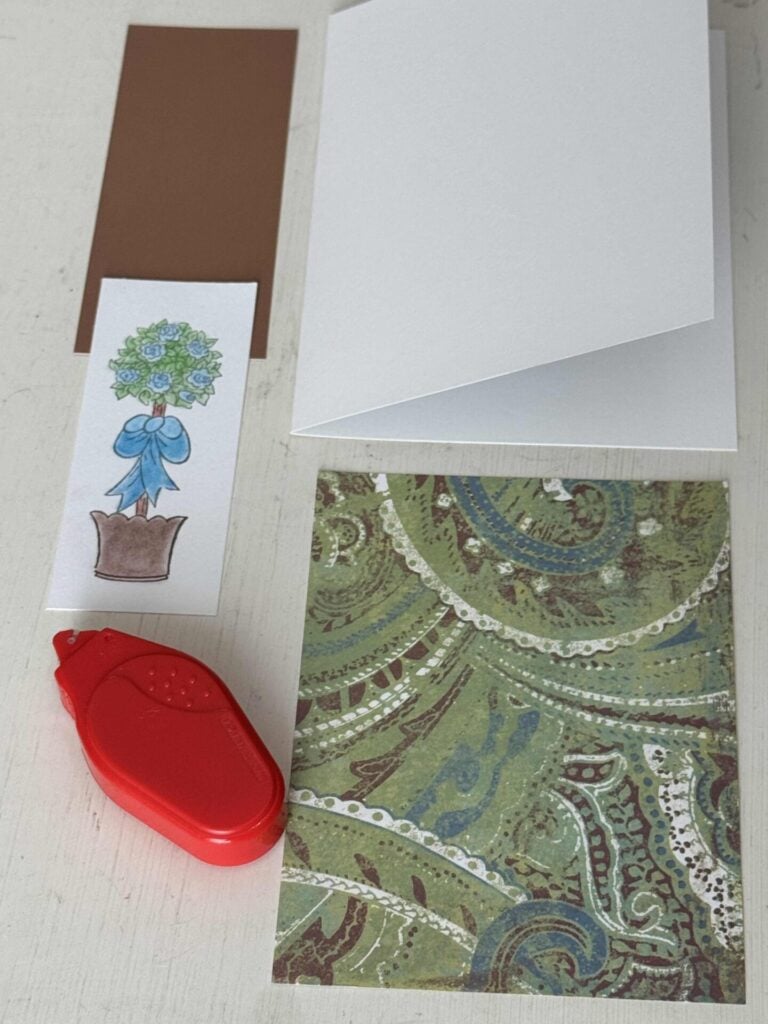
Now it’s time to put everything together.
Once you’re happy with your layout, use a tape runner to attach your layers to the card.
If you don’t have a tape runner, you can also use double-sided tape or glue—whatever you have on hand will work just fine.
It’s just that simple, and now you have a beautiful card!
Step 7: Add a Sentiment (Optional)
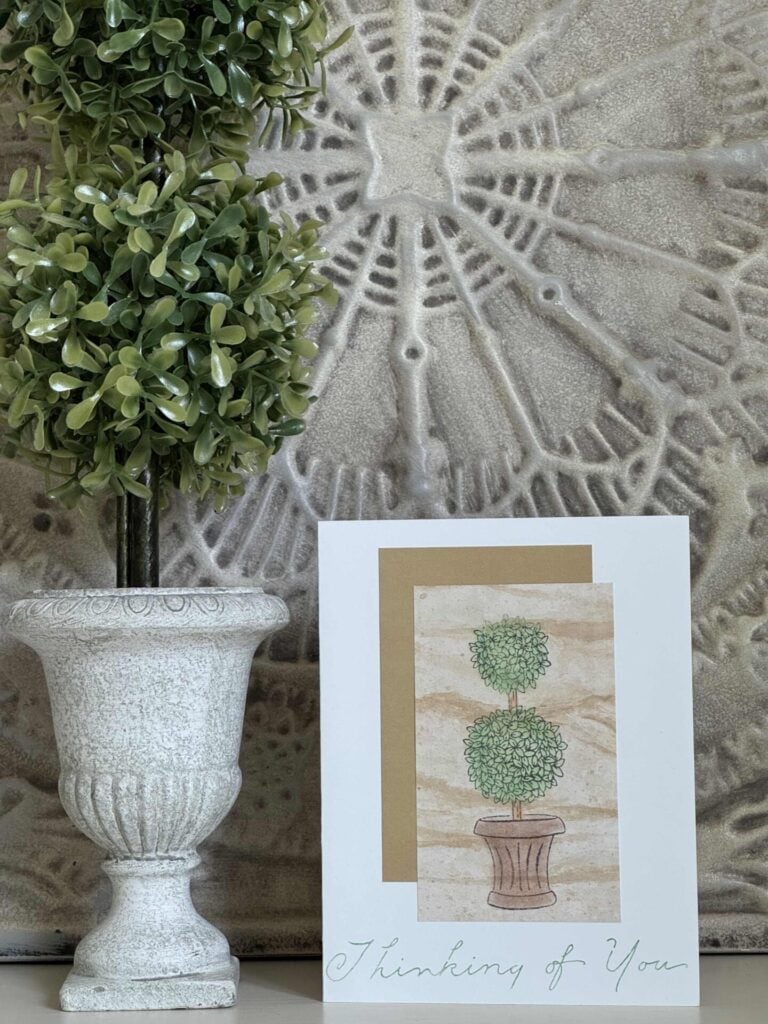
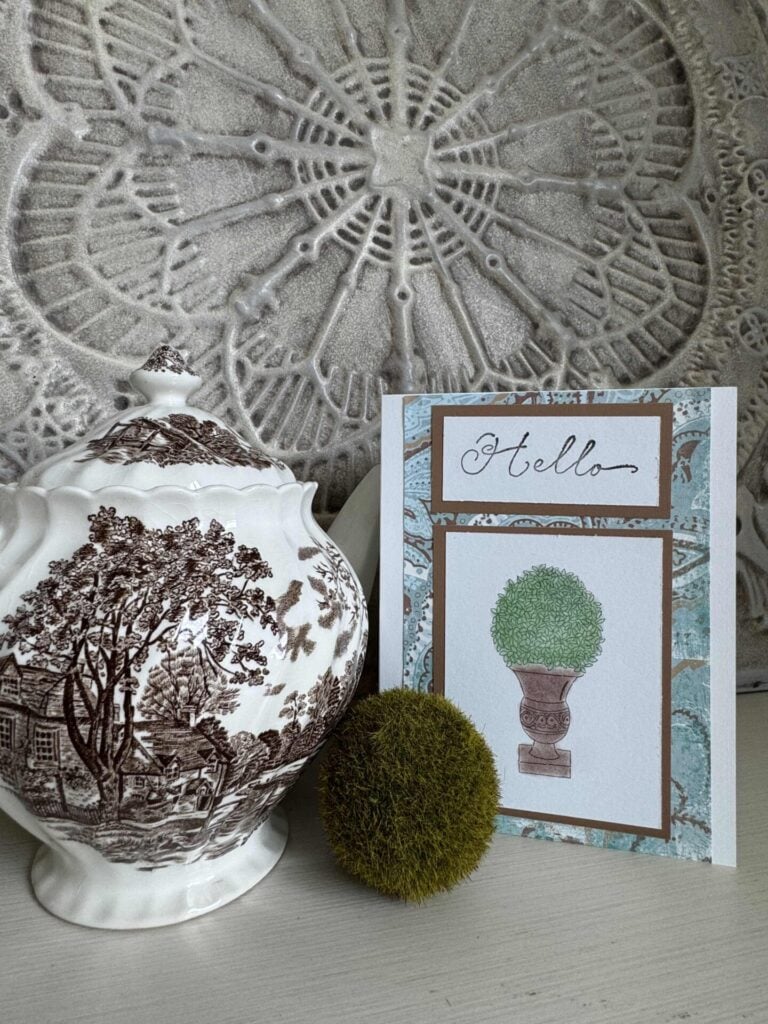
To finish your cards, you can add a stamped greeting like “hello,” “thinking of you,” or “congratulations.”
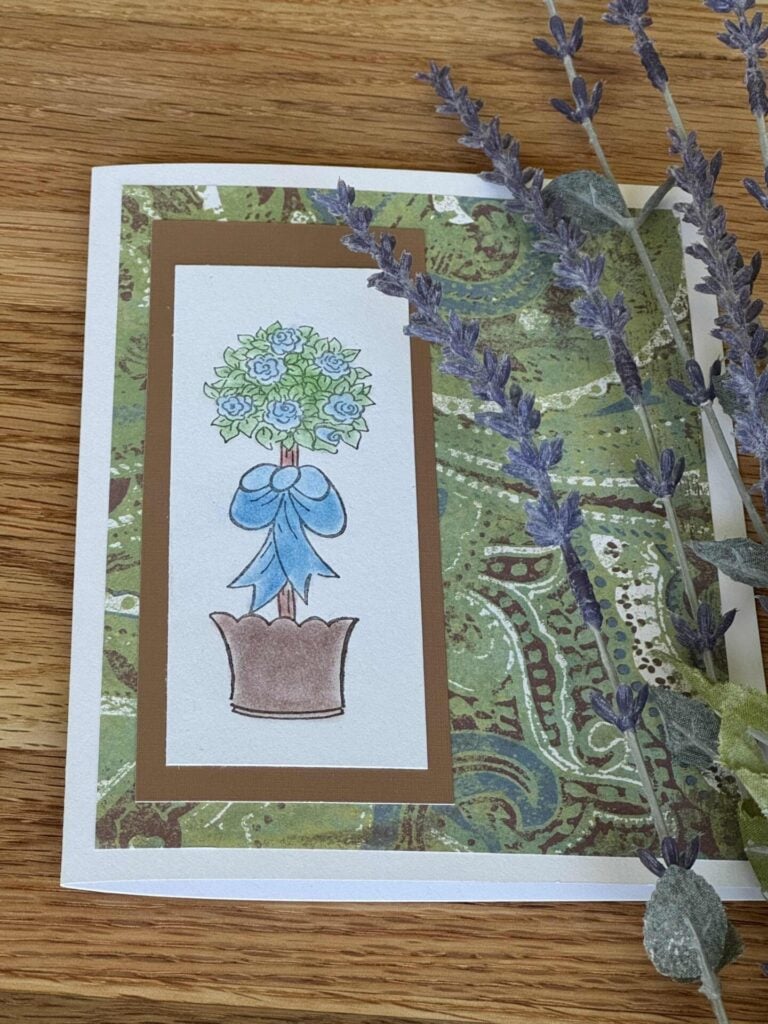
I stamped “Happy Birthday” on the inside of this card to keep the front more like a piece of artwork.
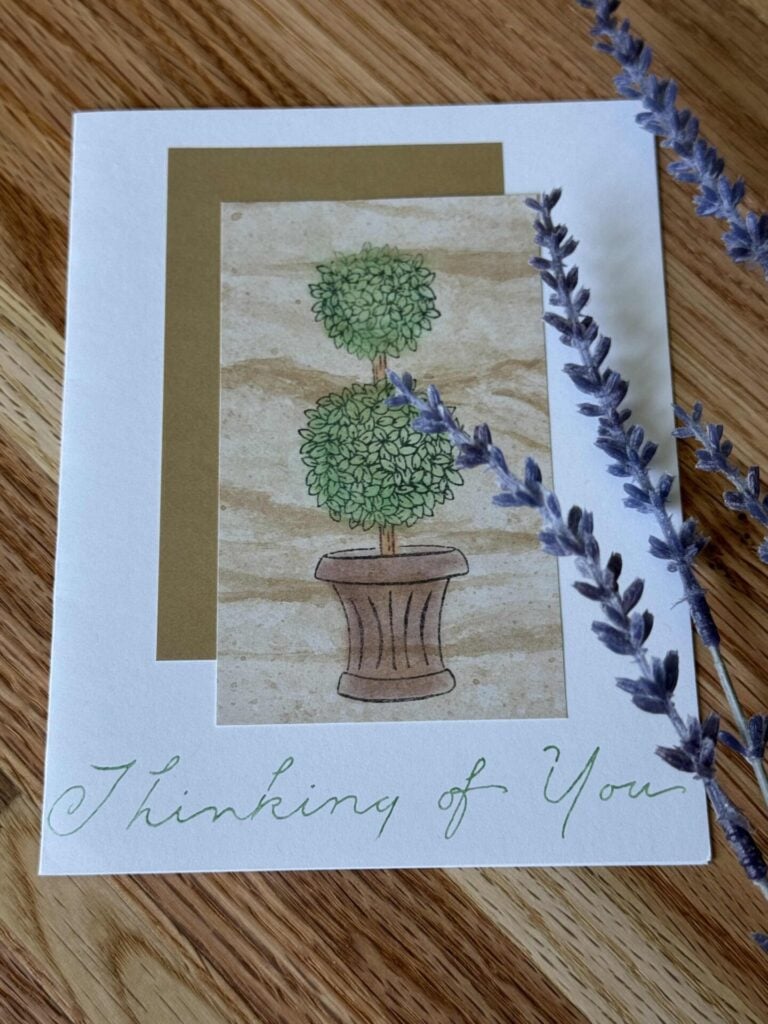
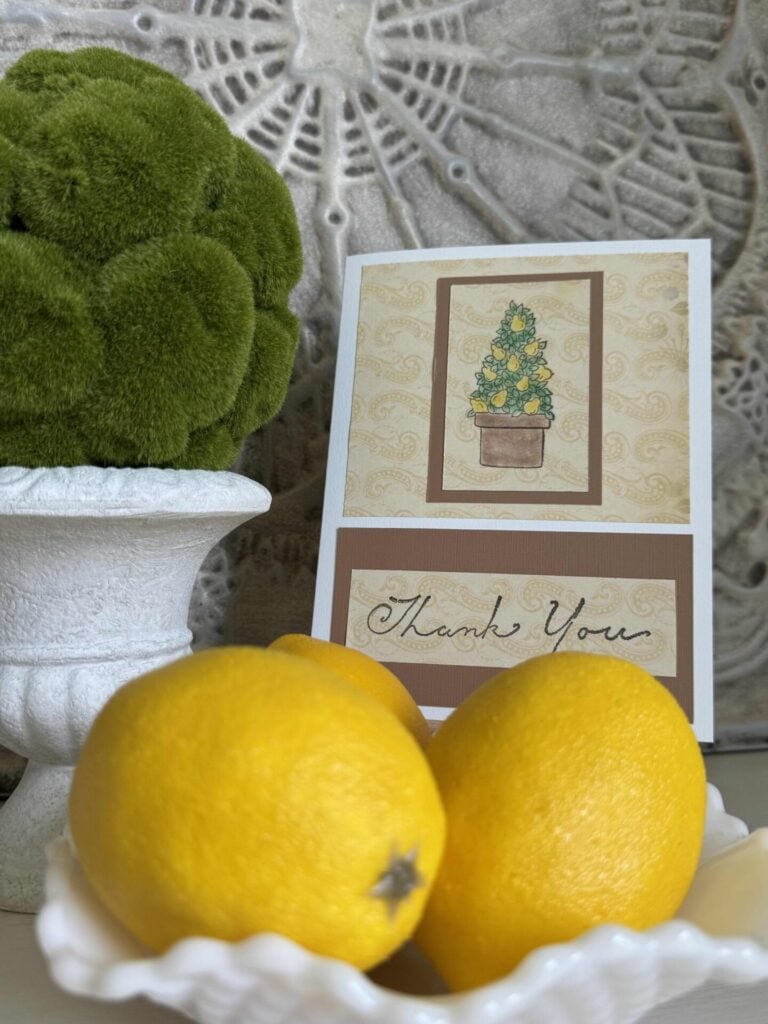
Here’s an example of how I used the sentiment on the outside of this card.
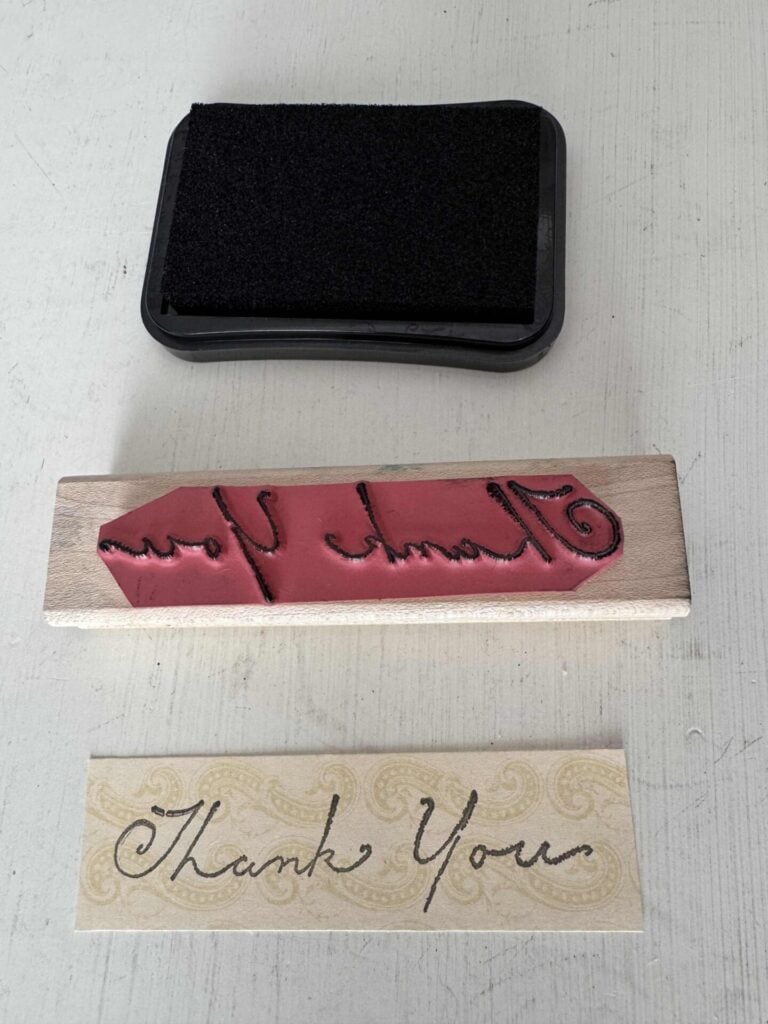
As you can see, this one will be a “Thank-You” card!
I thought you might also like to see how I layered the paper.
And the stamped designs.
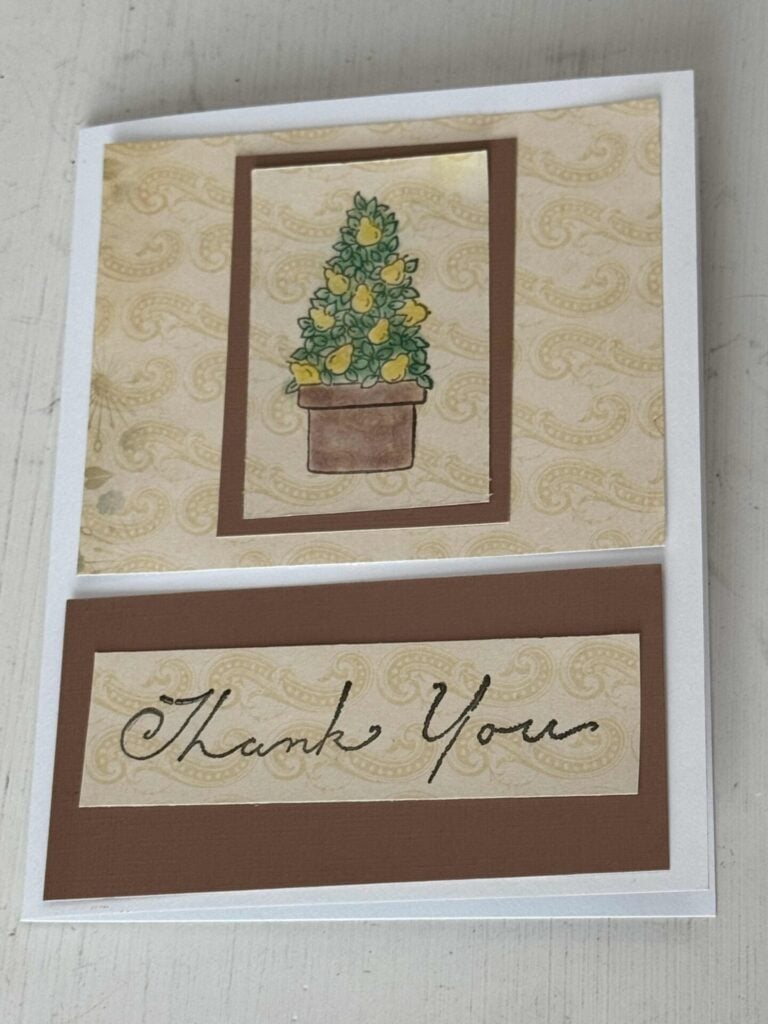
Didn’t it turn out cute!
I just adore how versatile handmade cards are, since you can easily customize them for different occasions by changing the sentiment.
Styling Your Handmade Cards as Decor
One of my favorite things about these handmade cards is that they’re pretty enough to enjoy as decor.
You can place a card on an easel, lean it against a vase or small frame, place it on a stack of books, or even display it on a tray with a few simple accessories.
Since I used topiary stamps, these cards have a soft, classic look that works beautifully with everyday decor—especially in a kitchen, entryway, or on a side table.
Swap out the designs or colors, and you’ve got an easy little update that feels fresh without much effort.
And when you’re ready, you still have a thoughtful, handmade card ready to share.
Tips for Making Your Own Handmade Cards
These simple tips will help you create handmade cards that look polished and come together easily.
- Try different stamps: If you don’t have topiary stamps, florals, botanicals, or simple wreath designs would work just as well.
- Change up the colors: Use soft pastels for spring, brighter shades for summer, or deeper tones for fall and winter.
- Use what you have: If you don’t have blending chalk, chalk pastels, or colored pencils can give a similar effect.
- Keep it simple: A single stamped image with soft color can be just as beautiful as a more layered design.
- Add simple embellishments: If you want a little extra detail, try adding ribbon, twine, buttons, or brads. A small embellishment can add texture without taking away from the design.
- Make a few at once: Since you already have your supplies out, create multiple cards in one sitting so you’ll have some ready when you need them.
Other Ways to Make Handmade Cards/Stationery
If you love creating projects like these handmade cards, here are other ideas from this month’s Handcrafted Society challenge.
Each project puts a unique spin on paper stationery and is full of creative inspiration.
How to Make Handmade Marbled Cards
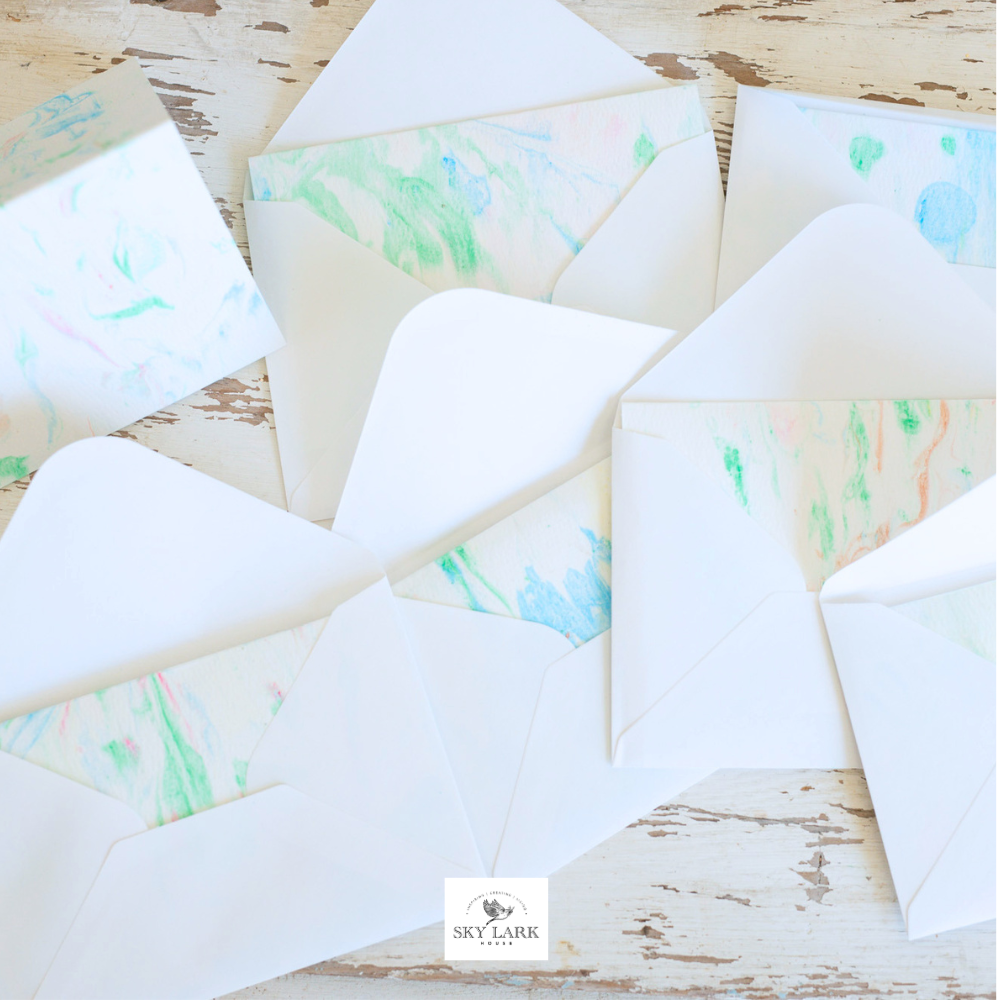
Anna from Skylark House shares a fun way to make handmade marbled cards with shaving cream.
How fun does that sound?
You’ve got to see how the marbled designs give each card a unique look, making them feel extra special and one-of-a-kind.
Handmade Collage Notecards
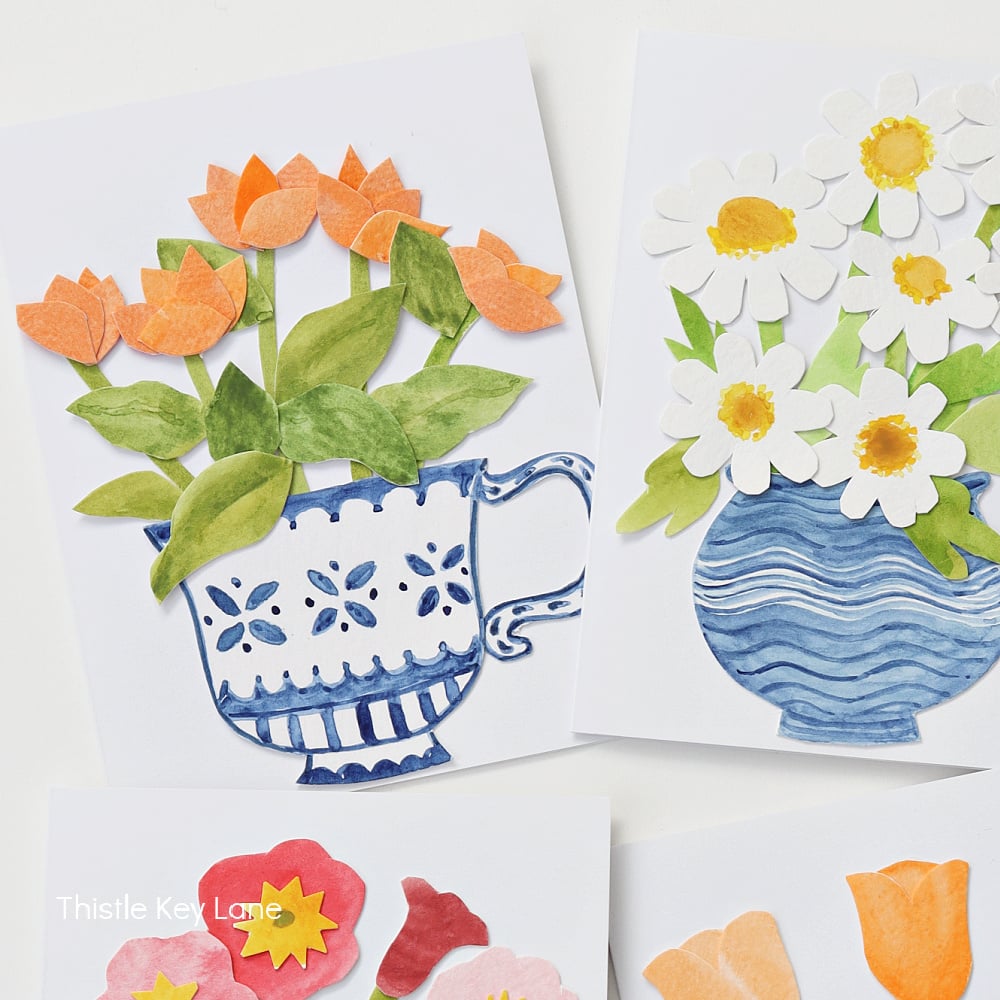
Michelle from Thistle Key Lane created beautiful handmade notecards featuring paper flower arrangement collages.
These cards have such a charming, artistic feel and would be a lovely way to connect with friends or family!
Origami Envelope: Flower That Holds a Handwritten Note
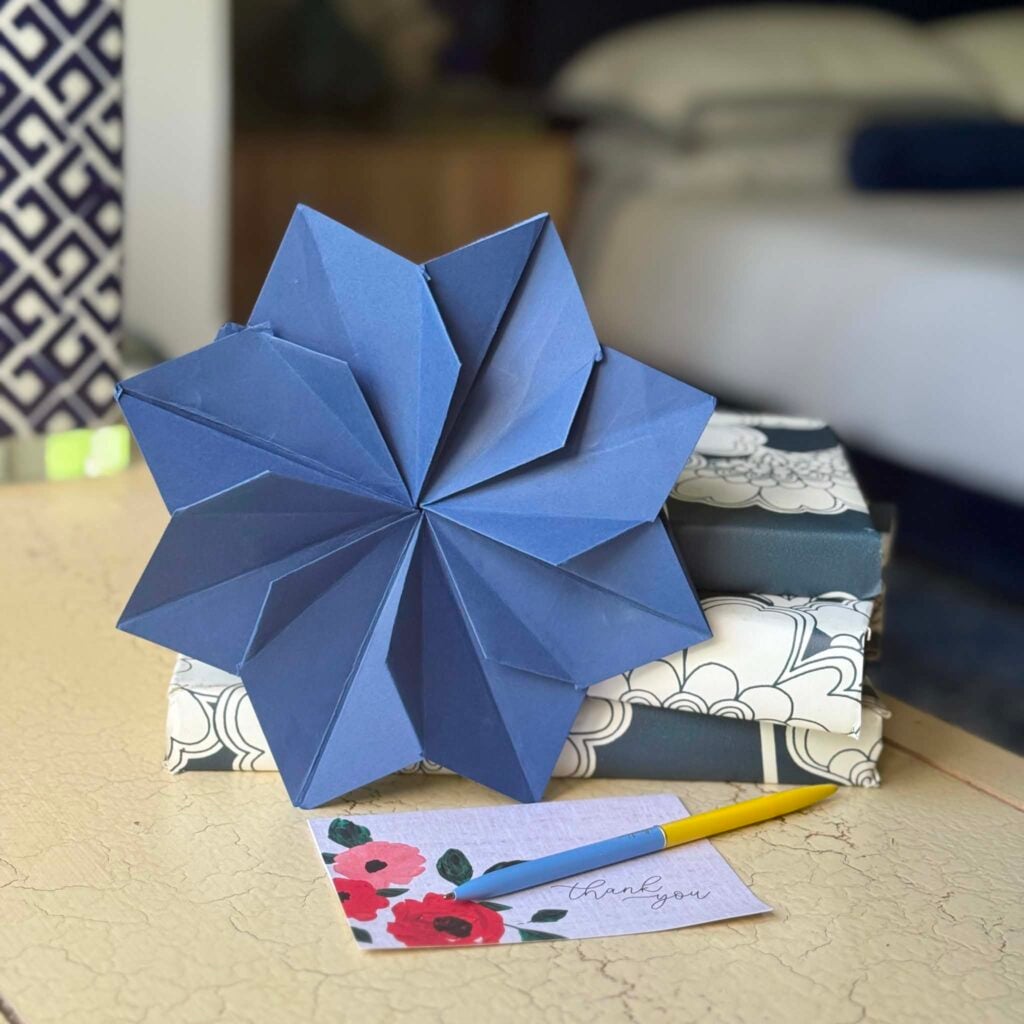
Missy from Sonata Home Design created such a thoughtful paper craft: an origami envelope flower.
What looks like a beautiful cardstock flower opens to reveal a handwritten note inside, making the message feel even more personal and meaningful.
Wouldn’t you be excited to receive this?
How to Make DIY Seed Paper for cards/stationery
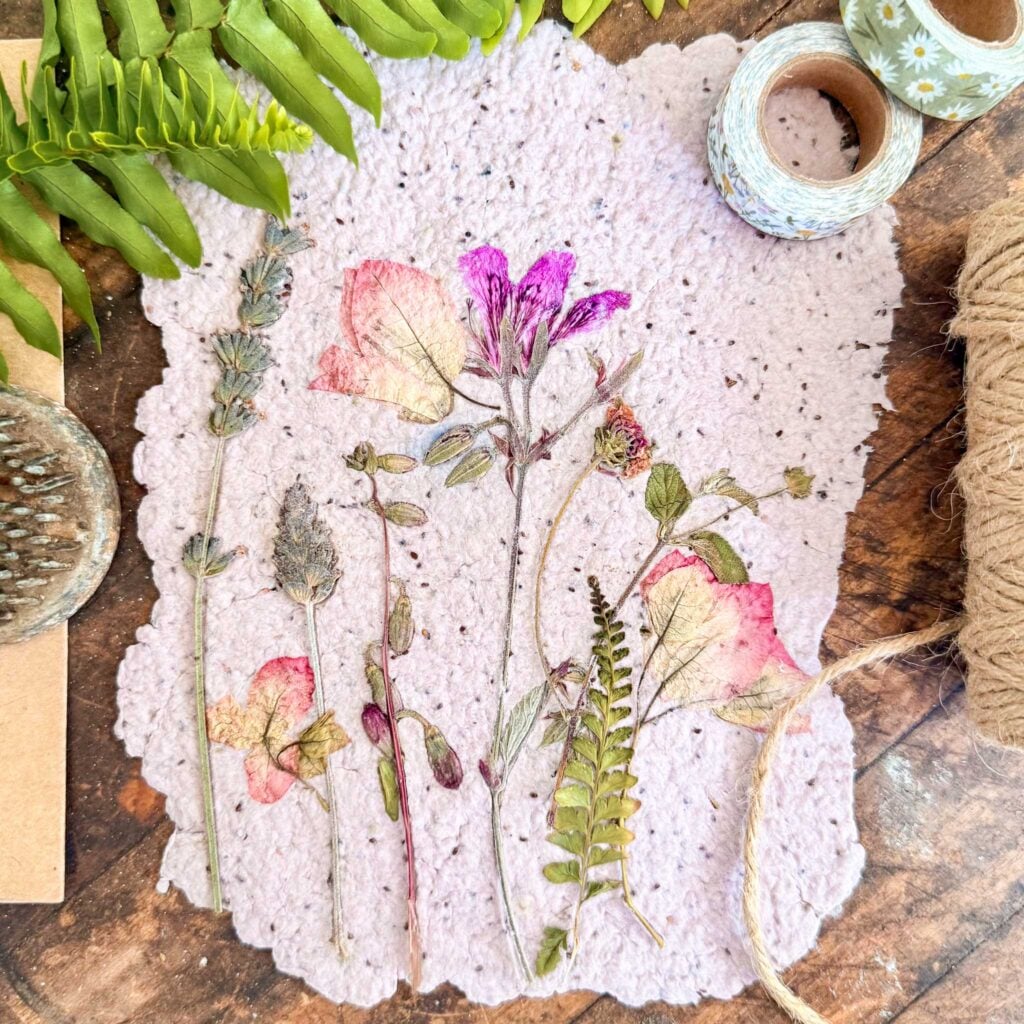
Wendy from WM Design House shares a creative way to make your own seed paper for cards and stationery.
I love that these handmade paper projects are not only beautiful but also can be planted afterward, making them a thoughtful gift for special occasions or anyone who loves a botanical touch.
Be sure to check out her tutorial and get her printable gift tags.
Handmade Cards to Hold Art — Too Pretty to Throw Away
What if your card doubled as a keepsake?
Diane from South House Designs shares a beautiful way to turn a handmade card into a frame for a tiny piece of art or a favorite photo!
This is definitely something your recipient will want to hold onto long after the occasion.
Closing Thoughts
Making your own handmade cards or stationery is a simple way to create something meaningful without spending much.
With just a few supplies and a little creativity, you can make cards that feel personal, thoughtful, and even a bit like artwork.
And honestly, that’s what makes them so special—each one is unique and made with intention.
Whether you’re creating a few to have on hand or making something specific for a friend or family member, these handmade cards are a beautiful way to add a personal touch to any occasion.
If you enjoy the blog, please sign up for our email list so you won’t miss a post!
Blessings, Donna and Rich
More DIY Inspiration
If you enjoyed this month’s Handcrafted Society project, here are a few more creative ideas from past challenges that you might love. These DIY projects all feature artistic details, handmade touches, and plenty of inspiration for creating something beautiful.
Click on the blue links to see the posts!
Make Your Own Block Print Kitchen Towels
Learn how to use simple wooden stamps and paint to create beautiful block-printed kitchen towels with a custom, hand-printed look. This project is an easy way to add an artistic touch to everyday decor.
Don’t Toss Wallpaper Samples—Make a Scalloped Tray Instead
Turn leftover wallpaper samples into a charming decorative tray with this simple DIY project. The layered patterns and painted details make this tray feel both creative and high-end.
How To Make A Lace Doily DIY Tote Bag
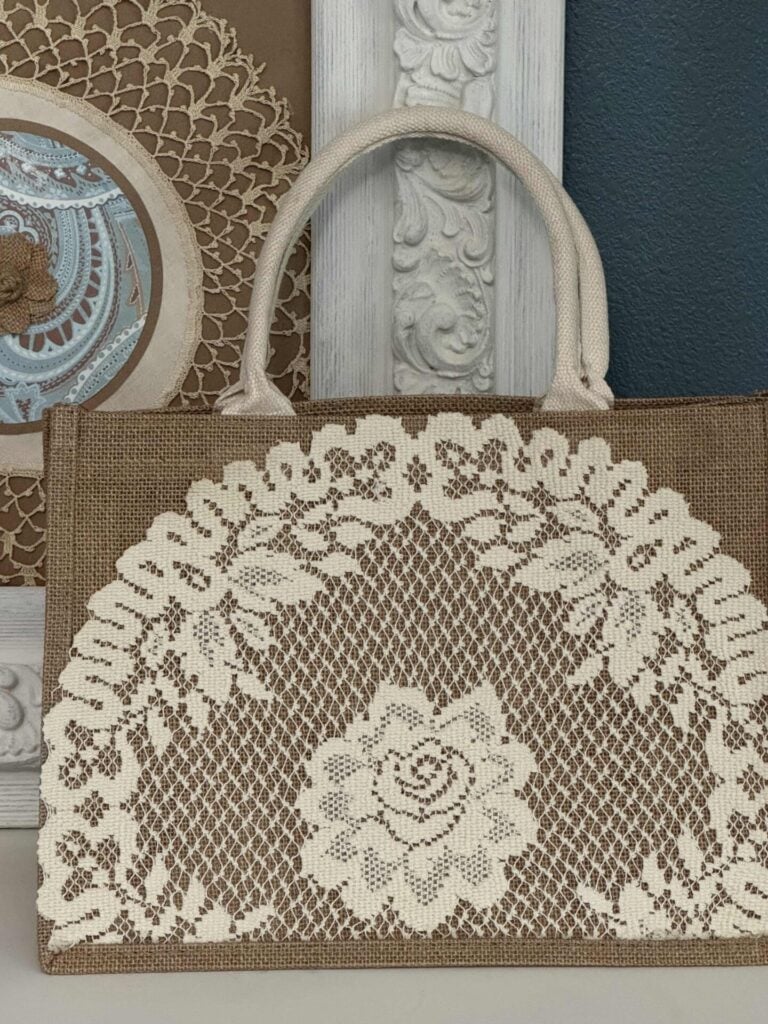
See how a vintage lace doily was transformed into a beautiful tote bag with soft texture and handmade charm. This project is a wonderful mix of creative reuse and artistic detail.
Pin It For Later
Don’t forget to pin the image below to one of your Pinterest boards (hover over the picture and click the red Pin button in the top left corner).
Related Posts:


**Some of the links in this post are affiliate links. This means if you click on the link and purchase the item, we will receive an affiliate commission at no extra cost to you. We appreciate your support. (disclosure policy)
Gorgeous Donna, absolutely gorgeous!! Now I want blending chalks. Using makeup daubers is so smart and makes it feel doable. You must have practiced to have such beautiful layering and blending !
Thank you Diane! Those chalks are so easy to use, it’s actually simpler than coloring with crayons! Have a wonderful day!
I love making cards and they are so personal when you receive one that has been made. Have fun making more!
Thank you Rita, from one card maker to another! ! I agree, it really is a nice personal touch! I’m very inspired after seeing all the creative ideas and thanks again!
These cards are so beautiful, Donna! I love the topiary designs and especially love how you added the soft coloring. Some really great tips! It’s always fun to see what you come up with!
Thanks a bunch Missy, you’re too kind! I’m still in awe over that flower envelope!
Fabulous note cards Donna! I love the stamps you are using, and the blended chalk looks amazing. I’m going to look into buying a chalk pallet or pastels and see what I can create! Thank you for the inspiration!
So glad you like them Michelle! They were so fun and easy to make! Thank you and have a great day!
I completely agree – the price of card is crazy! It’s easy to spend $18 buying three cards. Your stamped cards are lovely, meaningful and cost effective. The soft chalk colors you added to each stamp is beautiful. As always, love seeing your creativity and participating in the HCS with you.
I’m in shock every time I pick up a card in the store, it’s no wonder people don’t send cards like they used to! Maybe our ideas will change their minds! Thanks so much, my friend!
Your cards turned out SO cute!! Love the pretty stamped designs and the accented paper behind makes all the difference! So fun that they double as art, too!
Thanks Rachel, I’m so happy with how they turned out! It also feels good to be using some of my scrapbooking supplies, I rarely touch anymore!
Donna, I absolutely adore your handmade cards! You’re so right—greeting cards have become incredibly expensive these days. You found the perfect stamps, and I love the beautiful effect the chalk adds to each design. You are such a creative gal, and you make the whole process look so easy. Thank you so much for sharing your talent and inspiration!
Thanks Wendy! Your sweet words mean so much to me! I love participating in this fabulous group!