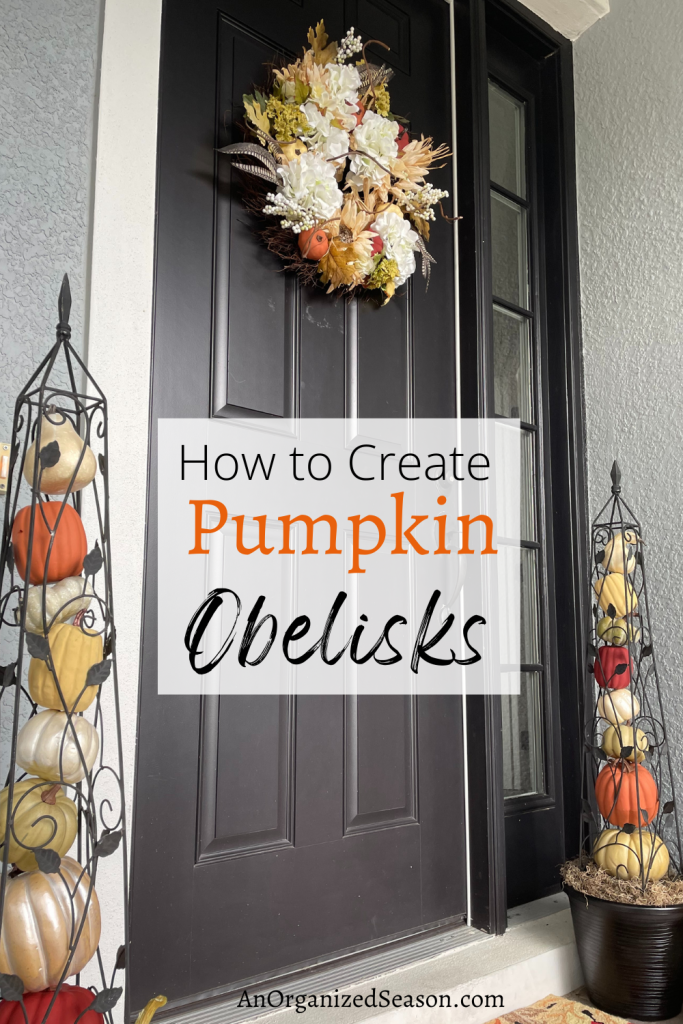
Looking for a creative new way to decorate with pumpkins indoors or out? Learn how to make pumpkin obelisks!
Table of Contents
**Some of the links in this post are affiliate links. This means if you click on the link and purchase the item, we will receive an affiliate commission at no extra cost to you. We appreciate your support. (disclosure policy)
What is an obelisk?
When I hear the word obelisk, the Washington Monument immediately comes to mind!
If you’re not sure what an obelisk is, here’s the definition.
An obelisk is a four-sided, tapered monument that ends in a pyramid-like shape at the top.
Today we are talking about a much smaller obelisk!
A garden obelisk!

Many people add this vertical element to their gardens or pots to support their plants as they grow tall.
Where did I get the idea for a pumpkin obelisk?

I was shopping at Hobby Lobby for fall foliage in July and spotted this cute pumpkin stack.
It reminded me of my obelisk and the wheels in my head started spinning!
I wondered if I could do something similar.
Should you use real or faux pumpkins?

I am using faux pumpkins, but you could use real pumpkins or gourds instead.
It’s a matter of preference and you need to consider your budget, as well.
Steps to make pumpkin obelisks
Gather
Gather or purchase the following items to complete this project:
- Obelisk(s)
- Flower pot(s)
- Bag of rocks or pebbles
- Pumpkins of various sizes
- Floral wire
- Plastic shopping bags for filler
- Spanish moss
- Spray paint-optional
- Craft paint-optional
- Paintbrushes-optional
Prep
The first step is to determine the number of pumpkins you need and how you will place them in the obelisk.

I played around with the pumpkins, placing the smallest one at the top and the largest at the bottom.
I used paint sticks to hold the pumpkins up during this step.
paint
The pots my mums came in were the perfect height to hold the obelisks!

I gave them a couple of coats of black spray paint!
Since I had so many different colors of pumpkins, I decided to paint some of them to match my Fall rug.

I chose to use terra cotta, orange, and muted yellow colors.
I applied three coats of paint to the pumpkins to get good coverage.
Be sure to keep them in the order they will be placed inside the obelisk!
Make
Do the following steps to make the pumpkin obelisk!
Secure the pumpkins

Lay the obelisk on its side and place the pumpkins in it.

Attach the floral wire in an “x” shape to hold the pumpkins up!

I attached a glue dot to the stem of each pumpkin and pushed it into the pumpkin sitting above it.
Note: I did not want to use hot glue since this will not be a permanent decor item. I will take this apart when Fall is finished!
Put the obelisk into a flower pot

Place the obelisk into a flower pot and add pond pebbles, rocks, or bricks to keep it from moving or being able to blow over.
I filled each pot about halfway up.

Next, stuff plastic shopping bags to finish filling the flower pot.

Hide the plastic bags and floral wire by covering them with Spanish moss.
Enjoy your pumpkin obelisks
I placed my pumpkin obelisks on either side of my front door!
However, you could use them indoors or out!
I encourage you to check out how I decorated the front porch on a budget!


Let me know what you think about my pumpkin obelisks in the comments below!
If you enjoy the blog, please sign up for our email list so you won’t miss a post!
Until next time, follow us on Pinterest, Facebook, and Instagram!
Blessings, Donna and Rich
Save it for later

More Fall DIY inspiration
- Make Dried Wheat Arrangements
- How to Decoupage Pumpkins
- Create a Pinecone Flower Wreath
- How to Make a Pumpkin Topiary
- Adorable Yarn Pumpkins
**Some of the links in this post are affiliate links. This means if you click on the link and purchase the item, we will receive an affiliate commission at no extra cost to you. We appreciate your support. (disclosure policy)
Those are so cute! If I knew where to find the obelisks here in Ontario, I would run out right now in the pouring rain and buy a couple..😩
Wow! Such a huge compliment! Thanks so much! I hope you can find some! Happy hunting!
Another quick question..how tall and wide would yours be at its widest?
Thanks!
Mine obelisks are four feet tall, from the ground to the top point. They are 6 inches wide at the bottom. Good luck with your search for some and let me know if you make these! Happy day, Donna
Such a cute idea! Love it. Thanks for sharing on Crafty Creators!
Thanks, Niki! I thought they were fun and different than I’ve ever made before! Happy Day to you!