Want to bring the gorgeous colors of fall indoors? I’ll show you how to make a fall garland that adds rich color and elegant style to your home.
Living in Florida, we don’t get to see the leaves change, so I love finding creative ways to capture that seasonal beauty.
**Some of the links in this post are affiliate links. This means if you click on the link and purchase the item, we will receive an affiliate commission at no extra cost to you. We appreciate your support. (disclosure policy)
This year, I made a garland that drapes gracefully from the top of our gold mirror down toward the floor.
The idea for this project came from a fall mantel I featured in my Seasonal Sentiments September Rewind newsletter.
I couldn’t stop thinking about the rich colors and textures, so I decided to create my own version using materials I already had on hand.

I also wanted it to coordinate with the flower arrangement I made from thrifted flowers and a vase that I’ll be using on my Thanksgiving table.
That project helped inspire the color palette for this garland—warm burgundy, gold, and touches of green.
It’s always fun to take an idea that inspires you and give it your own personal twist.
In fact, that’s what I hope you’ll do with this post.
I can’t wait to show you how I made this elegant garland, so let’s get started!
Gather Materials
Once I had my idea, I gathered a mix of faux stems and greenery in rich autumn colors to bring the look together.
I was so excited because I had everything I needed in my fall decor bins.
Here’s what I used to create my elegant fall garland:
- Light brown pipe cleaners- Hobby Lobby
- Magnolia Leaf & Pinecone Spray (3) from Hobby Lobby
- Faux branches (2)- Hobby Lobby
- Leaf garland
- Maple leaves bush (2)- Walmart
- Faux flowers- Thrift store
- Greenery
- Painters tape
- Wire cutters
Steps to make a fall garland
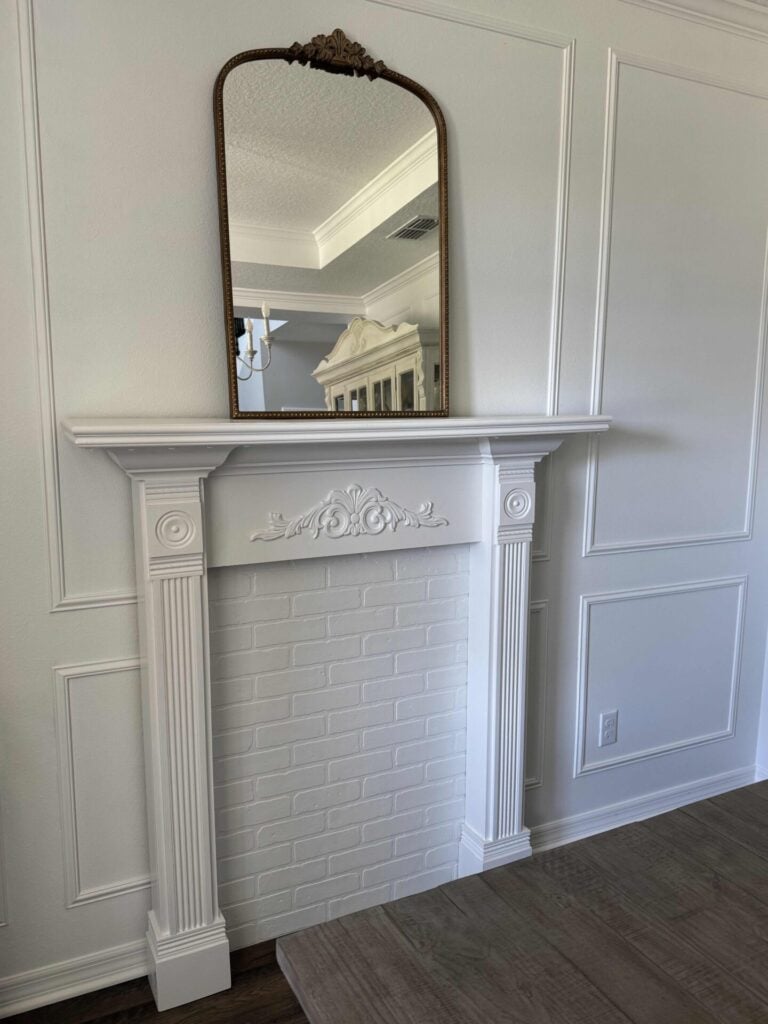
Before we get started, here’s a look at our mantel with just the gold mirror in place.
Seeing the space before I began helped me plan how the garland would drape and where to anchor each section.
Here are the steps I used to create my fall garland!
Create the base with magnolia leaf sprays
To begin, I used three sprays of magnolia leaves and pinecones from Hobby Lobby that I purchased a few years ago.

I placed the first spray against the mirror and bent the top to match the angle.
To hold it in place, I used painter’s tape to secure the bottom of the stem to the mirror.

Next, I flipped the second spray upside down and attached it to the first one using a light brown pipe cleaner.
Finally, I bent the long stem of the third spray and attached it to a command hook under our mantel with another pipe cleaner.
This created the draped effect I wanted, cascading beautifully from the top of the mirror down toward the floor.
Add faux branches for structure
Next, I added two faux branches to give the garland more length.

I placed one branch across the top of the mirror and the other hanging down from the spray beneath the mantel.
Both branches were secured to the magnolia sprays with light brown pipe cleaners.
This step helps define the overall shape of the garland and creates a natural, flowing base for the rest of the greenery and florals to attach to.
Layer in a leaf garland to fill the gaps

Then, I added a simple leaf garland to hide the magnolia sprays’ branches and give the base a fuller look.
It’s an older piece I’ve had for years (I can’t even remember where I bought it!), but it worked perfectly for this project.
I attached the garland to the magnolia sprays with pipe cleaners, making sure it blended naturally into the arrangement.
Sorry, I forgot to snap a photo of the garland on its own so you could see what it looked like.
Add maple leaves for color and fullness
To bring in more rich fall color, I used two maple leaf bushes I purchased at Walmart a couple of years ago.

I cut two stems off with wire cutters and wrapped their ends together to form a small bundle that you can see in the top right corner of the picture above.
After repeating the process, I ended up with six bundles total.

I placed one bundle on each end of the garland to soften the edges and fill in the bare spots.
The remaining four bundles were evenly spaced through the center to add fullness to the garland.
Add flowers and greenery for the finishing touches
To complete the garland, I used the remaining faux flowers from my thrift store arrangement, along with a few extra pieces from my fall decor bins.
I had three floral stems left over from the thrifted arrangement, but I knew they wouldn’t be enough to fill the space.

Luckily, I found some small burgundy hydrangeas and a few greenery picks with burgundy berries that coordinated beautifully.

I placed the large hydrangea bloom in the center of the garland, then tucked the smaller flowers throughout to balance the color and texture.

To finish, I added two of the greenery picks with berries on each end and the other two toward the middle.
These last touches really brought the garland to life and tied all the fall colors together.
Shape the wire branches for a natural look

The magnolia sprays have wire branches that stick out a bit, so I wanted to make them look more like natural grapevine pieces.
To do this, I used two sizes of dowel rods—one large and one small—and gently wrapped the wire branches around them to create soft, curved shapes.

This quick step makes a big difference, giving the garland a more realistic and elegant appearance.
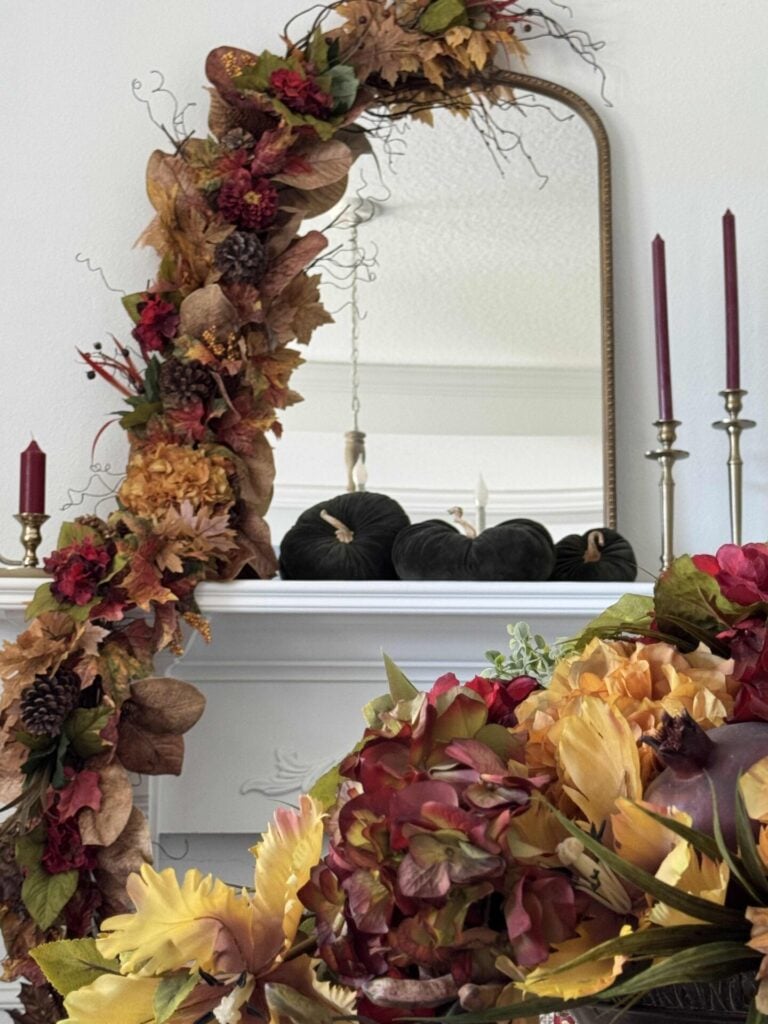
The styled mantel

My garland doesn’t look exactly like the one that inspired it—

Mine is not as thick, and I didn’t have another leaf garland long enough to reach all the way to the floor—but I still love how it turned out!

It adds the perfect touch of fall elegance to our dining room and makes me smile every time I walk by.
Final Thoughts
I hope this project inspires you to make your own version and decorate your mantel with the beautiful colors of the season.
Whether you use new supplies or pull from what you already have, creating something with your own hands is such a rewarding way to welcome fall into your home.
I’m planning to leave this garland up through Thanksgiving because it coordinates beautifully with my holiday decor—if you want to see how I styled our Thanksgiving table to match, click here!
If you enjoy the blog, please sign up for our email list so you won’t miss a post!
Until next time, follow us on Pinterest, Facebook, and Instagram!
Blessings, Donna and Rich
More Fall Decor Inspiration
If you like to get a high-end decor look for less, check out these posts:
- DIY Velvet Pumpkins With Real Stems
- Beautiful Fall DIY Charger Plates
- Simple But Elegant Thanksgiving Decor
- How to Decoupage Elegant Pumpkins
Pin It For Later
Don’t forget to pin the image below to one of your Pinterest boards (hover over the picture and click the red Pin button in the top left corner).

Related Posts:


**Some of the links in this post are affiliate links. This means if you click on the link and purchase the item, we will receive an affiliate commission at no extra cost to you. We appreciate your support. (disclosure policy)
Beautiful design. It looks perfect for the size of your mantle.
I’m so glad you like it! Thank you for your kind words and have a great day!
OMG That’s SO dramatic and amazing! LOVE the way it cascades down….it’s so cool that you used what you had on hand to create it!!
Thank you Rachel! It was so fun to put together and I was thrilled I actually had enough stuff to make it! Have a great day!
This looks amazing, Donna! I can easily see something like this in an old Georgian mansion. It’s beautiful! Thanks so much for the easy to follow step by step. I can’t wait to try this too! Hugs, CoCo
It was so easy and fun to make! I can imagine a beautiful pink and white garland draped down your fireplace! You have to try it, it would be so pretty! Thanks for stopping by!
Donna! Your garland is absolutely stunning!!! You have outdone yourself friend. I had seen Lucy’s mantel too and the drama is everything. Enjoy it for the season, it looks beautiful in your dining room. Happy November. XO- MaryJo
Thank you so much MaryJo! I think the black walls in her home really make that garland look even more dramatic. Mine does not have such a big effect but it’s still really pretty! I’m thinking about removing the leaves and adding greenery for Christmas, so stay tuned!