Want to make your bedroom look elegant? Follow our step-by-step guide to learn how to install crown molding with confidence.
We moved into a builder-grade home with minimal trim and basic finishes, leaving the rooms feeling plain.
**Some of the links in this post are affiliate links. This means if you click on the link and purchase the item, we will receive an affiliate commission at no extra cost to you. We appreciate your support. (disclosure policy)
So, we’re taking matters into our own hands to give our rooms a custom, high-end look on a budget by adding crown molding!
Adding crown molding is an excellent way to upgrade any space and give it architectural appeal!
While it may seem challenging, you can achieve professional-looking results with the right tools and techniques.
What is crown molding?
Crown molding is decorative trim installed where the walls meet the ceiling.
It adds a touch of elegance and detail to any room and enhances its visual appeal by creating a polished, finished look.
Installing it in any room can elevate the overall design and increase your home’s value.
Steps to install crown molding
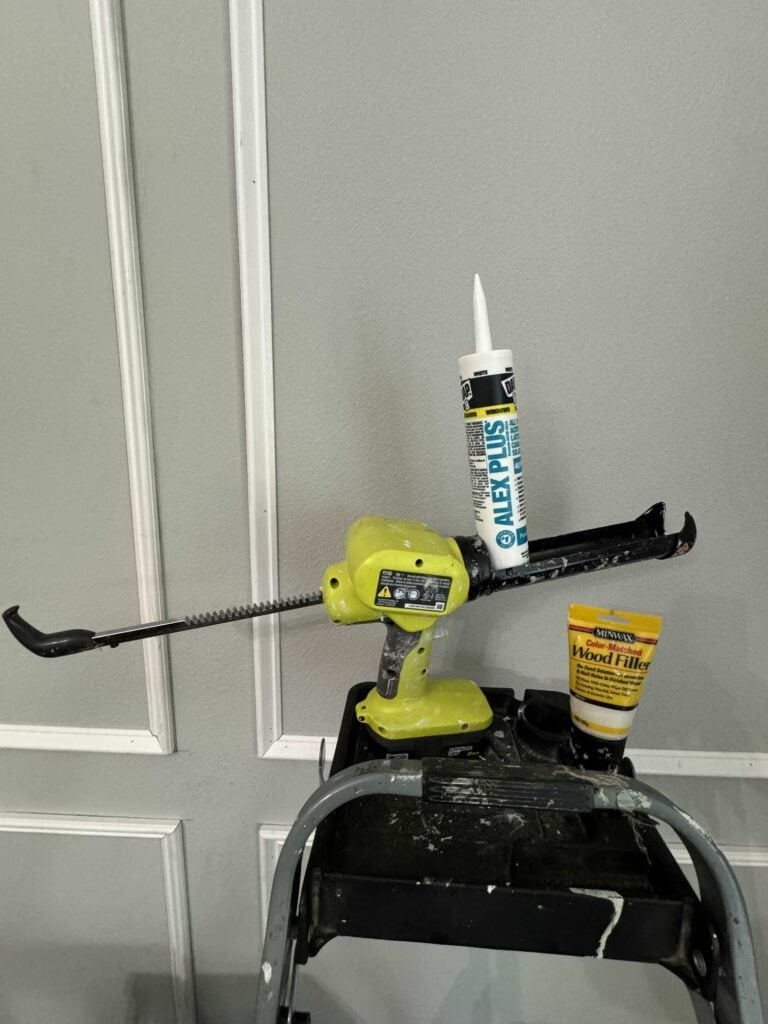
Gather
Gather the following materials to complete this project:
- Tape measure
- Power miter saw
- Stud finder
- Two stepladders
- Carpenter’s pencil
- Brad/finish nailer
- Caulk gun
- Crown molding (MDF or wood)
- Brads or finish nails for a power nailer
- Wood filler
- Paintable caulk
- Painter’s tape
- Paint
- Paintbrush and rollers
SELECT SIZE of CROWN MOLDING
Decide on the type and size of crown molding that best fits your bedroom’s style and budget.
Because our bedroom is large, we looked for the widest crown molding that fit our budget and decided on 5 1/4’ wide crown molding from Home Depot.
Note that your miter saw must also accommodate the size molding you select.
Measure the Room
Begin by measuring the perimeter of your bedroom to determine how much molding you need.
Add an extra 10-15% to account for mistakes and cuts.
Our bedroom has a tray ceiling, so we had to calculate the number of feet in the trey ceiling and the perimeter wall of the bedroom.
To minimize the number of joints, we had Home Depot cut and deliver the molding in 12’ and 16’ lengths.
We ordered four 12’ boards for the tray ceiling because it was square with 11’ sides, and we used 16’ boards for the bedroom walls.
TEST FIT MOLDING and mark Guidelines
We bought a small one-foot piece of crown molding from the store to take home and test fit on the ceiling.
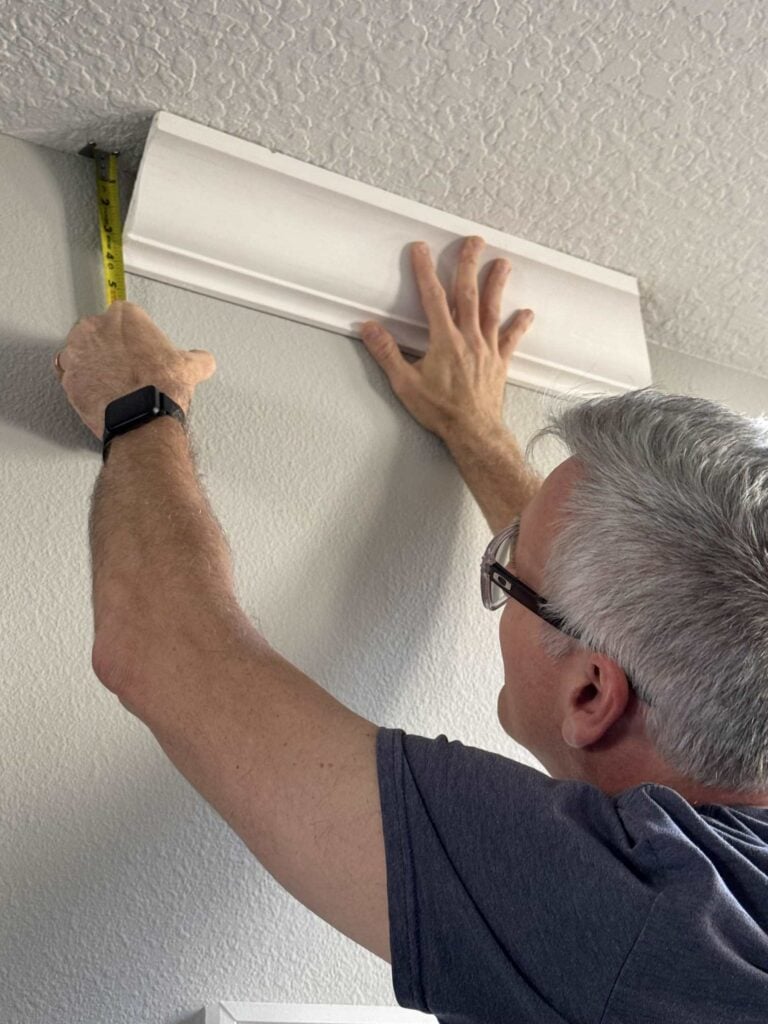
The molding sits at an angle from the wall up to the ceiling. After fitting it snugly to the ceiling and wall, we measured how far down the wall it went and how far out on the ceiling from the wall it went.
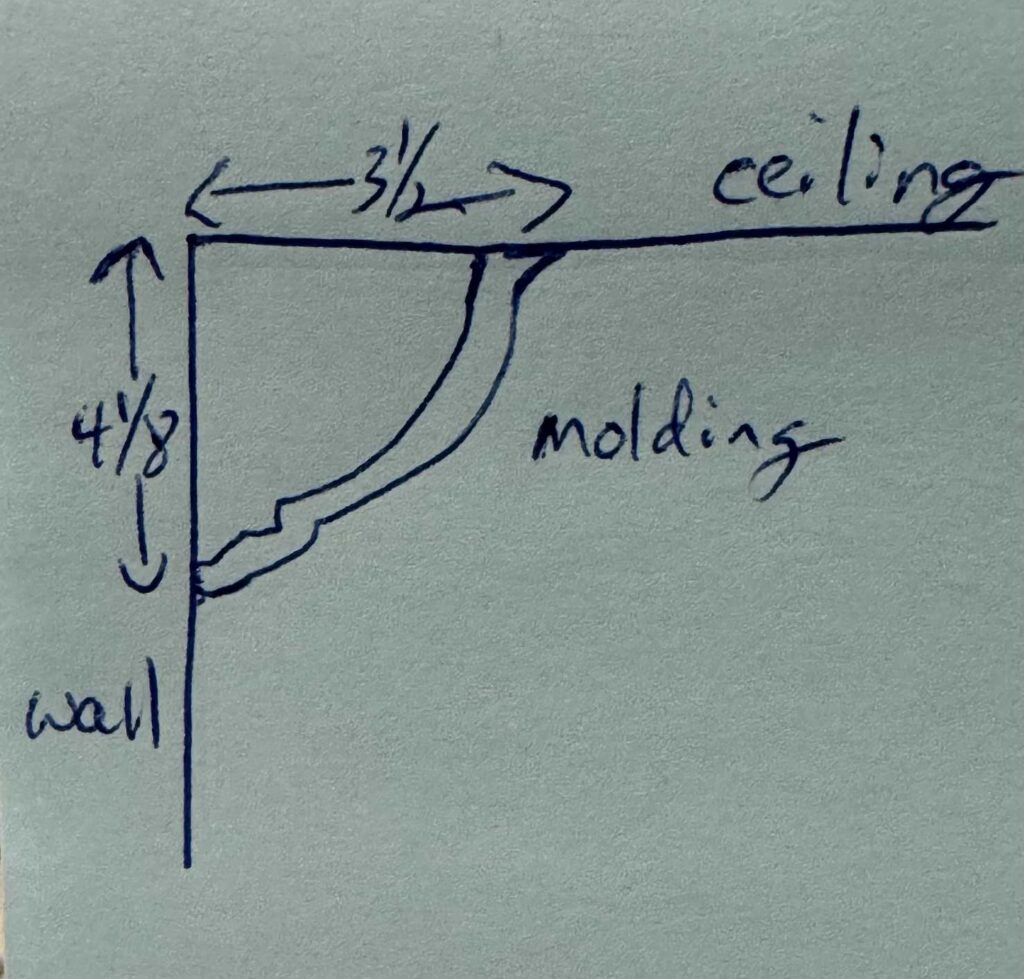
We will show you later how to use these measurements to set up your saw.

Rich cut a block of 2X4 to that measurement as a quick way to mark places on the wall and trey ceiling edge.
Find and mark wall studs

Use a stud finder to locate and mark the studs along the walls.
You will want to install brad nails through the molding into studs when possible.
SET UP SAW to CUT CROWN MOLDING
Each piece must be held the same way on the miter saw to cut the crown molding at the right angle consistently.
We need those measurements we took when test-fitting a piece of crown molding on the wall.
The idea is to mark the saw with the measurements so you can easily hold each piece the same way when making cuts.
The measurements taken on the wall and ceiling must be reversed on the saw.

The measurement from the wall across the ceiling is transferred to the miter saw “table.” The measurement taken down the wall must be transferred to the back vertical guide “fence.”
We usually mark the fence with a piece of tape at the place where the crown should rest against the fence.

Rich created a guide board to mount to the miter saw table for the molding to rest against.
You can go with the tape to mark the positions if you like.
When cutting the crown, the molding must be held upside down on the saw and opposite of how it will be mounted on the wall.
Cut the crown molding
When making any cuts, you will hold the molding on the saw upside down from how it is installed on your wall and ceiling.
All the cuts we will make will be with the saw rotated to 45 degrees to the right or the left, or we will make a 0-degree cut (straight).

Install the crown molding
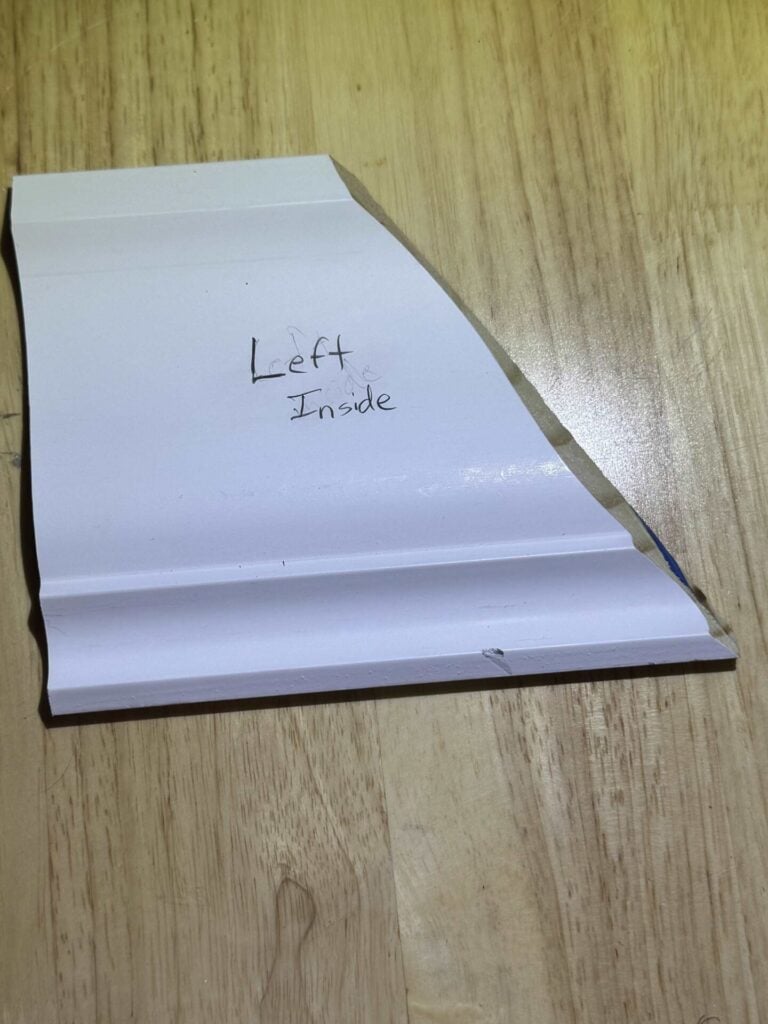
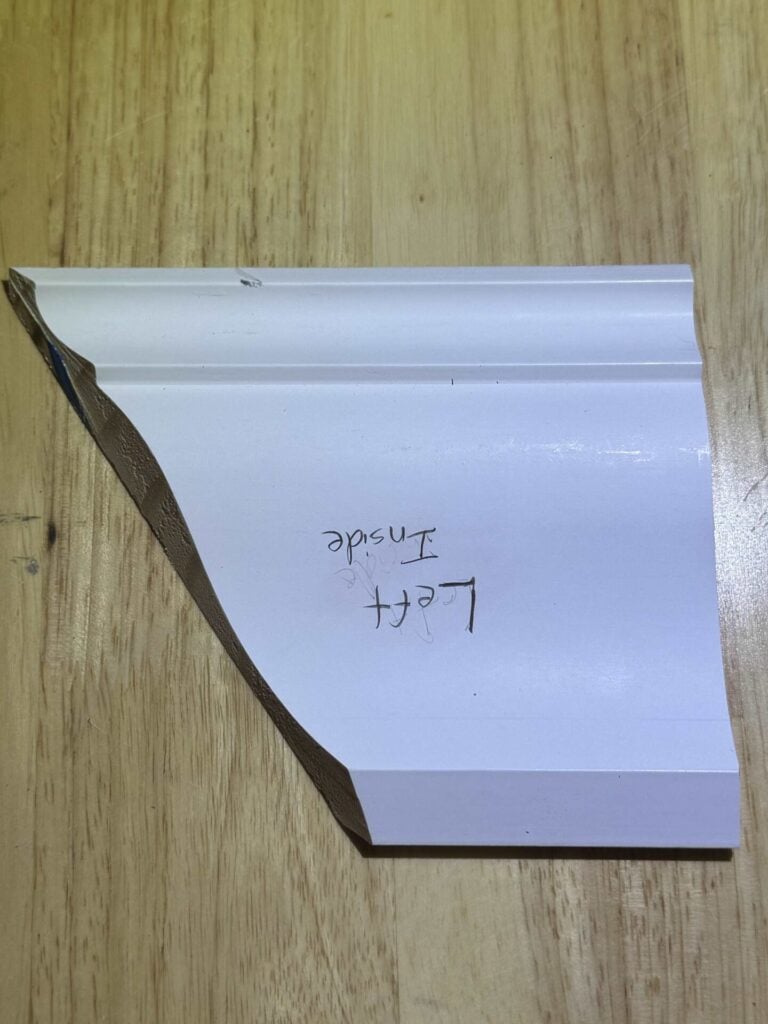
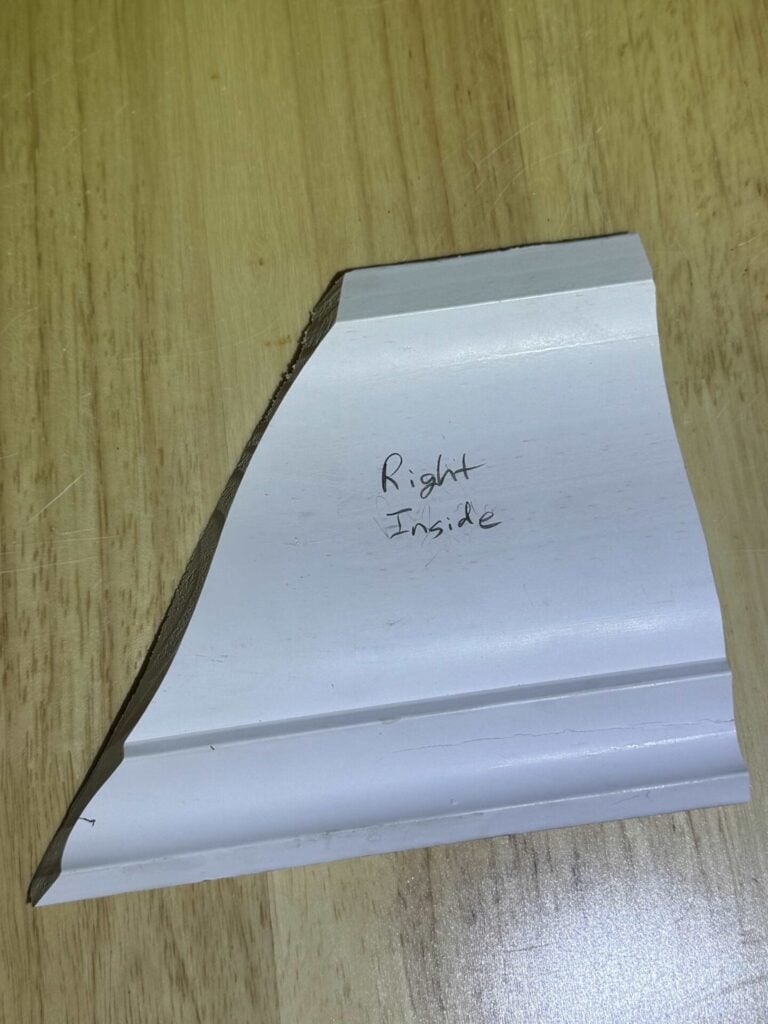
Because our corners were not nice and straight 90-degree corners, we will use a technique called coping the corner to install our inside corners.
You will cut an inside right or inside left corner cut.
Then, you will use a coping saw and back-cut the edge by angling the coping saw about 5-10 degrees.


The first piece of molding going to the corner will be cut at 0 degrees and mounted flush to the corner.
Then, the coped molding piece mounts and slides into place.
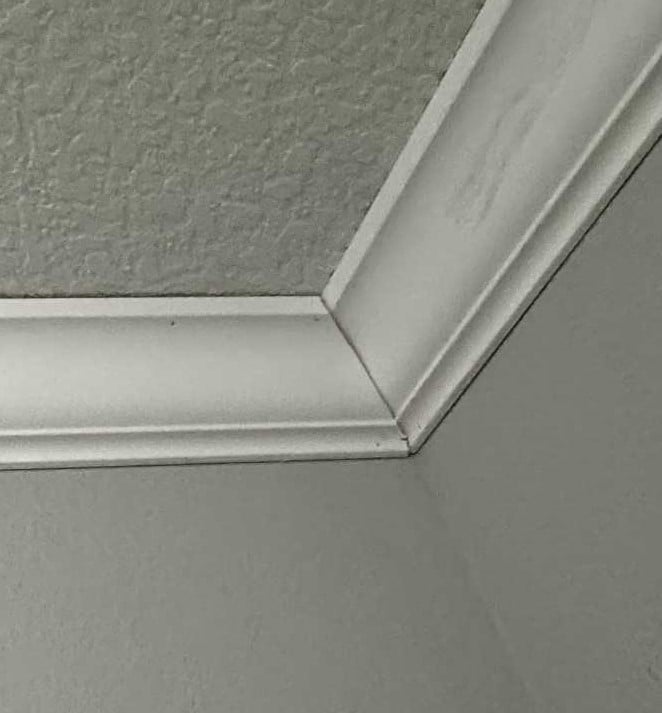
The advantage of a coped corner is that it will still fit nicely even if it is off by a few degrees from 90. What little seam is there can be patched with wood filler or caulk.
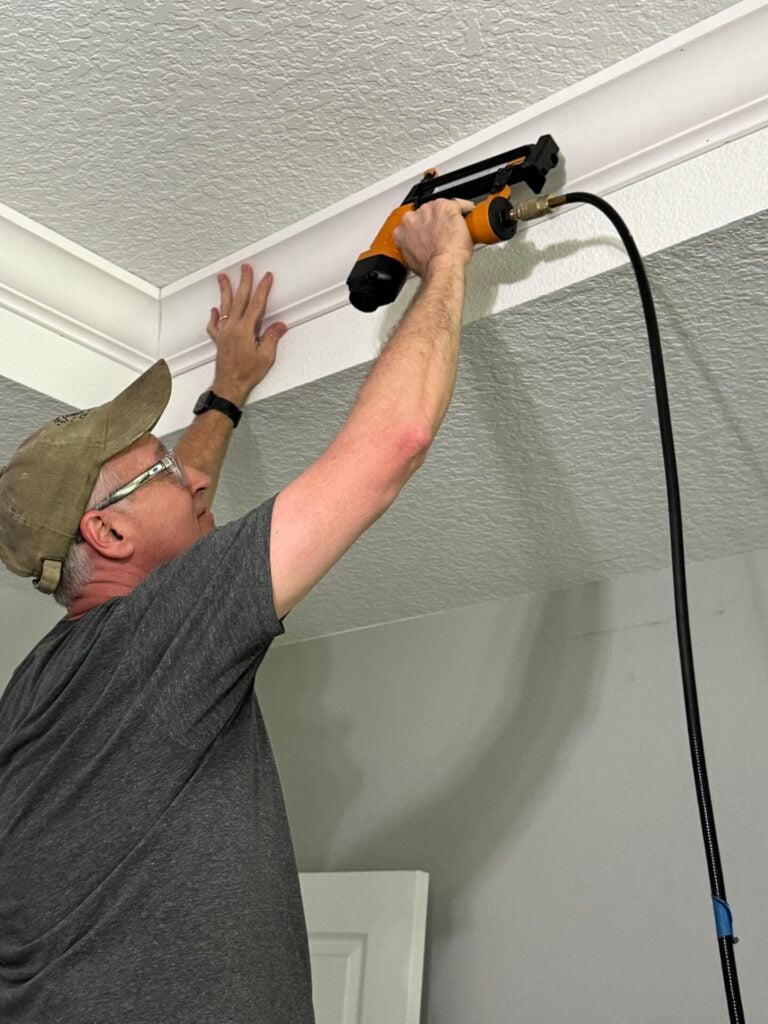
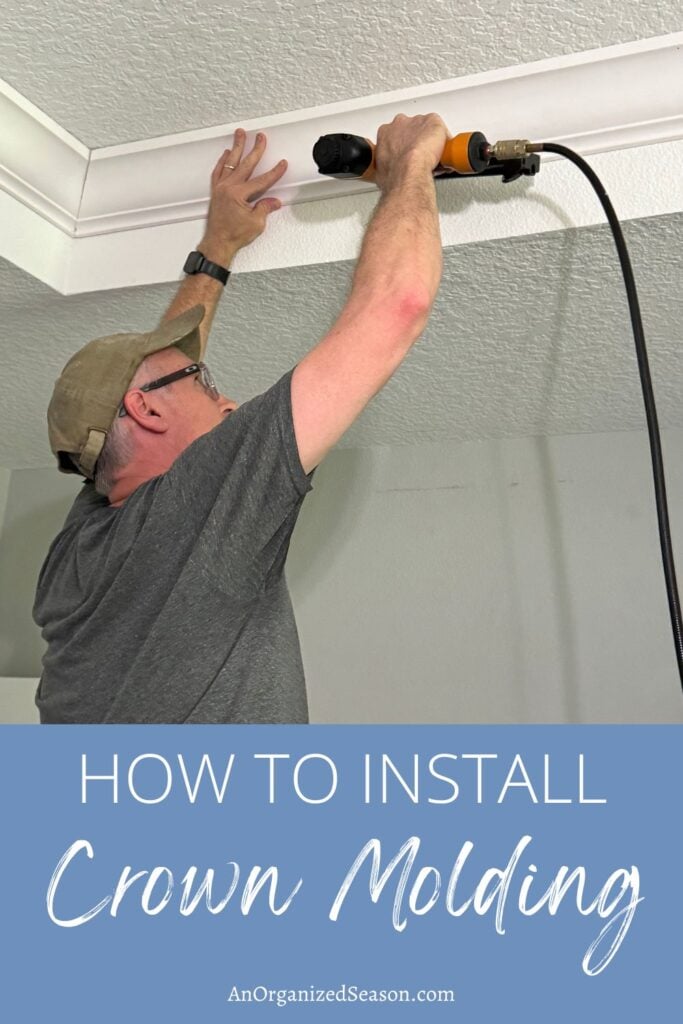
Depending on the length of each crown molding piece, you will need at least one other person to help hold it up on the wall.
Use the marks on the wall to align the pieces.
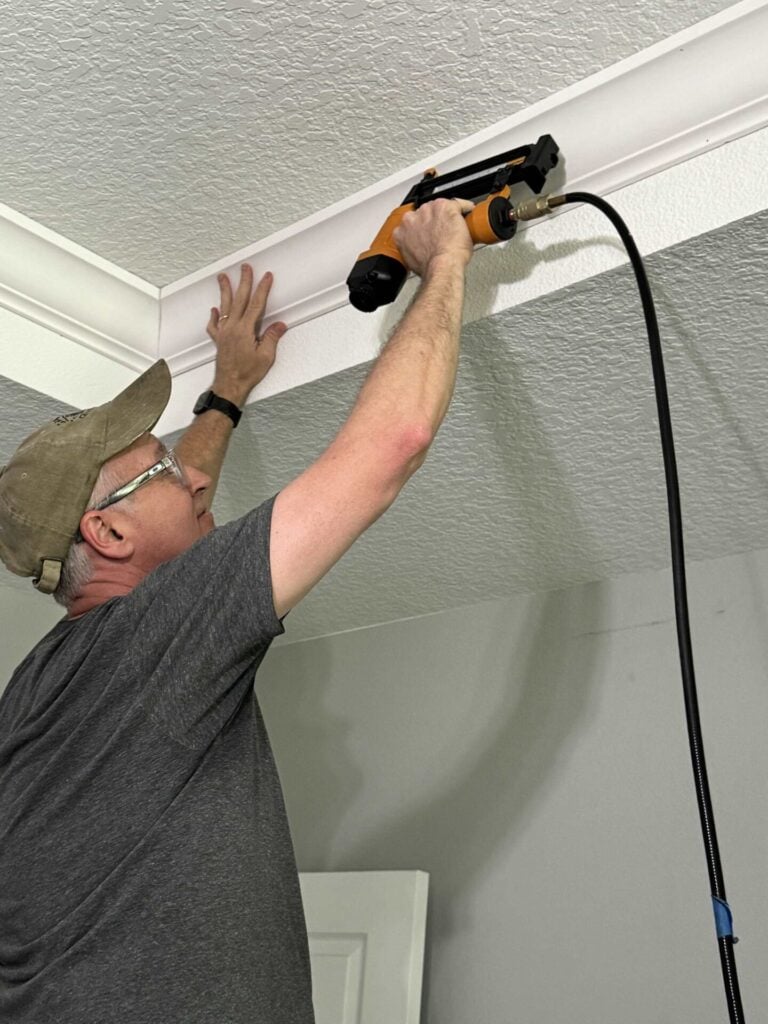
Secure the molding using a brad nail gun, putting a brad through it where the wall studs are marked.
In very large rooms, you can make a scarf joint to connect multiple pieces of molding to reach from corner to corner.

The first end of molding is cut at a 45-degree angle with the saw turned to the right or left.
Then, the connecting piece end is cut with the saw set at that same 45-degree angle.

The pieces should fit together with a nice seam that is barely noticeable.
Steps to finish crown molding
Use WOOD Filler or Caulk gaps
Use caulk to fill in gaps on the crown’s top or bottom for a seamless look.
We used wood filler for the corner joints and sanded them.
Wood fill nail holes
Brad nail holes should be filled with wood filler and wiped or sanded smooth.

The crown molding is done, but we’re not finished with the room yet.
The next step is to add picture frame molding. Stay tuned for that DIY!
Paint the crown molding
All of the molding is done, and now it’s time to paint!
Use painter’s tape to tape off the ceiling above the crown molding and the wall below it if you are painting the molding.
We only did the ceiling since we painted the crown molding and the walls the same color.

If you have an orange peel ceiling, it is best to paint and cut close to the edges. Applying paint over the tape will probably cause paint to get under it, as the ceiling is uneven. We had some of this and had to touch it up later.
The Finished Look

We adore the luxury look that crown molding added to our bedroom!

This project was challenging and took us longer than we thought, but we are so pleased with the results!
Here are some points to consider before you install crown molding!
Challenges of Installing Crown Molding
Installing crown molding yourself does come with challenges.
One of the most significant difficulties is making precise cuts, especially for inside and outside corners, where angles must be exact for a seamless fit.
Even minor measurement errors can lead to noticeable gaps, requiring extra adjustments and caulking to ensure a professional-looking finish.
Additionally, holding the molding in place while securing it can be tricky, mainly when working alone.
However, if you have the right tools and take your time, you can overcome these challenges.
In Conclusion
It may seem daunting to install crown molding, but you can achieve stunning results with patience and attention to detail.
We added molding to our dining room last year, so this is the second time we have done this, and it gets easier each time!
We look forward to adding it to several more places in our home!
If you enjoy the blog, please sign up for our email list so you won’t miss a post!
Until next time, follow us on Pinterest, Facebook, and Instagram!
Blessings, Donna and Rich
More DIY Inspiration
If you enjoyed this DIY project, check out some of the other projects we tackled in our home:
- How to Build a Modern Accent Wall
- Tips to Install a Wood Feature Wall
- How to Build a Faux Fireplace Mantel
- Best Way to Paint a Laminate Cabinet
- How to Build a Shelf Using Corbels
Pin It For Later
Don’t forget to pin the image below to one of your Pinterest boards (hover over the picture and click the red Pin button in the top left corner).
Related Posts:


**Some of the links in this post are affiliate links. This means if you click on the link and purchase the item, we will receive an affiliate commission at no extra cost to you. We appreciate your support. (disclosure policy)
This looks amazing, Donna! We’ve installed a lot of crown molding over the years too and oh my word the corners are not easy. Love the elegant look it provides to this space though and the wall color is a fabulous choice too. It’s like a relaxing retreat space! Great job, CoCo
It was a challenging project, but so worth it! Now I want to add it to all of our downstairs spaces! We’ll get there eventually! Thanks so much!