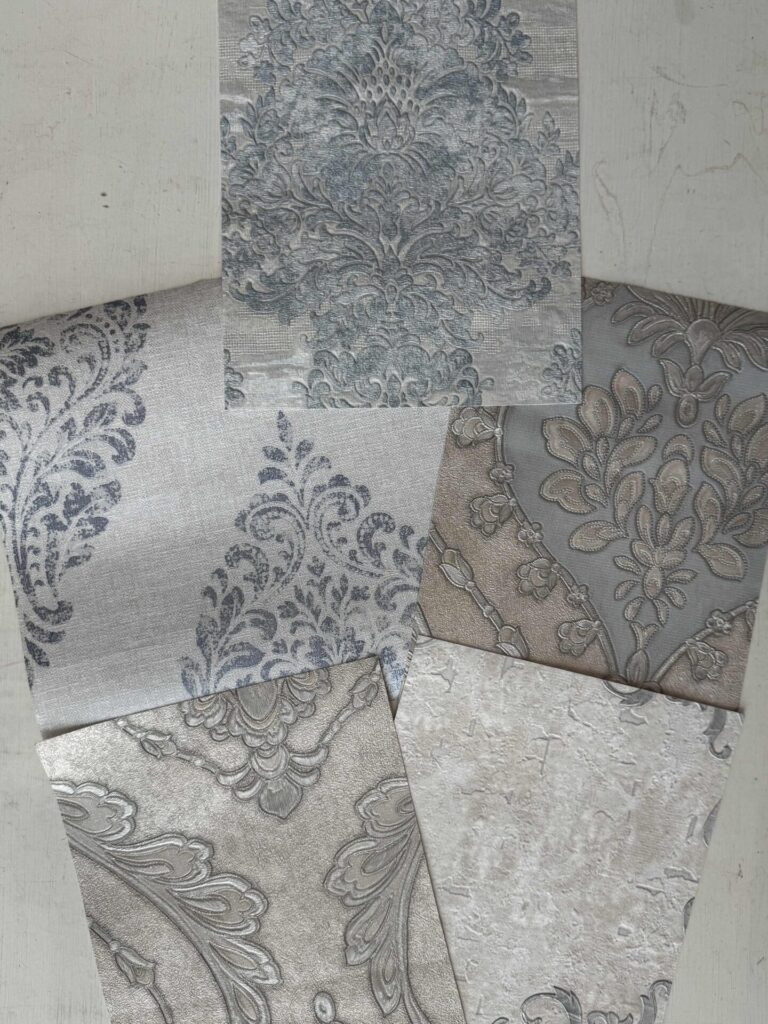
Do you have any wallpaper samples in your home? If so, don’t toss them just yet—there’s a simple and stylish way to put them to good use!
We’re in the process of making over our half bath, and while planning it, I picked out several wallpaper samples but quickly realized they weren’t quite right for our space.
**Some of the links in this post are affiliate links. This means if you click on the link and purchase the item, we will receive an affiliate commission at no extra cost to you. We appreciate your support. (disclosure policy)
Living in Florida, our walls have that orange-peel texture, so the wallpaper needed to be thick enough to hide the bumps—and all of the samples felt a little too plastic-like for my taste. (Maybe it’s the Kentucky girl in me, but I still love the look and feel of traditional paper wallpaper!)
Even though we chose not to hang wallpaper, I’m so glad I held on to the samples because they were perfect for this month’s Handcrafted Society Challenge!
If you’re new here, the Handcrafted Society is a group of blogging friends who challenge each other to create something using the same material or idea.
Then we share our creations on the second Tuesday of the month.
April’s challenge was to create something using leftover wallpaper or samples.
So today, I’m sharing how I turned one of our leftover wallpaper samples into a pretty and practical tray for our half bath.
Why I Love Using Wallpaper Samples for DIY Projects
Wallpaper samples are one of those little things you shouldn’t toss, because they’re so handy for small DIY projects like this.
They’re usually free (or very inexpensive), come in a variety of colors and patterns, and are the perfect size for adding a decorative touch without a big commitment.
Try framing them for amazing artwork! Can you say inexpensive gallery wall?
After picking out several samples for our half bath and realizing they weren’t quite right for the walls, it felt so good to give one of them a new purpose instead of letting them go to waste.
I’m so excited to show you how we made our adorable little tray!
Gather Materials
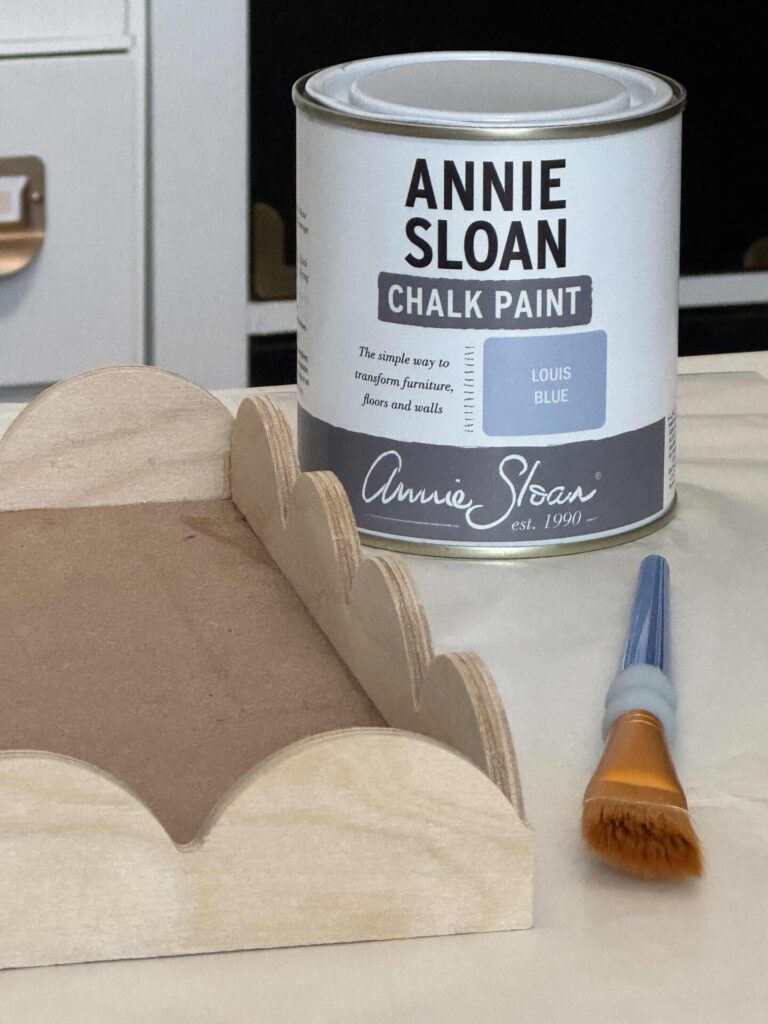
Gather the following materials to complete this project:
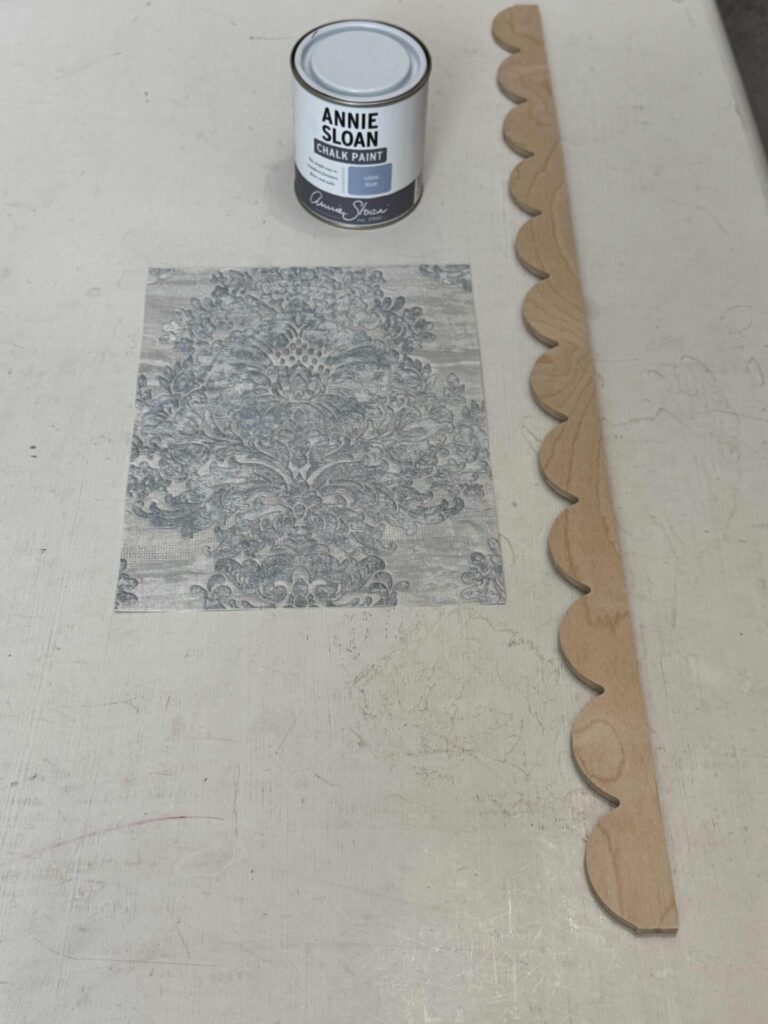
- Wallpaper sample
- Scalloped wood piece (tray sides)- (Hobby Lobby)
- Razor saw with miter box
- Compound miter saw
- Base (tray bottom)- 1/4 inch hardboard
- Sandpaper- Gator MicroZip Kit
- Tack cloth
- Wood glue
- Paint- Annie Sloan Louis Blue
- Paintbrush
- Sealer-Polycrylic
- Spray adhesive
- Craft knife
- Cutting Mat
- Clamps
How to Make a Decorative Tray
This is a simple project that doesn’t take much time, but the end result looks so pretty and polished.
Here’s how I put my tray together using one of those leftover wallpaper samples.
Cut the Wood
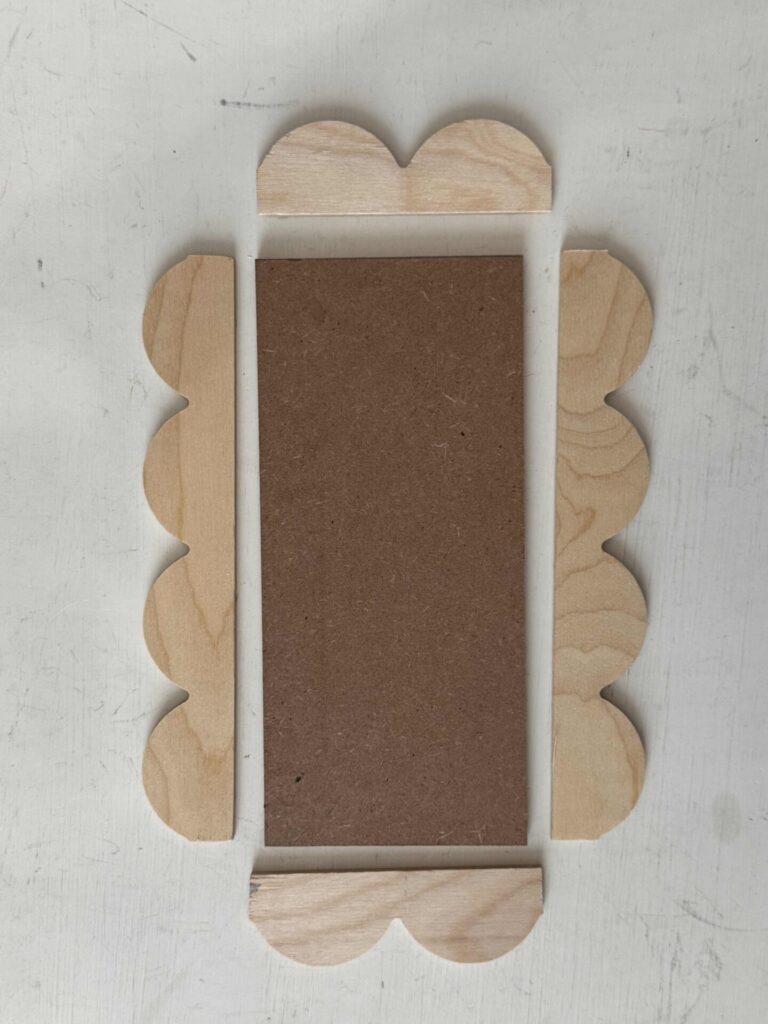
Start by cutting your scalloped wood trim into sections to form the sides of the tray.
Rich used a razor saw and a miter box to cut ours into four pieces—two longer sides with four scallops each and two shorter sides with two scallops.
Next, measure the length of your scalloped pieces to determine the size of the tray base.
Ours ended up being about 4.5 wide x 10 inches long.
Then, Rich cut a 1/4-inch-thick piece of hardboard to those measurements with his compound miter saw.
After a quick test fit, he trimmed it down slightly so it would fit perfectly inside the scalloped sides.
Cut the Wallpaper Sample to Fit the Base
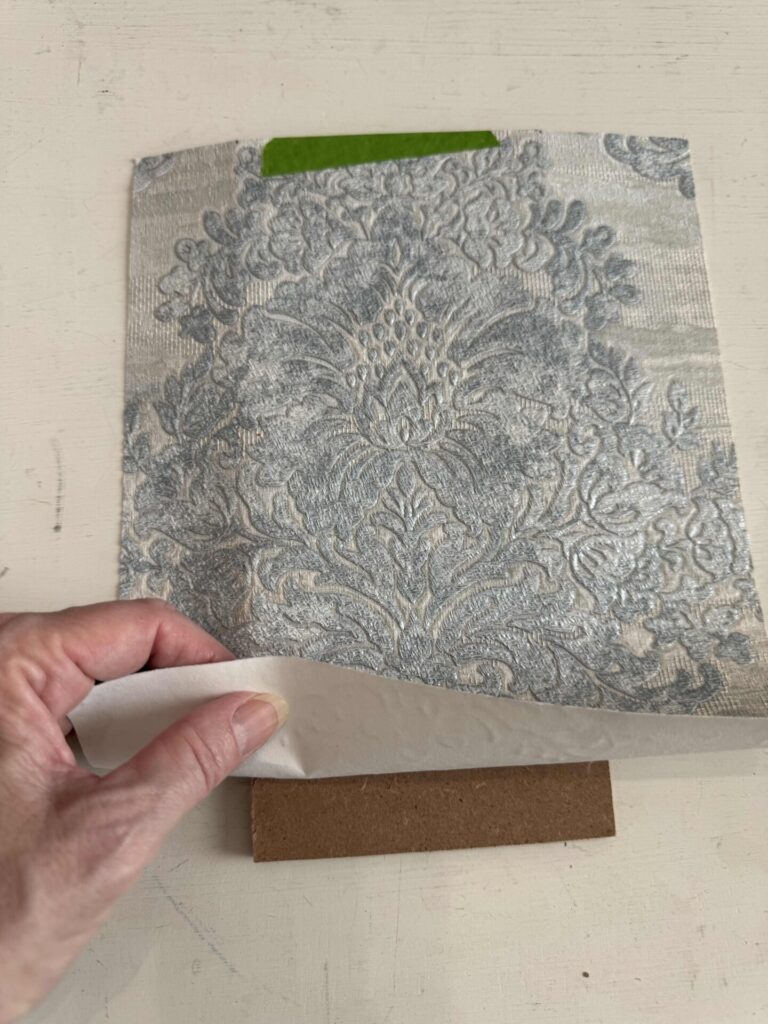
To get a precise fit, center your wallpaper sample over the wood base and secure it on one end with a small piece of painter’s tape.
Carefully flip it over and place it on a cutting mat.
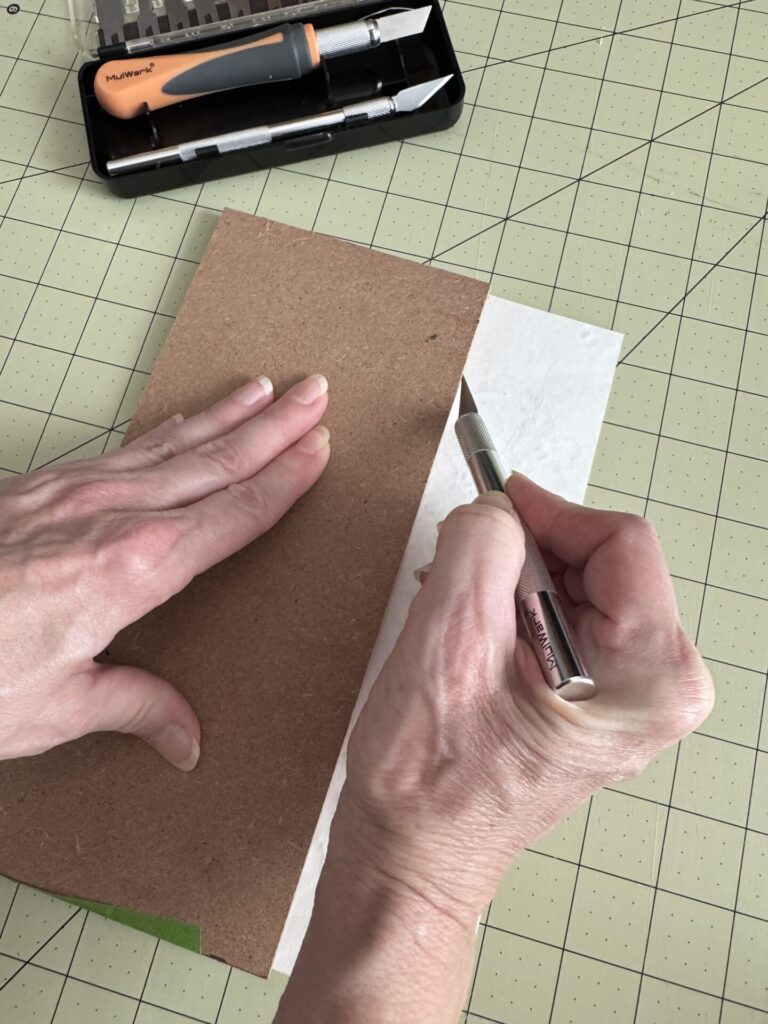
Using a craft knife, trim around the base.
Once it’s cut, remove the tape and set the wallpaper aside for later.
Assemble the Tray Base
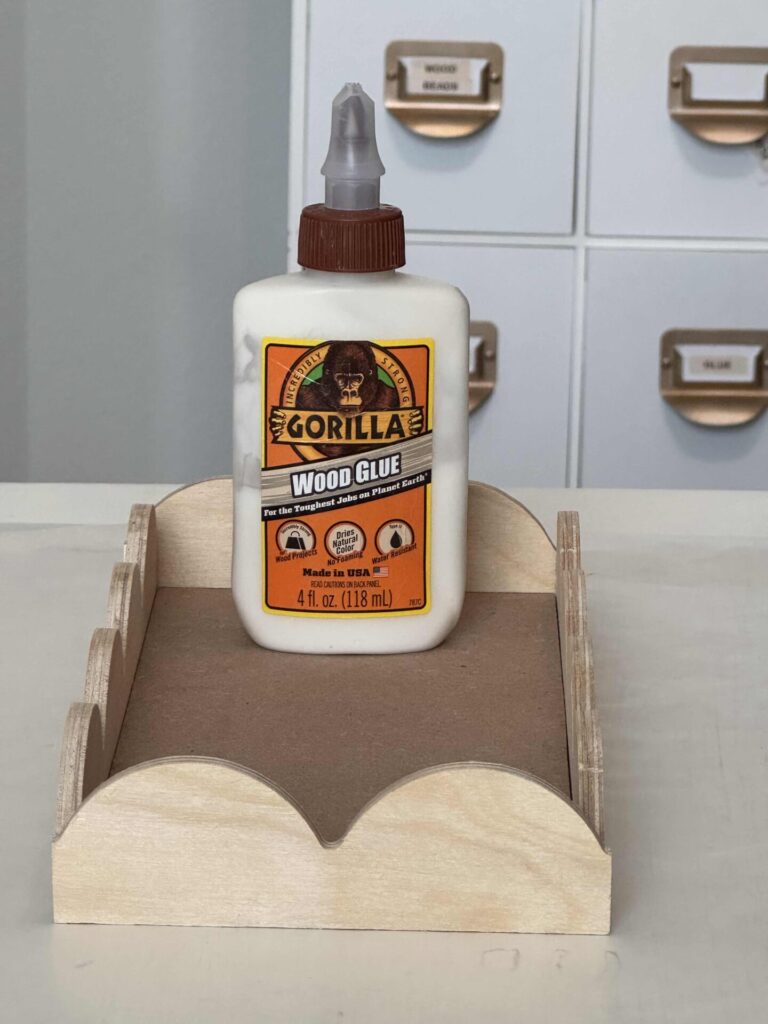
Using wood glue, attach the scalloped pieces around the base to form the tray.
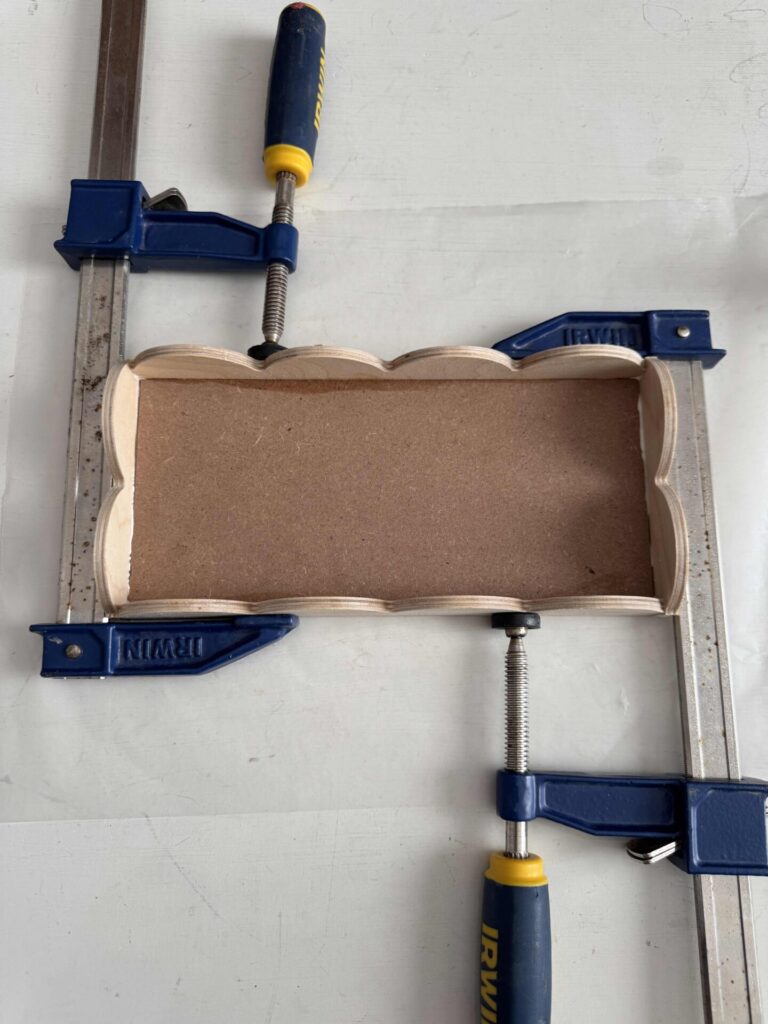
Clamps are really helpful here to hold everything in place while it dries.
Let it sit overnight to make sure it’s nice and sturdy.
Paint the Tray
Once the glue is fully dry, paint the scalloped sides of the tray in your chosen color.
There’s no need to paint the base since it will be covered with the wallpaper.
Seal The Tray
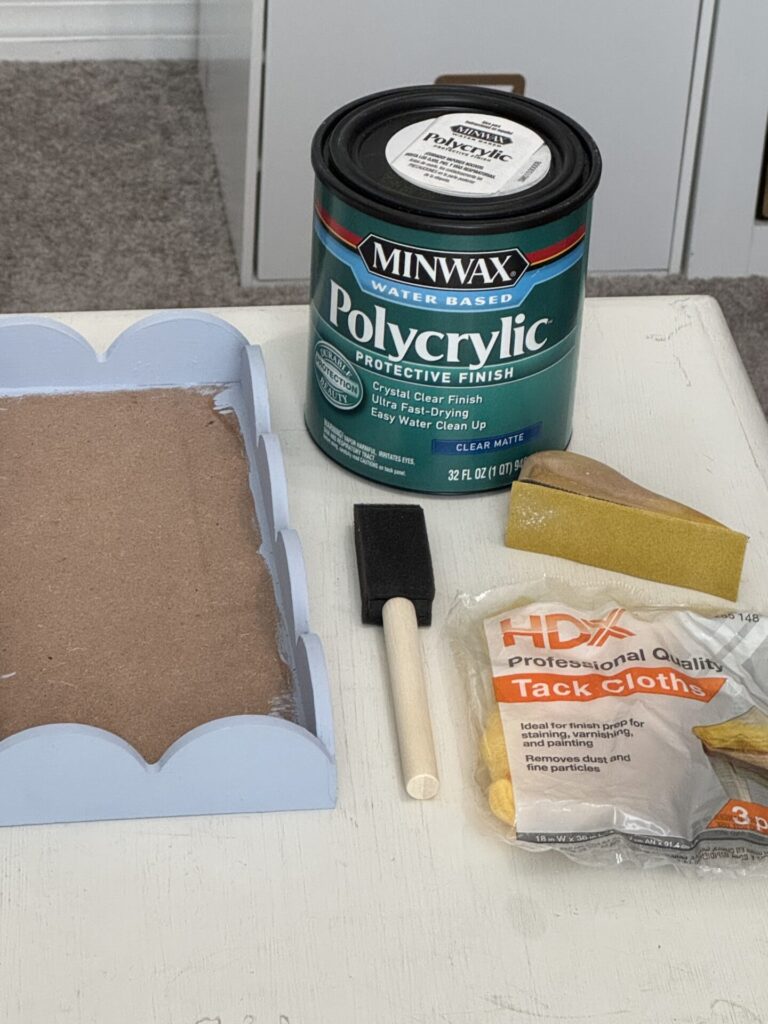
Since this tray will be used in a bathroom, I recommend sealing it to help protect the finish from moisture and everyday use.
To do this, lightly sand the painted wood to smooth any imperfections, then wipe it clean with a tack cloth to remove dust.
Using a foam brush, apply a thin, even coat of polycrylic over the tray.
Let it dry completely, then lightly sand again and wipe clean before applying a second coat.
This extra step helps create a more durable finish so your tray will hold up beautifully over time.
Adhere the Wallpaper
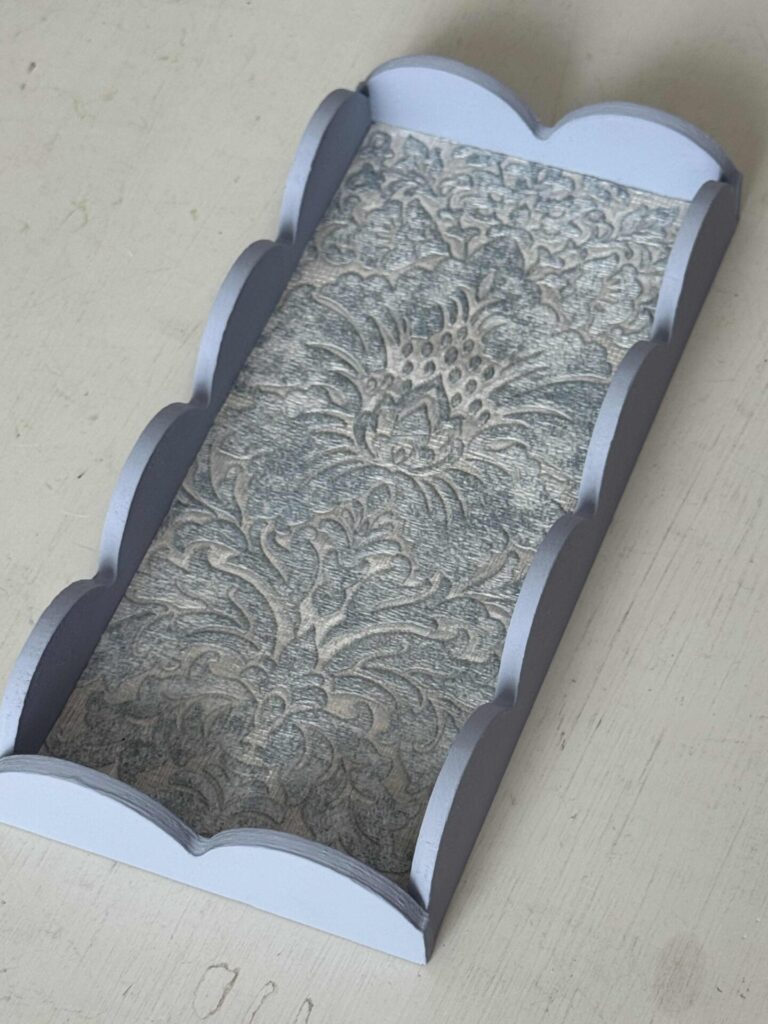
Finally, glue the wallpaper sample to the bottom of the tray.
I used Gorilla Glue Spray adhesive.
Since my wallpaper has more of a plastic-like finish, I didn’t need to seal over it.
If you’re using traditional paper wallpaper, you can absolutely brush a thin layer of Mod Podge over the top to seal it and protect it from moisture and wear.
How to Style a Small Bathroom Tray
One of my favorite things about this little tray is how versatile it is.
It’s not just pretty—it’s actually useful, which is always a win in a small space like a half bath.
Unfortunately, our bathroom is still a work in progress, so I can’t show it to you in the space right now.
We hope you’ll stick around because as soon as it’s finished, we’ll be sharing the reveal!
For now, here are three ways we could use it in the space.
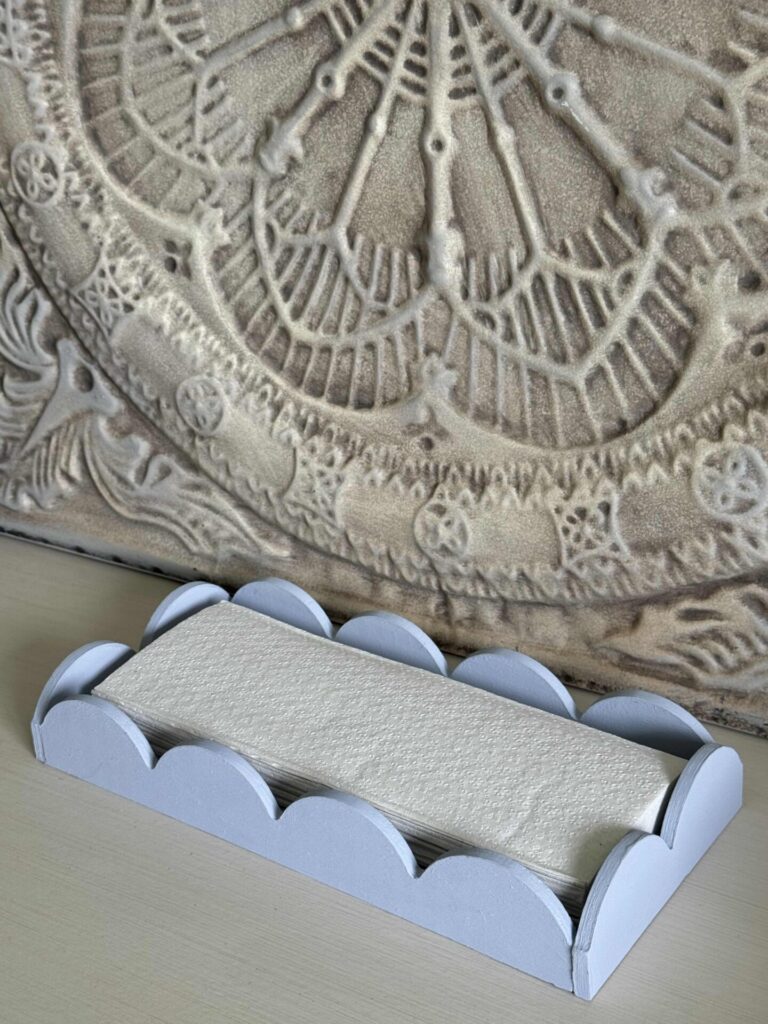
For guests, I love placing a small stack of folded paper towels on the tray.
It keeps them neat and easy to grab, while still looking intentional and put together.
It’s such a simple touch, but it makes the space feel a little more welcoming.
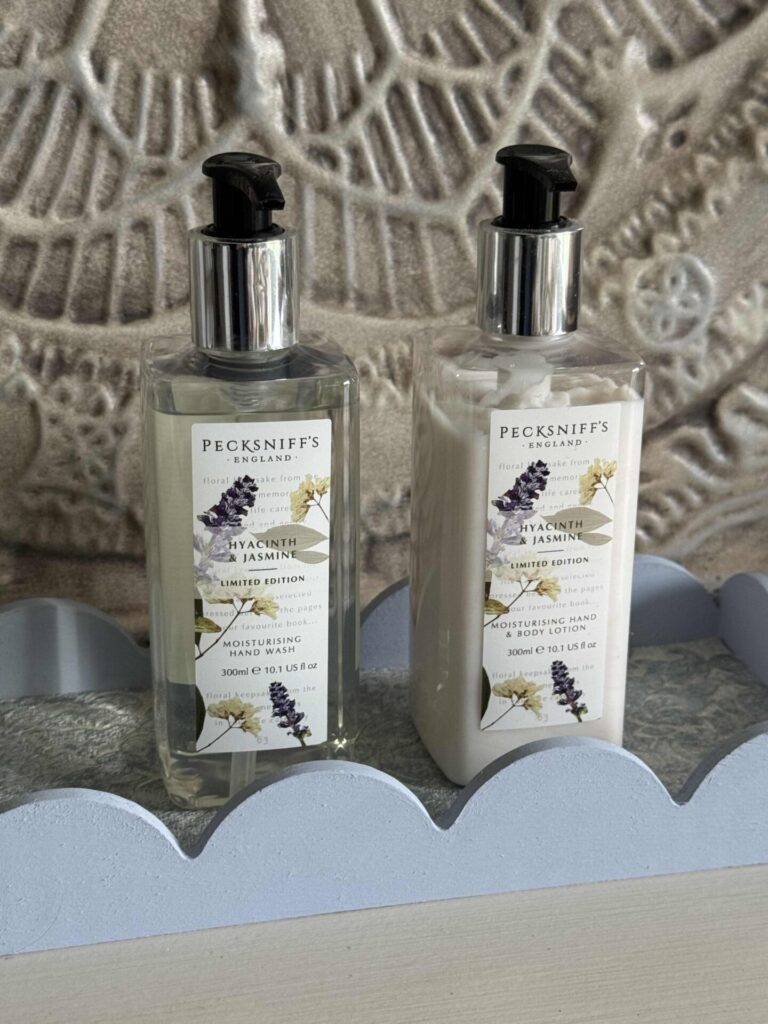
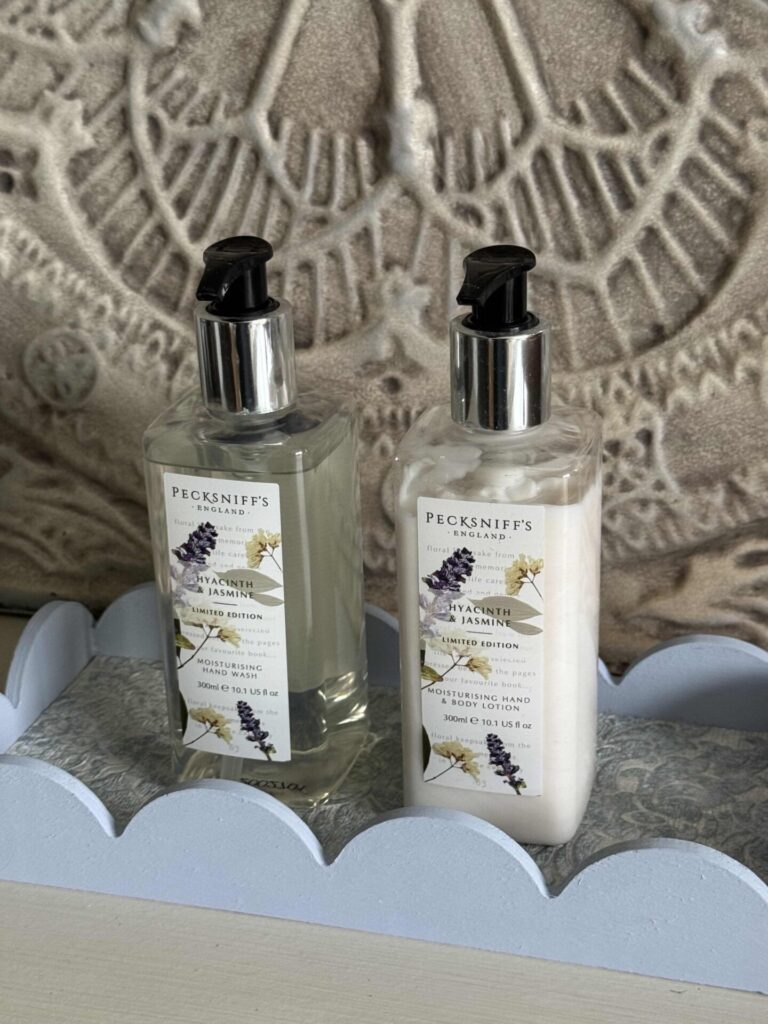
Another option is to use the tray to corral everyday essentials like a soap and lotion dispenser.
Grouping them together on a tray helps keep the countertop looking tidy and adds a decorative touch.
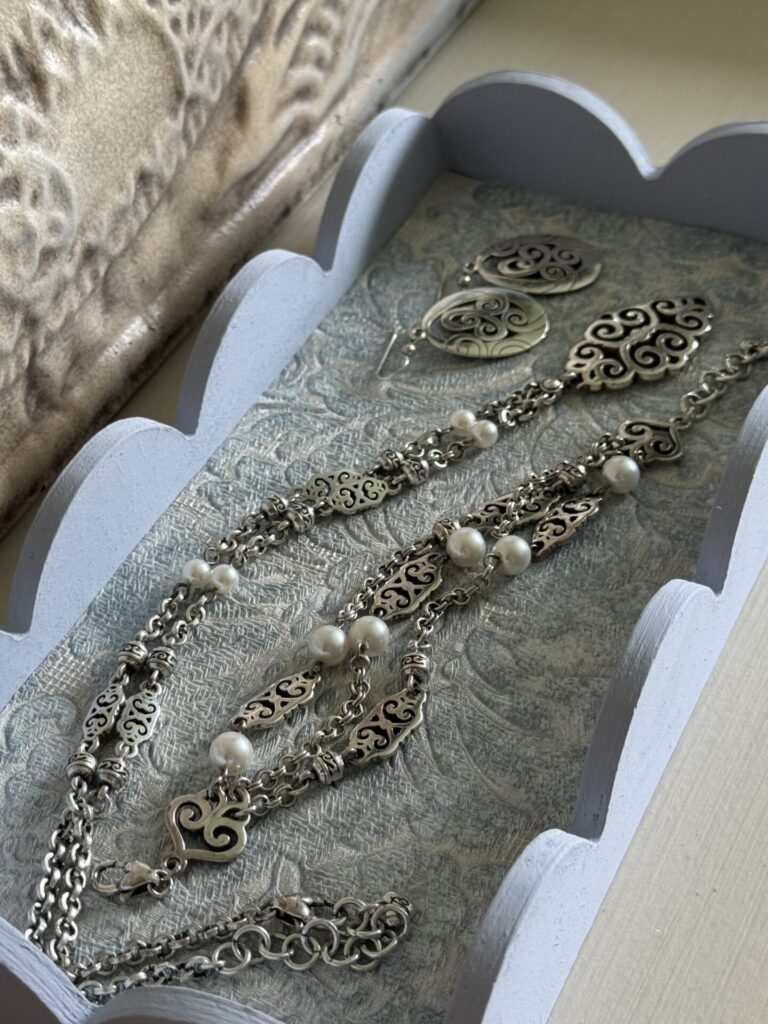
You can also use it as a spot to hold jewelry- it’s perfect for setting aside rings or a watch while washing your hands, or for setting out what you’re wearing the following day.
Other Ways to Use Wallpaper Samples/Leftovers
If you enjoyed this project, I think you’ll love these other DIY projects using wallpaper from my friends in the Handcrafted Society!
They’re all simple, budget-friendly ideas that add a little charm and personality to your home.
Take a look—you might just find your next project to try!
Beautiful Lampshade Update
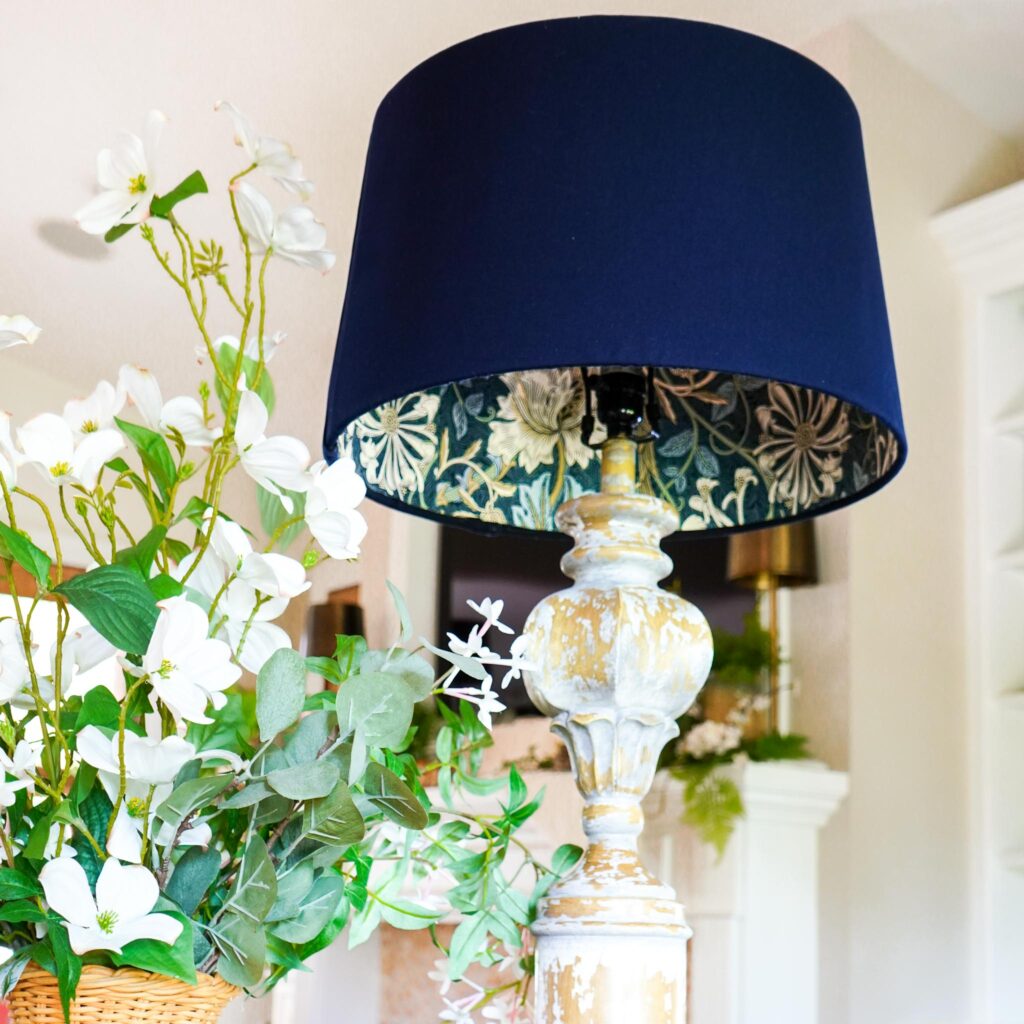
Got leftover wallpaper rolls gathering dust?
Don’t throw them away! Wendy from WM Design House shows how lining the inside of a lampshade is one of the easiest and most beautiful ways to use up those remnants — and the result looks like something straight out of an interior design magazine.
See See Wendy’s project here..
Easy Fix to Make a Basket More Functional
Woven basket trays are often not particularly functional. Here is an easy, quick, and budget-friendly solution!
Diane from South House Designs came up with a fix that cost just $2 while maintaining the flexibility to use the tray with or without the liner.
See Diane’s project here.
Transform A Dollar Store Bowl
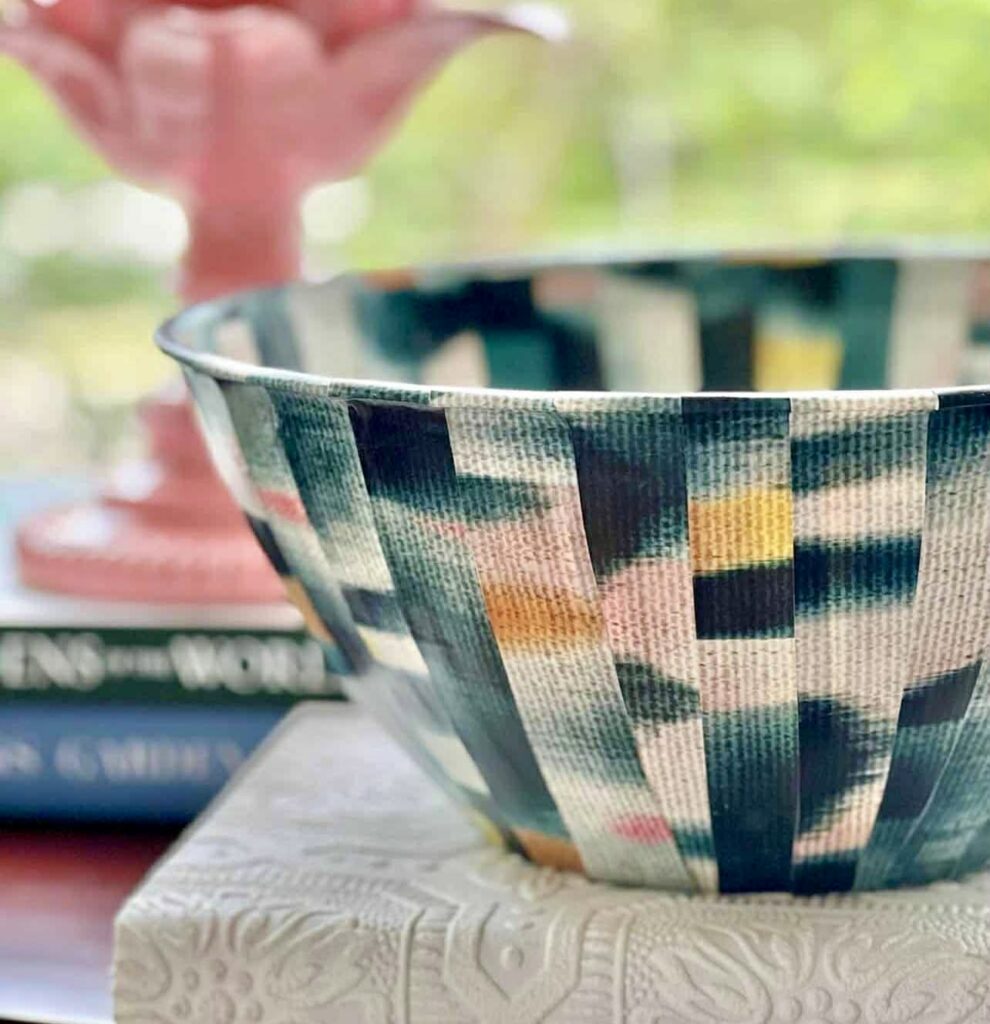
Learn how to transform a dollar store bowl into a high-end decor piece with wallpaper scraps.
Missy from Sonata Home Design shares this quick and easy idea that comes in under 5 dollars.
See Missy’s project here.
Decorate a Tray With Wallpaper
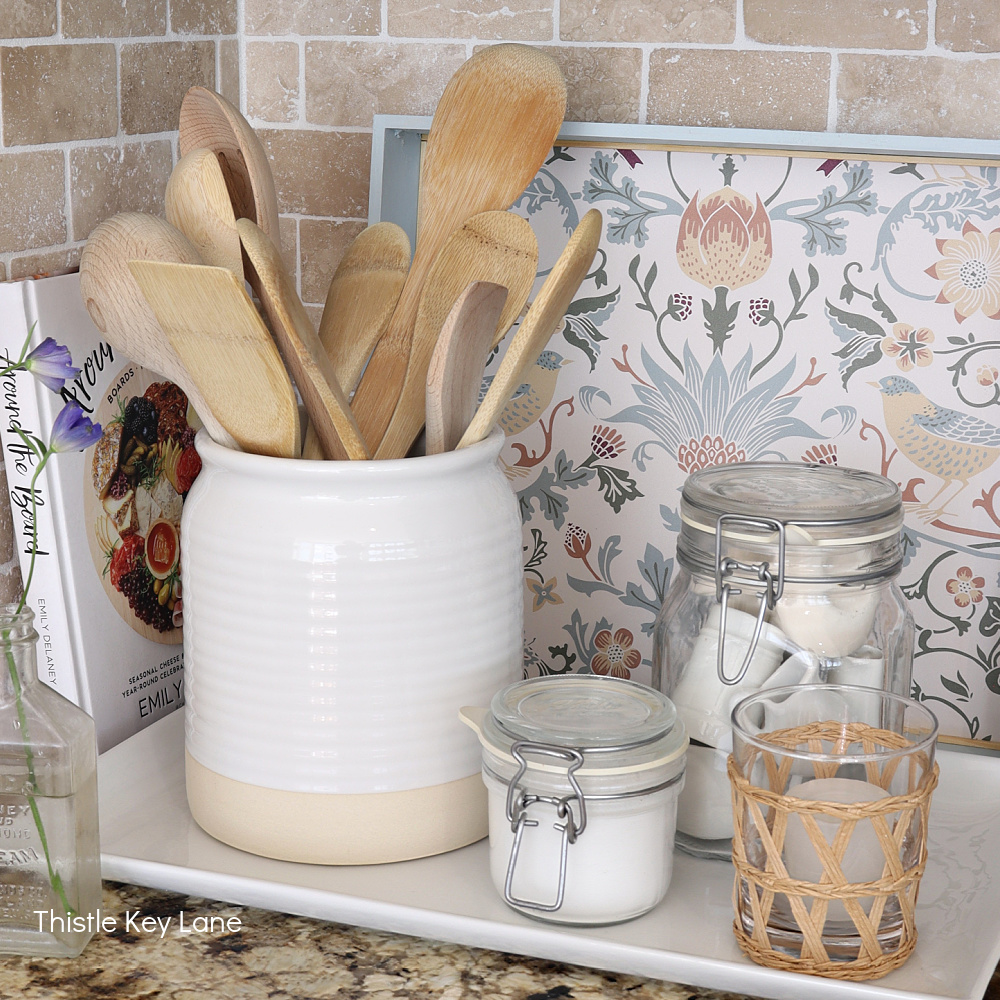
Have a plain tray at your house?
See how Michelle from Thistle Key Lane transforms her tray with wallpaper into a beautiful, functional decor piece.
Closing Thoughts
I’m so glad I held on to those wallpaper samples because this little tray turned out to be both pretty and practical.
I can’t wait to finish our half-bath makeover so you can see it.
The room looks so different, so be sure to subscribe here so you don’t miss the full reveal!
Blessings, Donna and Rich
More DIY Inspiration
If you enjoyed this project, I think you’ll love these other DIYs too!
They’re all simple, budget-friendly ideas that add a little charm and personality to your home.
Take a look—you might just find your next project to try!
- Easy No-Melt Way to Create Candles
- Simple Way to Upcycle An Outdated Thrift Store Vase
- Decoupage Shells to Make Beautiful Trinket Dishes
- How to Decorate Candles with Napkins
Pin It For Later
Don’t forget to pin the image below to one of your Pinterest boards (hover over the picture and click the red Pin button in the top left corner).

Related Posts:


**Some of the links in this post are affiliate links. This means if you click on the link and purchase the item, we will receive an affiliate commission at no extra cost to you. We appreciate your support. (disclosure policy)
Donna (and Rich), this tray is fabulous! I so appreciate you sharing the details of how you made it. I didn’t even realize HL has scallop wood trim. Grabbing my keys and off I go . . . .
Hey Diane! Isn’t that scalloped trim the cutest! I can’t wait to see how you would use it! Thanks so much!
Such a clever way to make a tray. And I love the wallpaper that you used! Very clever, Donna! Pinned!
Thank you Missy! It was so fun to make!
Love it!! I adore anything with scallops…that border on the tray is SO pretty! Such a great way to use up leftover samples!
I don’t know what it is about scallops but I love it too! Thanks a bunch!
I’m so impressed that you made your tray in addition to decorating it! Love the scallops of course, and the wallpaper you selected. So charming and pretty!
Thanks Michelle! I needed a small tray for the bathroom counter and when I saw that scalloped trim, I knew it would be perfect!