Are you looking for a fun way to countdown to Christmas? Here’s an inexpensive way to make a DIY Advent calendar!
Counting down to Christmas is fun for the old and young alike!
**Some of the links in this post are affiliate links. This means if you click on the link and purchase the item, we will receive an affiliate commission at no extra cost to you. We appreciate your support. (disclosure policy)
I love advent calendars and found an adorable one at Michael’s and was so tempted to put it in my cart!
But, as I walked around the store looking at all the beautiful Christmas decor, I realized I could make it for so much less than buying it!
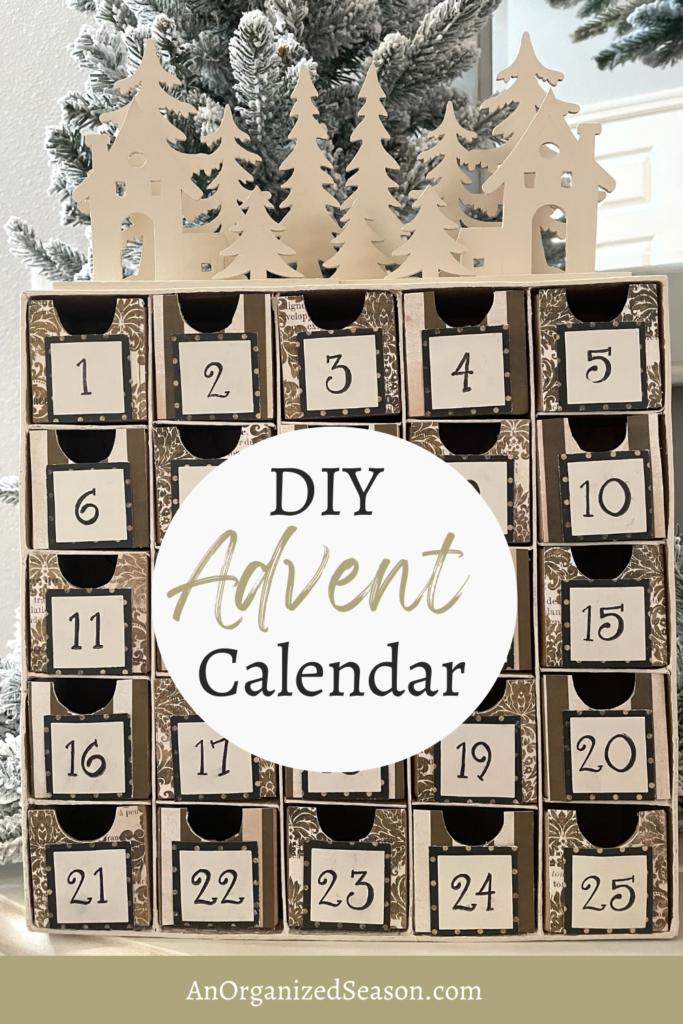
Here’s a look at my inexpensive DIY Advent calendar.

Do you have an advent calendar?
If you’ve never had one, you might be interested in learning its history.
What is an Advent Calendar
Advent comes from a Latin word meaning arrival or coming.
In the Christian tradition, Advent is four weeks and is intended as a time of preparation for the arrival of Jesus Christ.
Non-religious people use modern Advent calendars to mark off the days leading up to Santa’s arrival on Christmas Day.
Advent Calendars typically start on December 1 and go until December 25, although some calendars only have 24 days.

Original calendars had a flap that would peel open and show a picture.
Then, calendars started incorporating boxes filled with a piece of chocolate.
Today, Advent calendars come in all shapes and sizes.
Last year, I created an advent calendar out of ornaments!
It was fun counting down the days, and at the end of the month, I had the cutest tabletop Christmas tree you’ve ever seen!
However, I wanted a calendar to add treats or candy to.
My inspiration for a DIY Advent Calendar
Here’s a picture of the Advent calendar I saw at Michael’s!

I loved how the cute houses could be filled with treats.
I was shocked to see the price was $69.99, and even with 40% off, it still cost approximately $42.00.
I knew I could make one cheaper than that.
So I went shopping, and here’s what I came up with!

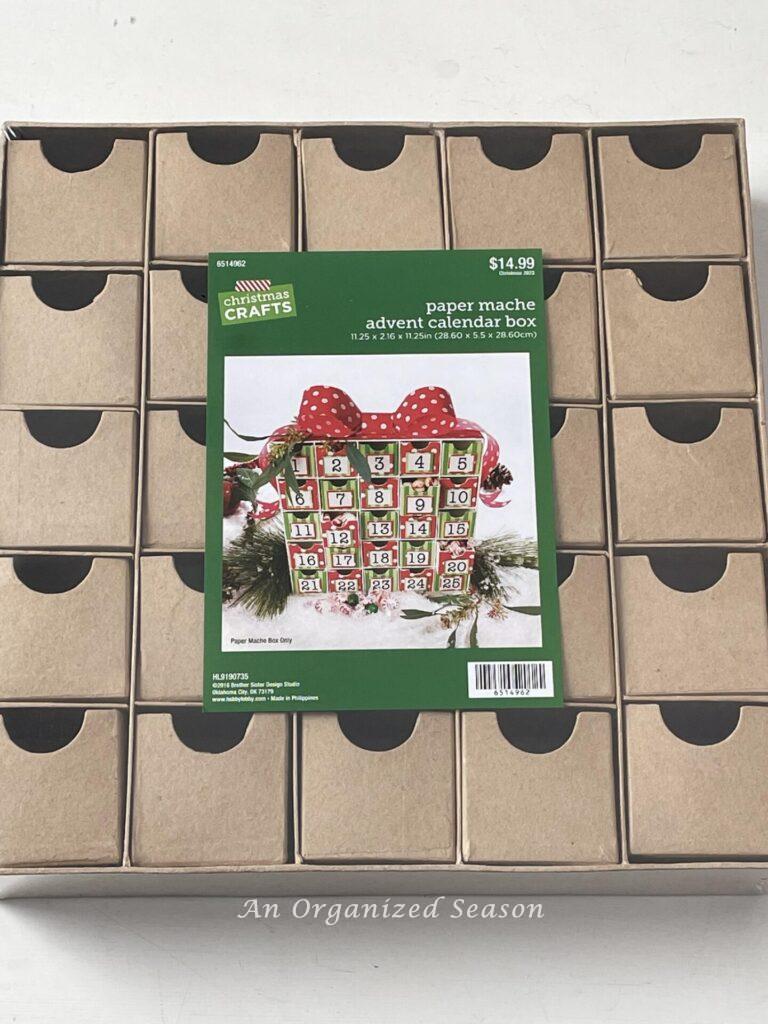
I found this paper mache advent calendar box at Hobby Lobby for $14.99.
All Christmas is 50% off, so with the discount, the price was $7.50!!
Then, I drove to The Dollar Tree to look for a wood nativity scene I had seen there last year.
Unfortunately, they did not have it, but they had these cute kits with trees shaped like the ones on the Michael’s advent calendar.

I bought them and headed home to get started on this fun DIY!
Since I have everything else I need to make this calendar, I only spent $11.25 plus tax!
Steps to make a DIY Advent Calendar
Gather

Gather or purchase the following items to make this Advent calendar:
- Paper mache advent calendar box- Hobby Lobby
- Wood cutouts -Dollar Tree -2 sets
- Ruler
- Scrapbook paper- three different pattern printed sheets and one solid color sheet
- Hot glue gun & glue sticks
- Silicone finger protectors
- Square paper punch-optional
- Craft knife
- Scissors
- Number stamps OR number stencils OR number stickers
- Stamp pad (if using stamps)
- Wood filler-optional
- Paint -optional
- Paintbrush-optional
Prepare Wood Cutouts
First, make sure you don’t make the same mistake I did!
I grabbed two bags, assuming they were the same, but when I opened the second one, it had a snowman instead of a house.
So look closely and make sure you buy the cutouts you want.

Decide how you want your cutouts to look.
I turned one of the houses around, and it didn’t fit into the slots on the wood base.
So, I had to cut one of the tips off with my craft knife.

I didn’t want the holes to show in the base, so I filled them with wood filler.

After it dried, I painted them to match my scrapbook paper.
I also painted the outside of the calendar box.
Let the paint dry while you make the rest of the calendar!
Cut the Paper
Here are the four sheets of scrapbook paper I chose to cover the drawers of the calendar.

Cut the paper for each number
I used the square punch to make twenty-five 1-1/4″ squares with the solid cream paper.

Then, I made twenty-five 1-1/2″ squares with the polka-dot printed paper.
*Tip- In hindsight, I wish my number squares were smaller. I should have used the 1-1/4″ punch to make the larger squares and cut the smaller squares 1″!
Now, it’s time to cut the paper to cover the drawers.
Cut the paper for the drawers
I used my paper cutter for this part of the calendar.
The boxes are 2″ X 2,” but they are a bit crooked, so I added 1/8″ to the height of each square (you’ll see why in a minute).

Cut 13 squares from the first printed sheet.
Then, cut 12 pieces from the other sheet.
Stamp Numbers

Now stamp the numbers on the solid squares.
I had to redo the numbers I smeared, so make sure yours are dry before you touch them!
Prepare Numbers

Hot glue the numbers to the larger printed squares.
Be careful when using the hot glue gun, as it can burn you.
I recommend using silicone finger protectors!
Prepare Boxes
Hot glue the squares to the front of each calendar box.

Notice that the height of each square looks different since the cardboard boxes are a little crooked.
Since I made the height 2- 1/8″ high, I could trim the ones that stuck up taller.
Now, the boxes aren’t the same height but appear as they are!

Next, use a craft knife to cut out the half circle on top of the box.
Adhere the Numbers to the Boxes

Use hot glue to adhere the numbers to the boxes!
Adhere Wood Cutouts

Last, adhere the wood cutouts to the top of the calendar box with hot glue.
Enjoy Your New DIY Advent Calendar

I’m so excited to add treats to this sweet calendar!

Bring on December 1!

I hope you’re inspired to make a DIY Advent calendar to countdown to Christmas!
If you enjoy the blog, please sign up for our email list so you won’t miss a post!
Until next time, follow us on Pinterest, Facebook, and Instagram!
Blessings, Donna and Rich
Pin It For Later

More Christmas DIY Inspiration
- Simple Pottery Barn Rustic Bell Hack
- Vintage Cone Christmas Tree DIY
- Unique Christmas Ornaments Made With Napkins
- How to Make Your Own Christmas Village
- Easy Cone Christmas Tree DIY
**Some of the links in this post are affiliate links. This means if you click on the link and purchase the item, we will receive an affiliate commission at no extra cost to you. We appreciate your support. (disclosure policy)
Donna, this amazing you made a beautiful Advent calendar.
Pinned!
Thank you, Cindy! The holidays will be here before we know it and I can’t wait to use it!
Such an adorable craft, Donna!! I love how it looks so similar to the one you saw at Michaels!! It looks just like it!!
And, the price was SO much nicer! Super cute, friend!
Thanks Rachel! I was so excited to find those wood cutouts at Dollar Tree which made the DIY possible! Now I can’t wait to fill it with goodies! Have a lovely day!
Do you know you always amaze me with your creativity Donna? I am stunned how you made this lovely advent calendar. I picked up the Dollar Tree cut outs last year thinking I could create something with them, but they sat on my craft table for a while, and inspiration never struck. This is PERFECT! I love it. We had an advent calendar when I was growing up, and I had wanted one in our home, but never really thought about making one. That has certainly changed since seeing yours! Hope you are well, and thank you for sharing your Christmas inspiration!
Hi Cara! Aren’t those wood cutouts the best! I’m glad you were inspired by the post and I hope you make an Advent calendar too! It’s so fun to count down the days till Christmas! Thanks and have a great weekend!
Such a fun way to save money and put your own spin on things, Donna! This advent calendar is totally adorable and I love all the extra special touches you added to make it feel festive for the season. It’s fabulous! Hugs, CoCo
Thanks so much CoCo! It was fun to make and I can’t wait to use it! Thanks for stopping by and have a great day!
Donna! I love this idea. The wooden trees on top are so perfect. I love that you can fill the drawers with little custom gifts.
Thank you Anna! I’m super happy with how it turned out and can’t wait to fill it for December!
So inspiring! I loved this project and I’m heading over to check out your ornament advent calendar from last year, too! Thanks for sharing such wonderful ideas!
Hi Laura! I’m so glad you enjoyed the post! An Advent calendar is an important tradition at our house each year! Let me know if you decide to make one!
LOVE that you DIY’d this to look like the expensive one, Donna!
We will be featuring you starting Wednesday at the Creative Crafts Linky Party! Pinned and shared!
Creatively, Beth
That’s wonderful Beth! I appreciate you featuring my Advent calendar! I’ll see you at the party!