Want to know why you should never throw scrap wood trim pieces away? Because you can transform them into a DIY wooden Christmas tree, or two, or maybe even three!
When cleaning up from a DIY project, you might be tempted to discard all the scrap wood pieces, but don’t!
**Some of the links in this post are affiliate links. This means if you click on the link and purchase the item, we will receive an affiliate commission at no extra cost to you. We appreciate your support. (disclosure policy)
With a bit of imagination, you can make something fabulous!
Inspiration to Build a Wooden Christmas Tree

When we remodeled our dining room, we added crown molding around the ceiling and picture frame trim on the walls.
We had scrap wood pieces left over from the project, and as I was collecting them, I thought some reminded me of the top of a Christmas tree.
So I started playing around with the scraps and knew I had a Christmas DIY in the works!
Here’s what those thoughts produced!
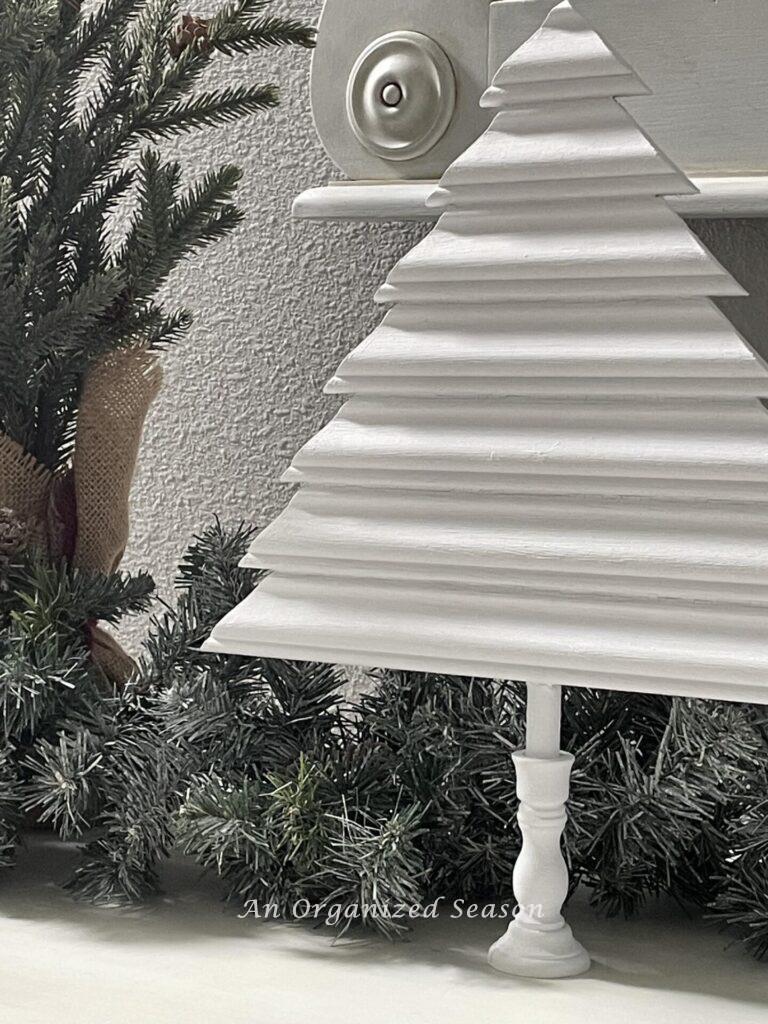
This adorable wooden Christmas tree!!
It turned out so great that I knew I couldn’t stop with just one!
So, we made a second tree and then a third!
Little did we know the wood trees would fit perfectly with our Winter Woodland Christmas theme!
Don’t worry if you love this idea and don’t have any scrap wood.
You can buy a piece of trim just for this project!
Steps to Make a Wooden Christmas Tree
Gather materials
Gather or purchase the following items to complete this DIY:
- Scrap wood trim pieces or buy a piece of wood molding
- Dowel rods- Hobby Lobby -7/16″ X 36″ and 7/8″ X 36″
- Candlestick holders- Hobby Lobby
- Wood glue
- Wax paper
- Pencil
- Ruler
- Miter shears
- Clamps
- Hot glue gun
- Hot glue sticks
- Silicone Finger Protectors
- Paint- Waverly Chalk in Snow White
- Paintbrush
Plan your design

Choose a triangle-shaped piece of wood for the top of your tree.
If you’re using pieces of scrap wood, pick the smallest one to use at the top.
Decide how tall you want your tree to be.
I originally planned to use leftover dowel rods and a square 2X4 block for the base, making the project cost-free.
However, I happened to be at Hobby Lobby buying wood slices for another project and saw those cute candlesticks!
I thought they would dress up the look of the trees, so I purchased dowel rods that fit inside the candlesticks perfectly.
If you want a more rustic-looking tree or to save money, skip using the candlestick holders!
Measure
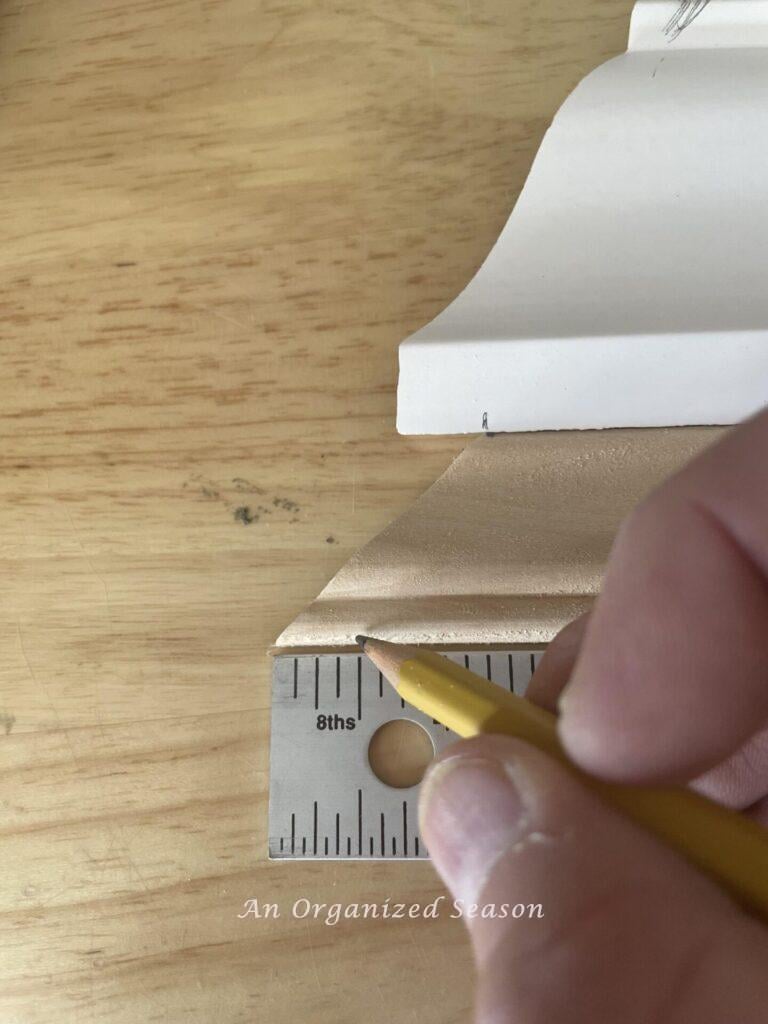
Measure and stagger each layer to get the look you want.
We did not want a plain triangle, so we indented each layer 1/2 inch from each edge of the layer above it.
Mark the 1/2 inch mark on each end of the prior layer.
The ends of each layer will angle down and out at 45 degrees.
The top part of each cut will line up with the mark on the layer above it.
Cut
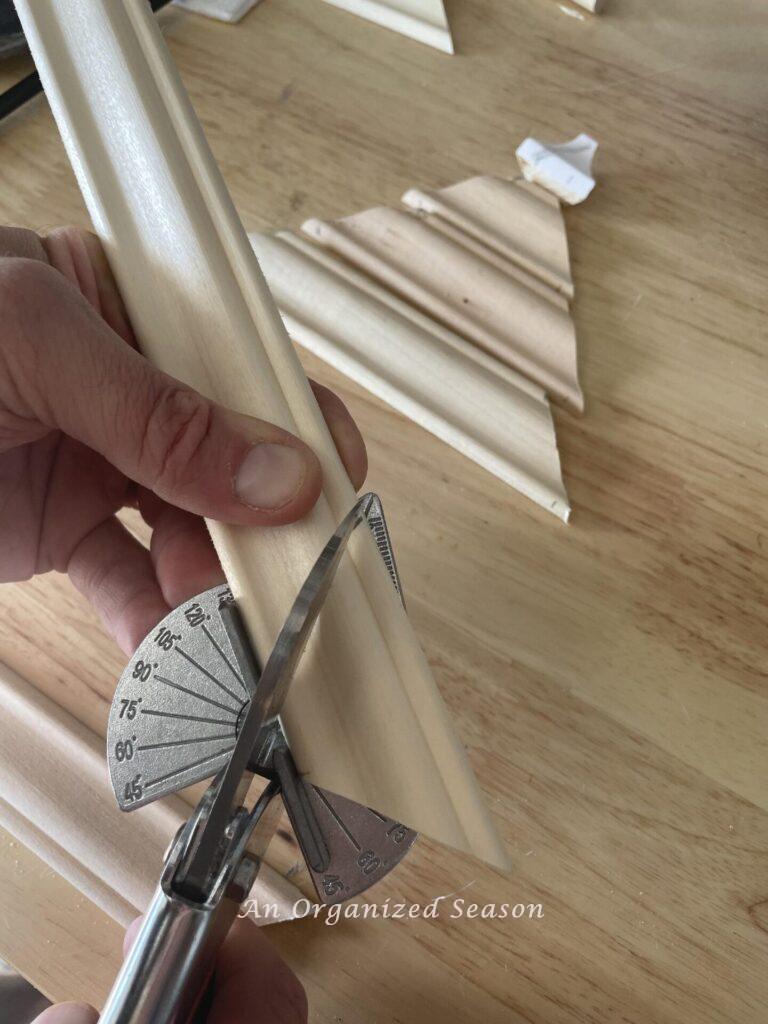
Use miter shears to cut 45-degree angles.
Cut the left side of your next layer with miter shears.
Then, line the top of the cut with the leftmost mark you made on a layer above it.
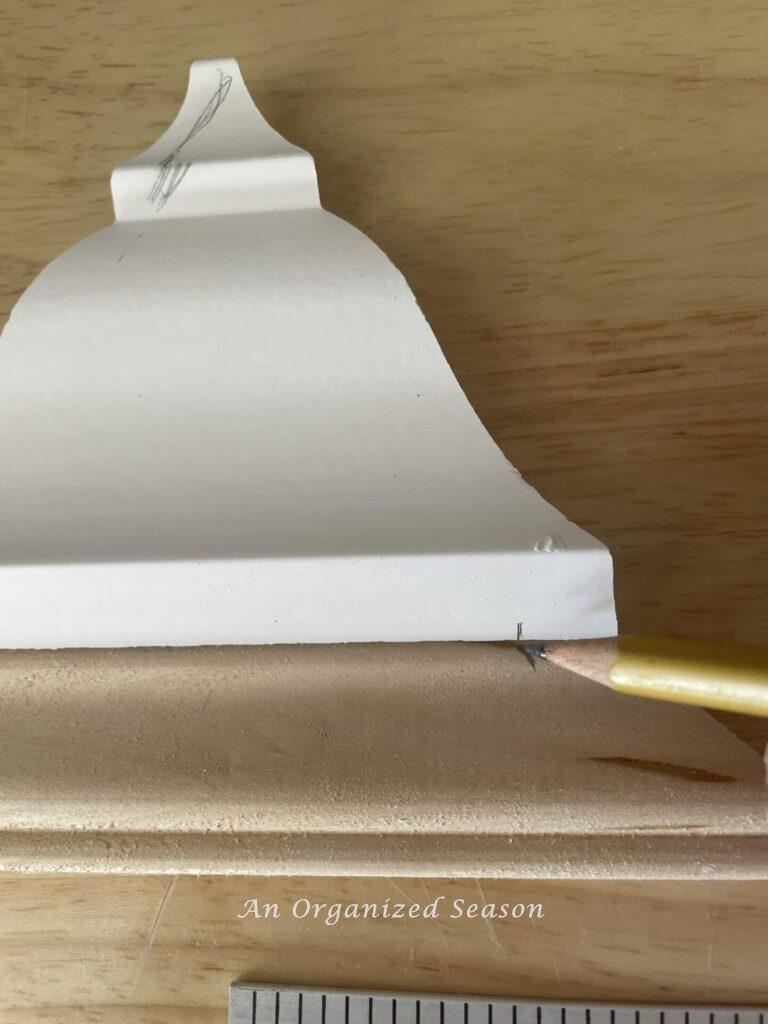
Then, go to the right, find your mark on the prior layer, and make a mark on your new layer.
Make a 45-degree cut, then go down and out from that mark to finish the right side of your new layer.
Repeat for all new layers you want to add.
Cut the dowel rods to a length you like.
*Tip- Don’t make them too tall because they might tip over!
Assemble

Lay a piece of wax paper on a flat surface.
Glue the edges of the trim pieces together.
Run glue along the crevices between each piece of trim.
Glue the dowels inside the candle holders.
Let dry for 24 hours.
Peel the trees off of the wax paper.
*Note- one of my trees raised off the wax paper as it dried and had a slight curve. No worries, we remedied that in the next step!
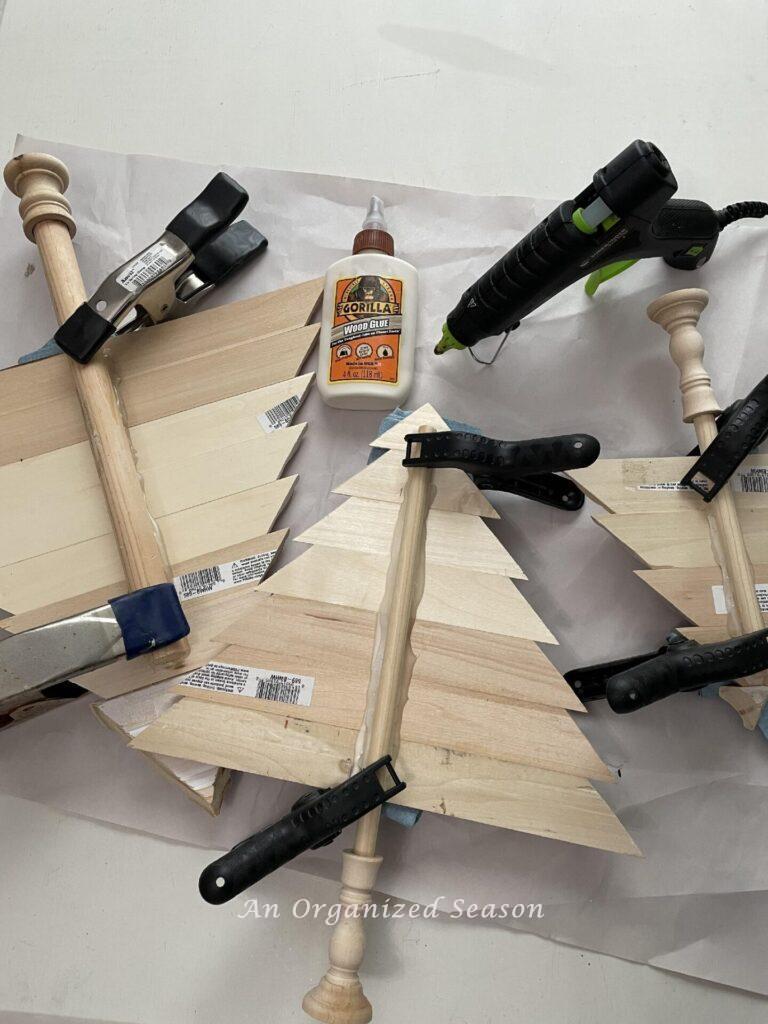
Run a stripe of wood glue down one side of the dowel rod.
Adhere it to the back of the Christmas tree.
Clamp the two pieces together.
*Note- Use a paper towel on the front of the tree to make sure the clamps don’t leave an indentation in the wood! Look closely to see the folded-up blue shop towels sticking out from under the trees.
Then, run a stripe of hot glue down the sides of the dowel rod.
Be very careful when using hot glue, as it can burn you. We suggest using silicone finger protectors!
*Tip- Remove the stickers off the back of the tree before you glue it to the dowel rod. We displayed ours in front of a mirror, and the stickers showed. So, I had to go back and remove the stickers and paint the back side of the tree as well!
Paint

Paint your trees any color you choose!
I went with white and planned to distress or antique them, but I changed my mind at the last minute!
The bright white reminds me of snow, so I left them alone!
Style Your wooden Christmas trees

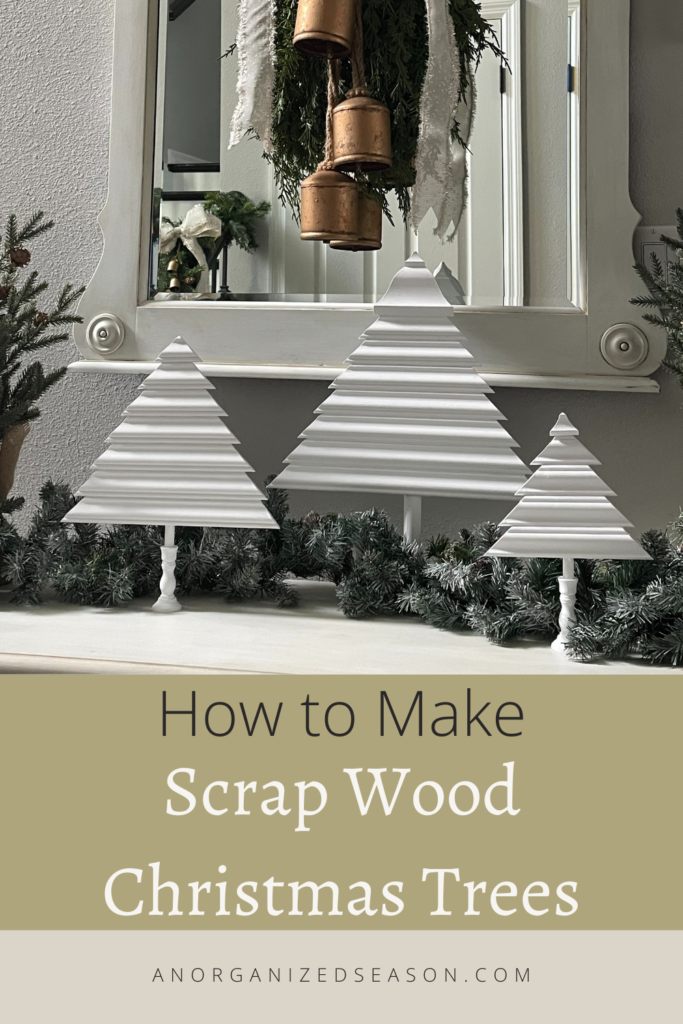
Here are our trees displayed in the foyer on a console table!

We added a garland and two small evergreen trees to give the Winter woodland vibe!

I’m so happy those top triangle-shaped wood pieces made me think of Christmas trees!
Amazing things can happen when you let your imagination run wild!
If you enjoy the blog, please sign up for our email list so you won’t miss a post!
Until next time, follow us on Pinterest, Facebook, and Instagram!
Blessings, Donna and Rich
Pin It For Later
More DIY Christmas Decor Inspiration
- Five Gingerbread Decor DIYs
- Easy Yarn Christmas Tree
- Christmas Ornaments Made From Napkins
- Pinecone Christmas Tree
- Vintage-Inspired Ornaments
**Some of the links in this post are affiliate links. This means if you click on the link and purchase the item, we will receive an affiliate commission at no extra cost to you. We appreciate your support. (disclosure policy)
How adorable, Donna!!! What an amazing use of leftover construction materials!!
I love that you painted them white…they go with Christmas decor but can also be used after the holidays for Winter decorating, as well.
Such a cute project!!
Thanks Rachel! I agree about keeping them out all winter! They remind me of snow-covered trees in a forest! They were so fun to make! Thanks again!
Amazing, love those trees, maybe you should make to sell.
Thank you for visiting and sharing your links with us at SSPS #291. See you again on Monday. January 8th, 2024
You’re very kind, Esme! Glad you like the trees! I’ve never thought about selling the things I make! Thanks for the suggestion and have a great day!
So excited about the way these came together, Donna, they’re adorable! I love the wavy lines and the candlestick holders you chose too. Plus, I love that you can create your own kind of winter wonderland and keep them out all season too. Loving and pinning as always sweet friend, CoCo
I know CoCo, I’m so happy I can use them through out the Winter months! So glad you like them! Thanks and have a great day!
Thanks for sharing with us, I’ll be featuring you this week when the next To Grandma’s house we go link party starts! Happy Xmas!
What wonderful news! It’s always a pleasure to be featured at you party! We appreciate it very much! Thank you!
I love your creations! And this Christmas Tree is just fabulous! I’ll feature you on Happiness Is Homemade 511!
Thank you! That’s such wonderful news! It is greatly appreciated! I’ll see you there!
Hey Donna. I agree with all other bloggers and that this is a great project. So you will be featured on the next Home Matters Linky Party this week. #HomeMattersParty
Hi Donna! That is such great news! Thanks and I’ll see you at the party!!